Workflow UI: Support of Action Sequences
This topic describes support of action sequences by Workflow UI.
Adding Subscribers
The customizer adds the subscribers to an action by using the new Actions
Executed on Success tab of the Action Properties dialog
box on the Actions page in the Customization Project
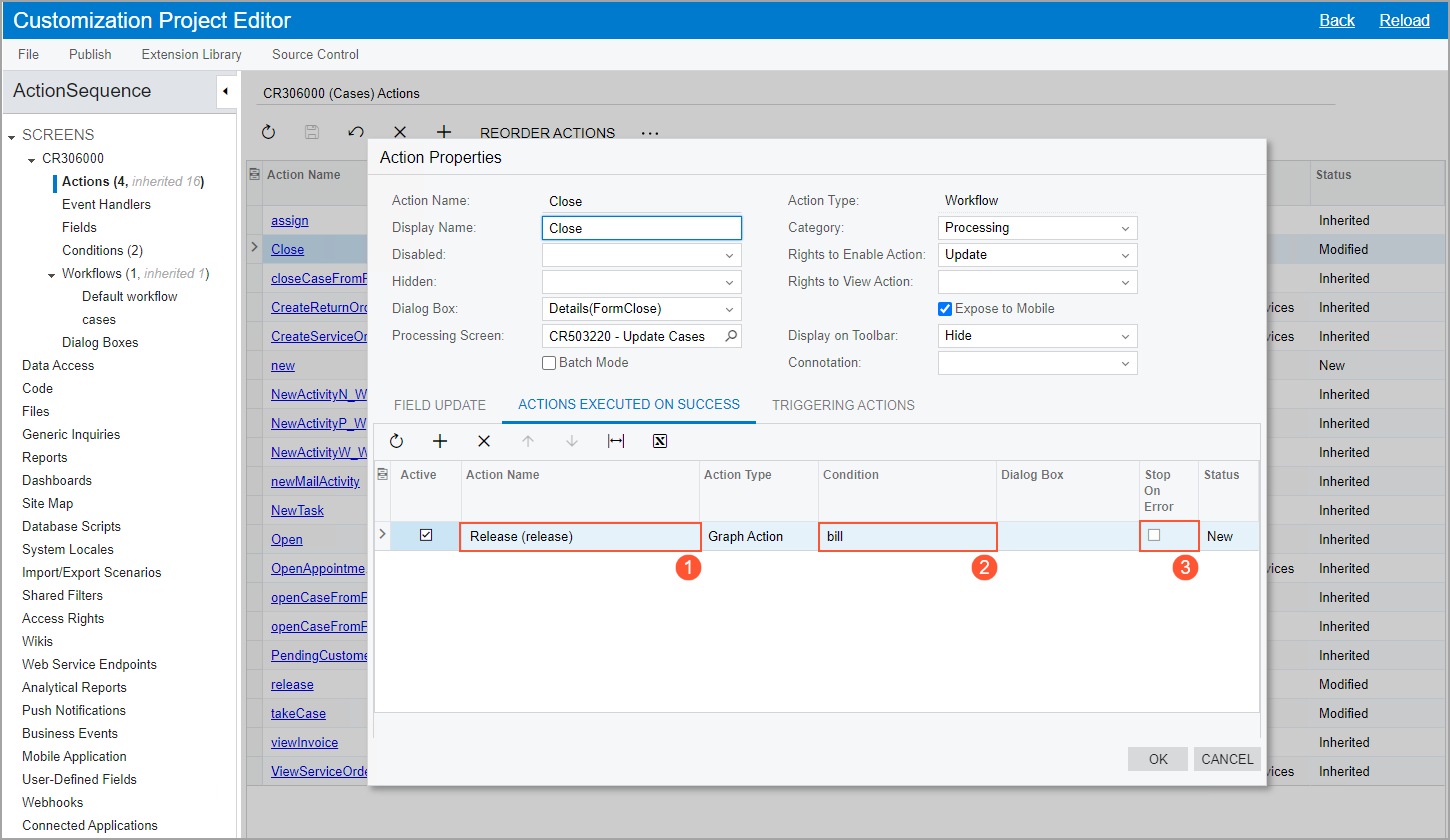
Editor. The following screenshot shows this dialog box for the Close action
on the Cases (CR306000) form. Notice that
this action has one subscriber: The Release action (see Item 1 in the
following screenshot), which the system executes if the case is billable (Item 2).
By default, the system executes all actions in a sequence even if any of these actions fails. If needed, the customizer can make the system stop the execution of subscribers if a triggering action fails by selecting the Stop on Error check box (Item 3).

Viewing the Triggering Actions
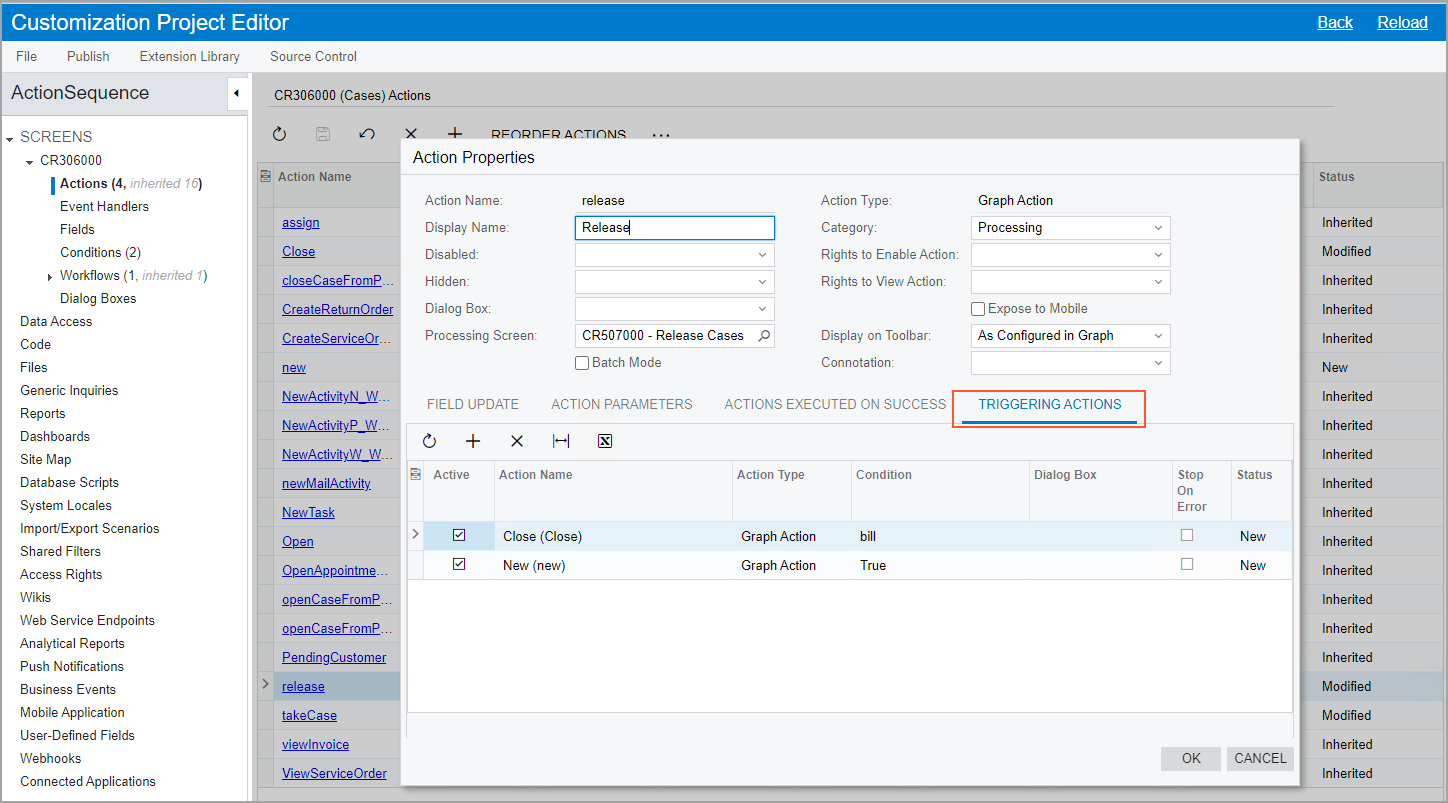
The customizer can see what actions trigger the execution of the current action on the new Triggering Actions tab of the same dialog box (see the following screenshot).

Note that after the customizer has added the Release action as a
subscriber on the Actions Executed on Success tab for the
Close action, the Close action automatically appears on
the Triggering Actions tab in the Action
Properties dialog box for the Release action.
Editing Dialog Boxes of Subscriber or Triggering Actions
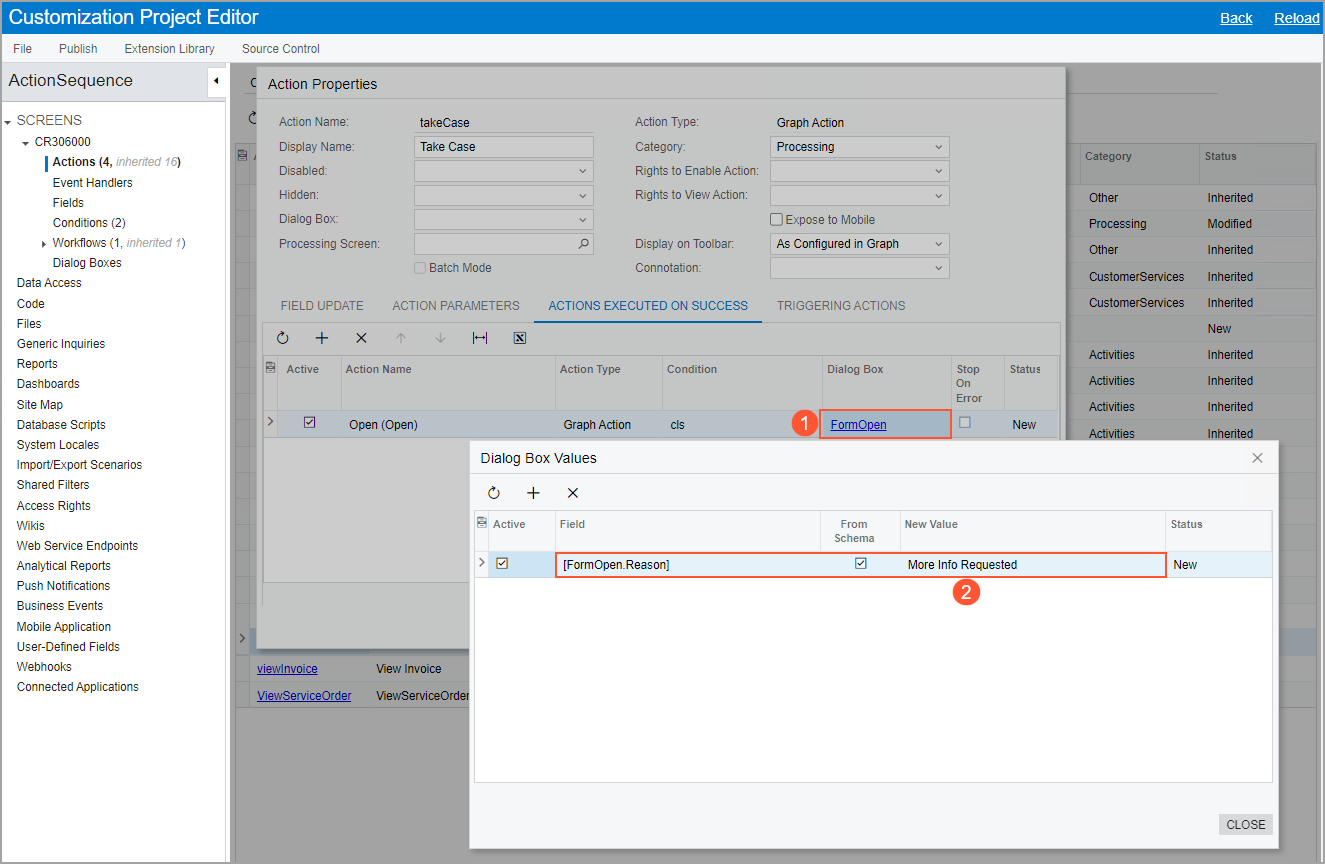
If a subscriber action or a triggering action has a dialog box configured for it, the
system displays the name of this dialog box as a link in the Dialog
Box column (see Item 1 in the following screenshot). If the customizer clicks
this link, the Dialog Box Values dialog box opens, in which the
customizer can specify values other than the default ones. The screenshot shows the
selection of the More Info Requested value (Item 2) instead of the default In
Process value for the Reason box of the
Details dialog box for the Open action.

If no values are specified explicitly in the Dialog Box Values dialog box, the system uses the default values specified on the Dialog Boxes page.
