
Platform: Streamlined Data Analysis with Modern UI Pivot Tables
In MYOB Acumatica 2025.2.1, the pivot table representation of generic inquiries has undergone a significant redesign, showcasing a modern, streamlined interface. You can expect a more intuitive experience—making it easier than ever to analyze data through the revamped pivot table functionality.
A Sleek Design and User-Friendly Interface
In the Modern UI, you can effortlessly toggle between the table and pivot data representations of generic inquiry forms. Pivot views support in-depth analysis of information from multiple perspectives, enhancing your ability to make informed decisions.
Moreover, new pivot table views are separated from the filters functionality. That is, now you can apply the same filter both to table and pivot data representations.
By default, generic inquiry forms display data in the Table view. If other data views are available, they’ll be listed in the View List drop-down menu, where you can choose another data representation. The menu caption changes to the name of the selected view, as you can see below.
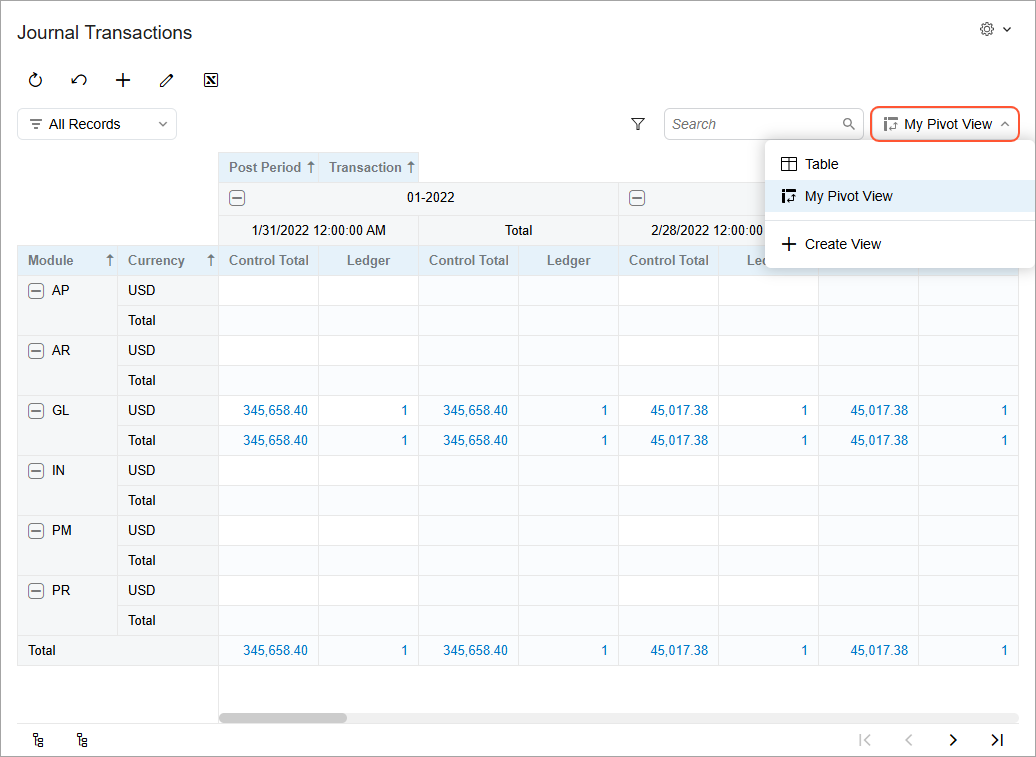
You can create your own pivot views, as explained below, or use pivot views created by an administrator.
Creating Pivot Views
To create a new pivot view, you open the generic inquiry’s View List menu and click Create View. The Create View dialog box opens, as shown below.
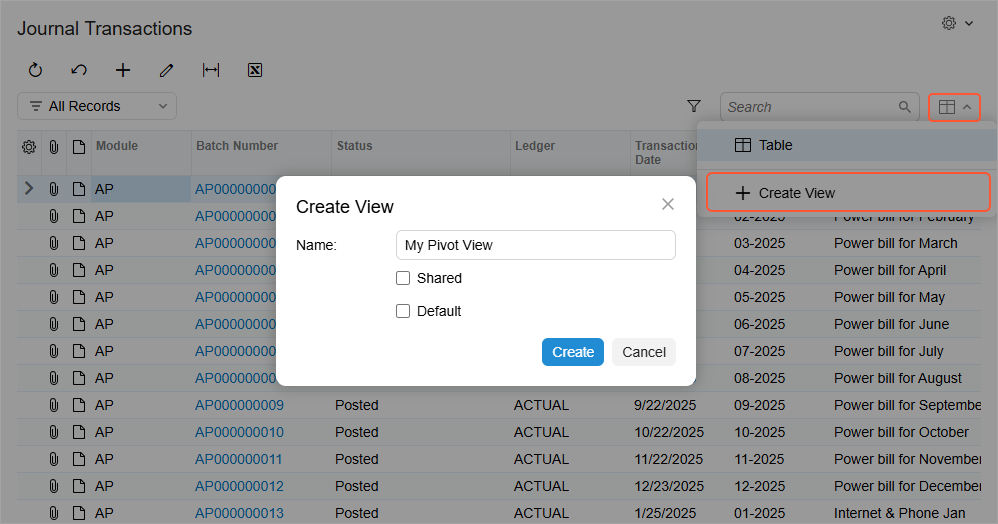
In the dialog box:
- Enter a name for your new view and then click Save.
- Optional: Select the Default check box if you want the system to open this view by default
- Optional (for users with the Administrator user role): Select the Shared check box to make this view available to other users.
- Click Create. The Settings dialog box opens (shown below).
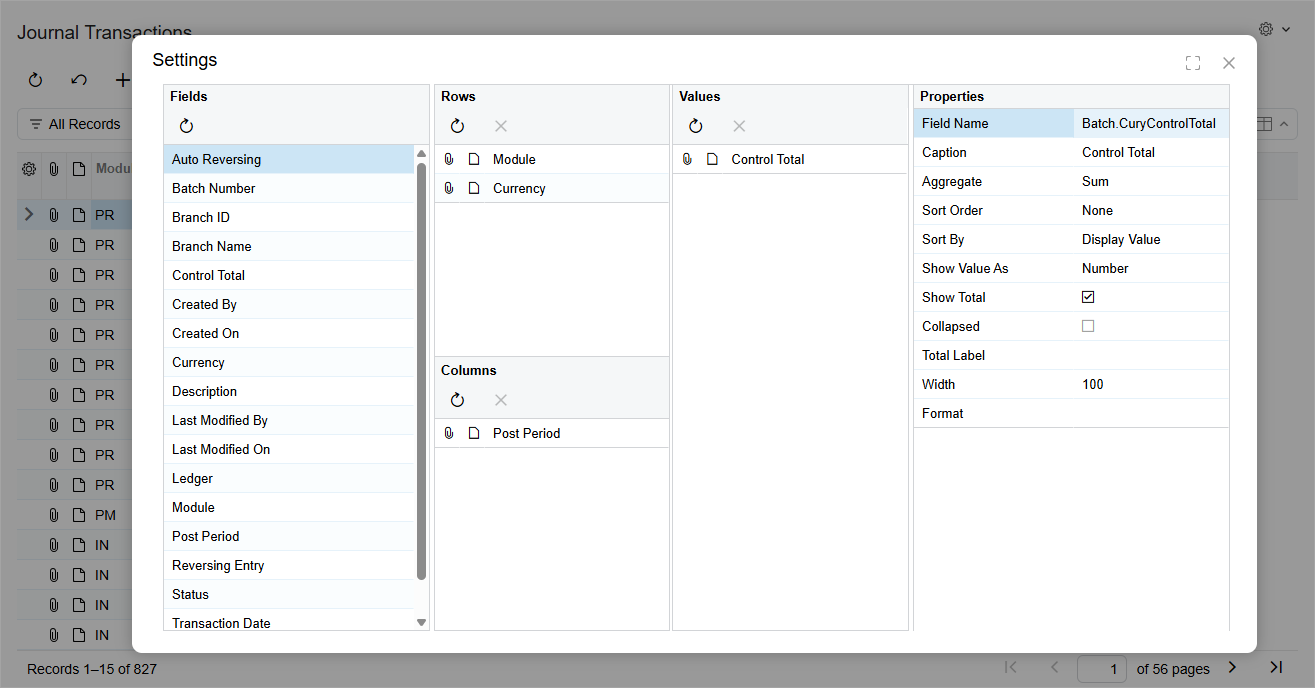
While the layout and purpose of the Settings dialog box resemble those of the Pivot Tables (SM208010) form, this version is specifically designed for configuring pivot tables as data views. Once you’ve applied your settings, you’ll see the new pivot view in the View List drop-down menu of the inquiry form.
Configuring Pivot Views
To configure an existing pivot view, you open the inquiry form's View List drop-down menu and hover over the pivot view name to display the Settings, Edit, and Delete buttons (see below).

Here’s how the buttons work:
- Settings: Opens the Settings dialog box so that you can reconfigure the pivot table.
- Edit: Opens the Edit View dialog box, where you can rename the pivot view, set it as the default view, and share it with other users (if you have the Administrator role).
- Delete: Deletes the view and all its settings.
Changes made to shared pivot views affect the pivot view’s appearance for all users, while changes to non-shared pivot views affect the pivot view’s appearance only your user account.
Learn More
To learn more about the pivot data representation, please refer to Managing Pivot Tables.