MYOB IMS Payroll 6.92 release notes
Introduction
The 6.92 release improves lots of existing features and reports to streamline your workflow.
Installing your upgrade
Before installing the desktop upgrade, you must close all Open payroll periods in your payroll companies
To install the desktop upgrade
Before you install the desktop version:
-
Close all Open payroll periods in your payroll companies.
-
Back up each of your payroll companies via the Tools menu.
-
Close all IMS applications on your PC.
Uninstalling an earlier version of IMS Payroll prior to installing this version is not recommended or required, as you’ll need to reinstall any custom payroll software or modules.
If you’re downloading the installer:
-
Double-click the executable file (.exe) that you downloaded.
-
Install the new version on every computer that has MYOB IMS Payroll installed.
To install the IMS Payroll Cloud upgrade
-
Log in to IMS Payroll Cloud.
-
At the bottom left, click the gold Upgrade button.
The Upgrade button only appears after you click on a company with the Closed status.
-
Repeat steps 1–2 for each payroll company you manage.
New Features
Simpler setup for sending emails
We’ve added a simpler way to email from MYOB IMS Payroll, so you no longer need to set up anything related to SMTP.
Go to Tools > Setup SMTP to open the E-mail – SMTP Mail Profile screen. There, you can choose the new Use MYOB Email Service option from the Authenticate dropdown.
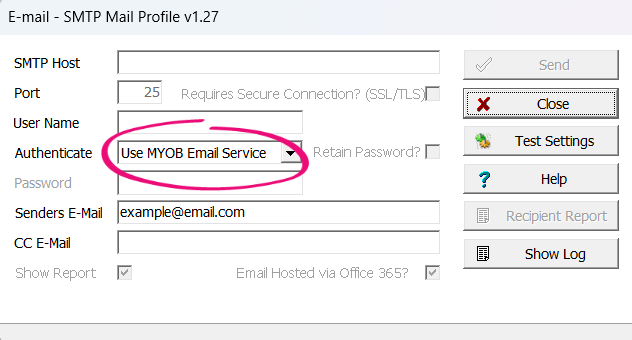
When using the MYOB email service, the only other information you need to enter is the Senders E-Mail.
Employee Inquiry improvements
We’ve made two main improvements to the Employee Inquiry screen, which you can open by clicking the Find icon on the Employee screen.
Showing permanent transactions
You can now view an employee’s permanent transactions by clicking the new plus icon next to their name.
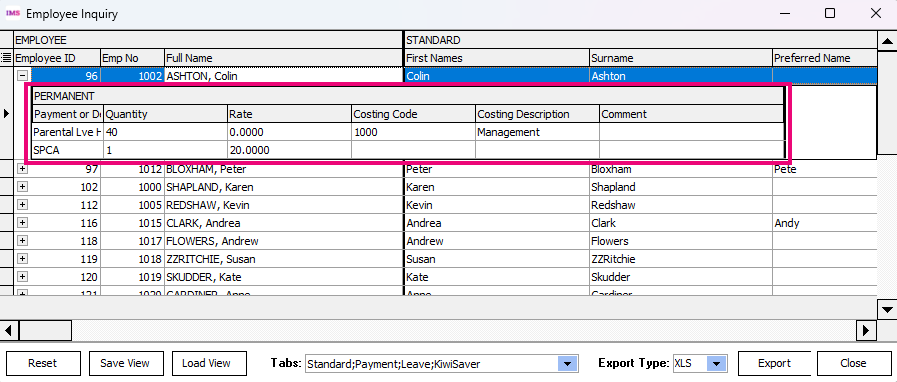
You cannot export permanent transactions from the Employee Inquiry screen.
Saving filters
You can now save your filters as a view. Loading a saved view instantly changes your filters, so you don’t have to manually tweak your filters every time you want to view different information.
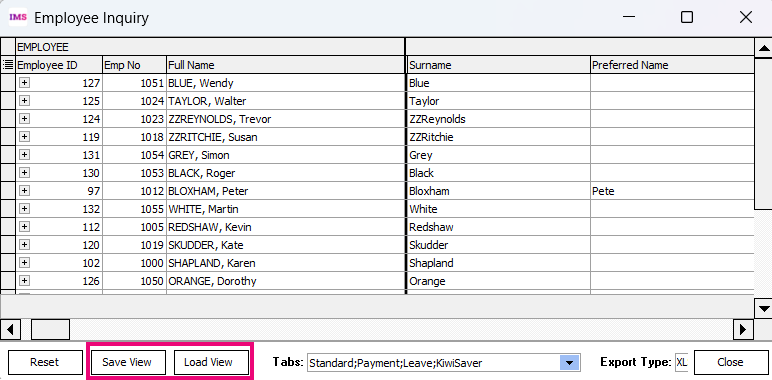
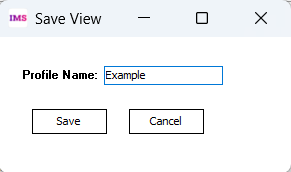
To save a view, set up your filters like normal. Then, click Save View. In the Save View window, enter a Profile Name and click Save.
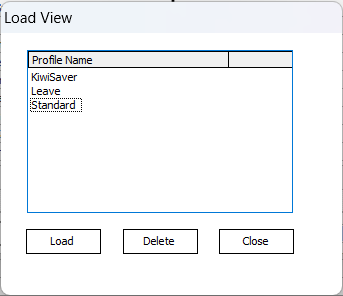
To load a view that you’ve saved, click Load View. On the Load View screen, select the view you want and click Load. You can also delete views on this screen.
Default location for extracted reports
You can now set a default file path for saving data file extracts of reports.
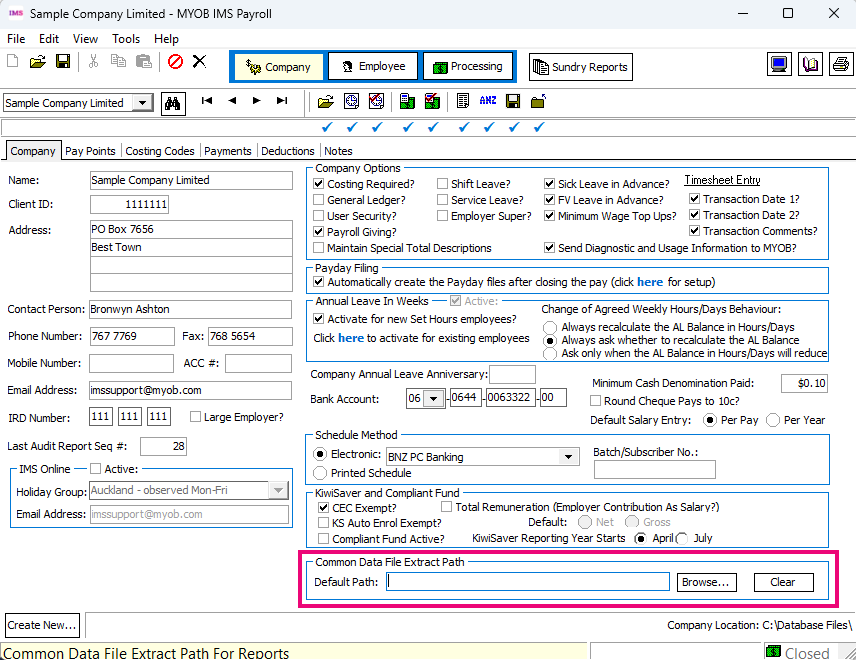
On the Company tab of the Company screen, we’ve added a new Common Data File Extract Path section. Click Browse to choose a default path where your data file extracts will be saved.
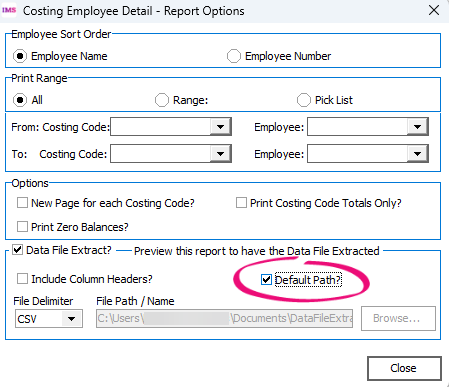
After choosing a default path, you need to individually choose which reports are saved to that path. Go to the 6-Reports tab of the Processing screen and click Options for one of the reports. Then, select the Default Path? checkbox.
You can also use the default path with sundry reports that have the data file extract option.
Picking employees to include in sundry reports
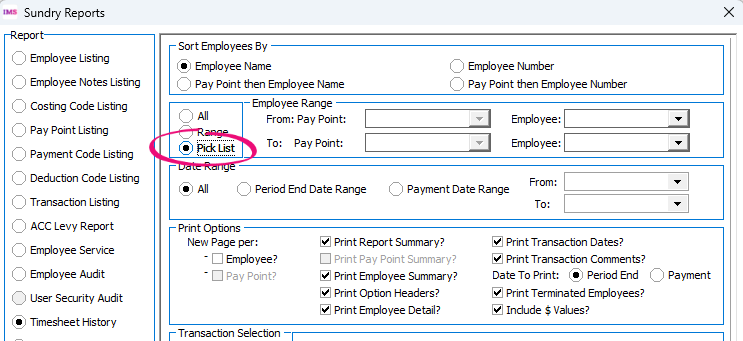
For the Timesheet History, Leave History and Standard Hours Worked sundry reports, you can now choose to only include specific employees.
In the report settings, select the Pick List option.
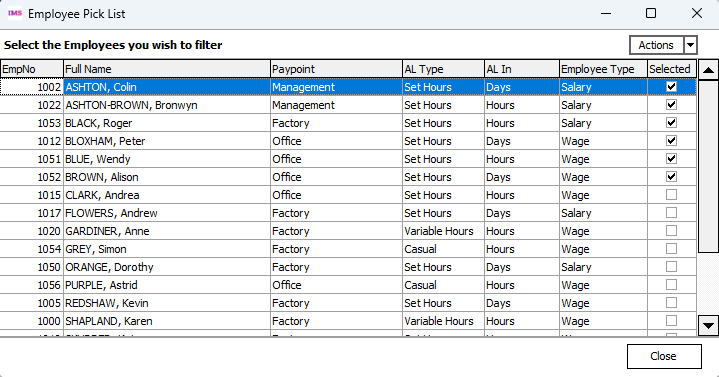
The Employee Pick List window opens. Select the employees you want to include and click Close.
Easier to identify overridden timesheets
If you override timesheet values, the overridden values are now shown in italic text after the pay has been closed – similar to how the rates are currently displayed in Timesheet Entry. You can see this in two places:
-
The History > Timesheet History tab of the Employee screen.
-
The Sundry Report > Timesheet History report.
Total hours on payslips
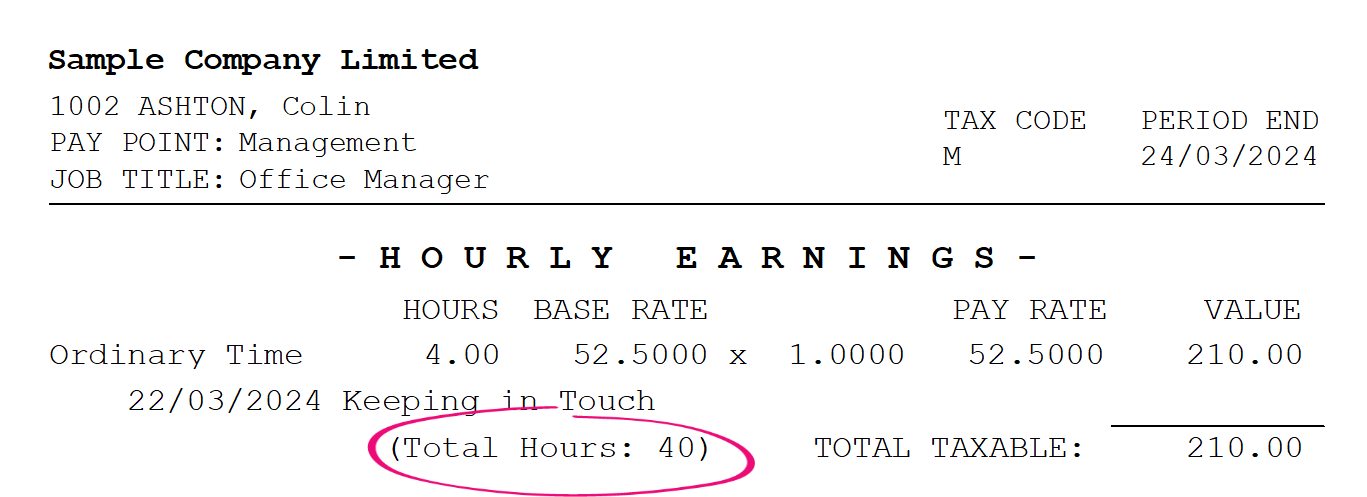
On employee payslips, you can now include the total hours that they worked in that pay period.
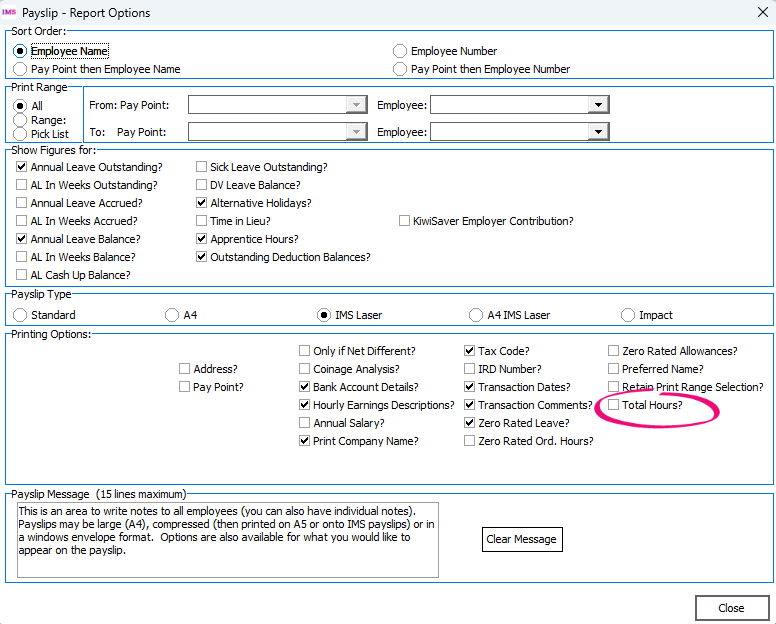
On the 6-Reports tab of the Processing screen, select the Payslip report and click Options. Then, on the Payslip – Report Options window, select the Total Hours? checkbox.
Here’s how the total hours look on a payslip.
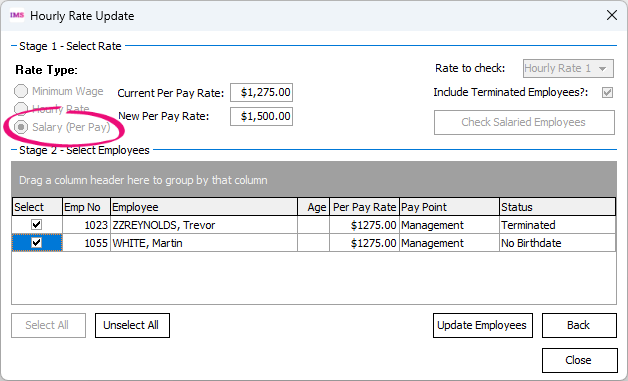
Updating per pay rates for salaried employees
You can now use the Hourly Rate Update tool to change rates for multiple salaried employees at once by selecting the new Salary (Per Pay) option.
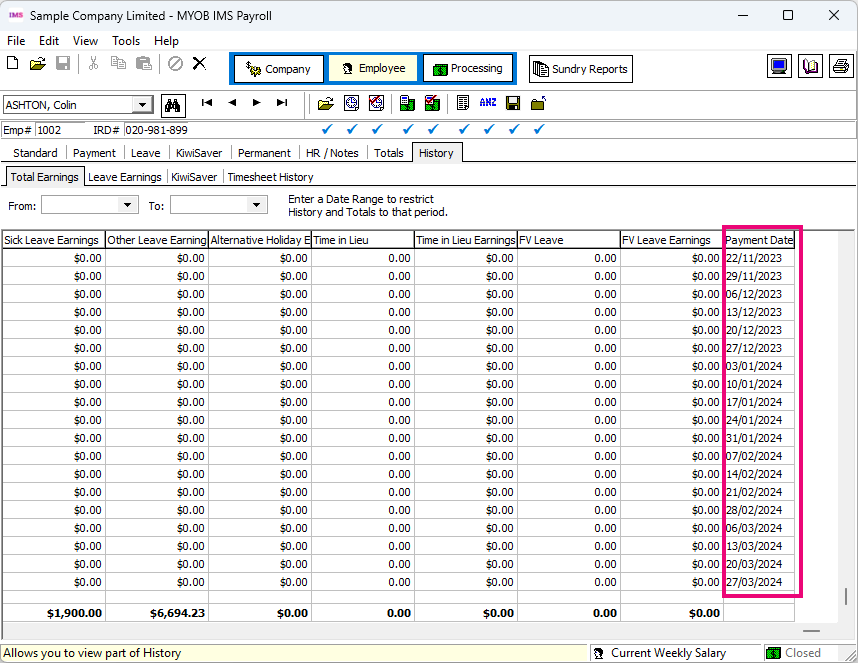
Payment date for historical pays
You can see when an employee was paid by checking the new Payment Date column. The column is on the History > Total Earnings tab of the Employee screen.
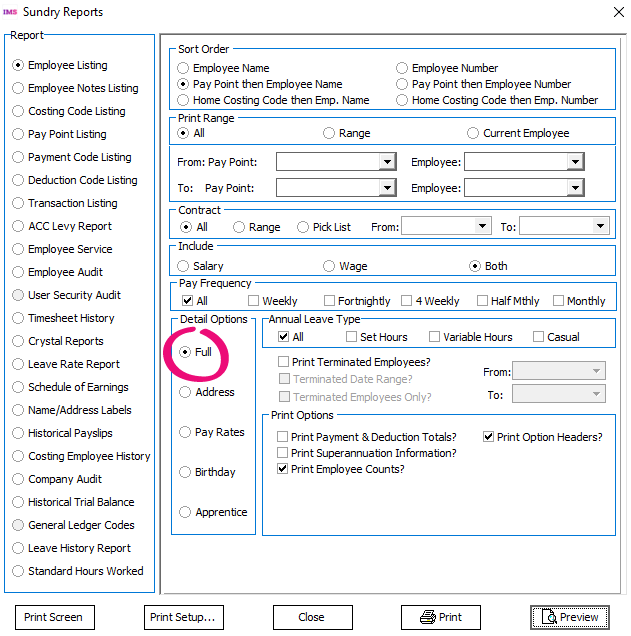
Employee listing includes family violence leave
The Employee Listing report can now include family violence leave values. To include the values, select Full in the Detail Options section of the report settings.
You can find the family violence leave near the bottom of the report.

Changing payment settings in first pay of new tax year
You can now change payment settings for the first open pay of a new tax year. You’re able to change the tax type, earnings type or if the payment is liable for ACC earnings.
To safely reopen the first pay of the new tax year so you can run pays for the previous tax year, make sure you restore your end-of-year backup.
Other improvements
-
The 4 Week Average Rate (OWP4) – Include in rate comparison check box is now included in the Employee Inquiry screen.
-
You can now choose Bank of China (88) when selecting a bank account for your company, employees or deductions.
-
We added the data file extract option to several more reports and sundry reports, e.g. Employee Payroll Summary, Timesheet History and Transaction Listing.
-
We’ve added two new columns to the leave section of the Employee Inquiry screen: SL RSE Worker and SL RSE Accrued.
-
We fixed an issue where tabbing between fields on the Employee > Leave > Annual Leave screen was missing the Next Entitlement Weeks field.
-
We increased the maximum amount of a single payment to pay or deduct. It’s now 10 million dollars. Previously, it was 1 million dollars. Some reports might cut off parts of these large sums. If you encounter this, try using the A4 payslip format.
-
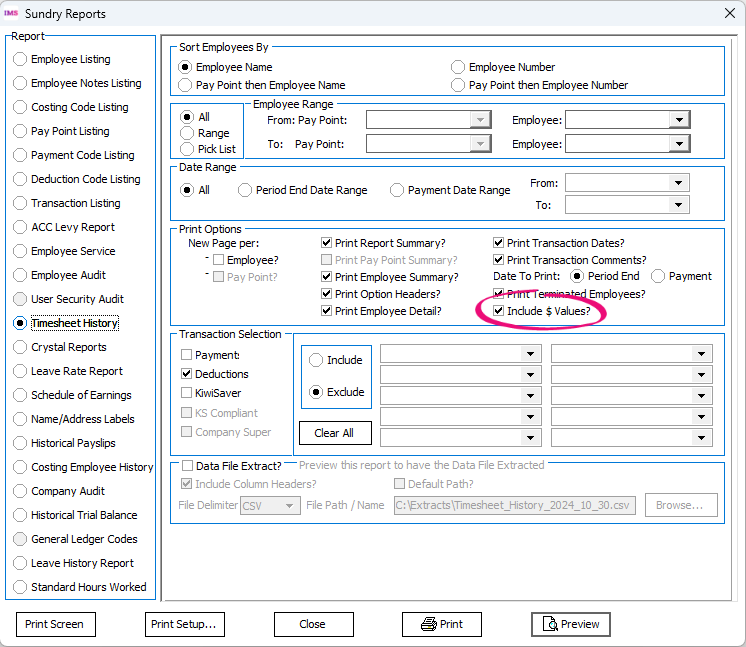
For the Timesheet History sundry report, we added a new Include $ values? checkbox, which is selected by default.
-
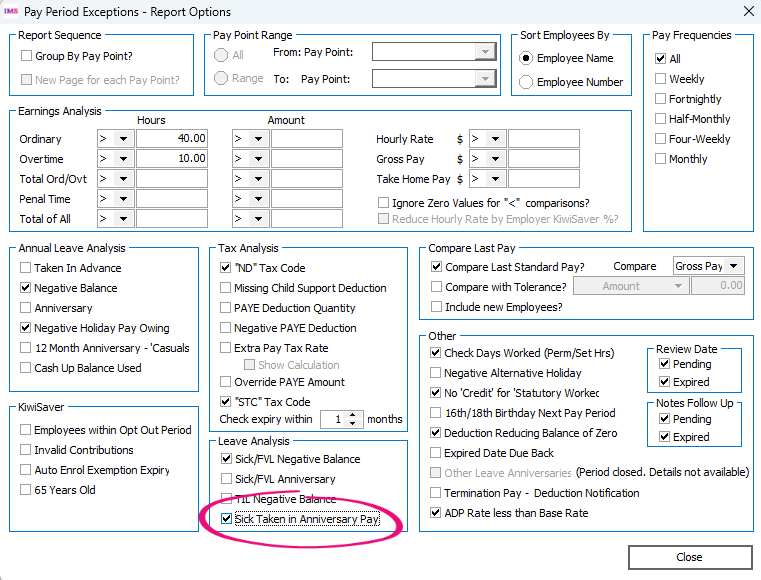
For the Pay Period Exceptions report, the new Sick Taken in Anniversary Pay checkbox lets you list employees paid sick leave in the same pay as their sick leave rollover.
-
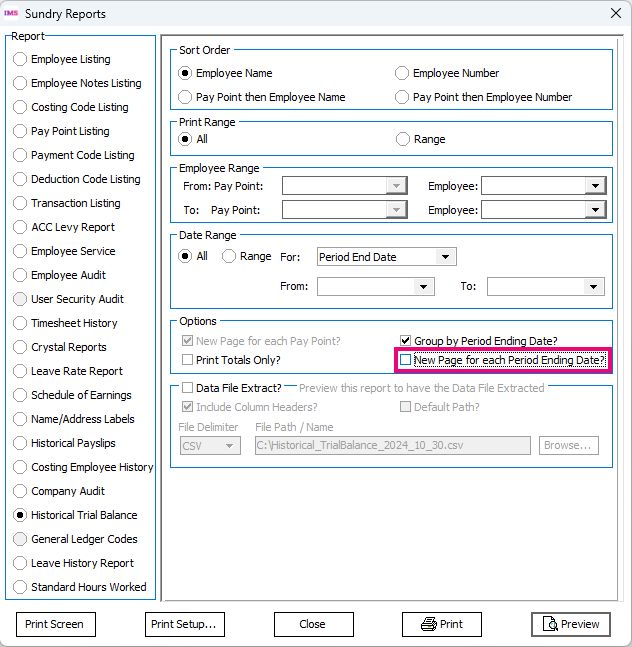
For the Historical Trial Balance sundry report, you can now choose to print multiple pay periods per page. To do so, select Group by Period Ending Date? and then deselect the new New Page for each Period Ending Date? checkbox.