
Bill Prepayments: To Process a Prepayment
The following activity will walk you through the process of creating a prepayment request, making a payment based on the prepayment request, and applying the prepayment to a bill.
Video Tutorial
This video shows you the general process but may contain less detail than the activity has. If you want to repeat the activity on your own or you are preparing to take the certification exam, we recommend that you follow the instructions in the steps of the activity.
Story
Suppose that the SweetLife Fruits & Jams company has ordered a new design for the company's printed labels and paper bags from Wingman Printing Company. They requested an advance payment of $425 for these services. Further suppose that the prepayment that SweetLife made on January 18, 2025 has to be applied to an AP bill from Wingman Printing Company.
Acting as a SweetLife accountant, you have to record a request for an advance payment of $425 to the PRINTICO vendor. You then need to make a payment for the request, and then apply this prepayment to the bill.
Configuration Overview
For the purposes of this activity, the following features have been enabled on the Enable/Disable Features (CS100000) form:
- Standard Financials, which provides the standard financial functionality
- Multibranch Support, which supports multiple branches in your instance of MYOB Acumatica
- Multicompany Support, which supports multiple companies within one tenant.
On the Accounts Payable Preferences (AP101000) form, the Hold Documents on Entry check box has been selected in the Data Entry Settings section.
On the Vendors (AP303000) form, the PRINTICO (Wingman Printing Company) vendor has been defined. This vendor has the CHECK payment method specified as the default one.
Process Overview
To create a prepayment request and a payment, you will enter the vendor's prepayment request on the Bills and Adjustments (AP301000) form. Then you will create a payment for this prepayment request on the Checks and Payments (AP302000) form, and release the payment on the Release Payments (AP505200) form. You will apply the prepayment to an AP bill on the Checks and Payments form and release the application.
System Preparation
To prepare the system, do the following:
- Launch the MYOB Acumatica website, and sign in to a company with the U100 dataset preloaded. To
sign in as an accountant, use the following credentials:
- Username: johnson
- Password: 123
- In the info area, in the upper-right corner of the top pane of the MYOB Acumatica screen, click the Business Date menu button and select 1/18/2025. For simplicity, in Step 1 and Step 2 of this process activity, you will create and process all documents in the system on this business date.
- On the Company and Branch Selection menu, also on the top pane of the MYOB Acumatica screen, make sure that the SweetLife Head Office and Wholesale Center branch is selected. If it is not selected, click the Company and Branch Selection menu to view the list of branches that you have access to, and then click SweetLife Head Office and Wholesale Center.
Step 1: Creating and Releasing a Prepayment Request
To create and release a prepayment request, do the following:
- Open the Bills and Adjustments
(AP301000) form.Tip:To open the form for creating a new record, type the form ID in the Search box, and on the Search form, point at the form title and click New right of the title.
- On
the form toolbar, click Add New Record, and specify the
following settings in the Summary area:
- Type: Prepayment
- Vendor: PRINTICO
- Due Date: 1/18/2025 (the current business date, which is inserted by default)
- Post Period: 01-2025 (inserted by default based on the selected date)
- Description: Prepayment for label design
- On the
Details tab, click Add Row on
the table toolbar, and specify the following settings for the added row:
- Branch: HEADOFFICE (inserted by default based on the selected branch)
- Transaction Descr.: Label design
- Ext. Cost: 425
- Account: 61000 - Advertising Expense
- On the form toolbar, click Remove Hold.
- On the form toolbar, click Release to release the prepayment request.
Step 2: Creating a Payment to Pay for the Prepayment Request
To create a payment to pay for the prepayment request, do the following:
- While you are still viewing the prepayment request on the Bills and Adjustments (AP301000) form, on the form toolbar, click Pay/Apply.
- On the Checks and Payments
(AP302000) form, which is opened, review the
payment, and verify that it has the following settings in the
Summary area:
- Type: Payment
- Vendor: PRINTICO
- Payment Method: CHECK
- Payment Amount: 425
- Application Date: 1/18/2025
- Description: Prepayment for label design
- On the Documents to Apply tab, verify that there is only
one row with the following settings:
- Document Type: Prepayment
- Reference Nbr.: The reference number of the document you created in Step 1
- Amount Paid: 425
- On the form
toolbar, click Remove Hold,
then
click Save to save the payment. The
following screenshot illustrates the payment prepared to pay the prepayment
request.
Figure 1. The payment prepared to pay the prepayment request 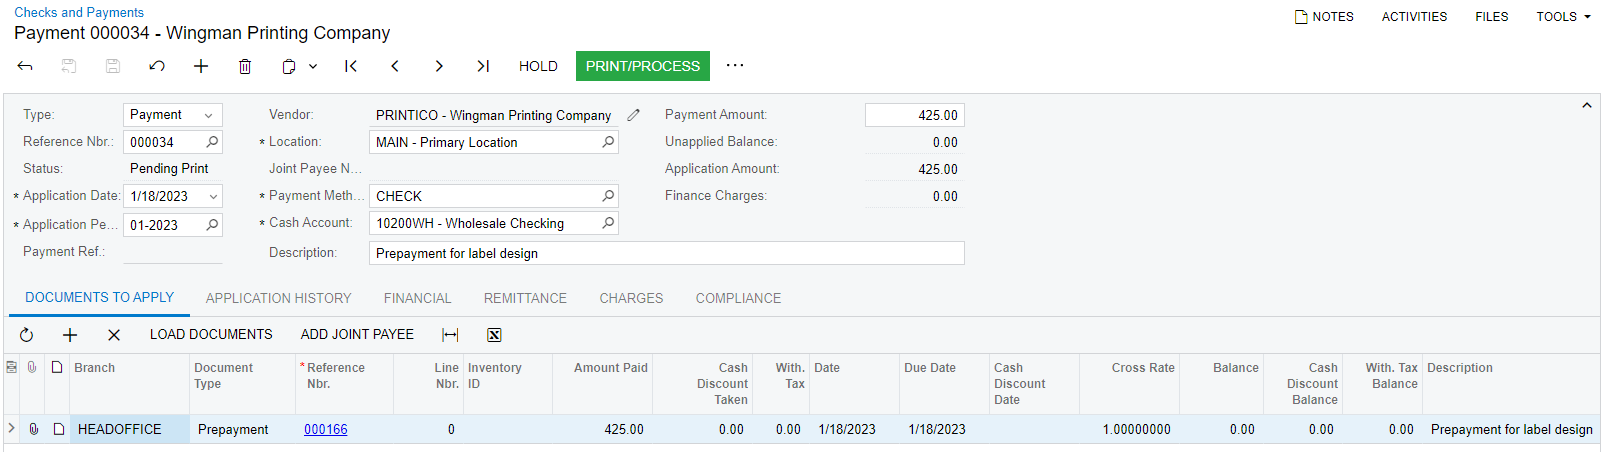
- On the form toolbar, click Print/Process.
- On
the Process Payments / Print Checks
(AP505000) form, which is opened, notice that the
system has added a row with the payment and
selected
the unlabeled check box for it.
On the form toolbar,
click Process.
A separate browser tab has opened showing a printable version of the selected payment.
- Review the printable version of the printed payment. Tip:In a production setting, you would click Print on the form toolbar to print the check.
- Close the browser tab.
- On the Release Payments (AP505200) form, which is opened, click Process. In the Processing pop-up window, which is opened, click Close.
Step 3: Applying the Prepayment to a Bill
To apply the prepayment to a bill, do the following:
- In the info area, in the upper-right corner of the top pane of the MYOB Acumatica screen, click the Business Date menu button and change the business date in your system to 1/30/2025.
- Open the Checks and Payments (AP3020PL) list of records.
- Select the prepayment with an amount of $425 and a date of
1/18/2025
as follows:
- Click the Filter Settings button in the filtering area.
- In the Filter Settings dialog box, which opens,
click
Add Row, and specify the following
settings:
- Property: Type
- Condition: Equals
- Value: Prepayment
- Click Apply and close the dialog box.
- Click the link in the Reference Nbr. column for the $425 prepayment to open it on the Checks and Payments (AP302000) form.
- On
the Documents to Apply tab,
click Add
Row, and specify the following settings in the table:
- Document Type: Bill
- Reference Nbr.: The bill with an amount of $425 and dated 1/23/2025
- Amount Paid: 425 (filled in automatically)
The following screenshot shows the prepayment that has been applied to a bill, but not yet released.
Figure 2. The prepayment applied to the AP bill 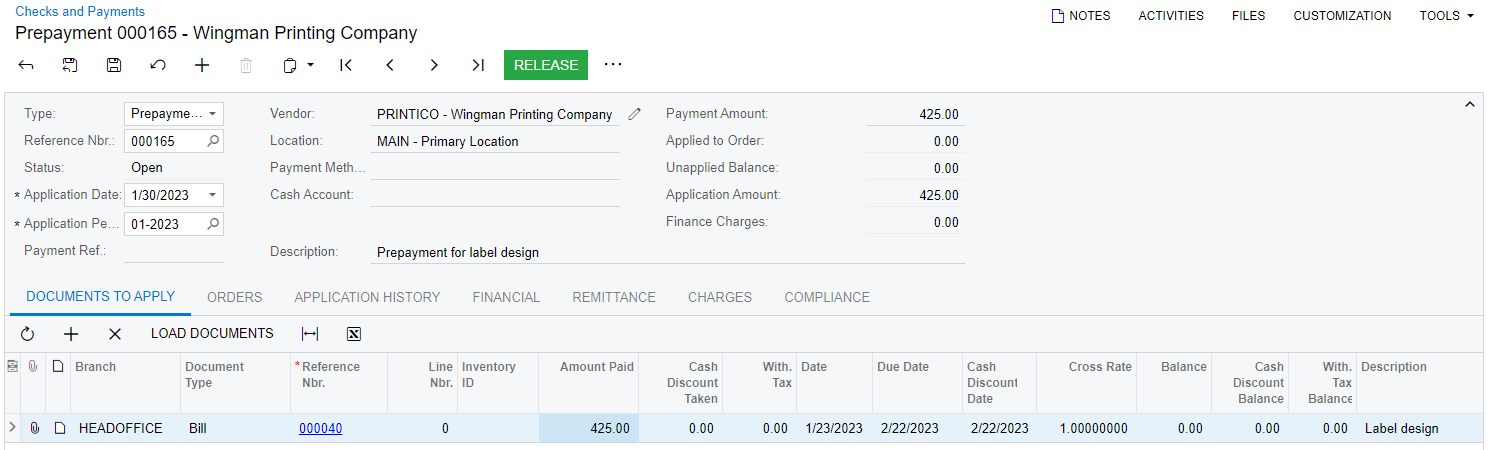
- On the form toolbar, click Release to release the prepayment application to the bill.