
Acumatica Add-In for Outlook: Lead Management
With the Acumatica add-in for Outlook, you can easily convert any email from a potential customer into a lead and save it in MYOB Acumatica.
When you open an email with the Acumatica add-in running, it tries to find related leads on the Leads (CR301000) form. That is, it looks for leads whose email addresses match the one selected in the Filter box on the Related Records form of the Acumatica add-in.
If matching leads are found, they appear in the Leads section of the Related Records form. You can:
- Link the email to the related lead to keep all important communication details in one place. For details, see Acumatica Add-In for Outlook: Email Activity Management.
- Review the lead by clicking its name, which is a link. The record opens on the Leads form in your MYOB Acumatica instance.
- Quickly create a related lead and link it to the email, as described in the next section.
Lead Creation
To create a lead with the email address selected in the Filter box of the Related Records form, click Add Lead in the Leads section—either directly or through the More menu.
The Lead form opens (see below), and the following boxes may be filled in automatically:
- First Name: The first word of the email address if it consists of two or more parts separated by spaces (for example, Mill Gibson <mill.gibson.mail.com>); otherwise, the box is empty.
- Last Name: The second word of the email address if it consists of two or more parts separated by spaces (for example, Mill Gibson <mill.gibson.mail.com>). If a last name can’t be derived, the email address selected in the filter box is inserted.
- Business Account: The name of the existing related business account that has the same email address as the address specified in the filter box; otherwise, the box is empty.
- Email: The email address selected in the filter box.
- Description: The email subject.
- Link Email to Lead: Selected.
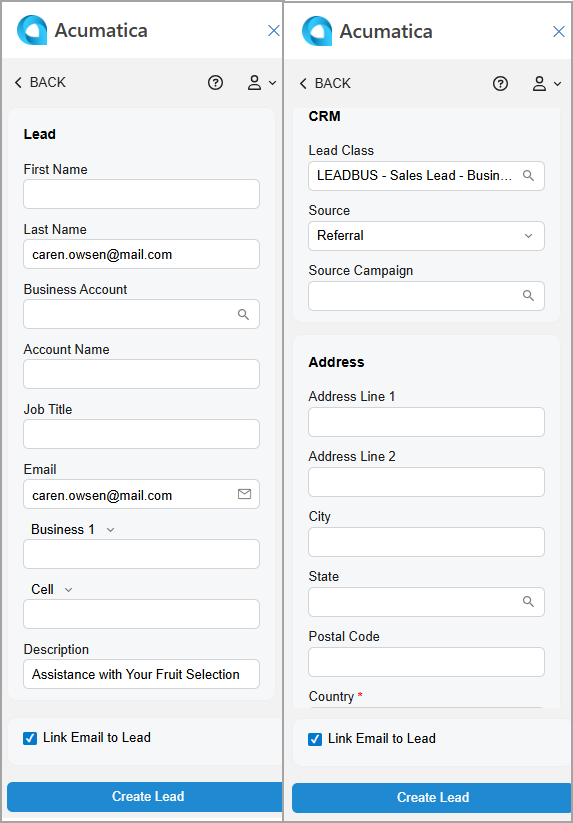
After you click Create Lead, the form you go to depends on the state of the Link Email to Lead check box:
- If it’s cleared, you return to the Related Records form. The system refreshes the Leads section and shows the newly created lead.
- If it’s selected, you go to the Email Activity form. The system fills in the Related Account and Related Entity boxes with the lead you created and selects Lead in the Related Entity Type box. For details, see Acumatica Add-In for Outlook: Email Activity Management. The email is linked to the newly created lead in MYOB Acumatica.
Access Rights
Users with the following user roles have the Delete access rights to the Lead form:
- AcumaticaSupport
- Administrator
- CR Marketing Manager
- CR Sales & Marketing Admin
- CR Sales Representative
- CR Support Admin
- CR Support Representative