
Acumatica Add-In for Outlook: General Information
The Acumatica add-in for Outlook works with open incoming and sent email in your Outlook mailbox. It searches MYOB Acumatica for leads, contacts, and business accounts that correspond to the sender and recipient addresses in the emails. It also searches for documents and profiles to which the email has been linked.
You start using the Acumatica add-in by opening an email and clicking the Acumatica button on the toolbar to open the add-in panel. (For details about how to pin the button, see Acumatica Add-In for Outlook: To Install the Acumatica Add-In.)
Depending on whether the email has already been linked to a record in MYOB Acumatica, one of the following forms will be shown first on the add-in panel:
- Linked Records: Shows records (profiles and documents) linked to the email or its attachments. You see this form first if the email has already been linked to a record in MYOB Acumatica.
- Related Records: Displays records that contain the same email address as the opened email sender or one of the recipients. You see this form first if the email hasn't already been linked to a record in MYOB Acumatica.
Viewing Linked Records
The Linked Records form shows the records in MYOB Acumatica to which the opened email has already been linked. If you click the link to the record in the Email Attached To section, the system opens it in your browser.
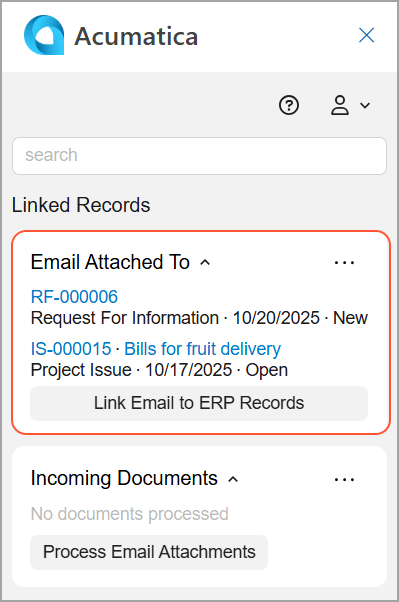
If the Email Attached To section shows no linked records or you want to link the email to other records, click Link Email to ERP Records to go to the Related Records form and select records to which the email will be linked.
In the Incoming Documents section (shown below), you can see the attached documents that have already been submitted to MYOB Acumatica for recognition.
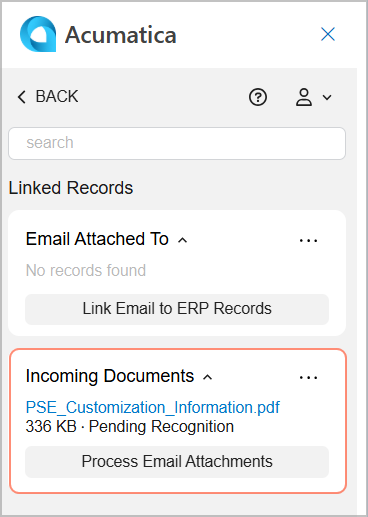
The section is available if the AP Document Recognition Service feature is enabled on the Enable/Disable Features (CS100000) form and the attached document is in a recognizable format, such as PDF.
For details, see Acumatica Add-In for Outlook: Incoming Document Management.
Working with Related Records
You can use the Related Records form to review and create records in MYOB Acumatica that are related to the current email. You can also select records to which you want to link the email.
Record Groups
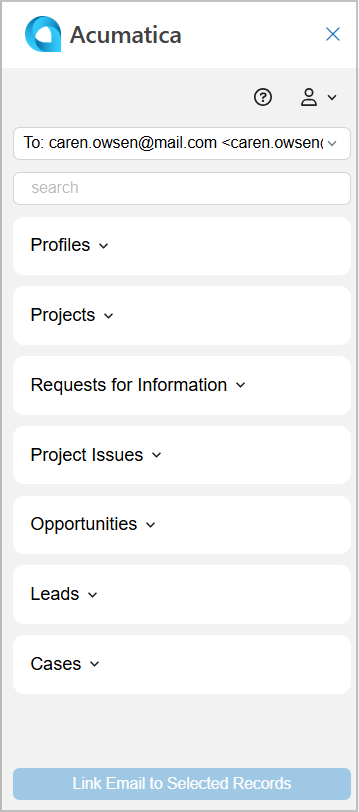
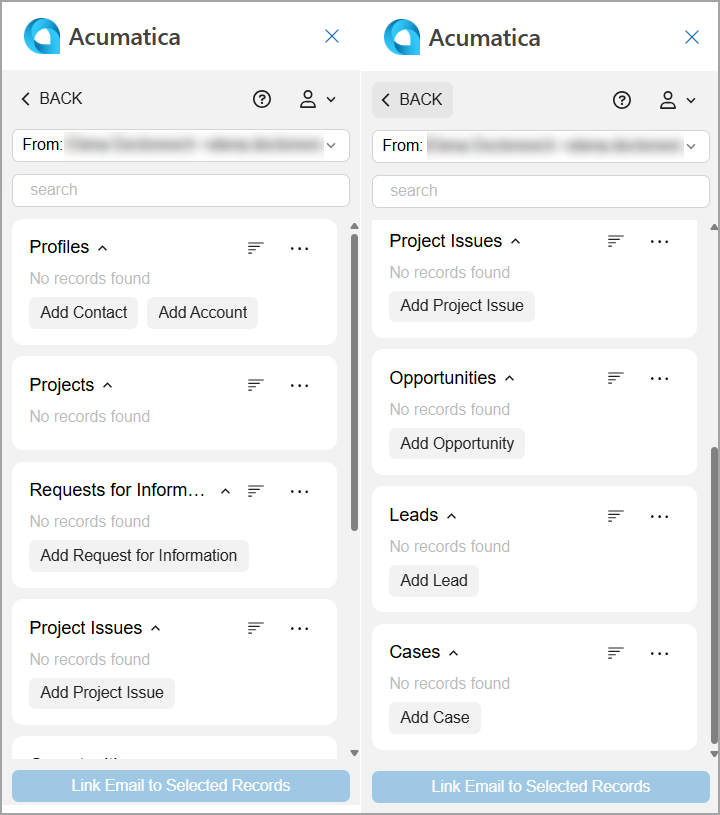
On the form, records are grouped by type (see below).
Filtering, Searching, and Sorting Records
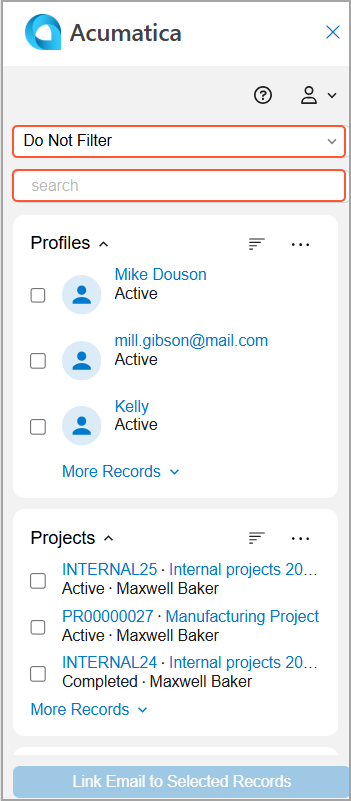
At the top of the form, use the Filter box to select the email address to match (see below). By default, the From address is selected. The system shows any records in MYOB Acumatica with this email address.
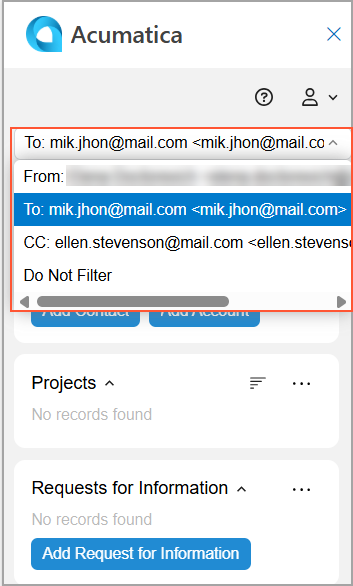
If you select Do Not Filter, all MYOB Acumatica records will be shown in each group of records (see below).
To find a particular record, use the Search box.
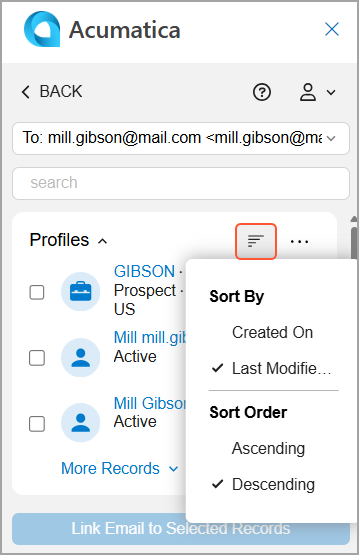
You can also use sorting options to work with records more easily. Click Sort (shown below) to select one of the available sorting options.
Creation and Linking of Records
You can create a new record based on the selected email address or the content of the message. To do this, click the corresponding button, such as Add Opportunity or Add Contact, in the groups of records (see below).
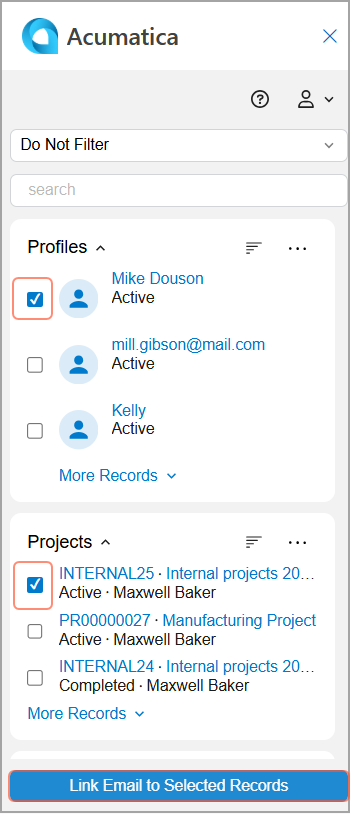
To link the email to a record or multiple records, first select the unlabeled check box for each needed record. Then click Link Email to Selected Records at the bottom of the form (see below). The system opens the Email Activity form in the add-in panel. For details, see Acumatica Add-In for Outlook: Email Activity Management.
You can also use the Related Records form as a starting point to modify records. Click a record's link and the system opens that record on the corresponding data entry form in MYOB Acumatica.
Access Rights
The following user roles have the Delete and Read access rights to the Related Records and Linked Records forms.
| User Role | Access Rights |
|---|---|
| AcumaticaSupport | Delete |
| Administrator | |
| AP Admin | |
| AP Clerk | |
| AR Admin | |
| AP Clerk | |
| CR Marketing Manager | |
| CR Sales & Marketing Admin | |
| CR Sales Representative | |
| CR Support Admin | |
| CR Support Representative | |
| Customer Data Manager | |
| PO Admin | |
| PO Buyer | |
| PO Clerk | |
| PO Manager | |
| Project Accountant | |
| SO Admin | |
| SO Clerk | |
| SO Manager | |
| Vendor Data Manager | |
| AP Viewer | Read |
| AR Viewer | |
| CR Viewer | |
| PO Viewer | |
| SO Viewer |