
Importing Documents (Vendors)
This topic describes how to import vendor documents (bills, adjustments, or prepayments).
Task Description
Suppose that you want import vendor documents from the IS__Vendor_Details.xlsx file. The file contains several bills for vendors with IDs V000000103, V000000107, and V000000108. The IDs of the documents in the Reference Nbr. column are the external IDs used by the vendor. The Vendor Invoice Nbr./Payment Nbr. column contains invoice IDs specified by the vendor. You will use values from the Vendor ID column to identify vendors in the system.
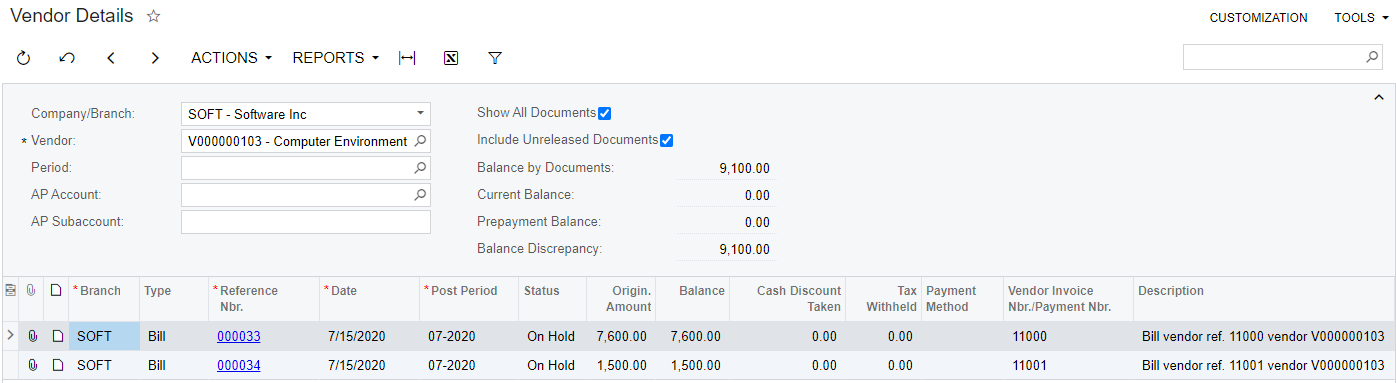
You can see the documents of a vendor on the Vendor Details (AP402000) form, as the following screenshot shows.
To import documents for several vendors, you will use the Bills and Adjustments (AP301000) form.
During import, MYOB Acumatica automatically assigns each document an ID according to the numbering system currently used in the system.
Implementation
To import vendor documents, perform the following steps, which are described in detail below:
1. Configuring Auto-Numbering of Records in the System
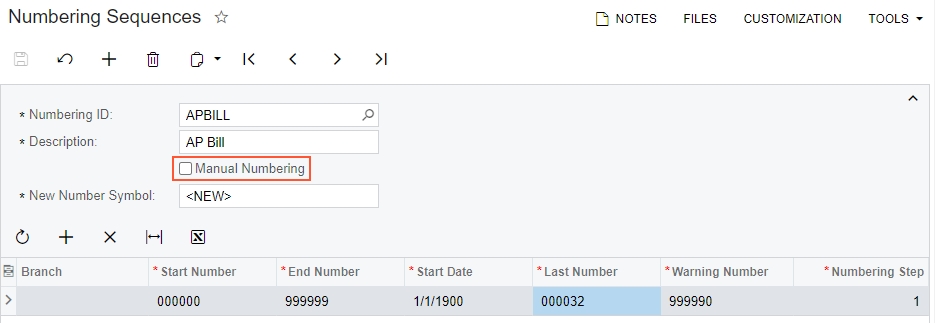
On the Numbering Sequences (CS201010) form, create the APBILL numbering sequence and clear the Manual Numbering field for it, as shown in the following screenshot.
2. Creating a Data Provider
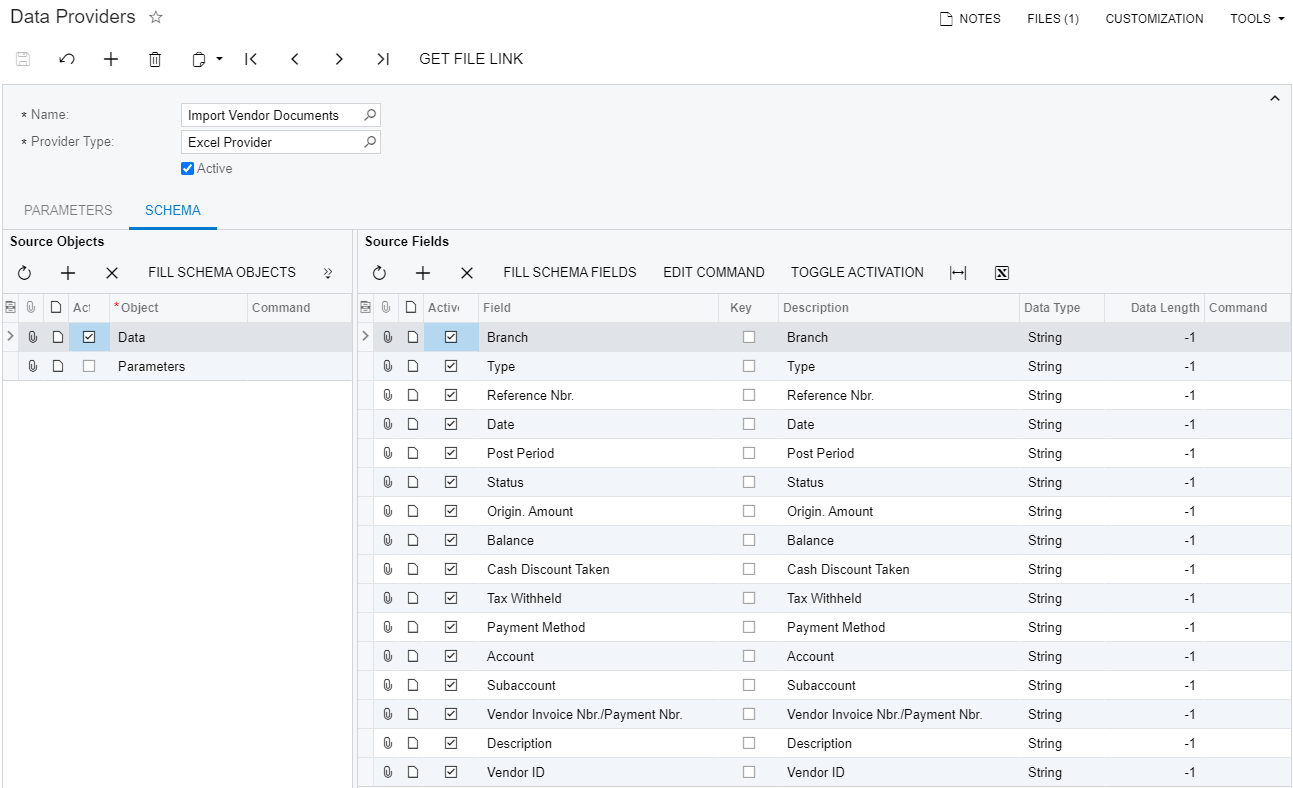
On the Data Providers (SM206015) form, create an Excel data provider for the Vendor Details.xlsx file with the name Import Vendor Documents, as the following screenshot shows.
3. Creating an Import Scenario
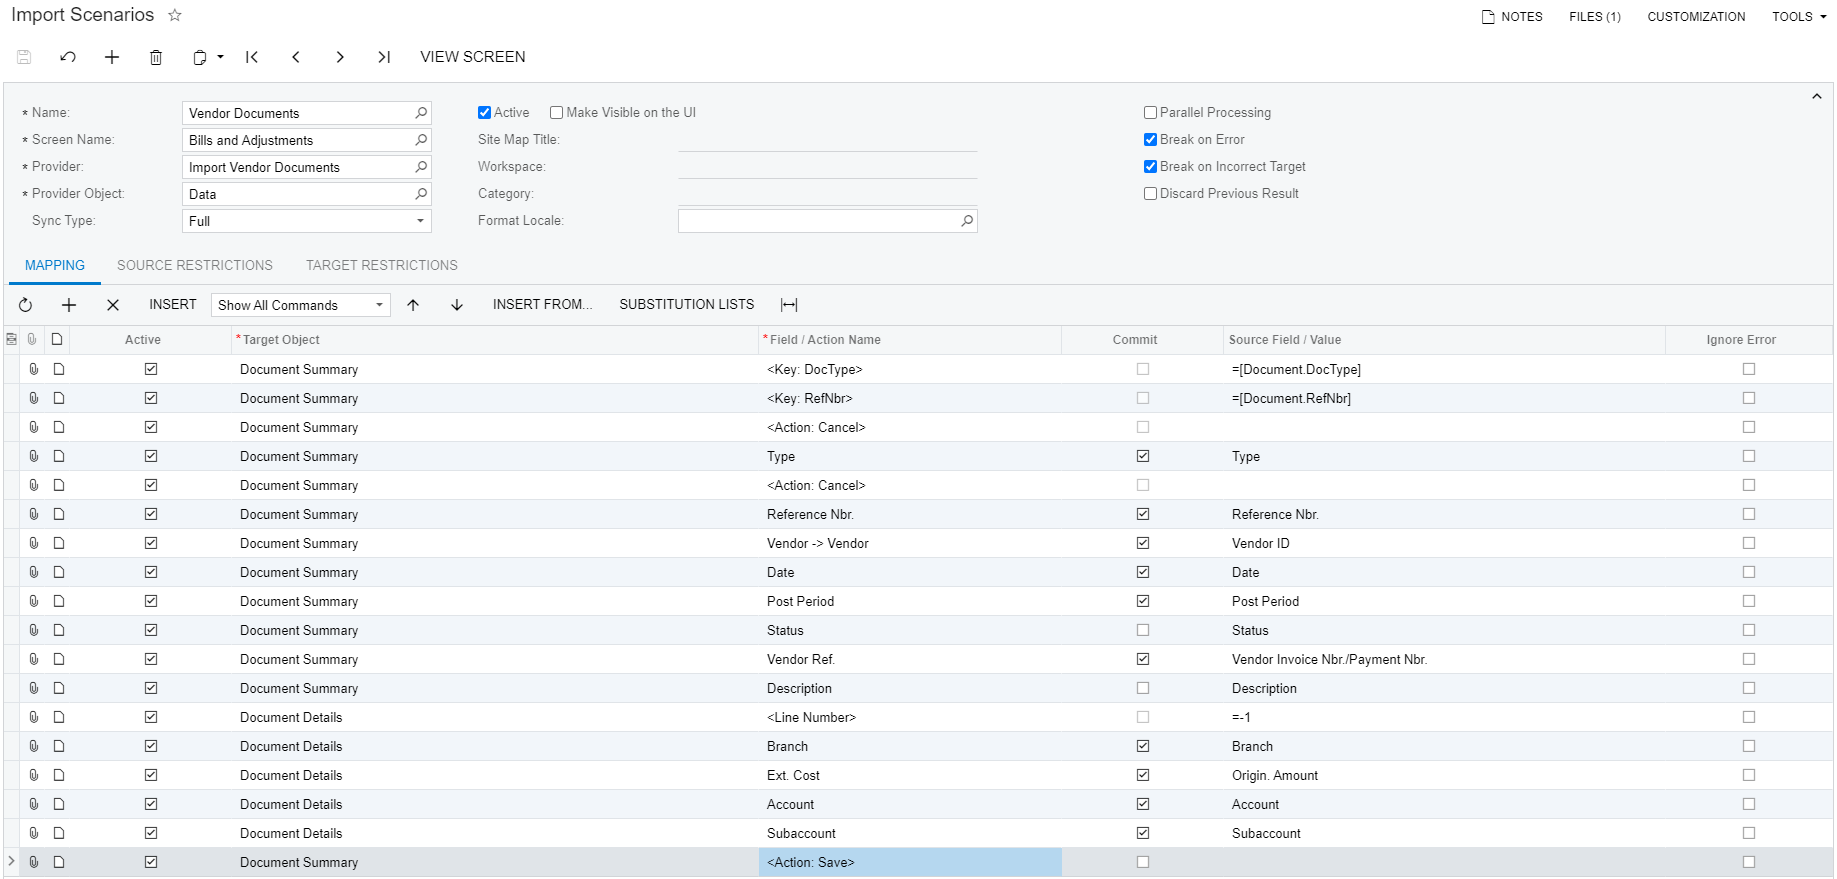
On the Import Scenarios (SM206025) form, create an import scenario that uses the data provider you have created in the previous step. The mapping of the scenario is shown in the following screenshot.
4. Running the Scenario
On the Import by Scenario (SM206036) form, select the Vendor Documents scenario in the Summary area, and click Prepare & Import on the form toolbar. The records from the Excel file are imported into the system.
5. Reviewing the Imported Records
Review the result of the importing on the Bills and Adjustments (AP301000) form. You can see that five records have been added to the system. They have been assigned IDs according to the numbering sequence used by the system, as shown in the screenshot below. Each record has been added for the appropriate vendor as specified in the source file. The status of the imported records has been changed to On Hold.

Summary
To import vendor documents, you enable the auto-numbering of records to assign the documents the IDs according to the numbering sequence currently in use.
In the import scenario, you map the external reference number to the Reference
Nbr. field on the Bills and Adjustments (AP301000) form. You also map
vendor ID from the source file to the Vendor ID field on this form.