
Importing Payment Instructions (Vendors)
This topic describes how to update payment instructions for a vendor.
Task Description
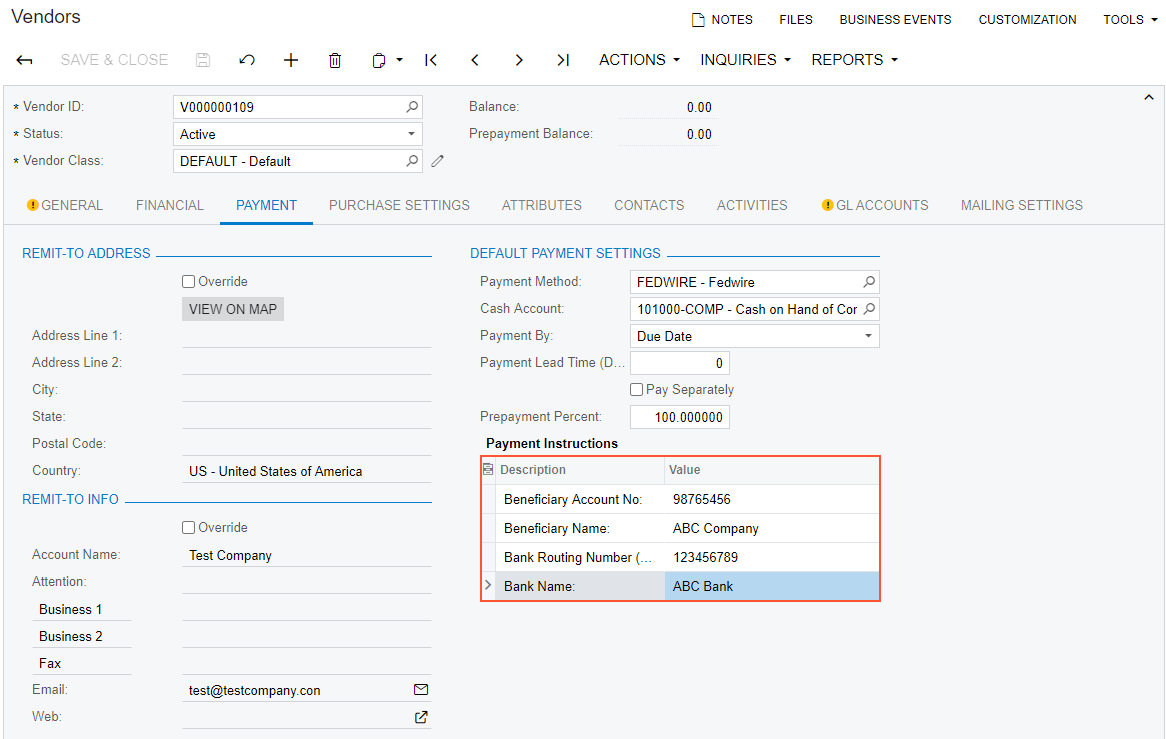
Suppose that you want to update information about payment instructions for the vendor with the ID V000000109 and import new data from an Excel file. You can see the payment instructions in the Default Payment Settings section on the Payment tab of the Vendors (AP303000) form, as the following screenshot shows.
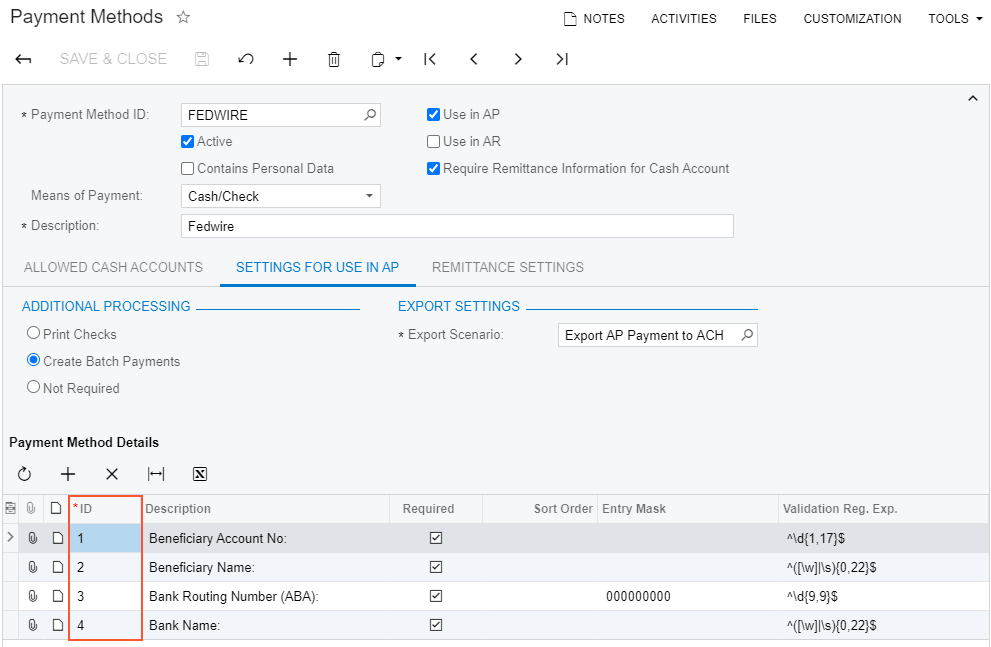
The data for the update is available in the IS__Vendor_Payment_Instructions.xlsx file. For the import scenario, you need the IDs of the payment method details, which you can find on the Settings for Use in AP tab of the Payment Methods (CA204000) form, as shown in the screenshot below. You will map these IDs to the columns in the source file.
Implementation
To import payment instructions, perform the following steps:
1. Creating a New Data Provider
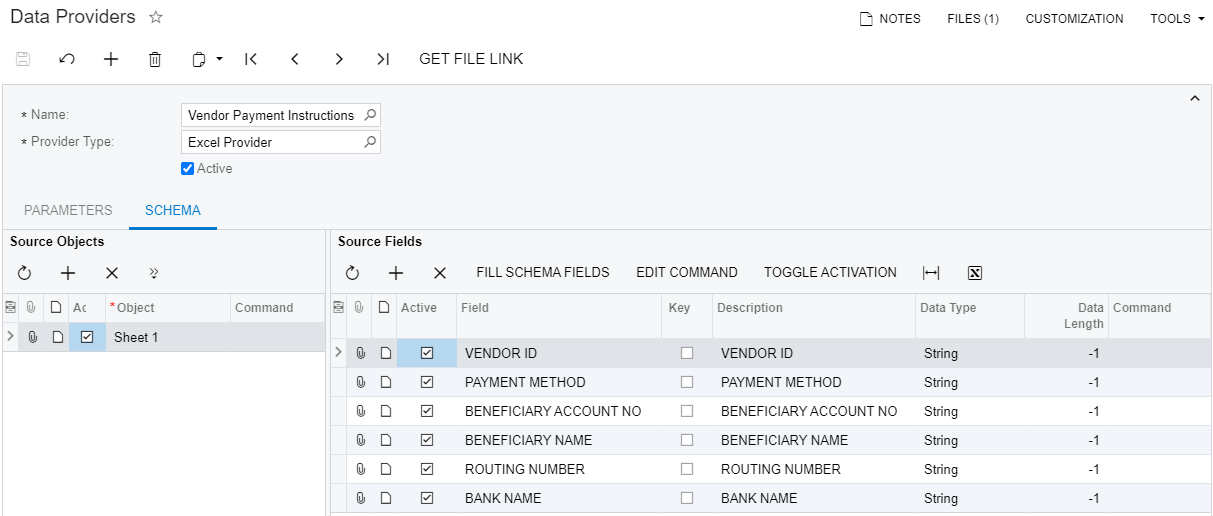
On the Data Providers (SM206015) form, create an Excel data provider for the Vendor Payment Instructions.xlsx file with the name Vendor Payment Instructions, as the following screenshot shows.
2. Creating an Import Scenario
On the Import Scenarios (SM206025) form, create an import scenario that uses the data provider you have created in the previous step. The mapping of the scenario is shown in the following screenshot.
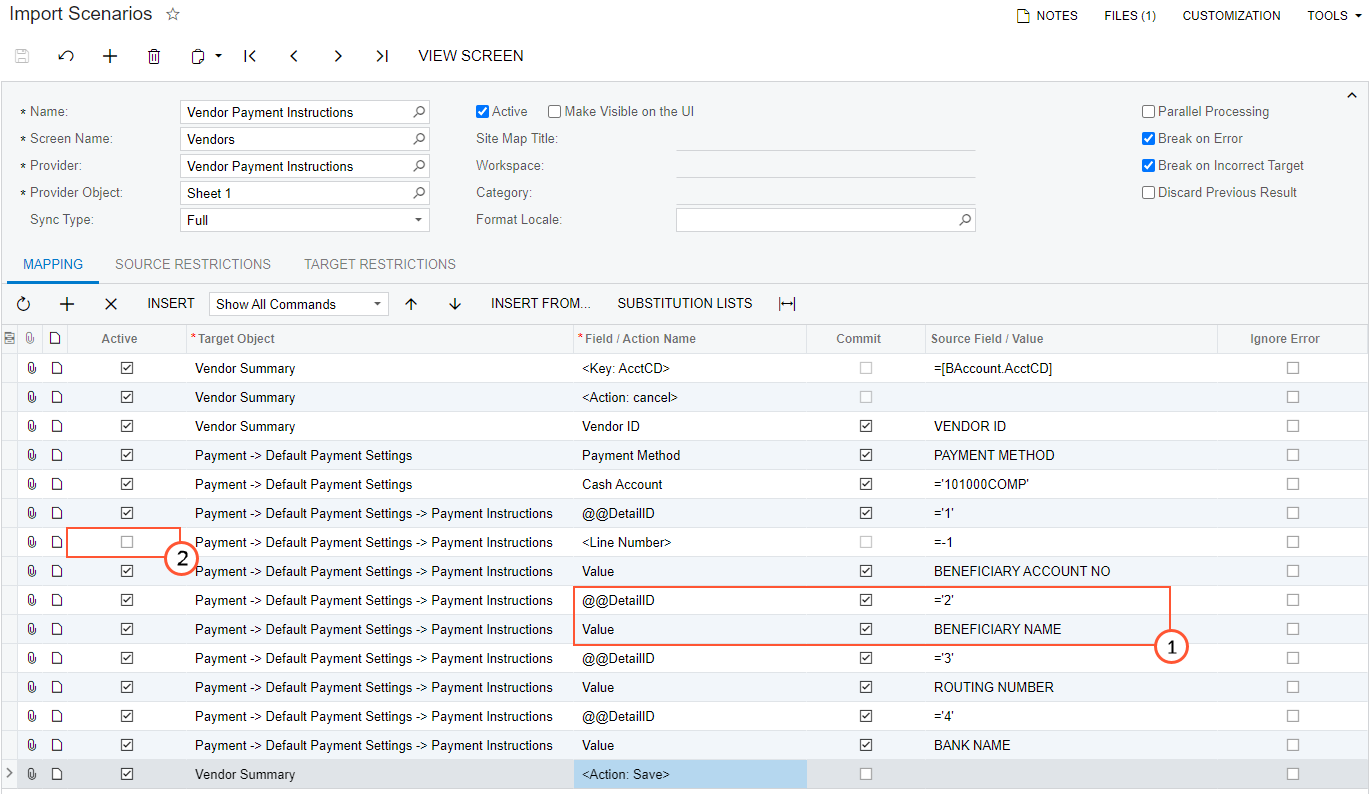
In the mapping, you have specified the custom key @@DetailID, which refers
to the detail line of the payment method, and you have specified the value for the key for
each of the detail lines (see item 1 in the screenshot above). You have also selected the
Commit check box for these commands.
You have deactivated the line with the <Line Number>=-1 command (item
2). You need to update the existing detail records and do not need to insert new rows for
them.
3. Running the Scenario
On the Import by Scenario (SM206036) form, select the Vendor Payment Instructions scenario in the Summary area, and click Prepare & Import on the form toolbar. The records from the Excel file are imported into the system.
4. Reviewing the Imported Records
Review the results of the import on the Payment Settings tab of Vendors (AP303000) form. You can see that the payment instructions have been updated, as the following screenshot shows.

Summary
To update payment instructions for a vendor, in the import scenario, you have specified
@@DetailID as a custom key and mapped it to the ID of the payment method.
Directly after this command, you have assigned the custom key the value that is displayed in
the Description column of the Payment Method
Details table. You did this for each of the four detail lines of the payment
method.
Related Concepts
Types of Target Fields in Import Scenarios