Extending the Existing Workflow Without Coding from the Customization Project Editor
Some forms of MYOB Acumatica have predefined workflows. You can extend these workflows in the Customization Project Editor, which gives you the tools and interface to make these changes without coding.
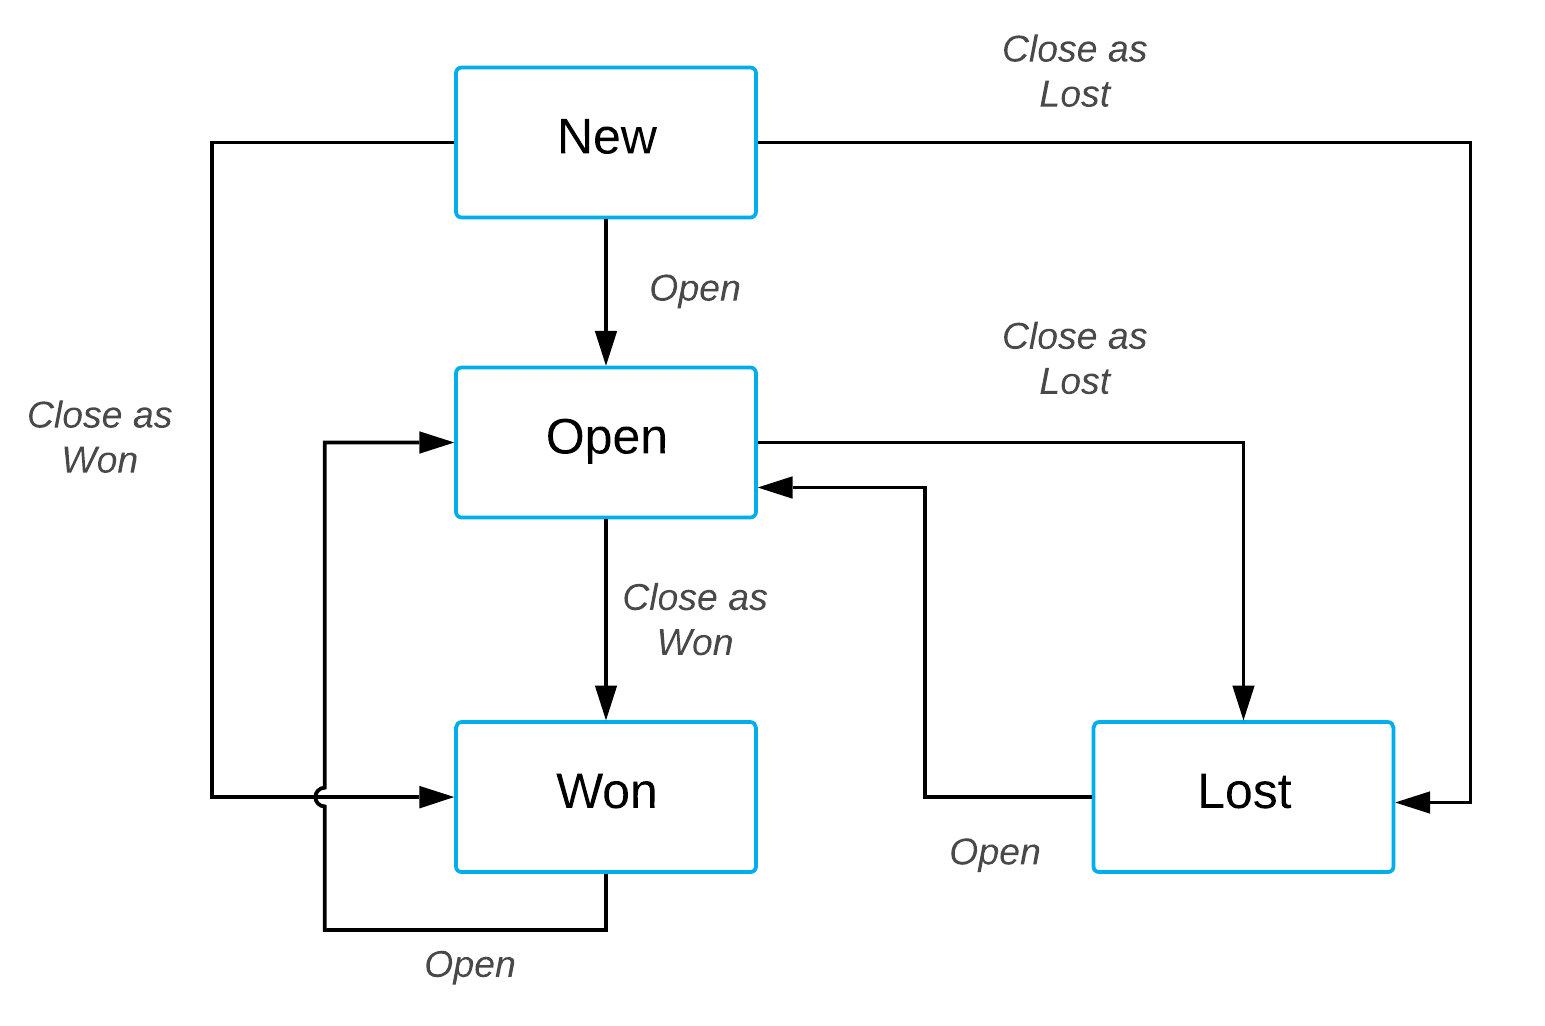
This example demonstrates the extending of the predefined workflow for working with an opportunity. The predefined workflow for the Opportunities (CR304000) form includes the states (shown in the blue rectangles and representing statuses) and actions shown in the following diagram.

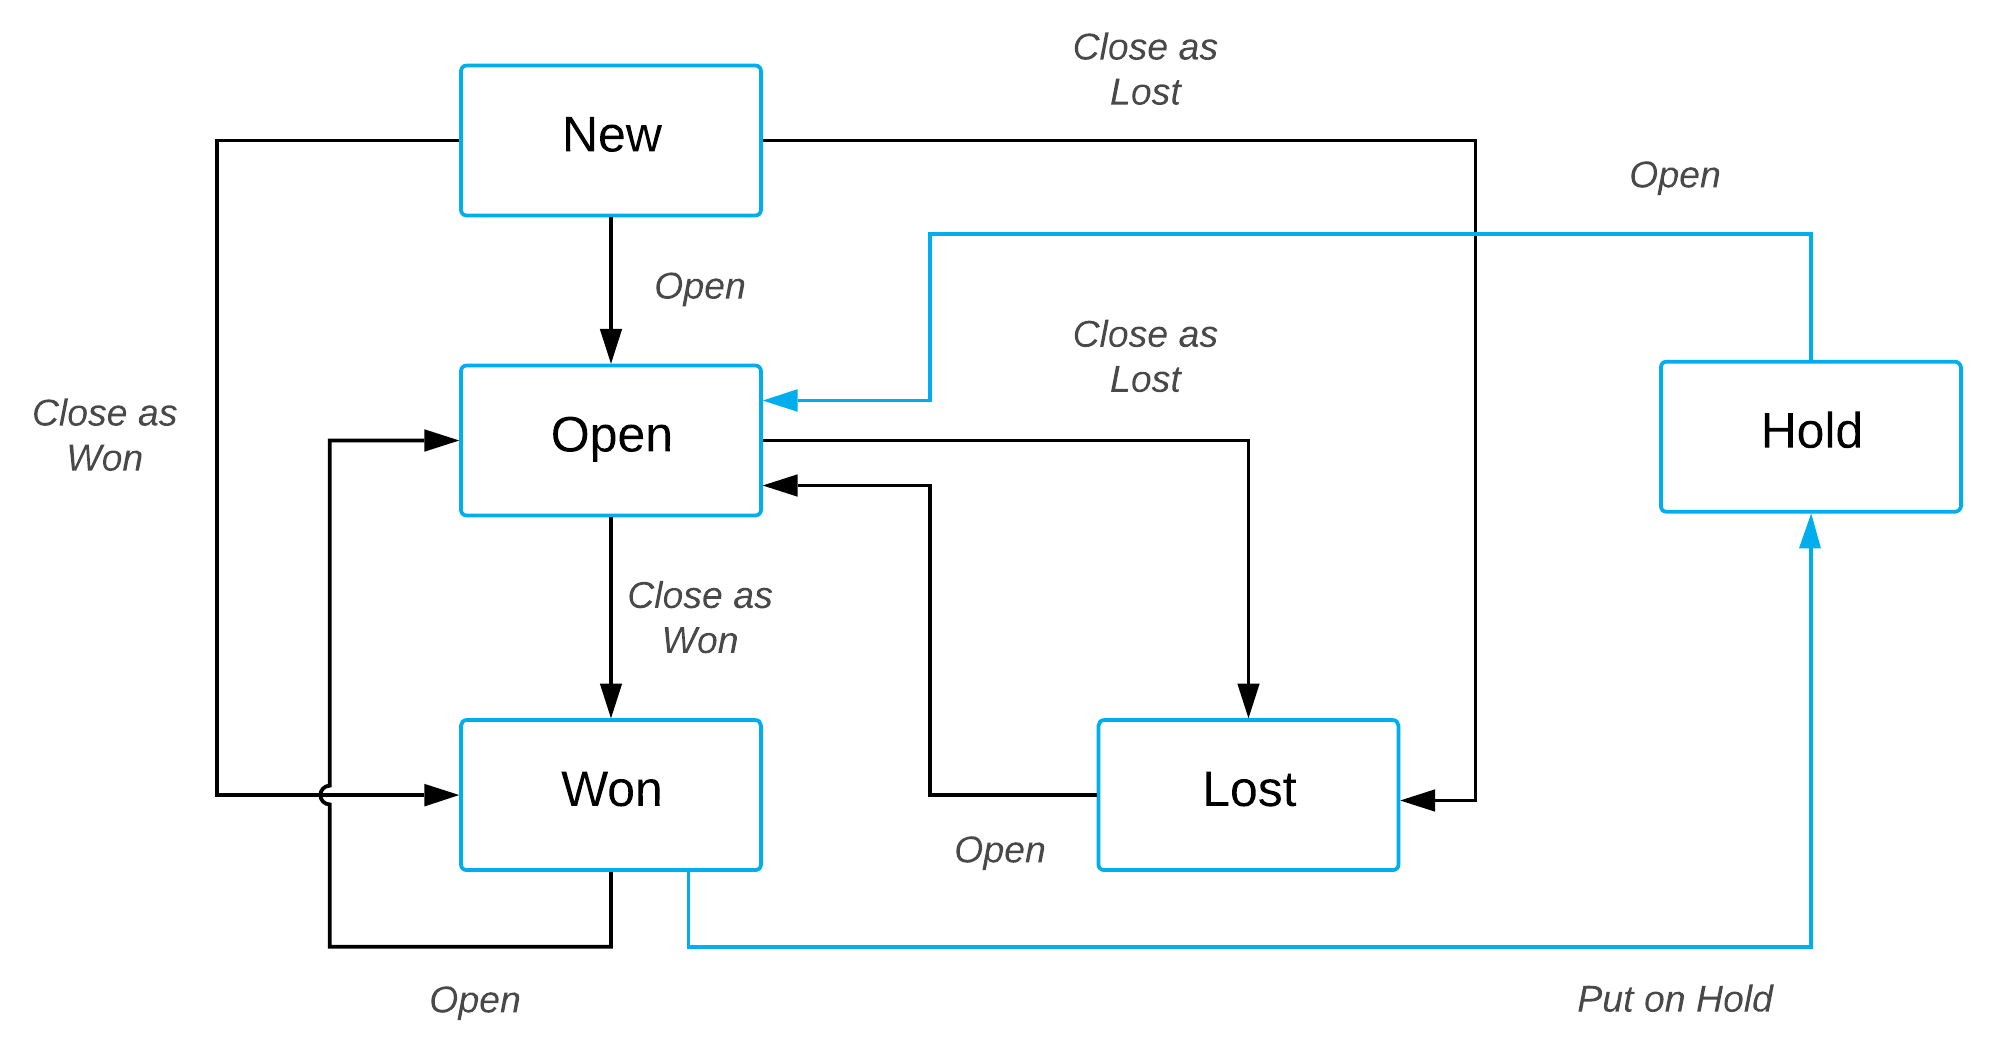
Suppose that you need a new status called Hold that can be used for opportunities. After you perform customization, a user should be able to change an opportunity’s status from Won to Hold by clicking the Hold action, and change the status from Hold to Open by clicking the predefined Open action.
The following diagram presents the possible statuses after customization and the actions that change statuses.

Based on these specifications, you will implement the new workflow for opportunities by performing the following general tasks, which are described in greater detail in the sections that follow:
- Adding the Opportunities form to the list of customized screens as described in Add the Opportunities Form to the List of Customized Screens.
- On the Workflows page, creating a workflow based on the existing one as described in Create a Custom Workflow Based on an Existing One.
- In the Workflow Editor, adding the Hold state as described in Add the Hold State to the Custom Workflow.
- For the Won state, defining a transition and the Hold action as described in Create the Transition from the Won State to the Hold State.
- For the Hold state, adding a transition and the Open action as described in Create the Transition from the Hold State to the Open State.
Add the Opportunities Form to the List of Customized Screens
To add the Opportunities (CR304000) form in the list of customized screens, do the following:
- Open the Customization Project Editor.
- In the navigation pane, click Screens.
- On the page toolbar, click Customize Existing Screen.
- In the Customize Existing Screen dialog box, which opens, select the Opportunities form.
- Click OK.
The Opportunities form is displayed on the Customized Screens page and is listed in the navigation pane under the Screens node.
For details on adding a form to the list of customized screens, see To Add a Page Item for an Existing Form.
Create a Custom Workflow Based on an Existing One
To create a new workflow, do the following:
- In the navigation pane of Customization Project Editor, select .
The CR304000 (Opportunities) Workflows page opens.
- On the form toolbar, click Add Workflow.
- In the Add Workflow dialog box, which opens, specify the
following values:
- Operation: Extend Predefined Workflow
- Base Workflow: Default Workflow
- Workflow Type: DEFAULT
- Workflow Name: The internal name of the workflow
- Click OK.
The dialog box is closed, and the workflow appears in the table on the Workflows page. Notice that the workflow’s status is Inherited.
- Clear the Active check box for the predefined workflow, and select the Active check box for the created workflow.
- On the page toolbar, click Save.
- In the table, click the name of the workflow.
The State Diagram: <Workflow Name> page opens. Now you will add the Hold state.
Add the Hold State to the Custom Workflow
To add the Hold state, do the following:
- On the toolbar of the States and Transitions pane, click Add State.
- In the Add State dialog box, which opens, specify the following
values:
- Identifier: H
- Description: Hold
- Click OK.
- On the States and Transitions pane, place the Hold state after the Won state by using the buttons on the toolbar.
Create the Transition from the Won State to the Hold State
You need to create a transition from the Won to the Hold state. To perform this transition, you also need to create the Put on Hold action. Do the following:
- In the States and Transitions pane, select the Won state.
- On the toolbar of the States and Transitions pane, click Add Transition.
- In the Add Transition dialog box, which opens, select Hold as the Target State.
- Click Create, which is next to the Trigger Name box.
- In the New Action dialog box, which opens, enter the following
values:
- Action Name: PutOnHold
- Display Name: Hold
- To save the action you have created, click OK.
- In the Add Transition dialog box, make sure the created action is specified in the Action box, and click OK to close the dialog box.
- On the page toolbar, click Save
Create the Transition from the Hold State to the Open State
You now need to create a transition from the Hold state to the Open state. To perform this transition, you can use the existing Open action. by perform the following actions:
- In the States and Transitions pane, select the Hold state.
- On the toolbar of the States and Transitions pane, click Add Transition.
- In the Add Transition dialog box, which opens, specify the
following values:
- Action Name: Open (Open)
- Target State: Open
- Click OK to close the dialog box.
- On the page toolbar, click Save.
