
Modifying a BLC Action
To modify the behavior of an action that is defined within a business logic controller (BLC, also referred to as graph), you should override an action delegate.
Suppose that you need to rename the Release button to Extended Release on the Receipts (IN301000) form, which is shown in the following screenshot.
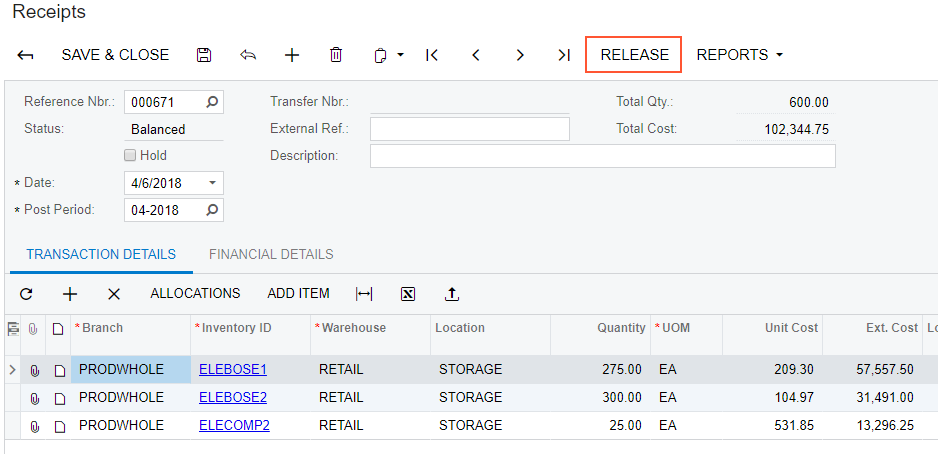
To do this, you have to find the business logic controller for the form and modify the display name of the action that corresponds to the Release button as follows:
- Find the business logic controller for the form, on the
Customization menu, select Inspect Element
and click the button caption on the form. The system should retrieve the following
information of the button, which appears in the Element Properties
dialog box:
- Control Type: DS Callback Command. The type of the UI control.
- Business Logic: INReceiptEntry. The business logic controller that contains the code of the action that is represented by the Release button.
Thus, to rename the button, you have to change the
DisplayNameparameter of thePXUIFieldattribute for theReleaseaction in the BLC extension for the INReceiptEntry class. - Modify the attributes of the action, by doing the following:
- Select in the Element Properties dialog box
- In the Select Customization Project dialog, specify the
project to which you want to add the customization item for the business logic
controller of the form and click OK.
The Code Editor opens for customization of the business logic code of the form (see the screenshot below). The system generates the BLC extension class in which you can develop the customization code. (See Graph Extensions for details.)
Figure 2. The BLC extension class generated for customization of the business logic code executed for the Receipts form 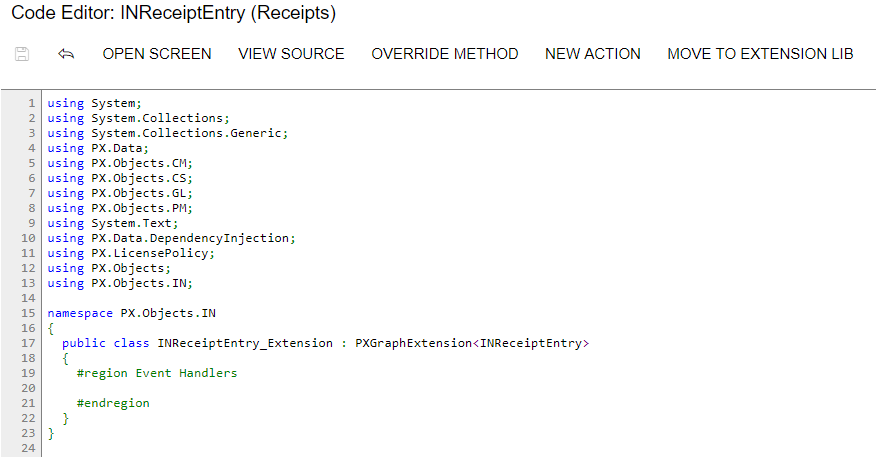
- Modify the
DisplayNameparameter of thePXUIFieldattribute for theReleaseaction by redefining the action in the BLC extension class, to which the attributes are attached. Insert the code listed below into theINReceiptEntry_Extensionclass, as shown in the screenshot below. In theDisplayNameparameter, you specify the new name for the button, "Extended Release".#region Customized Actions public PXAction<INRegister> release; [PXUIField(DisplayName = "Extended Release", MapEnableRights = PXCacheRights.Update, MapViewRights = PXCacheRights.Update)] [PXProcessButton] protected IEnumerable Release(PXAdapter adapter) { return Base.release.Press(adapter); } #endregion
The redefined action delegate must have exactly the same signature—that is, the return value, the name of the method, and any method parameters—as the base action delegate has. You always have to redefine the action delegate to alter either its delegate or the attributes attached to the action. To use the action declared within the base BLC or a lower-level extension from the action delegate, you should redefine the generic
PXAction<TNode>data member within the BLC extension, as shown in the code above. You do not need to redefine the data member when it is not meant to be used from the action delegate. For details, see Graph Extensions. When you redefine an action delegate, you have to repeat the attributes attached to the action. Every action delegate must have PXButtonAttribute (or the derived attribute) and PXUIFieldAttribute attached. - Click Save in Code Editor to save the changes.
The system adds the customization to the business logic code to the Code list of project items. See Code for details.
To view the result of the customization, publish the customization project and open the Receipts form. Verify that the button caption has changed to Extended Release. Click this button for a document with the Balanced status and verify that the release procedure works exactly as it worked before publication of the current customization project.