Quick Data Entry Tips
Time Entries:
Start and End times can be entered in various formats. (All times are shown in 24 hour format)
-
Start and end times do not require the : or 00 e.g. midday can be entered as 12, with no requirement to enter as 12:00
-
Start times before midday can be entered as a single number e.g. 08:00 start can be entered as 8
-
End times will automatically switch to PM in order to be after the Start time on the same day e.g. if start at 08:00 and finish at 17:00, end time can be entered as 5, and system will default to 17:00
-
Start times between midday and midnight can be entered with a ‘p’ e.g. 4.30pm can be entered as 430p, or entered as 1630
|
Column |
Explanation |
|---|---|
|
|
Moving quickly from field to field: The Tab key or Enter key on your keyboard moves you quickly from field to field Tabbing, or Entering, to a populated field will highlight the data. The data can be typed over, rather than deleting it first Pressing the Shift and Tab keys together will move you backwards through fields |


-
Start times after midnight (e.g. adding an entry for “tomorrow” such as doing a recall from 1am to 3am), type a + (e.g. 1+ will generate 01:00+, then end time of 3 will generate 03:00+)
-
End times after midnight will have a + automatically applied e.g. if starting at 22:00 and ending at 06:00, the end time will display as 06:00+ to indicate it’s after midnight
|
Entry |
Result |
|---|---|
|
8 |
8:00 (or 20:00 if used for an End time that starts after 8:00 am) |
|
830 |
8:30 (or 20:30 if used for an End time that starts after 8:30 am) |
|
1630 |
16:30 – Translates directly into 24 hour time |
|
430p |
16:30 – The p indicates this is 4.30pm, which is then turned into 24 hour time |
|
13 |
13:00 – Translates directly into 24 hour time |
|
1p |
13:00 – The p indicates this is 1 pm, which is then turned into 24 hour time |
|
1+ |
01:00+ - The + indicates it is after midnight |
Quick use tools:
|
|
Removing / Adding Lines:
Clicking this button will remove everything that has been entered on this line o For clients with job costing, clicking the red ‘X’ once will remove the hours entered for job costing. Clicking the red ‘X’ again will remove the job/activity codes (ie make the whole line blank)
Clicking this button (or alternatively using ALT=) will create a new line. For example if you wanted to enter two time-bands on one day, two leave types taken on one day or a partial day’s leave |
|
|
Auto-Population of data: To repeat data that is in a row above, rather than manually entering it in, using the ‘ditto’ key on your keyboard will replicate it The ditto key will replicate any populated field directly above. In the example below, you could use the ditto key in the start, end and break boxes on the Tuesday or Wednesday and it will mirror what is entered on the Monday
|
|
|
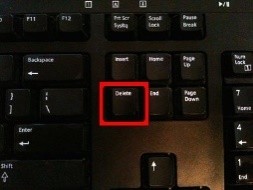
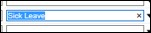
Deleting field data: For keyboard users, the quickest way to delete data in a field is to tab to the field and then hit DEL For mouse users, some internet browsers will provide an ‘x’ at the end of the field. For example, clicking on the ‘x’ in this box will remove the Sick Leave reason code from the box |
|
|
Viewing Historical Data: Clicking on the History button allows you to view historical information e.g. previous timesheets Use the buttons to move up or down through the historical timesheets
|
|
|
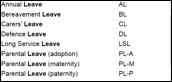
Shortening Pick-lists: If there are multiple types of reason codes to select from, typing one common word such as ‘leave’ will condense the list down to only leave reasons Alternatively, start typing the name or code in the pick list (e.g. ‘par’ or ‘parental’) and you will only get reasons that have the word ‘parental’ in them |
|
|
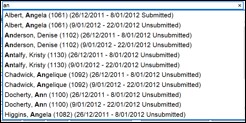
Searching for Employees: Start typing employee’s name or employee code e.g. if searching for Anderson: Typing ‘A’ will shorten list to all employees whose surname or fist name starts with ‘A’ Typing ‘An’ will shorten list to all employees whose surname or first name starts with ‘An’ Typing ‘And’ will shorten list to all employees whose surname or first name starts with ‘And’ |
|
|
Jumping to months (either ahead or behind): On the Leave Planner, rather than scrolling through month by month, if you want to jump say six months ahead/behind, click the ‘Show Me’ button and type in a future/behind date and click OK. This will automatically leap you to that month. Remember to remove the date when you are finished, or the system will automatically take you there each time you log in |
|
|
Expand and Contract screens: Screens such as My Roster and My Leave can have a top half and a bottom half to them. The top half is a summary and the bottom half is the employee detail. Clicking on Expand in one half of the screen will close the other half Clicking on Contract will bring the screen back to two halves |
|
|
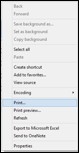
Printing timesheets: Use your browser’s Print dialogue |