IMS Online Max – Administrator Guide
Introduction
This document provides guidelines on:
-
Permanent Rosters
-
Variable Rosters
-
Administrator functions:
-
Sending leave reminders
-
Locking variable rosters
-
Locking leave requests
-
Opening periods
-
Creating timesheets
-
Recalculating timesheets
-
Importing transactions to payroll
-
Closing periods
-
Synchronising employee data to IMS Online
-
Recalculating future leave requests
-
Trouble-shooting
-
-
Warning messages
-
Business rule configuration
-
Standard reports
-
Quick Tips
Note that this level of functionality is only available in IMS Online Max.
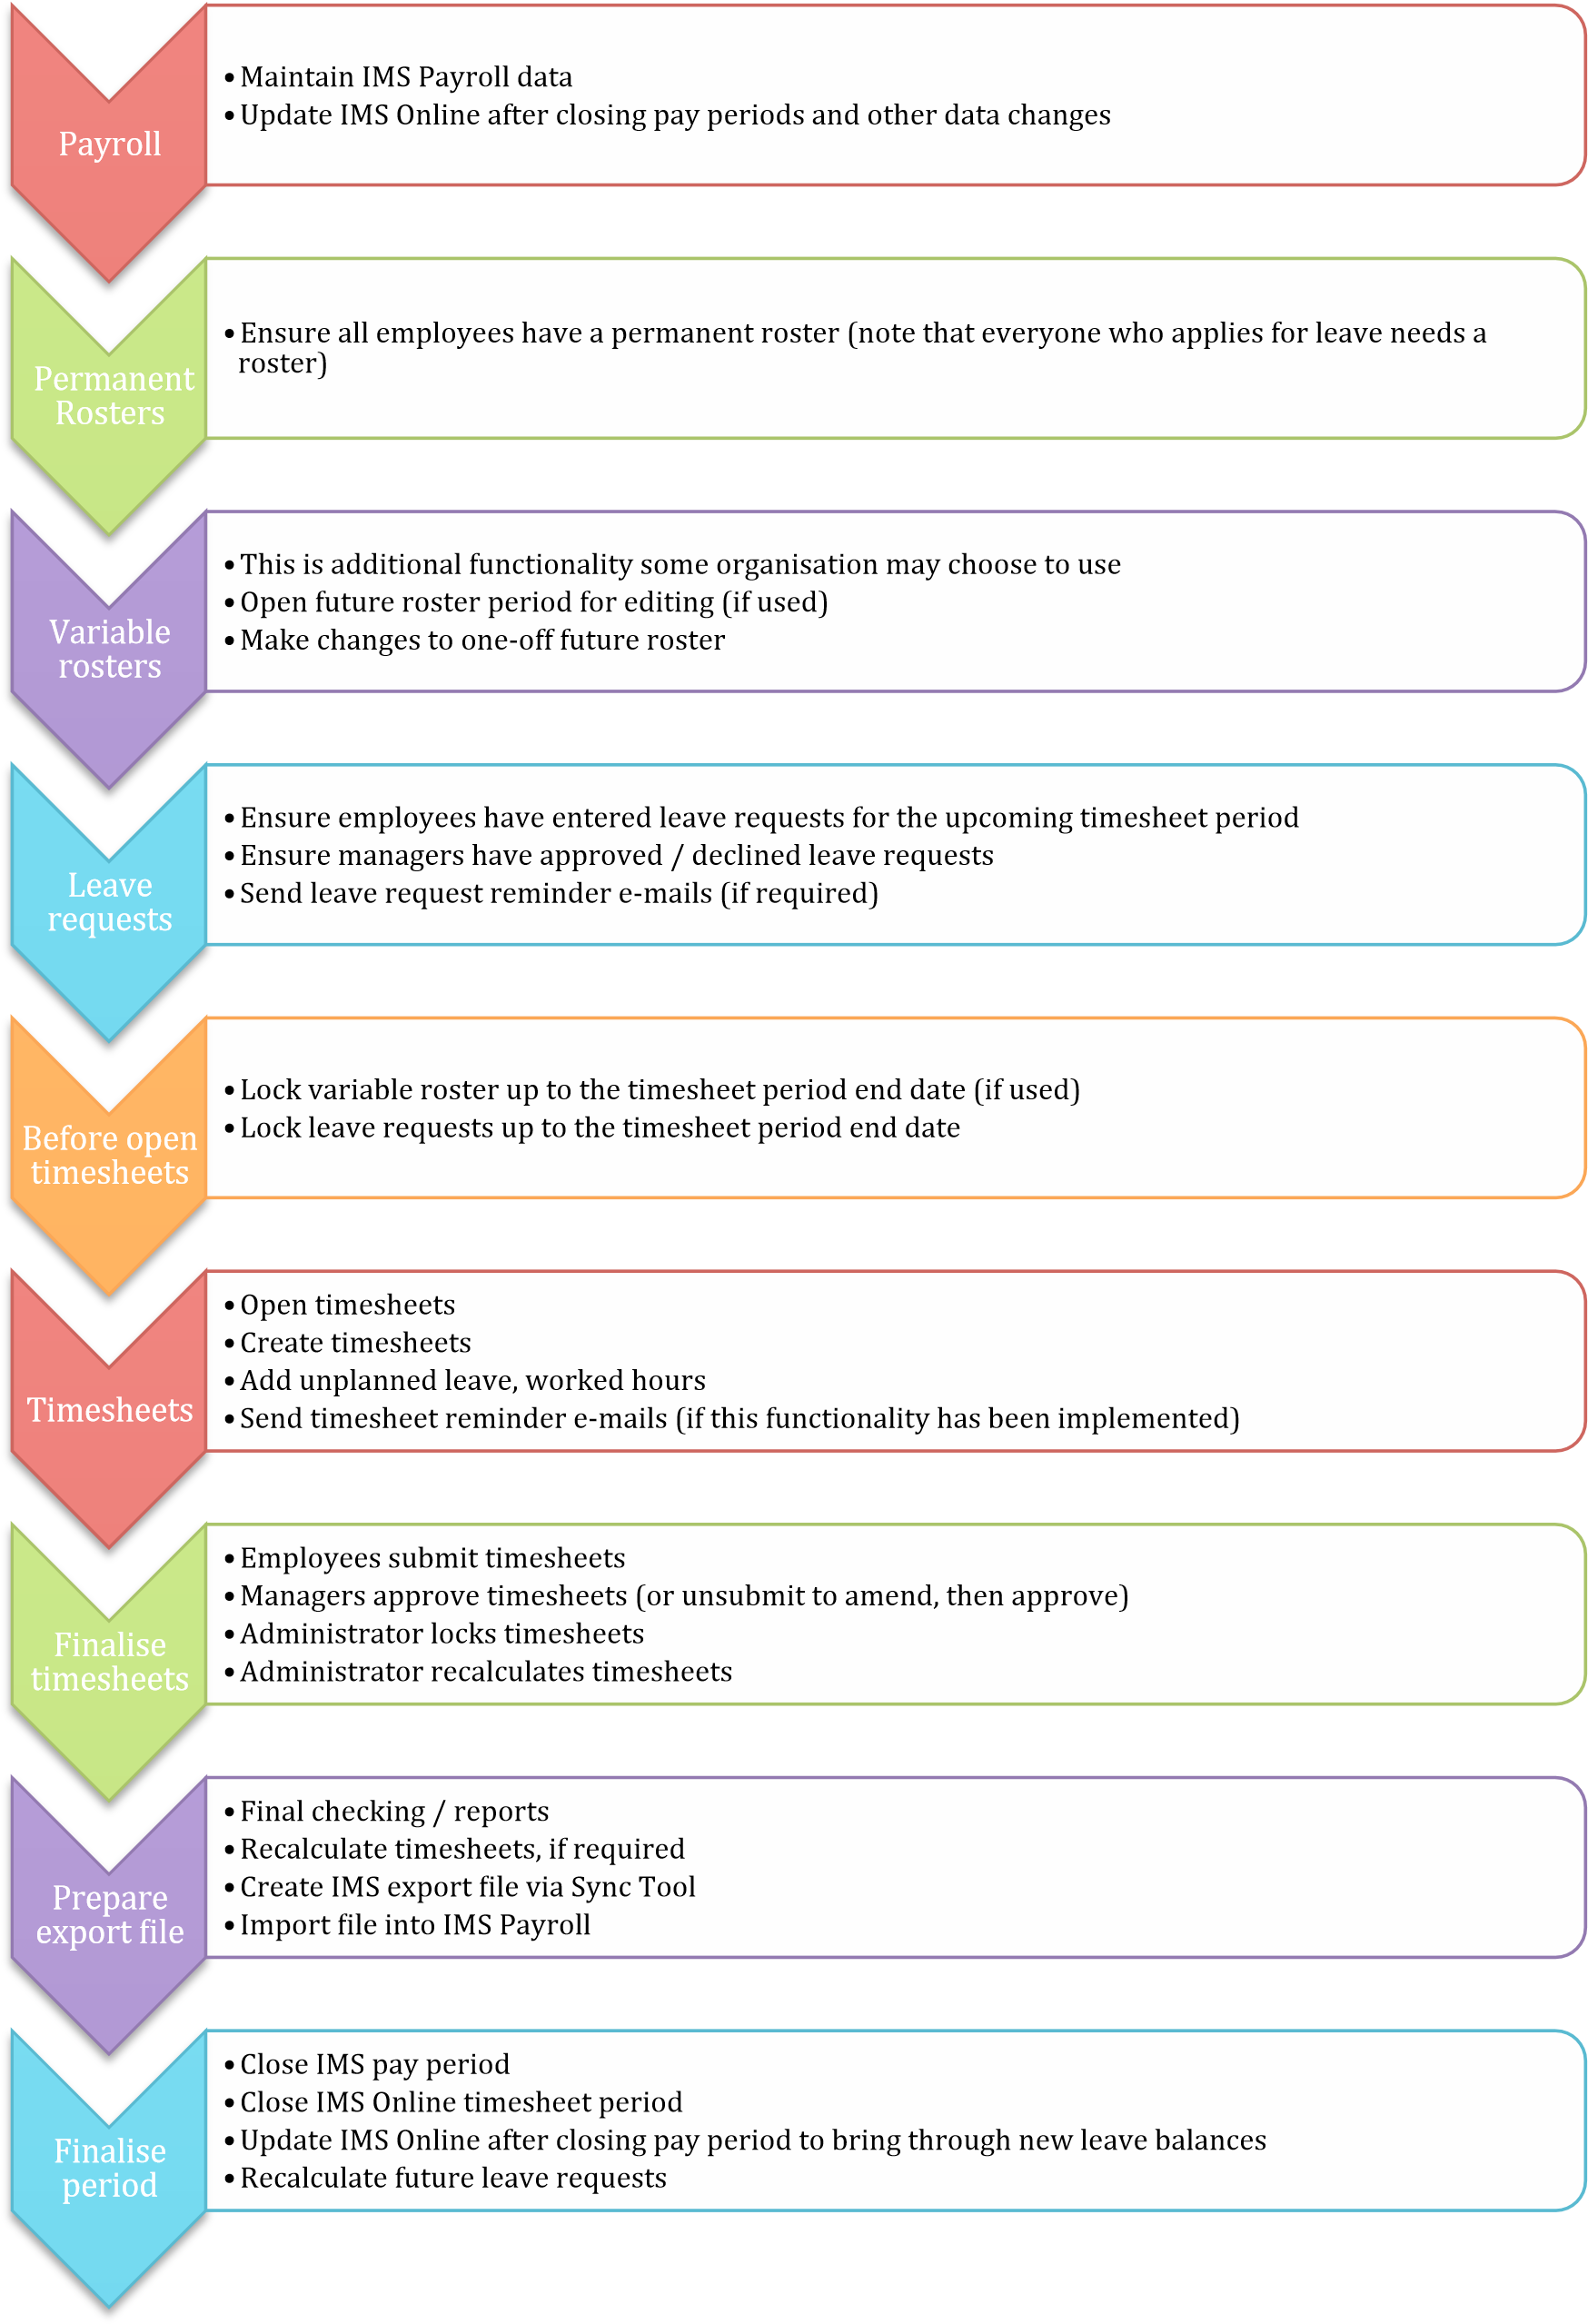
Administrator tasks
Permanent Rosters
For Leave Requests and Timesheet functionality to work, all employees must have a permanent roster assigned to them.
There are two types of Rosters available in TimeFiler. They are Permanent and Variable rosters.
Although all sites use permanent rosters, not all sites will necessarily use variable rosters.
Variable rosters allow a Manager or Administrator to make one-off changes to the permanent roster for a future date range.
Introduction to Rosters
Rosters can have different impacts depending on how your TimeFiler system is configured.
What is a roster?
A roster is simply a standard, or expected, working pattern assigned to employees.
What is the benefit of a roster?
-
It can be used to provide a starting point for employee timesheets. This means the employee or manager only needs to enter exceptions for the period such as leave, additional allowances and hours worked.
-
It can be pivotal in payment calculations, for example different overtime calculations for the day depending on whether it is a rostered day or not, public holiday calculations (for example, to determine whether an Alternative Holiday is payable), and leave calculations.
-
It provides more information to the employee when applying for leave giving full visibility of scheduled working days into the future. Of course, this is of great benefit to managers as well.
-
One-off changes may be made to the roster that does not impact the employee’s permanent roster. This document does not cover this functionality; please contact us for further information.
How does the roster impact timesheets?
-
Roster information can be transferred to the timesheet at the time of opening the timesheet period. This provides a starting point for the timesheet.
-
You may choose however to make the timesheet start as a blank slate. For some organisations, this can be better to help ensure employees are filling in their timesheets more accurately without simply accepting the roster as their timesheet.
How does the roster impact leave requests?
-
Roster information will be seen in the Monthly Planner area, providing great visibility to both employees and managers regarding scheduled hours/days of work.
-
This makes it easier for employees to choose leave days – and easier for managers to decide whether leave should be approved or declined by being able to see the whole team’s roster for the day.
Roster templates
Roster Templates define a standard working pattern that can then be applied to employees.
View existing templates
Roster Templates are viewed from the Masterfiles page via Employee Permanent Rosters:
-
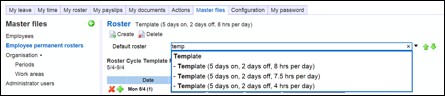
Start typing “template” into the Name field; a list of templates that have already been set up will be displayed:
-
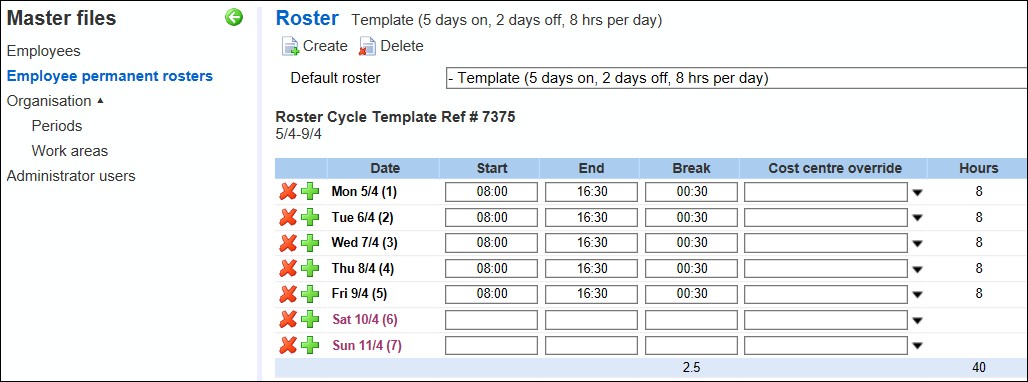
To view the roster for an existing template, simply arrow down to the relevant template to highlight it, and then press Enter (or click on the template using your mouse):
-
The above template is seven days in length. The roster pattern is made up of five working days of eight hours per day; followed by two days off.
-
When assigning the roster template to an employee, the employee can start on any day of the roster pattern. For example, let’s say the employee starts on a Wednesday. The employee will start on day three of the roster, which means the employee works for two days, has two days off, and then goes onto the normal pattern of five days on and two days off.
Create a new template
Roster Templates are created from the Employee Permanent Rosters link on the MasterFiles page:
-
Start typing “template” into the Name field; a list of templates that have already been set up will be displayed (as per above screenshot).
-
Highlight Template, and press Enter:

-
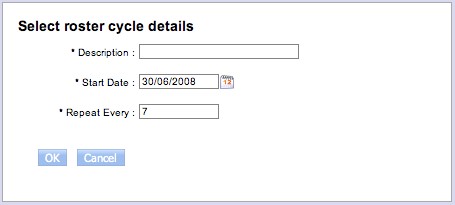
To add a new Roster Template, click on the Create button:
|
Field |
Explanation |
|---|---|
|
Description |
Type in a meaningful description for the Roster Template. |
|
Start date |
Enter a start date for the roster cycle. |
|
Repeat every |
This is the number of days that makes up the roster pattern. For example five days on and two days off is a seven-day pattern, whereas a four-on and four-off pattern is an eight-day pattern. |
-
Click OK to save the Roster Template.
Assigning roster templates to employees
-
Use the dropdown list to navigate to the applicable employee on the Employee Permanent Rosters page (on Masterfiles tab page), and then click the Create button.
-
You will be presented with the following screen:
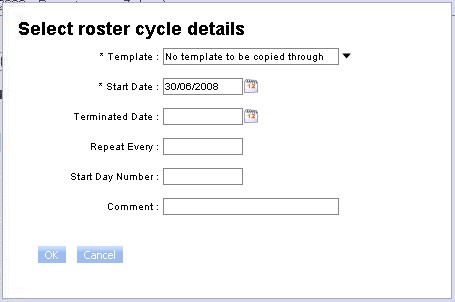
|
Field |
Explanation |
|---|---|
|
Template |
Click on the drop-down arrow to view a list of previously configured roster templates. If the work pattern you wish to apply to the employee is not on the list, then you will set up an individual roster pattern (see next section for more information). |
|
Start date |
Type in the start date for the new roster pattern. Important Note – this date cannot be earlier than the employee’s start date with the organisation. |
|
Terminated date |
• This field would normally be left blank, however if this roster pattern has a fixed end date, type in the finish date for the roster pattern. |
|
Repeat every |
• Leave this field blank (this value is determined from the roster template). |
|
Start day number |
This field specifies the day within the cycle on which the employee will start. For example a new starter may commence employment on Monday 7 April, so for a seven-day pattern, this is likely to be Day One of the roster cycle. However if the employee starts work on a Wednesday, this is likely to be Day Three of a seven-day pattern. |
|
Comment |
• Enter a comment for the roster cycle pattern, if required |
Once a roster template has been assigned to an employee, there is no further linkage to it. For example if the roster template changes in the future, these
changes do not flow through to employees previously set sourced from the template. up with a roster
-
Press OK to generate the roster pattern for the employee.
-
You are able to make changes to the roster if it is slightly different to the roster template at this stage.
-
You only need to save the roster pattern if you have made changes at employee level after generating the roster from the roster template.
Assigning individual rosters to employees
-
Use the dropdown list to navigate to the applicable employee on the Employee Permanent Rosters page (on Masterfiles tab page), and then click the Create button.
-
You will be presented with the following screen:
|
Field |
Explanation |
|---|---|
|
Template |
• Leave this field blank since you are setting up a roster pattern that is not generic. |
|
Start date |
Type in the start date for the new roster pattern. Important Note – this date cannot be earlier than the employee’s start date with the organisation. |
|
Terminated date |
• This field would normally be left blank, however if this roster pattern has a fixed end date, type in the finish date for the roster pattern. |
|
Repeat every |
This field holds the number of days in the roster cycle. For example, 7 days (ie 5 on, 2 off); 8 days (ie 4 on, 4 off) |
|
Start day number |
• Leave this field blank. |
|
Comment |
• Enter a comment for the roster pattern, if required |
Administrator tasks timeline
-
Open roster for editing: Variable rosters (used for one-off editing of the permanent roster) can be opened at any time leading up to the beginning of the period
-
Use the ‘Open roster for editing’ function on the Actions page
-
It is important that variable rosters are opened for the same period as the timesheet e.g. if timesheet period is 1st to 14th, then the variable roster period must be the same
-
More than one variable roster period can be open at once
-
-
Send leave reminders to employees and managers asking them to submit/approve any outstanding leave requests up to period end date. This should be done prior to creating timesheets for the period
-
This assists with ensuring leave is submitted and approved prior to creating the timesheets, which will ensure correct leave populates the timesheet when it is opened
-
All leave from the leave planner will populate the timesheet, irrespective of its status i.e. unsubmitted, submitted, approved
-
-
Lock leave requests and lock variable rosters up to period end date
-
No more leave requests can be created by employees/managers. Any unplanned leave is entered directly into the timesheet
-
If leave requests are not locked prior to timesheets being created, then any leave requests within the timesheet period will not populate the timesheet. This means leave transactions will not be generated, resulting in leave not being paid or deducted from the employees’ balance
-
-
No more one-off changes can be made to the roster for that period. Any late changes should be entered directly into the timesheet
-
If variable rosters are not locked prior to timesheets being created, then any roster changes within the timesheet period will not update the timesheet. The roster at the time the timesheet is created applies to the timesheet
-
-
-
Open period and create timesheets (so employees can enter their time and unplanned leave for the period ahead). Log out/in.
-
Lock period timesheet
-
Employees and managers cannot make any more changes
-
Administrators can edit the locked timesheet if required
-
Recalculate timesheets (optional). This processes all timesheets
-
-
Create export file for the period to import payments to the payroll system
-
Close period
-
Timesheet period should be closed after the payroll system’s pay period has been closed
-
Run process or tool that brings through updated leave balances from your payroll system
-
-
Recalculate leave requests
-
This updates any leave requests where leave without pay may have applied at the time of making the request due to insufficient leave balance, but employee now has sufficient balance
-
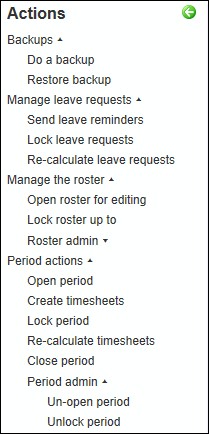
The Administrator functions are located on the Actions tab page:
Variable Rosters
Variable rosters is additional functionality some organisations may choose to use. It allows a Manager or Administrator to make one-off changes to the permanent roster in a future date range.
This demonstrates the three-step flow from permanent rosters to variable rosters to timesheets:
Permanent roster
-
This is the default under-lying roster pattern for the employee
-
Required for all employees
-
Is the starting point for Variable roster
-
Required for employees' Leave Requests
Variable roster
-
Variable rosters can be opened up in advance e.g. could be two weeks or four weeks in advance, depending on your business requirements
-
The variable roster period must match the pay period date range (i.e. if your pay period is fortnightly, the variable roster must be opened for the same fortnightly date range)
-
When variable rosters are opened, the permanent roster is copied into the variable roster and the individual employees' rosters can then be edited as required (i.e. if the employee's default permanent roster needs to be 'tweaked' say for that fortnight)
-
The variable roster 'trumps' the permanent roster
-
The variable roster is locked prior to creating the timesheets
-
Whatever is in the variable roster will auto-populate the timesheet when the timesheet is created
Timesheet
-
The variable roster pattern (if it exists, i.e. has been opened for editing), will auto-populate the timesheet when it is created at the beginning of the pay period. Otherwise, timesheet is auto-populated with permanent roster
-
The employee's days and start/end times can still be edited within the timesheet during the current period
Roster tab page
Roster summary information is displayed on the Roster tab page:
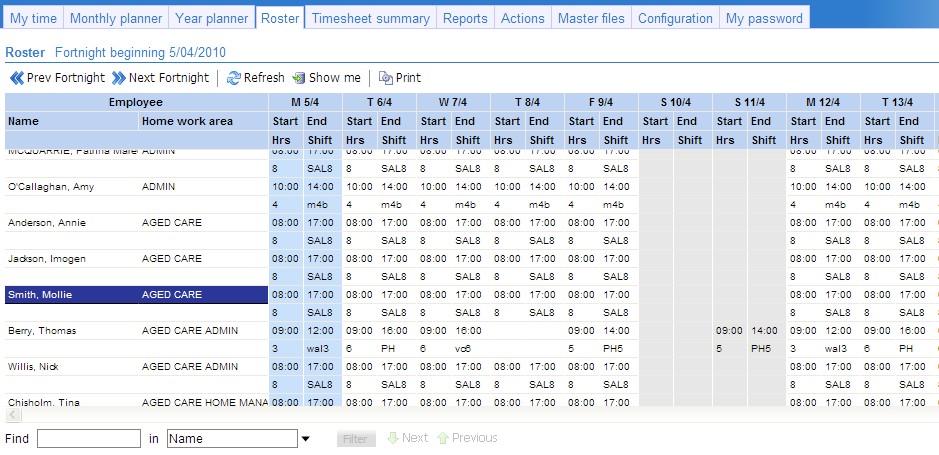
The roster summary is usually a week, fortnight or a month in length.
-
This page, by default, displays the employees’ permanent roster, along with any one-off changes that have been made to the roster via this tab page.
-
If there is no permanent (default) roster set up for employees then this page will be blank until a one-off roster has been added.
Open roster period for editing
In order to add a one-off roster to employees, the variable roster period has to be opened.
Navigate to the Actions tab page, and select ‘Open roster for editing’:
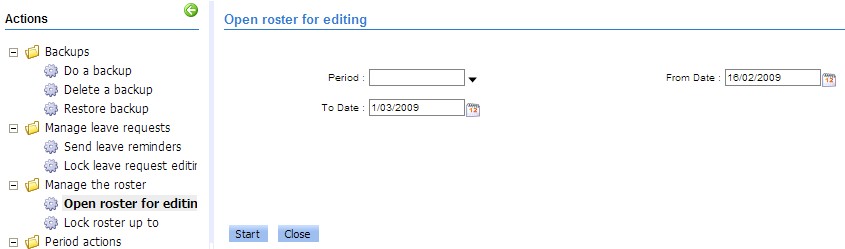
|
Field |
Explanation |
|---|---|
|
Period |
• Use the dropdown box to select a period code for the date range you wish to open the one-off roster for |
|
From date |
• Select the start date for period range (this is the start date of the one-off roster period) |
|
To date |
• Select the end date for period range (this is the end date of the one-off roster period) |
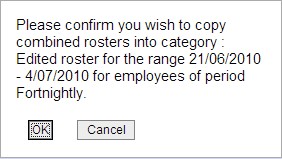
Click Start to open the roster period ready for editing. The following screen will be displayed:
Click OK to proceed.
Set up a one-off roster change
• To enter roster override details for employees:
-
Navigate to the Roster tab page
-
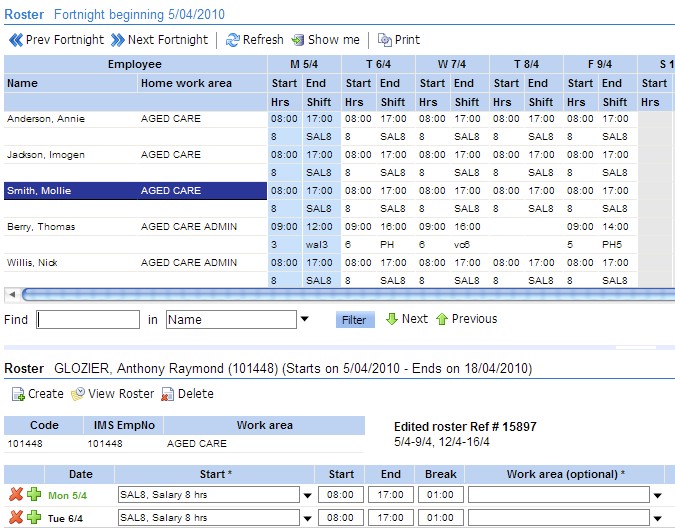
Highlight the employee in the roster summary area of the page:

-
Enter the roster for the fortnight for the employee in the lower half of the screen.
-
Press Save.
-
Highlight the next employee you wish to enter a one-off roster for, and repeat the process.
Send Leave Reminders
Prior to creating timesheets, Administrators may send an email to remind employees and managers to attend to outstanding Leave requests.
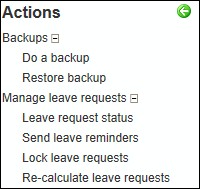
To send leave reminder emails, select Send leave reminders on the Actions tab page:

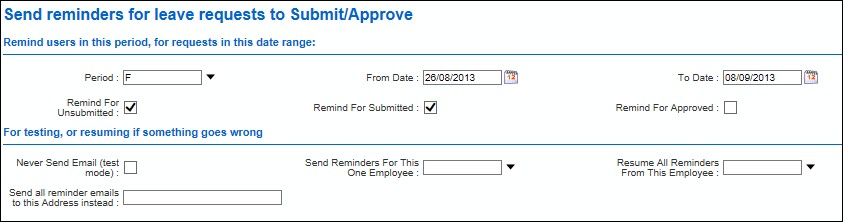
Select the pay period and the applicable date range. Leave reminders would generally be sent to people who have leave requests that are submitted (but not approved) and un-submitted (not sent to manager for approval). There is the option to send it to people who have approved leave requests should your organization choose to do so.
Click Start.
Employees with unapproved leave requests will receive an email asking them to attend to them.

Managers with employees who have unapproved leave requests will receive an email asking them to attend to these.

Problem Solving
There is the ability to test leave reminders or to resume them at a certain point.

|
Field |
Explanation |
|---|---|
|
Never Send Email (test mode): |
Ticking this box means no emails will be sent out to employees |
|
Send Reminders For This One Employee: |
You are able to select one particular employee to send a Leave Reminder email to |
|
Resume All Reminders From This Employee: |
If, during the process of sending leave reminders, your system crashes, you are able to resume leave reminders from the point they stopped. This saves having to re-run them from the beginning and employees receiving multiple emails |
|
Send all reminder emails to this Address instead: |
To test all leave reminder emails are working you could have them sent to one email address, rather than sending them out to the employees |
Lock Variable Roster
If your organisation has this functionality, the editable roster period must be locked prior to opening and creating timesheets. Locking variable rosters means no more changes can be made to employees’ work patterns up to that date. This prevents the employees’ rosters becoming mismatched with their timesheet.
To lock rosters, select Lock roster up to on the Actions tab page:
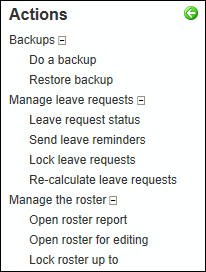

Select the date and the pay period. This means no further changes can be made to employees’ work patterns up to this date. Generally, the ‘Lock Up To Date’ would be the last day of the pay period you are about to create timesheets for.

Click Start.
A message appears asking you to confirm this is the date you wish to lock roster editing up to.
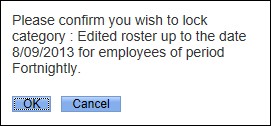
Click OK.
After the rosters are locked an audit log is displayed.

Lock Leave Requests
Locking leave requests means no more leave can be entered into the leave planner up to that date. This prevents the employees’ leave becoming mismatched to their timesheet. Once leave requests are locked and the timesheet created, you are able to enter any additional leave directly into the timesheet.
To lock leave requests, select Lock leave requests on the Actions tab page:
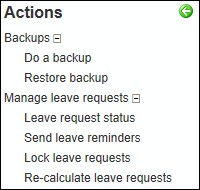

Select the date and the pay period. This means no further leave can be entered up to this date. Generally, the ‘Lock Up To Date’ would be the last day of the pay period you are about to create timesheets for.

Click Start.
A message appears asking you to confirm this is the date you wish to lock leave requests up to.
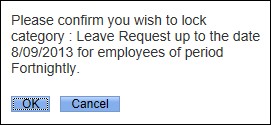
Click OK.
After the leave requests are locked an audit log is displayed.

Open Period
Prior to creating timesheets, the timesheet period must be opened. The timesheet period is the same date range as the pay period.
To open timesheets, select Open period on the Actions tab page:
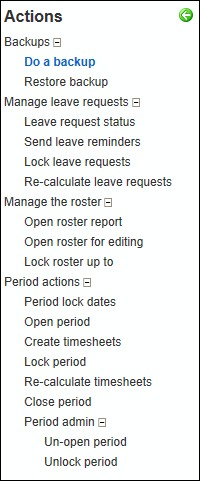

To select the pay period, click on the drop-down arrow. Periods should be opened in order. It is not good practice to open a future period without opening the periods that precede it.

Click Start.
A message appears asking you to confirm this is the period you wish to open.
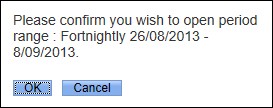
Click OK.
After the period is opened an audit log is displayed.

Create Timesheets
You can bulk create timesheets for every employee in a period. This is the recommended method for creating timesheets, to ensure that all possible timesheets are created.
To create timesheets, select Create timesheets on the Actions tab page:
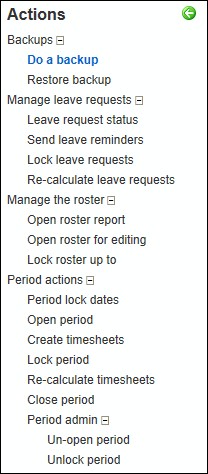

Select the period range you wish to open Timesheets for. This is generally the same period you have just opened up.
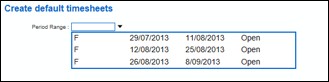
Click Start.
Creating timesheets after timesheets have already been created will only create timesheets for those employees who do not currently have a timesheet for that period.
A message appears asking you to confirm this is the period you wish to create timesheets for.
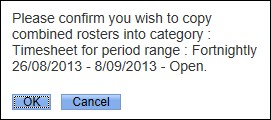
Click OK.
After the timesheets are created an audit log is displayed showing a list of all the employees that timesheets have been created for.

The audit log should be checked for yellow warnings or red critical alerts. Red critical alerts must be fixed.

At the bottom of the audit log you should check to ensure the process has completed successfully.

All un-submitted, submitted and approved leave requests from the Leave Planner will be pulled into the timesheet. For leave requests that span the pay period date
range, payment transactions will only be included for dates within the current timesheet (remaining days will be paid in the next period’s timesheet)
Lock Period Timesheet
At the completion of the timesheet period, the TimeFiler Administrator needs to lock the period so that no further changes can be made. Once the period has been locked, the Administrator is able to check data and make changes if necessary, before creating the export file.
Fast facts about locking timesheet periods
|
Question |
Answer |
|---|---|
|
When do I lock the timesheet period? |
After employees have finished completing their timesheets for the period, and prior to checking data / creating an export payments file for Payroll. |
|
What happens when I lock a timesheet period? |
No further changes to the timesheet may be made by employee and managers (note that Administrators can still make changes). |
Only Administrator users can edit Timesheets when the period is locked. Employees can still view them via the History option in Timesheets.
To lock timesheets, select the Lock period on the Actions tab page:
Select the period range you wish to lock Timesheets for.
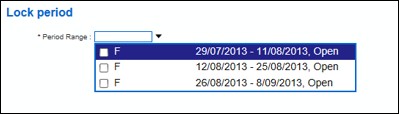
Click Start.
A message appears asking you to confirm this is the period you wish to lock timesheets for.
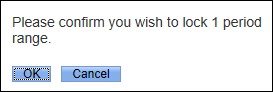
Click OK.
After the timesheets are locked an audit log is displayed.

Re-calculate timesheets
Processing occurs at different stages throughout the timesheet process:
-
After opening the timesheet period, and the ‘Create Timesheets’ action has been run, the timesheets are processed automatically as they get generated.
-
If employee timesheets are modified, payments are recalculated automatically (displayed underneath the timesheet).
It is recommended that you recalculate timesheets prior to importing the payments file into IMS Payroll. This will ensure:
-
Timesheet data is calculated using up-to-date leave balances and / or modified fields on the employee masterfile.
-
A chance to review warnings and alerts prior to finalising the timesheet period.
To re-calculate timesheets, select the Re-calculate timesheets on the Actions tab page:
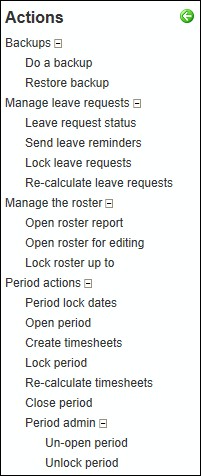

Select the period you wish to re-calculate by clicking on the drop-down arrow. Only open or locked periods will be available to select from.
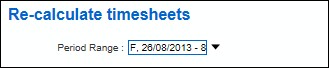
Click Start.
A message appears asking you to confirm this is the period you wish to recalculate timesheets for.
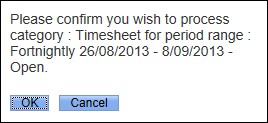
Click OK.
After the timesheets are recalculated an audit log is displayed. The log will group employees by Timesheet status and highlight any warnings and alerts.

The audit log should be checked for yellow warnings or red critical alerts. Red critical alerts must be fixed.

At the bottom of the audit log you should check to ensure the process has completed successfully.

Processing timesheets ensures that payments calculated for the timesheet are 100% up to date.
For example, leave payments may change as leave balances get updated from
Payroll, and payments may also change depending on other employee field changes.
Importing Payments to Payroll
Importing timesheet payments from IMS Online Max into the pay-run is performed via IMS Online.
IMS Online Synchronisation Tool tasks
Log into the IMS Online Synchronisation Tool via the IMS Online menu item on the Tools toolbar within IMS Payroll:
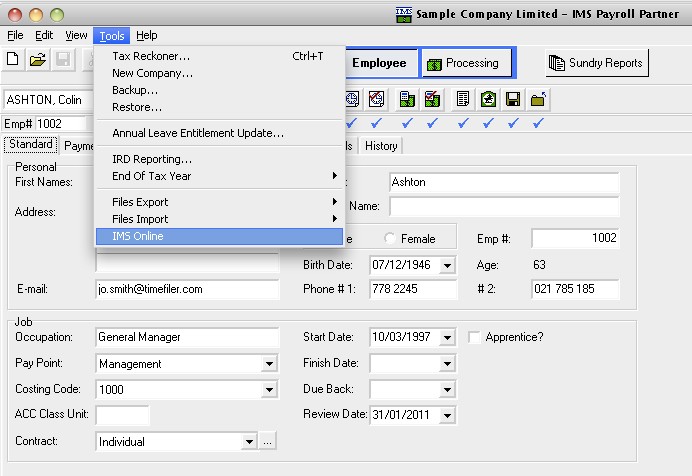
You will be presented with the following screen:
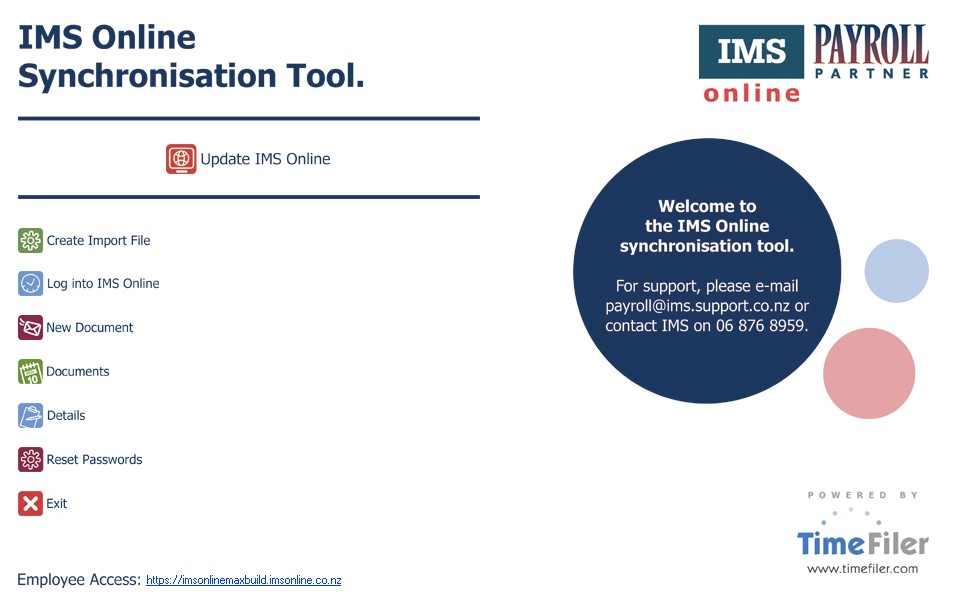
Create Import File
On the IMS Online Synchronisation Tool home screen, click Create Import File. The following screen will be displayed:
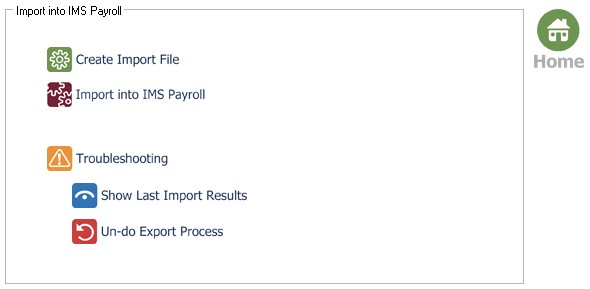
Click Create Import File. A dropdown box will be displayed:

Valid timesheet date ranges will be displayed:
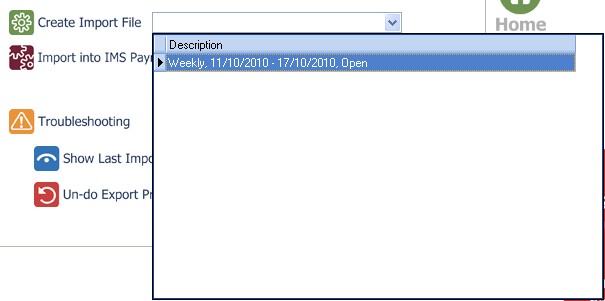
If there are no open timesheet periods, the following message will be displayed: “No period date ranges available to select”. It is only possible to create an import file for an open and locked timesheet period.
Double click the timesheet period range; you will be presented with the following confirmation box:
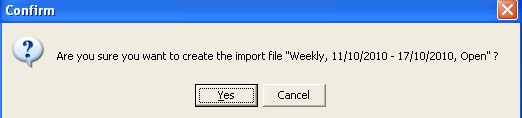
Click Yes to continue.
At the end of the process, a confirmation box will appear:
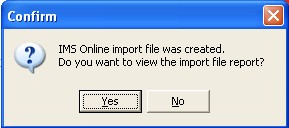
Click Yes to view the import file report.
Two pages are displayed on the report; transactions and validation messages:
Please check both pages of the import file report.
Import file log: transactions
The first page of the Import File Log displays the transactions that have been created ready for import into IMS Payroll:
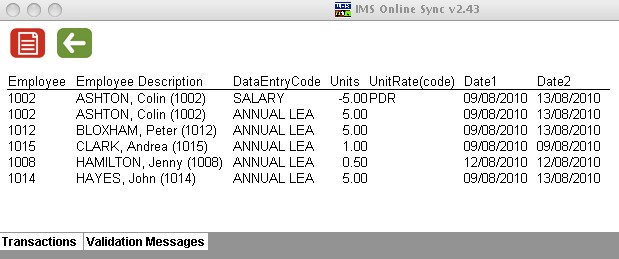
You can click on the red Print button to print the results to your local printer.
Now click on the Validation Messages tab at the bottom of the Import File log.
Import file log: validation messages
The second page of the Import File Log displays the system warnings that have been generated in the system for the Timesheets in the period date range:
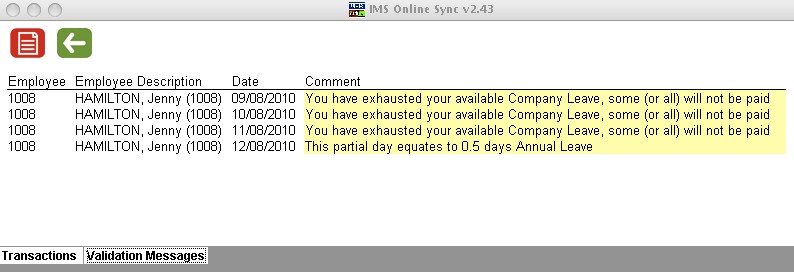
If you are not happy with the Transactions and/or Validation Messages, and need to go back into IMS Online to make changes, you will need to Undo the Export process (as detailed in the Troubleshooting section of this document).
Click the green arrow to go back to the main screen.
Import into IMS Payroll
Click Import into IMS Payroll. A dropdown box will be displayed:

Valid timesheet date ranges will be displayed:
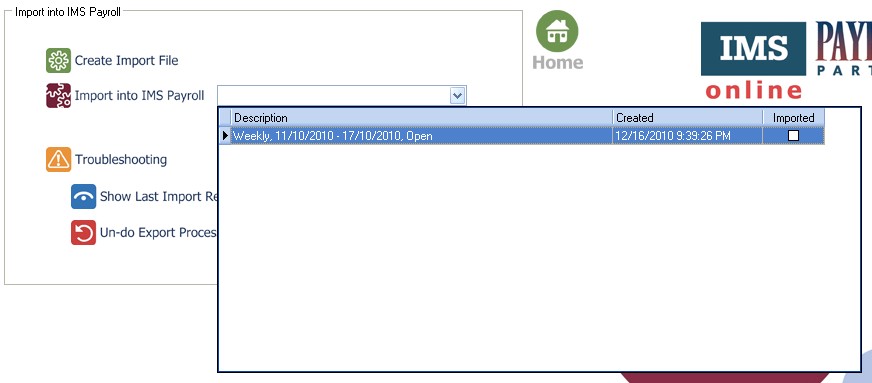
Double click the timesheet period range; you will be presented with the following confirmation box:
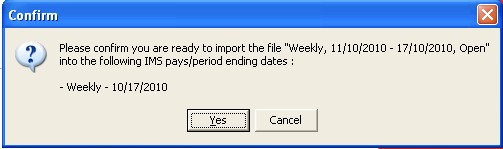
You must have the Time Import Module installed to complete this step. You must also have the pay period open in IMS Payroll.
Click Yes to continue. The Time Import window will display:
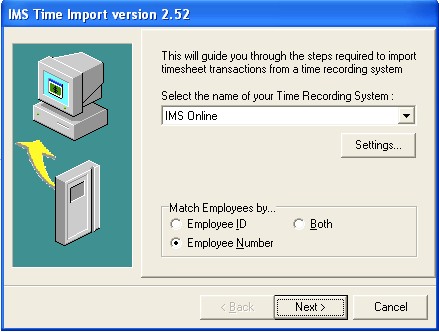
These settings should not be changed.
Click Next to continue.
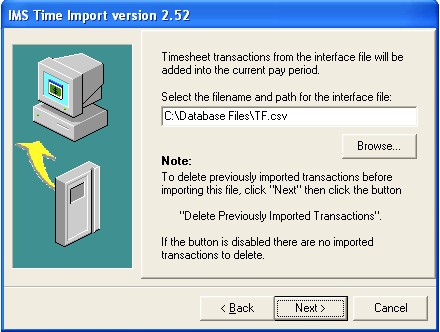
Click Next to continue.
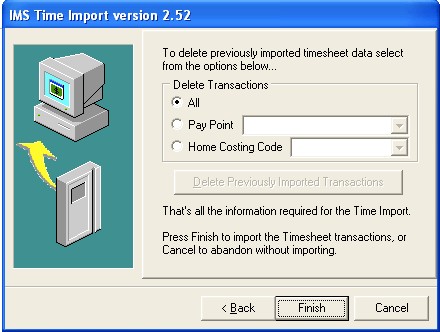
Click Finish to continue.
The IMS Online timesheet transactions will now be imported into the open IMS Payroll period.
Troubleshooting
The Troubleshooting area allows you to:
-
View the last Import File Log (in case you forgot to print it out, or need to take another look at it).
It is not possible to view historical Import File Logs beyond the previous one.
-
Undo the Export process (allows Timesheet data to be adjusted, and then recreated ready for import into IMS Payroll).
Show Last Import Results
Click Show Last Import Results. Import File Logs will be displayed for the last period range:
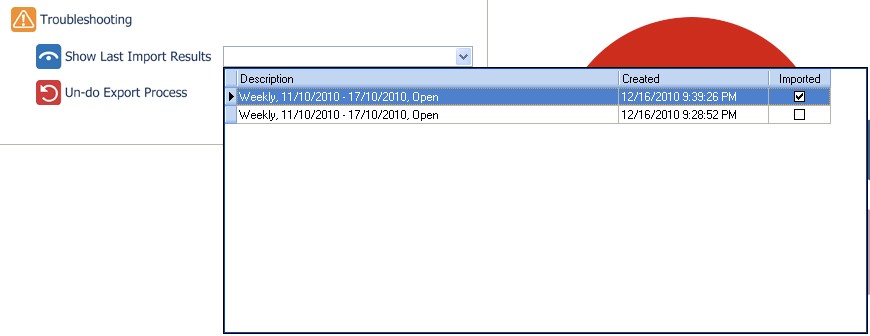
Double click the timesheet period range to view the Import File log.
All attempts at creating the import file are displayed for selection. A tickbox indicates which file was imported into IMS Payroll.
Note that information is displayed on the Transactions tab as well as the Validation Messages tab.
Un-do Export Process
If you discover that the Timesheets you have just created an import file for are not correct, or you have created the import file in error, it is possible to “un-do” the process so that it can be recreated again in the future.
Remember to make any changes in IMS Online if necessary before recreating the import file.
It is only possible to un-do the export process for the previous imported period.
Click Un-do Export Process. A period range drop-down box is displayed:
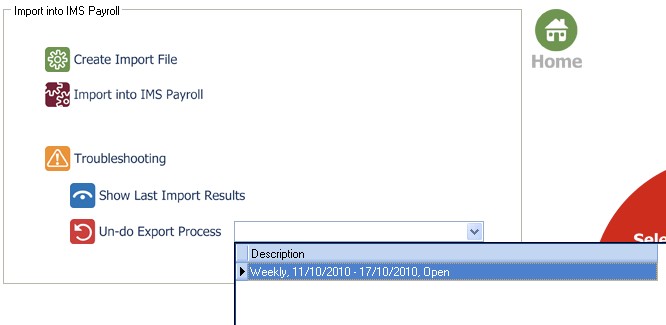
Make sure this is the period range you are planning to un-do the export process for, then click on the period date range.
You will then be asked to confirm whether you want to un-do the export for the selected period range:
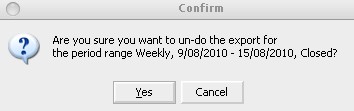
Click Yes to undo; otherwise press Cancel. If you clicked Yes, then IMS Online Sync will proceed to un-do the export process:
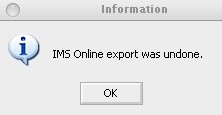
You may now run through the Create Import File process again after making any necessary changes that may be required in IMS Online.
Close timesheet period
Closing a period is the final task to carry out when the export to IMS Payroll has been carried out and the pay period in IMS Payroll has been closed.
Fast facts about closing timesheet periods
|
Question |
Answer |
|---|---|
|
When do I close timesheet periods? |
It is recommended you close the timesheet period once the corresponding period has been closed in IMS Payroll. |
|
What happens when I close a timesheet period? |
Timesheet data can no longer be edited in Timesheets. It is not a straightforward task to take a timesheet period back to an ‘unopened’ state, so only close the period once it has been successfully imported into Payroll. |
To close periods, select Close period on the Actions tab page.
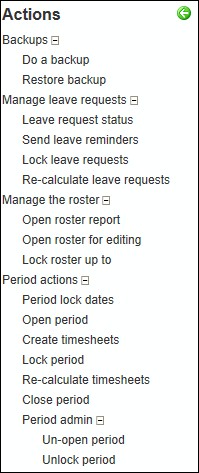

Select the locked period you wish to close.
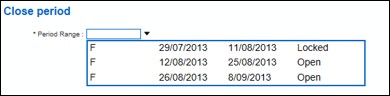
Click Start.
A message appears asking you to confirm this is the period you wish to close.
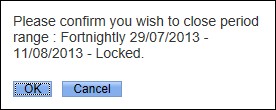
Click OK.
After the timesheets are closed an audit log is displayed.

You can only close periods that are locked first Closed periods can only be unclosed by TimeFiler Support (support@timefiler.com)
Update IMS Online data
After closing the IMS pay period and the IMS Online period, the updated employee Masterfile information in IMS Payroll (such as leave balances) should be synchronised to IMS Online.
Click on the ‘Update IMS Online’ button within the IMS Online Synchronisation Tool.
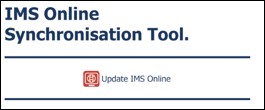
Recalculate leave requests
If you choose to perform this function, it should be run after:
-
Closing the IMS pay period
-
Closing the IMS Online period
-
Running the ‘Update IMS Online’ tool to bring the new leave balances in the payroll system into IMS Online.
Why recalculate leave requests?
Warnings are generated for leave requests when the employee, manager or administrator creates them. This means a warning about insufficient leave balances for a request made three months ago may no longer be accurate since balances increase and decrease as leave is accrued and taken.
The warnings generated on leave requests are based on the total leave balance available at the time of the request, or when they were last recalculated (i.e. if this Recalculate Leave process has been runs since).
If you have Projected Leave as a customization to your site then Leave Requests will use this annual leave balance instead of the current annual leave balance, reducing the requirement for leave request recalculations
When leave requests are recalculated the warnings are updated based on the current leave balances, which is why it should be run after syncing data from IMS Payroll at the end of a period.
How to recalculate leave requests

To recalculate leave requests, go into Actions – Manage leave requests and select the ‘Re-calculate leave requests’ action.
The above screenshot shows how you may select employees in a particular period, along with the start and end date for the recalculation range.
Keep the recalculation date range to two months at most so that the recalculate process doesn’t time out. Do not recalculate periods already processed & closed
Click Start.
Frequently asked questions
When I run the ‘Recalculate Leave Requests’ action, am I able to see what warnings have been generated against leave requests in the date range I selected?
Any warnings that have been generated for that date range will be displayed in the audit log following the recalculation of the leave requests (the audit log appears at the bottom of the screen).
How come there are instances where a warning generates alerting that LWOP will occur when some of the leave has already been paid?
When recalculating leave requests, entire leave requests are recalculated, so any leave requests that have already been partially paid will be compared against the current balance and show incorrect warnings.
Why is no warning generated if an employee has two leave requests in the same period and the second leave request should result in LWOP (e.g. employee’s sick leave balance is 1 day, and there are two leave requests of 1 days’ sick leave each)?
Each leave request is considered against the leave balance individually. If it had been 2 days of sick leave in one request it would have displayed a warning that LWOP would result. But two 1 day requests are each compared to the 1 day balance and deemed to be payable.
If I don’t recalculate leave requests, does that mean the leave will be paid incorrectly on the timesheets?
It is important to note that whatever the warnings on the leave requests say, the payments generated at timesheet stage will be correct. The timesheet looks at the employee’s current balances and pays the leave accordingly.
Period Administration
If Periods have been opened or locked by mistake, they can be un-done.
If Periods have been closed by mistake, they cannot be un-closed, without contacting TimeFiler Support.
Un-open period
Periods can be un-opened, which will set the period back to a blank state and remove all timesheets for that period. This can be useful if periods & timesheets are opened too early.
To un-open a period, go to Un-open period on the Actions tab.
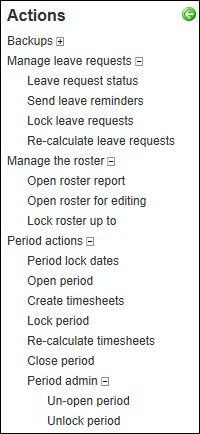

Select the period you wish to un-open by clicking on the drop-down arrow.
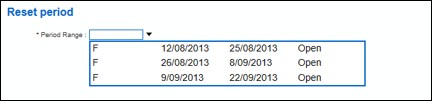
Click Start.
A message appears asking you to confirm this is the period you wish to un-open.
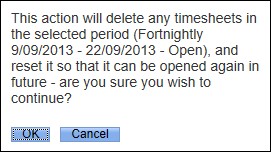
Click OK.
After the period is un-opened an audit log is displayed.

This process cannot be reversed.
Unlock period
You would generally un-lock a period if you needed to correct timesheets prior to importing to payroll.
To unlock a period, go to Unlock period on the Actions tab.

Select the period you wish to unlock by clicking on the drop-down arrow.

Click Start.
A message appears asking you to confirm this is the period you wish to un-lock.
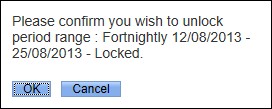
Click OK.
After the period is unlocked an audit log is displayed.

Un-close period
There is no ability for a user to unclose a period. Please contact TimeFiler Support for assistance (support@timefiler.com).
Warnings
This section explains the two different types of warning messages that appear on leave requests or timesheets and the corrective action required.
Critical Warnings
Critical warnings are highlighted in red and must be fixed.

|
Scenario |
Explanation |
|---|---|
|
Start time has not been entered in a quarter hour unit (this warning may be turned off in Business Rules) |
Warning: “Please enter a Start Time ending in 00, 15, 30 or 45 min” Action: Change the Start time ensuring it is entered as a quarter hour unit. |
|
End time has not been entered in a quarter hour unit (this warning may be turned off in Business Rules) |
Warning: “Please enter an End Time ending in 00, 15, 30 or 45 min” Action: Change the End time ensuring it is entered as a quarter hour unit. |
|
A second timesheet entry for the day overlaps with another entry for the same day, for exaple: 8am to 12:30pm worked time 12:00 to 4pm Annual Leave (overlap between 12 and 12:30) |
Warning: “Overlaps with another entry on this day. Please edit or delete this entry” Action: Ensure the End time of the first timesheet entry for the day is earlier than the Start of the next timesheet entry for the day. |
|
User has chosen a leave type on timesheet or leave request for which a payment code has not been specified in Business Rules |
Warning: “A <leave type> pay code does not exist: choose a different reason and advise your Administrator” Action: Administrator needs to remove this leave type as a selectable type, or specify the pay code for the leave type in Business Rules. |
Non-Critical Warnings
Non-Critical warnings are highlighted in yellow and are warning messages only. They will not prevent the timesheet or leave request from being saved or submitted.

|
Scenario |
Explanation |
|---|---|
|
Enter a leave reason against a non rostered day |
Warning: “Is this entry correct; note that there is no roster for the day” Action: You should only be assigning leave reasons against a day that has been a rostered (scheduled) day of work for the employee. |
|
If an Annual Leave entry has been entered that results in an insufficient leave balance, Leave without Pay is payable |
Warning: “You have exhausted your available Annual Leave balance, some will be paid as Leave Without Pay” Action: No action required if this is correct; otherwise change the leave reason to a different leave type so it may be paid. |
|
If a Company leave entry has been entered that results in an insufficient leave balance, Leave Without Pay is payable |
Warning: “You have exhausted your available Company Leave balance, some will be paid as Leave Without Pay” Action: No action required if this is correct; otherwise change the leave reason to a different leave type so it may be paid. |
|
If a Sick Leave entry has been entered that results in an insufficient leave balance, Leave without Pay is payable |
Warning: “You have exhausted your available Sick Leave balance, some will be paid as Leave Without Pay” Action: No action required if this is correct; otherwise change the leave reason to a different leave type so it may be paid. |
|
If a Shift Leave entry has been entered that results in an insufficient leave balance, Leave without Pay is payable |
Warning: “You have exhausted your available Shift Leave balance, some will be paid as Leave Without Pay” Action: No action required if this is correct; otherwise change the leave reason to a different leave type so it may be paid. |
|
If a Service Leave entry has been entered that results in an insufficient leave balance, Leave without Pay is payable |
Warning: “You have exhausted your available Service Leave balance, some will be paid as Leave Without Pay” Action: No action required if this is correct; otherwise change the leave reason to a different leave type so it may be paid. |
|
If a Time in Lieu entry has been entered that results in an insufficient leave balance, Leave without Pay is payable |
Warning: “You have exhausted your available Time in Lieu balance, some will be paid as Leave Without Pay” Action: No action required if this is correct; otherwise change the leave reason to a different leave type so it may be paid. |
|
User enters a leave reason into a Timesheet that does not have a corresponding approved Leave Request |
Warning: “This Leave was not previously Approved” Action: No action required. |
|
Leave type is in Days, and a partial leave day is taken that results in a full day |
Warning: “This partial day equates to 1 day <leave type>” Action: No action required. |
|
Leave type is in Days, and |
Warning: “This partial day equates to 0.5 days <leave type>” |
|
a partial leave day is taken that results in a half day |
Action: No action required. |
|
Employee enters a Partial Day request for a number of hours that is greater than rostered hours for the day |
Warning: “Leave will be capped at Rostered hours (xx hours) <where xx is the number of rostered hours for the day>” Action: Review the number of hours requested for the partial leave day |
|
User enters a Leave Request against a nonrostered day |
Warning: “This Leave Request will not result in a payment (no rostered days)” Action: Review roster, or remove Leave Request |
Business Rule Configuration
This section explains the fields on the Configuration / Business Rules tab pages and how they interact with leave requests, timesheet calculations, payroll payments and



emailing.
Leave
This tab page controls rules surrounding leave requests.
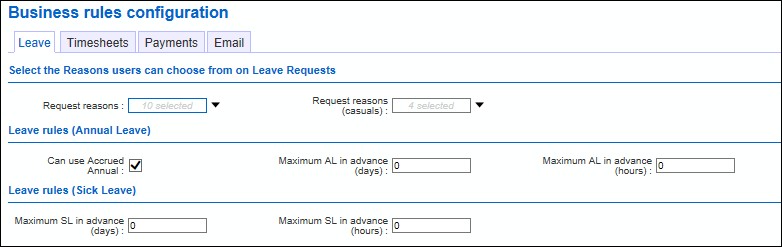
|
Field |
Explanation |
|---|---|
|
Request reasons: |
By default, the standard IMS Online Express leave reasons will be available for use, but additional leave types may also be selected here. Click on the drop-down arrow to view the list of request reasons. |
|
Request reasons (casuals): |
A different set of leave reasons can be specified for casual employees. Generally casuals have less leave reasons available to them than permanent employees. |
|
Can use Accrued Annual: |
Ticking this box allows both available and accrued leave to be used when employees are applying for annual leave. If this box is un-ticked, only the available leave portion will be used and anything over and above available leave will default to Leave without pay. |
|
Maximum AL in advance (days): |
For organisations who have their annual leave in Days, a maximum number of days can be specified that are allowed to be utilised from the Accrual balance. For example, if employees are only allowed to use five days of their accrual, then ‘5’ would be entered in this field. |
|
Maximum AL in advance (hours): |
For organisations who have their annual leave in Hours, a maximum number of hours can be specified that are allowed to be utilised from the |
|
Accrual balance. For example, if employees are only allowed to use 40 hours of their accrual, then ‘40’ would be entered in this field. |
|
|
Maximum SL in advance (days): |
For organisations who have their sick leave in Days, a maximum number of days can be specified that an employee can use in advance of their entitlement i.e. how far into negative their balance can go. |
|
Maximum SL in advance (hours): |
For organisations who have their sick leave in Hours, a maximum number of hours can be specified that an employee can use in advance of their entitlement i.e. how far into negative their balance can go. |
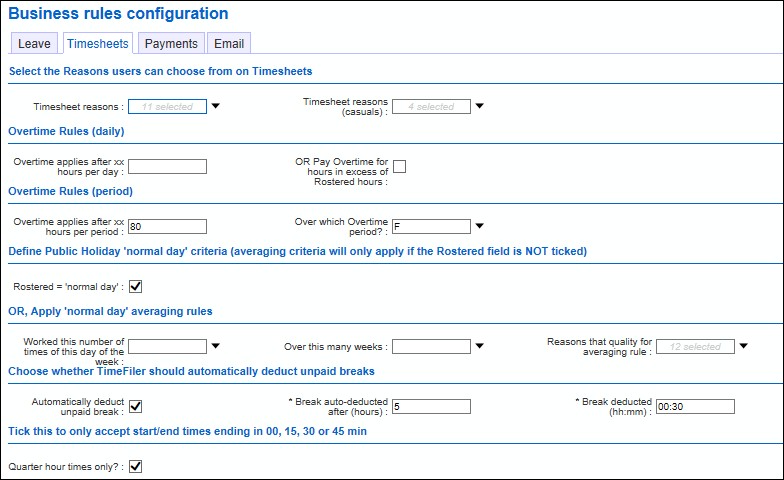
Timesheets
This tab page controls rules surrounding timesheet calculations.
|
Field |
Explanation |
|---|---|
|
Timesheet reasons: |
The codes available on the timesheet’s ‘Leave/Worktype’ pick-list. Click on the drop-down arrow to select the codes required. |
|
Timesheet reasons (casuals): |
A different set of leave/worktype reasons may be specified for casual employees. Generally casuals have less leave/worktype reasons available to them than permanent employees. |
|
Overtime applies after xx hours per day: |
This is used if overtime is paid on a daily basis. Overtime payments will apply after the number of hours specified in this field. Only one of this or the box below can be used. Warnings will be generated if both daily overtime options are selected (only one should apply). |
|
OR Pay Overtime for hours in excess of Rostered |
Overtime payments will apply for any hours worked in excess of the rostered hours for that day. Only one of this or the box above can be |
|
hours: |
used. Warnings will be generated if both daily overtime options are selected (only one should apply). |
|
Overtime applies after xx hours per period: |
This is used if overtime is paid on a period basis. Overtime worked after xx hours worked per period (Administrator must also specify period code; only period codes sourced from IMS will be available – if the overtime is different to existing pay period frequencies, then this will have to be customised). |
|
Over which overtime period?: |
This works in tandem with the above field. The applicable period code must be specified. |
|
Rostered = ‘normal day’: |
This determines public holiday payments. If this field is ticked, and the employee is rostered to work on a public holiday, then the system assumes they did work and appropriate payments will be calculated. If the field is not ticked, then the system assumes the employee did not work on the public holiday and will pay it as having been observed. |
|
Worked this number of times of this day of the week: |
This is used if the averaging formula is used to calculate applicable payment for public holidays (generally used for casual employees). For example, for a casual to be paid for a public holiday that falls on a Monday, they may have to have worked two out of the last four Mondays to qualify. Therefore, ‘2’ would be entered in this field. There is 1-5 available in the drop-down list, any other values will need to be configured. |
|
Over this many weeks: |
Works in tandem with the above field. In the above example, ‘4’ would be entered in this field. There is 1-5 available in the drop-down list, any other values will need to be configured. |
|
Reasons that qualify for averaging rule: |
Works in tandem with the above two fields. Administrators are able to select leave reasons that may be included in the averaging formula above. For example, Sick leave may count as being a ‘worked’ day. |
|
Automatically deduct unpaid break: |
Ticking this field means an unpaid break will automatically be applied after a certain number of hours worked. The parameters of this break are based on the criteria in the following two fields. |
|
Break auto-deducted after (hours): |
The number of hours an employee works before an unpaid break is forced. For example, if an unpaid break is required after five hours worked, then ‘5’ should be entered in this field. |
|
Break deducted (hh:mm): |
The length of the unpaid break is entered here. For example, if after five hours a 30 minute unpaid break is required, then 00:30 is entered in this field. |
|
Quarter hour times only: |
Ticking this field means times can only be entered in quarter hourly units e.g. 07:00, 07:15, 07:30 and 07:45. If the box is unticked, then times can be entered in any units. |
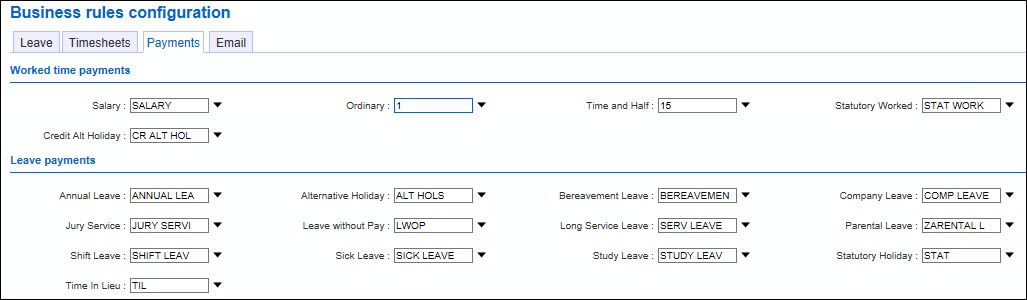
Payments
This tab page controls the payroll codes. These codes will determine where the worked time and leave payments are costed to and will go on to the export file for importing into the payroll system.
|
Section |
Explanation |
|---|---|
|
Worked time payments |
The applicable allowance code is connected to each worked time payment. For example in the above screenshot, the allowance code for Time and Half overtime payments is ‘15’. |
|
Leave payments |
The applicable leave code is connected to each leave type. For example in the above screenshot, the payroll code for Annual Leave is ‘ANNUAL LEA’. Some organisations may use numeric coding e.g. 201. |
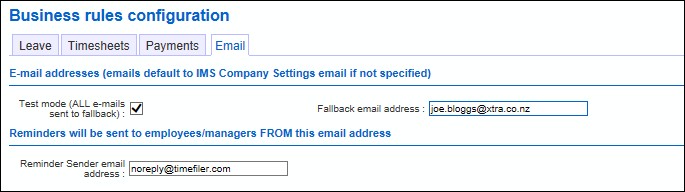
This tab page controls emailing from IMS Online Max. When testing email processes, this screen can be set for testing purposes.
|
Field |
Explanation |
|---|---|
|
Test mode (ALL emails sent to fallback): |
This is used for testing the emails generated from IMS Online Max. Ticking this box and putting an email address in the ‘Fallback email address’ box will send any emails there. For example, you could use this if you were testing the leave reminder emails. In the above screenshot, everybody’s reminder emails would go to joe.bloggs@xtra.co.nz. |
|
Fallback email address: |
Where the test emails will be sent to. |
|
Reminder Sender email address: |
This is the address that will show as the sender of reminder emails. All employees and managers who receive reminder emails will show they came from noreply@timefiler.com. If nothing is entered in this field, it will default to the email address in the IMS Company Settings. |
Standard reports
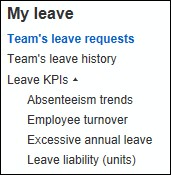
There are a set of standard reports available within IMS Online:
My leave page:
-
Absenteeism trends
-
Employee turnover
-
Excessive annual leave
-
Leave liability (units)
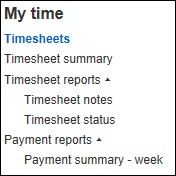
My time page:
-
Timesheet notes
-
Timesheet status
-
Payment summary – week
Running reports
This section provides a general overview of:
-
Report settings
-
Running reports
-
Viewing reports
-
Report output formats
-
Printing reports
Report Settings
Reports may have one or two tab pages used to determine the report settings:
Details
-
Can be used to specify the periods, date ranges, payments, and other commonly changed settings on the report
-
Can be used to filter data e.g. by employee, date ranges, projects (in job costing instances)
-
To select all items in a pick list, leave the field blank. (In the example below, leaving the ‘Employees’ filter empty means the report will run for all employees)

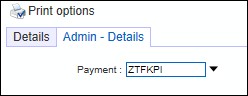
Admin – Details
-
Administrators set the values on this tab page (e.g. the payment codes) that are used within the report
-
Settings on this tab apply to all users of the report
-
Generally these settings don’t change that often. Note, that to save changes to these settings, the save occurs upon running the report
To run the report, click on ‘Start’ at the bottom of the page
After the report has generated, a ‘paper’ symbol appears:

-
Left click to view the report on-screen
-
Right click to save it elsewhere (select ‘Save Target As’)
Report Formats and Printing
Reports can be generated in different formats:
-
PDF
-
Excel
-
On screen (which generates report as a webpage).
To select the report format, click on ‘Print Options’ at the top of the page.
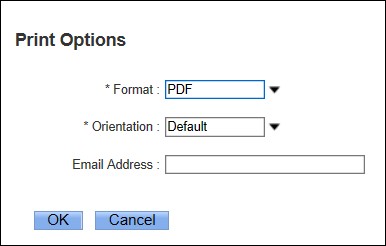
Print Options allows users to:
-
Select the report format
-
Change the orientation (i.e. landscape or portrait)
-
Email the report to a nominated person
The settings are saved for each user for the next time the report is run.
Absenteeism trends
This report is designed to work for customers using IMS Payroll as the source database, and reports data from the IMS Payroll leave history.
Purpose of report
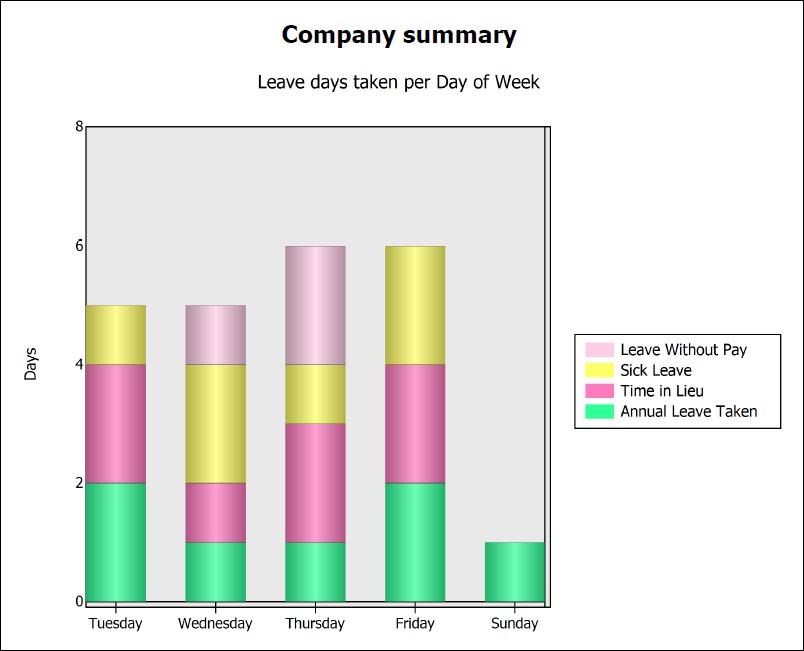
This report gives a visual display of which days of the week leave are taken on. This report is particularly useful for seeing which days of the week employees are taking sick leave.
Report output
-
Company summary is at the top
-
Per work area displays underneath
Report settings
The report is run for a specified date range.

Employee Turnover
Purpose of report
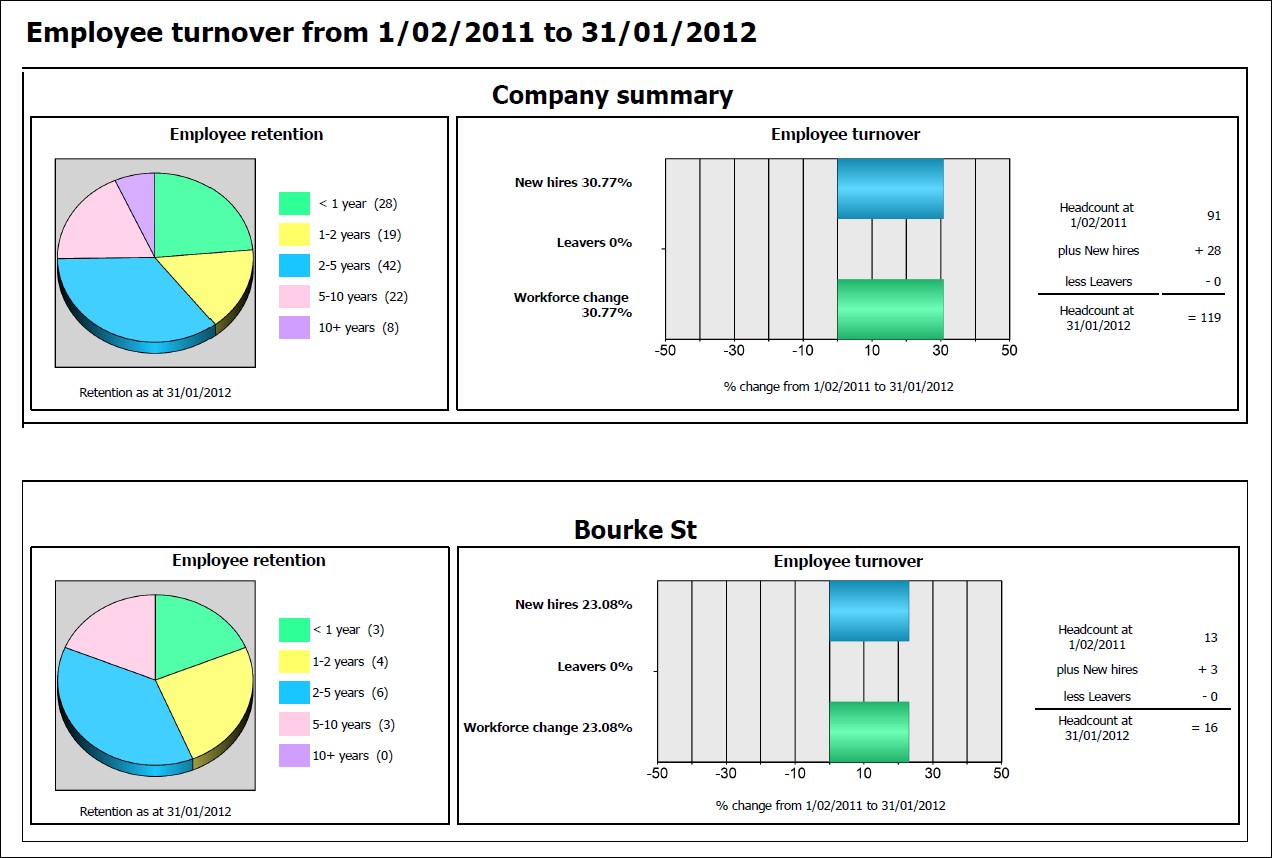
The Employee Turnover report has two parts:
-
Employee Retention:
-
Summarises the length of employment, broken down into five bands
-
< 1 year
-
1 – 2 years
-
2 – 5 years
-
5 – 10 years § > 10 years.
-
Employee Turnover:
-
Compares the number of new hires against the number of departing employees giving a total change in numbers over a selected period.
Note, that this report excludes employees with an employment status of ‘CAS’ (casual).
Report output
-
Company summary is at the top
-
Turnover per work area displays underneath
Report settings
A date range is required for determining the employee retention/turnover statistics. In the below screenshot, the report is being run for a twelve month period February 2011 to January 2012.

Excessive Annual Leave
Purpose of report
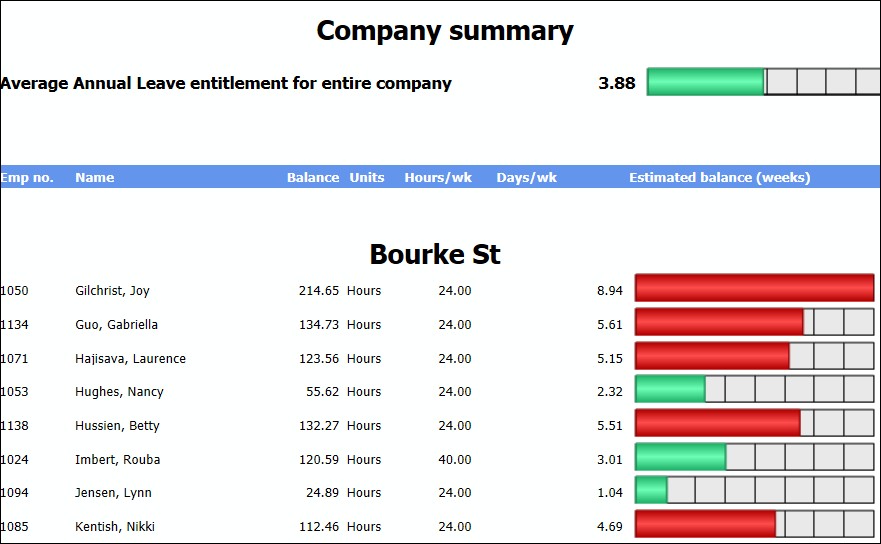
The Excessive Annual Leave report converts annual leave into weeks (rather than days or hours) and highlights (in red) employees with balances in excess of X weeks (with ‘X’ being determined by the user).
Report output
-
Company summary is at the top
-
Per work area displays underneath
In the below example, ‘4 weeks’ has been set by the user:
-
Employees with < 4 weeks leave balance display in green
-
Employees with > 4 weeks leave balance display in red
-
Company summary is the average annual leave balance and displays in green as it is < 4 weeks
Report settings
To set the ‘X’ value on the report, users will find this on the ‘Configuration / Configure display report settings’ screen.

To run the report, it is from the My Leave screen. Simply click on it and the results will display on screen.
Leave liability (units)
This report is designed to work for customers using IMS Payroll as the source database.
Purpose of report
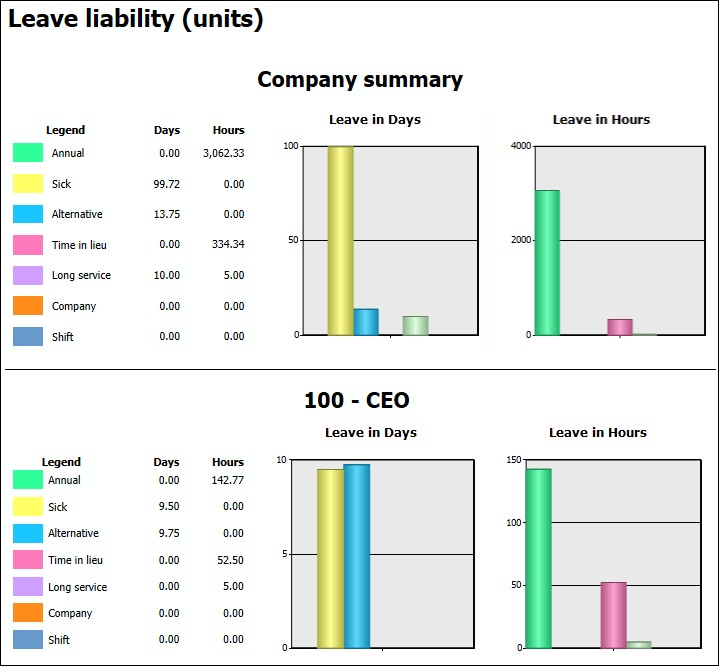
The Leave Liability report displays the total leave balances for each Work Area.
Report output
-
Company summary is at the top
-
Per work area displays underneath
Report settings
To specify which leave types will display on the report, users will find this on the ‘Configuration / Configure display report settings’ screen.

Running the report is from My Leave screen. Simply click and the results will display.
Timesheet Notes
Purpose of report
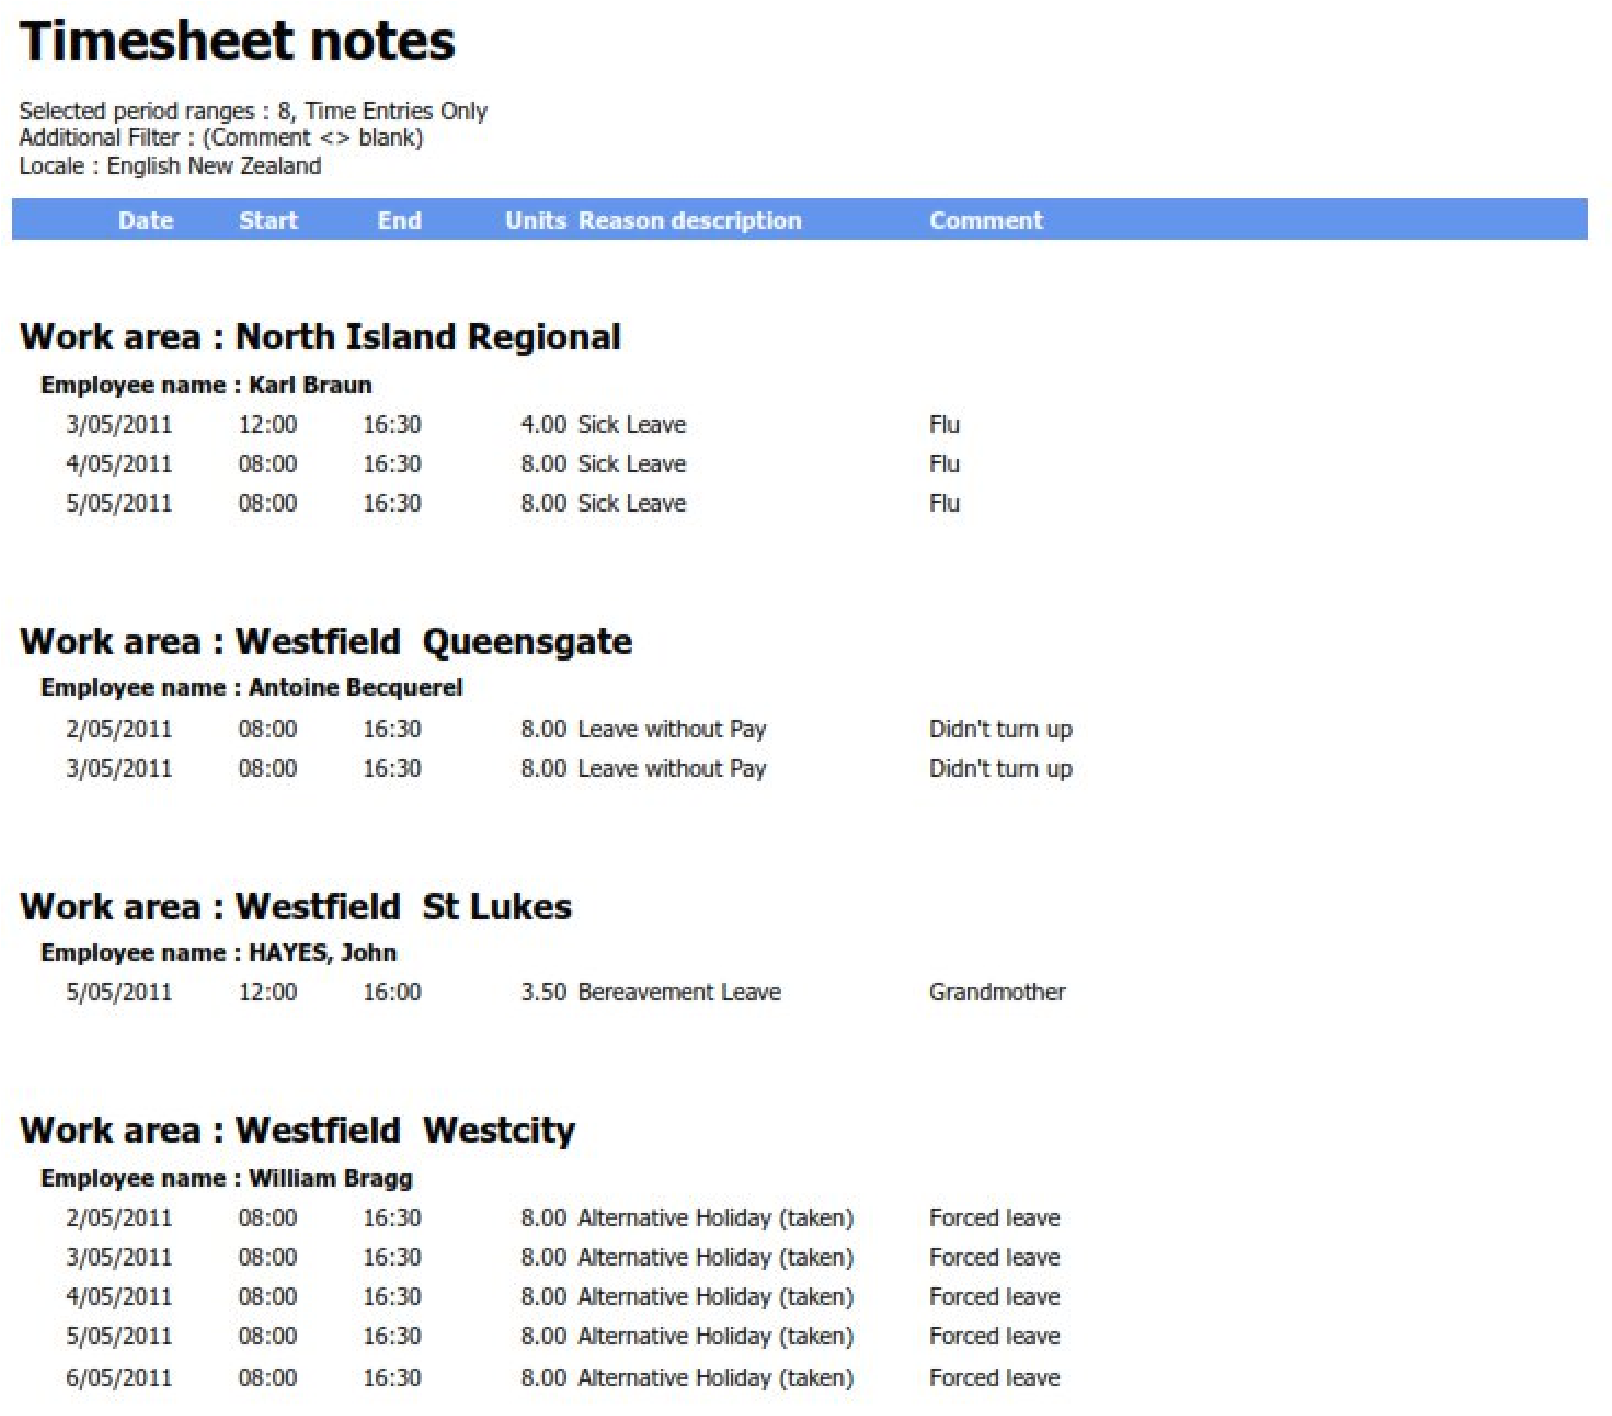
This report shows notes that employees or managers have entered on timesheets.
Report output
Employees that work across multiple work areas will have the applicable notes display under the applicable work area.
Report settings
The report will be sorted by:
-
Work Area
-
Employee
-
Payment Code
Multiple periods can be selected. Only entries with notes will show on the report.
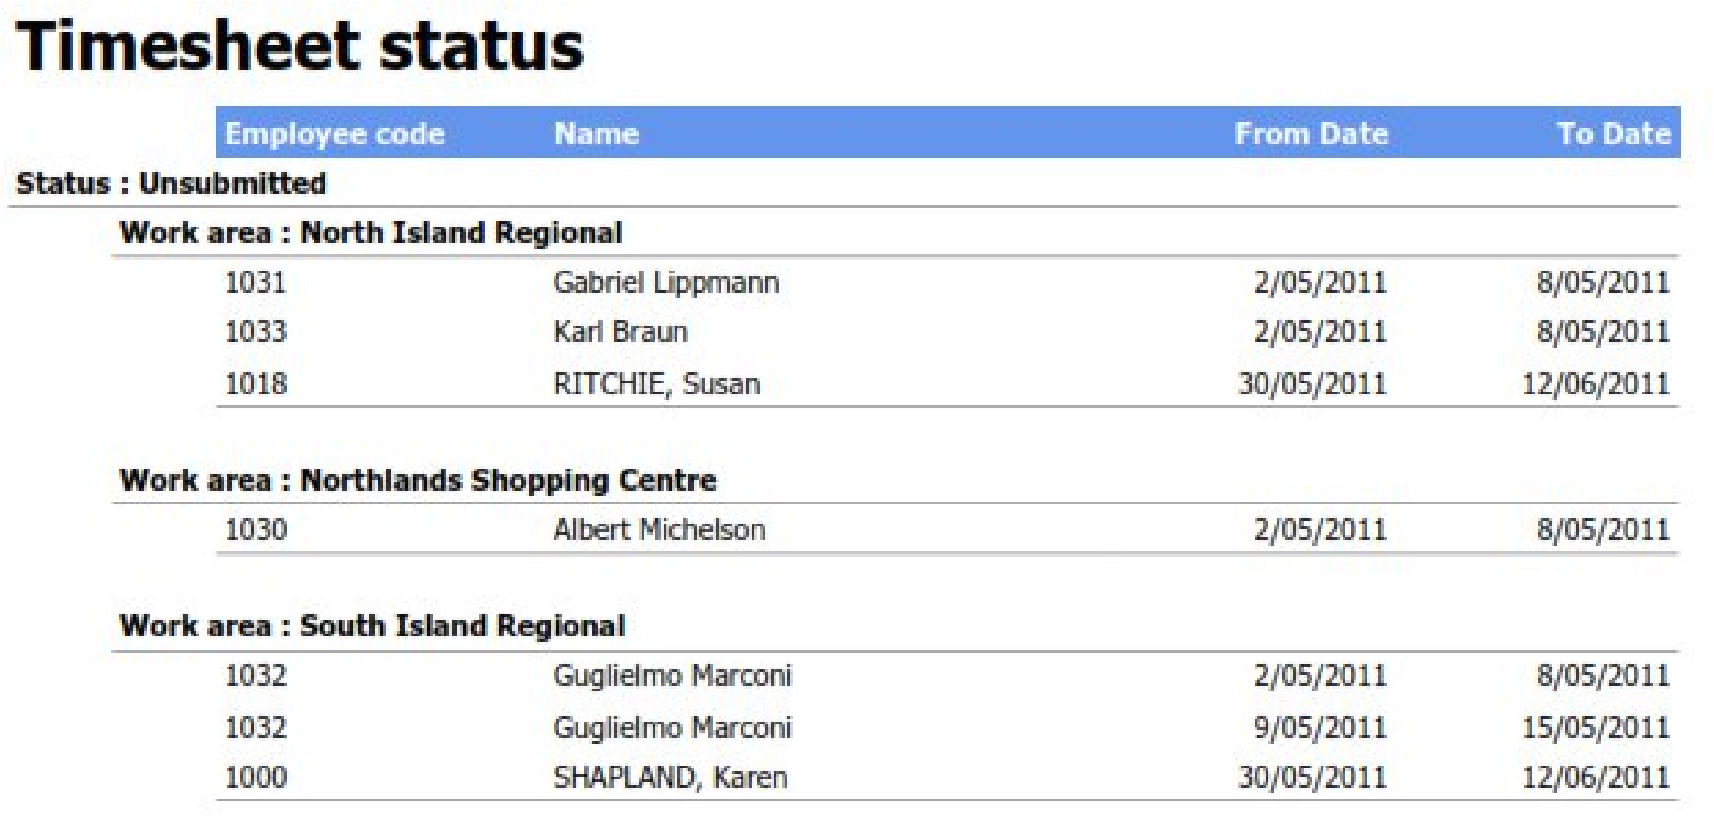
Timesheet Status
Purpose of report
This report shows the status of the timesheet. Status is defined as:
-
unsubmitted (employee hasn’t submitted timesheet for approval yet)
-
submitted (timesheet has been submitted but manager hasn’t approved it yet)
-
approved (manager or administrator has approved the timesheet).
Report output
The report is sorted by:
-
Status
-
Work Area
• Employee
Employees that work across multiple Work Areas will appear under their primary work area.
Report settings
The user selects a date range and which status types to report on.

Multiple periods can be selected by choosing the relative date range.
Payment Summary
Purpose of report
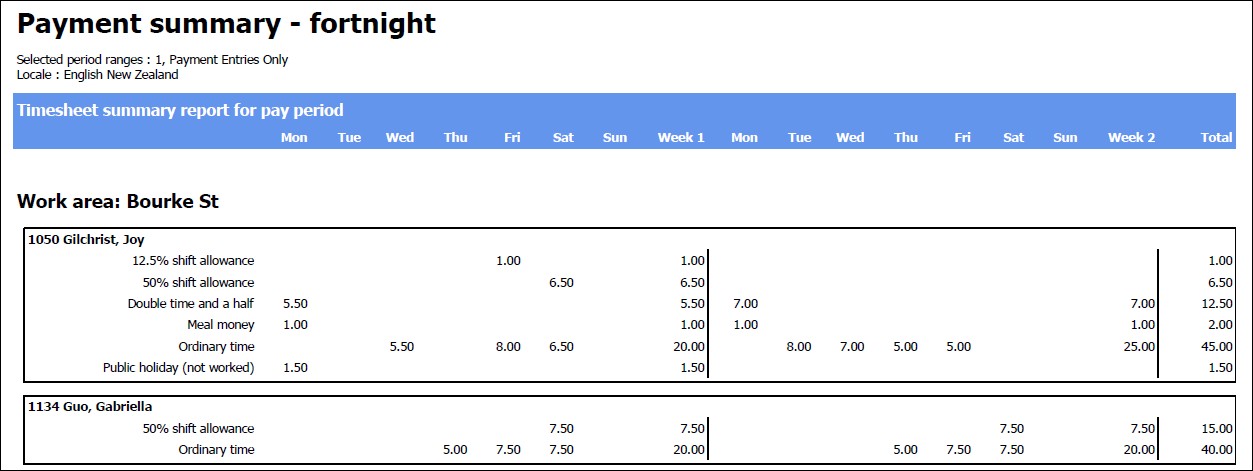
The Payment Summary shows payments broken down by:
-
Work Area
-
Employee
-
Payment Code
It can be useful to see employees’ payments for each day of the period (e.g. ordinary time, overtime, allowances, leave).
Report output
Employees that work across multiple work areas will have the applicable payments display under the applicable work area.
The report is available in weekly, fortnightly and monthly layouts.
Report settings
• Multiple periods can be selected
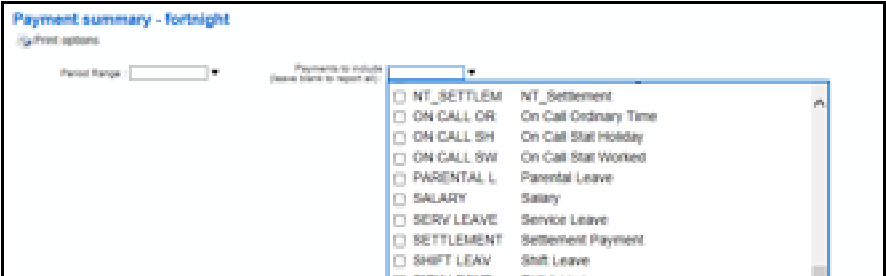
• Specific payment types can be selected.
Appendix 1: Using IMS Online efficiently
Time Entries:
Start and End times can be entered in various formats. (All times are shown in 24 hour format)
-
Start and end times do not require the : or 00 e.g. midday can be entered as 12, with no requirement to enter as 12:00
-
Start times before midday can be entered as a single number e.g. 08:00 start can be entered as 8
-
End times will automatically switch to PM in order to be after the Start time on the same day e.g. if start at 08:00 and finish at 17:00, end time can be entered as 5, and system will default to 17:00
-
Start times between midday and midnight can be entered with a ‘p’ e.g. 4.30pm can be entered as 430p, or entered as 1630
-
Start times after midnight (e.g. adding an entry for “tomorrow” such as doing a recall from 1am to 3am), type a + (e.g. 1+ will generate 01:00+, then end time of 3 will generate 03:00+)
-
End times after midnight will have a + automatically applied e.g. if starting at 22:00 and ending at 06:00, the end time will display as 06:00+ to indicate it’s after midnight
|
Entry |
Result |
|---|---|
|
8 |
8:00 (or 20:00 if used for an End time that starts after 8:00 am) |
|
830 |
8:30 (or 20:30 if used for an End time that starts after 8:30 am) |
|
1630 |
16:30 – Translates directly into 24 hour time |
|
430p |
16:30 – The p indicates this is 4.30pm, which is then turned into 24 hour time |
|
13 |
13:00 – Translates directly into 24 hour time |
|
1p |
13:00 – The p indicates this is 1 pm, which is then turned into 24 hour time |
|
1+ |
01:00+ - The + indicates it is after midnight |
Quick use tools:
|
Column |
Explanation |
|---|---|
|
|
Moving quickly from field to field: The Tab key or Enter key on your keyboard moves you quickly from field to field Tabbing, or Entering, to a populated field will highlight the data. The data can be typed over, rather than deleting it first Pressing the Shift and Tab keys together will move you backwards through fields |


|
|
Removing / Adding Lines:
Clicking this button will remove everything that has been entered on this line
Clicking this button (or alternatively using ALT=) will create a new line. For example if you wanted to enter two time-bands on one day, two leave types taken on one day or a partial day’s leave |
|
|
Auto-Population of data: To repeat data that is in a row above, rather than manually entering it in, using the ‘ditto’ key on your keyboard will replicate it The ditto key will replicate any populated field directly above. In the example below, you could use the ditto key in the start, end and break boxes on the Tuesday or Wednesday and it will mirror what is entered on the Monday
|
|
|
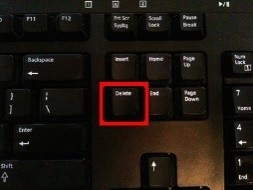
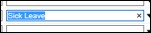
Deleting field data: For keyboard users, the quickest way to delete data in a field is to tab to the field and then hit DEL For mouse users, some internet browsers will provide an ‘x’ at the end of the field. For example, clicking on the ‘x’ in this box will remove the Sick Leave reason code from the box |
|
|
Viewing Historical Data: Clicking on the History button allows you to view historical information e.g. previous timesheets Use the buttons to move up or down through the historical timesheets
|
|
|
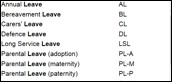
Shortening Pick-lists: If there are multiple types of reason codes to select from, typing one common word such as ‘leave’ will condense the list down to only leave reasons Alternatively, start typing the name or code in the pick list (e.g. ‘par’ or ‘parental’) and you will only get reasons that have the word ‘parental’ in them |
|
|
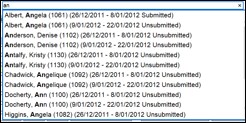
Searching for Employees: Start typing employee’s name or employee code e.g. if searching for Anderson: Typing ‘A’ will shorten list to all employees whose surname or fist name starts with ‘A’ Typing ‘An’ will shorten list to all employees whose surname or first name starts with ‘An’ Typing ‘And’ will shorten list to all employees whose surname or first name starts with ‘And’ |
|
|
Jumping to months (either ahead or behind): On the Leave Planner, rather than scrolling through month by month, if you want to jump say six months ahead/behind, click the ‘Show Me’ button and type in a future/behind date and click OK. This will automatically leap you to that month. Remember to remove the date when you are finished, or the system will automatically take you there each time you log in |
|
|
Expand and Contract screens: Screens such as My Roster and My Leave can have a top half and a bottom half to them. The top half is a summary and the bottom half is the employee detail. Clicking on Expand in one half of the screen will close the other half Clicking on Contract will bring the screen back to two halves |
|
|
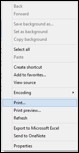
Printing timesheets: Use your browser’s Print dialogue |