Configuring Related Containers
Example: Configuring a Screen with One-to-Many (Master-Detail) Containers
With one-to-many containers declared inside the screen object, one container is considered the master container, while all other containers are considered detail containers.
The following code is an example of the one-to-many-containers scheme. You can see the full example if you select on the toolbar of the Mobile Application page in the Customization Project Editor.
add screen EP301000 {
openAs = Form
add container "DocumentSummary" {
...
}
add container "AddReceipts" {
type = SelectionActionList
visible = False
listActionsToExpand = 1
add field "Description"
add field "ClaimAmount"
add field "Date"
add field "Currency"
add listAction "SubmitReceipt" {
icon = "system://Check"
behavior = Void
}
attachments {}
}
add container "ExpenseClaimDetails" {
fieldsToShow = 6
listActionsToExpand = 3
containerActionsToExpand = 3
add field "Description"
add field "Amount"
...
attachments {}
}
...
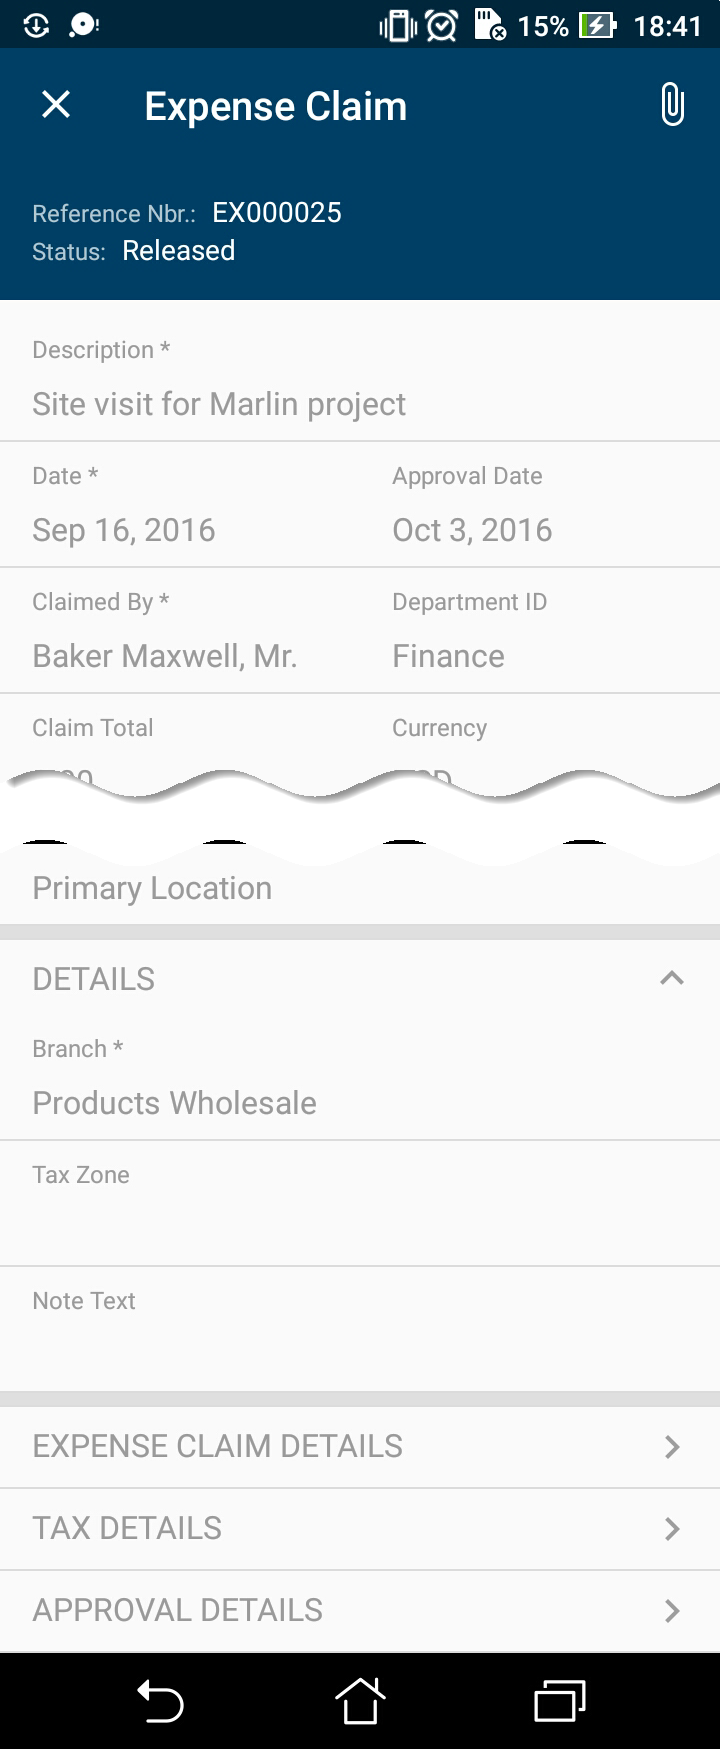
}In this example, DocumentSummary is the master container. All other
declared detail containers are displayed on the screen below the master container in the
order of their declaration.
Example: Displaying Fields from Different Containers in One Container
You can configure a container so that it displays fields form different containers.
The screen in this example includes the ClaimDetails container, which also
has a field from the ReceiptDetailsExpenseDetails container. You do not
need to declare both containers. Instead, in the field object, you separate the
corresponding container name and its field with the # symbol, as shown in the
following sample code.
add screen EP301020 {
  openAs = Form
  add container "ClaimDetails" {
    …
    add field "ReceiptDetailsExpenseDetails#Description"
    add field "Date"
    add field "ExpenseItem" {
      pickerType = Searchable
      selector {
        add field "Description"
        add field "InventoryID"
      }
    }
    …
  }
  …
}
In this example, the Description field of the
ReceiptDetailsExpenseDetails container is displayed (among other fields).
To see the full example, in the navigation pane of the Customization Project Editor select
the Mobile Application page and click .
The following screenshot shows the resulting screens with containers containing declared fields.
Example: Configuring a Screen with Many-to-One (Master-Detail) Containers
MYOB Acumatica includes dialog boxes that are opened from forms and that provide additional actions for items in a grid. For example, on the Expense Claims (EP301030) form, you could use the Add Receipts dialog box to add receipts to an expense claim entity. See the following screenshot.
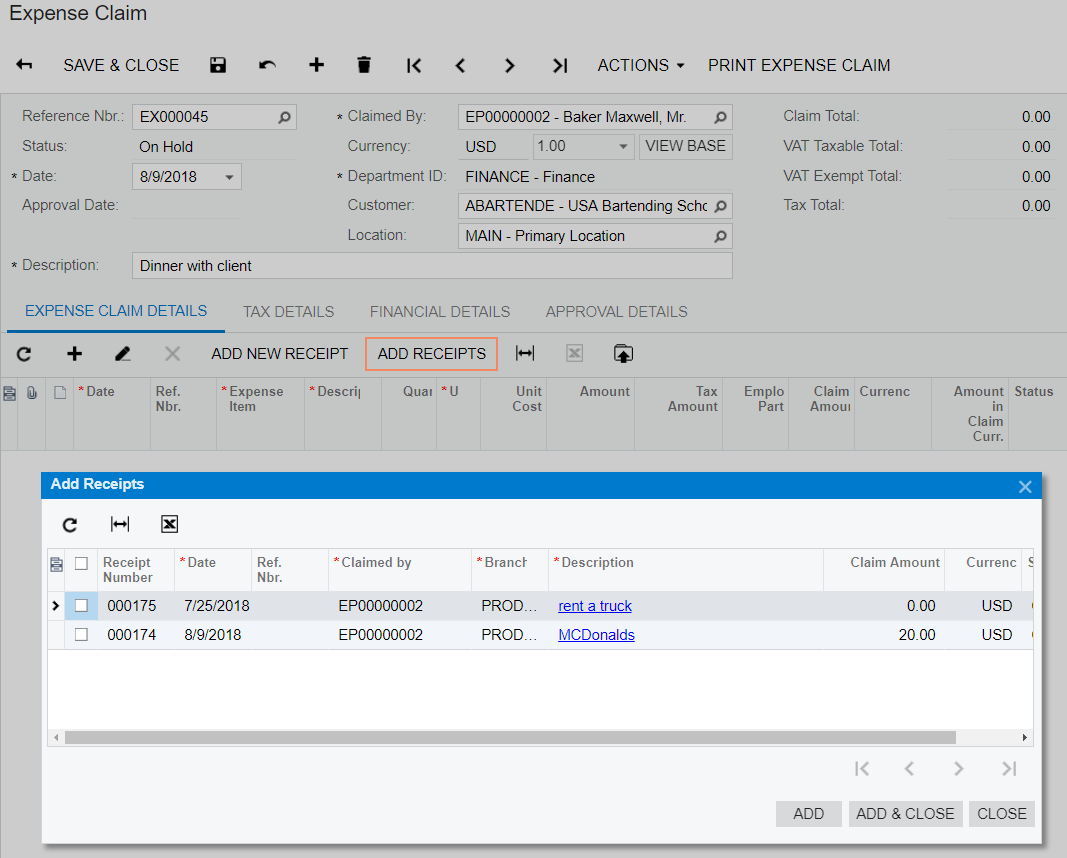
To map this kind of dialog box to the mobile app, you need to specify type =
SelectionActionList for the container corresponding to this dialog box in the
form's WSDL schema and specify a listAction, as
shown in the following code.
add screen EP301000 {
openAs = Form
…
add container "AddReceipts" {
type =
          SelectionActionList
visible = False
listActionsToExpand = 1
add field "Description"
add field "ClaimAmount"
add field "Date"
add field "Currency"
add listAction "SubmitReceipt" {
icon = "system://Check"
behavior = Void
}
attachments {}
}
…
}To see the full example, in the navigation pane of the Customization Project Editor select the Mobile Application page and click .
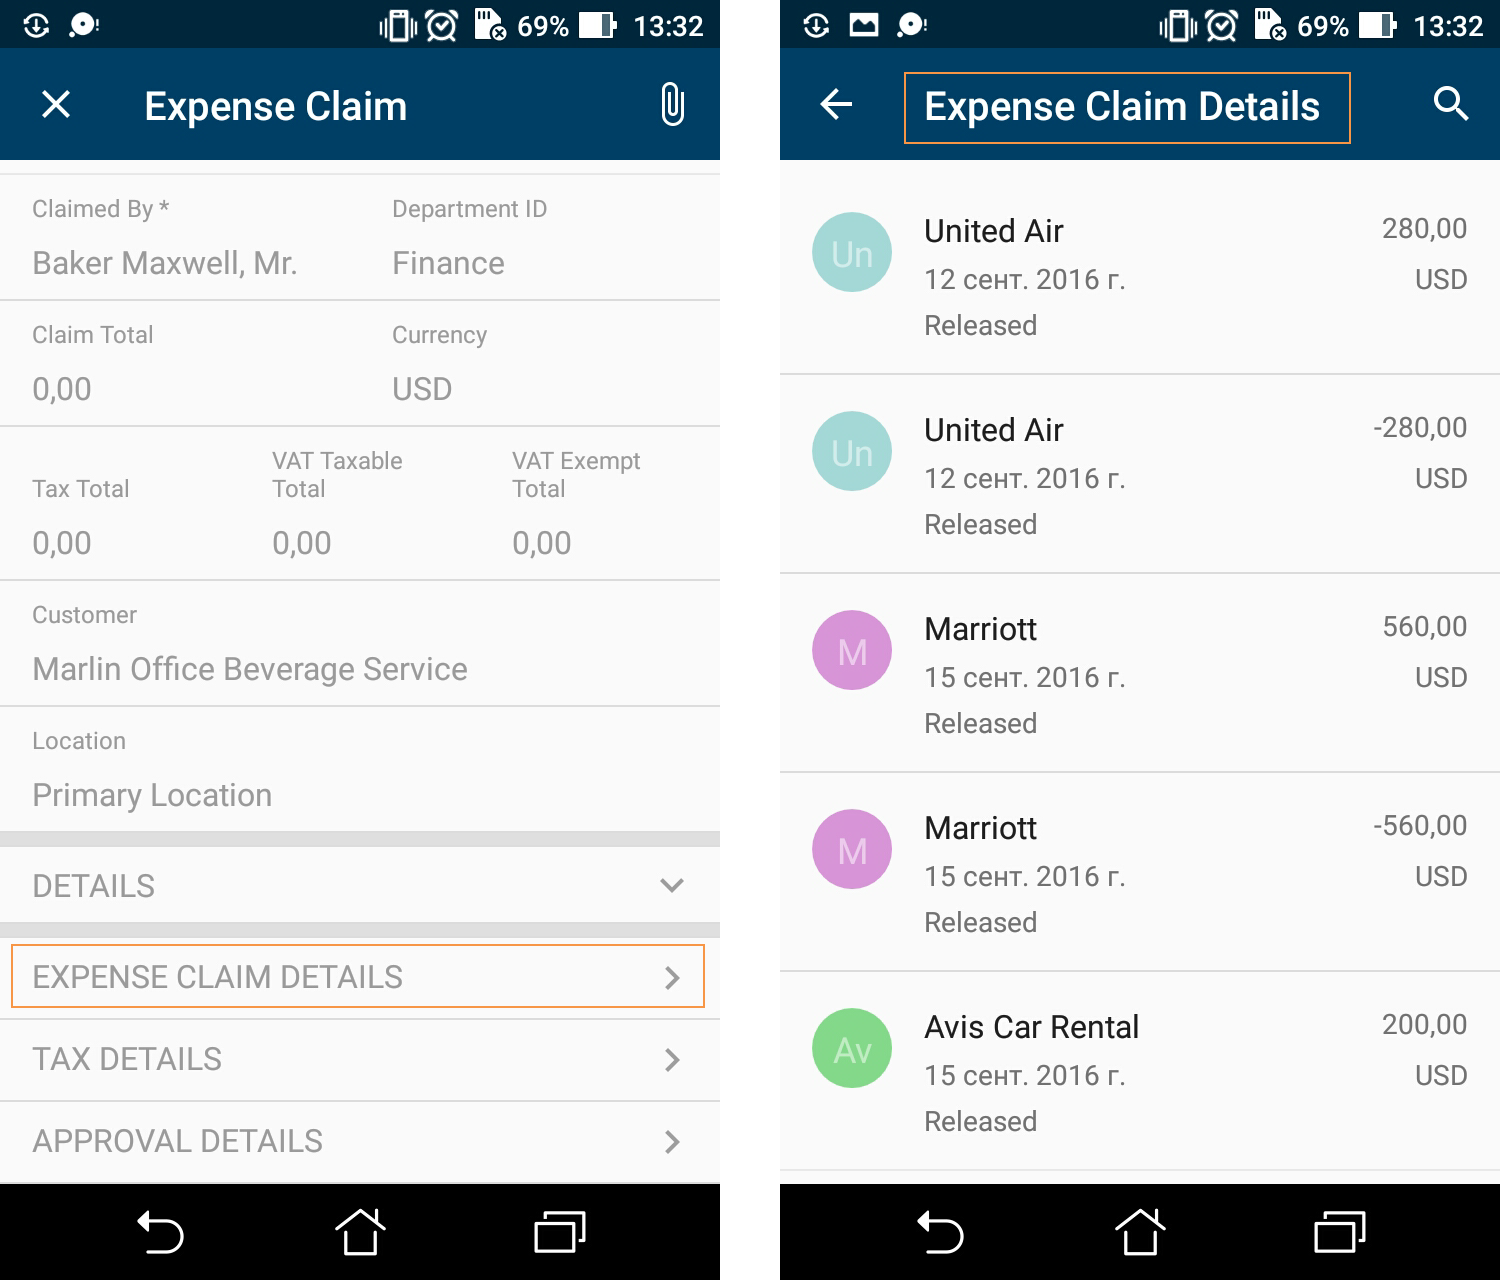
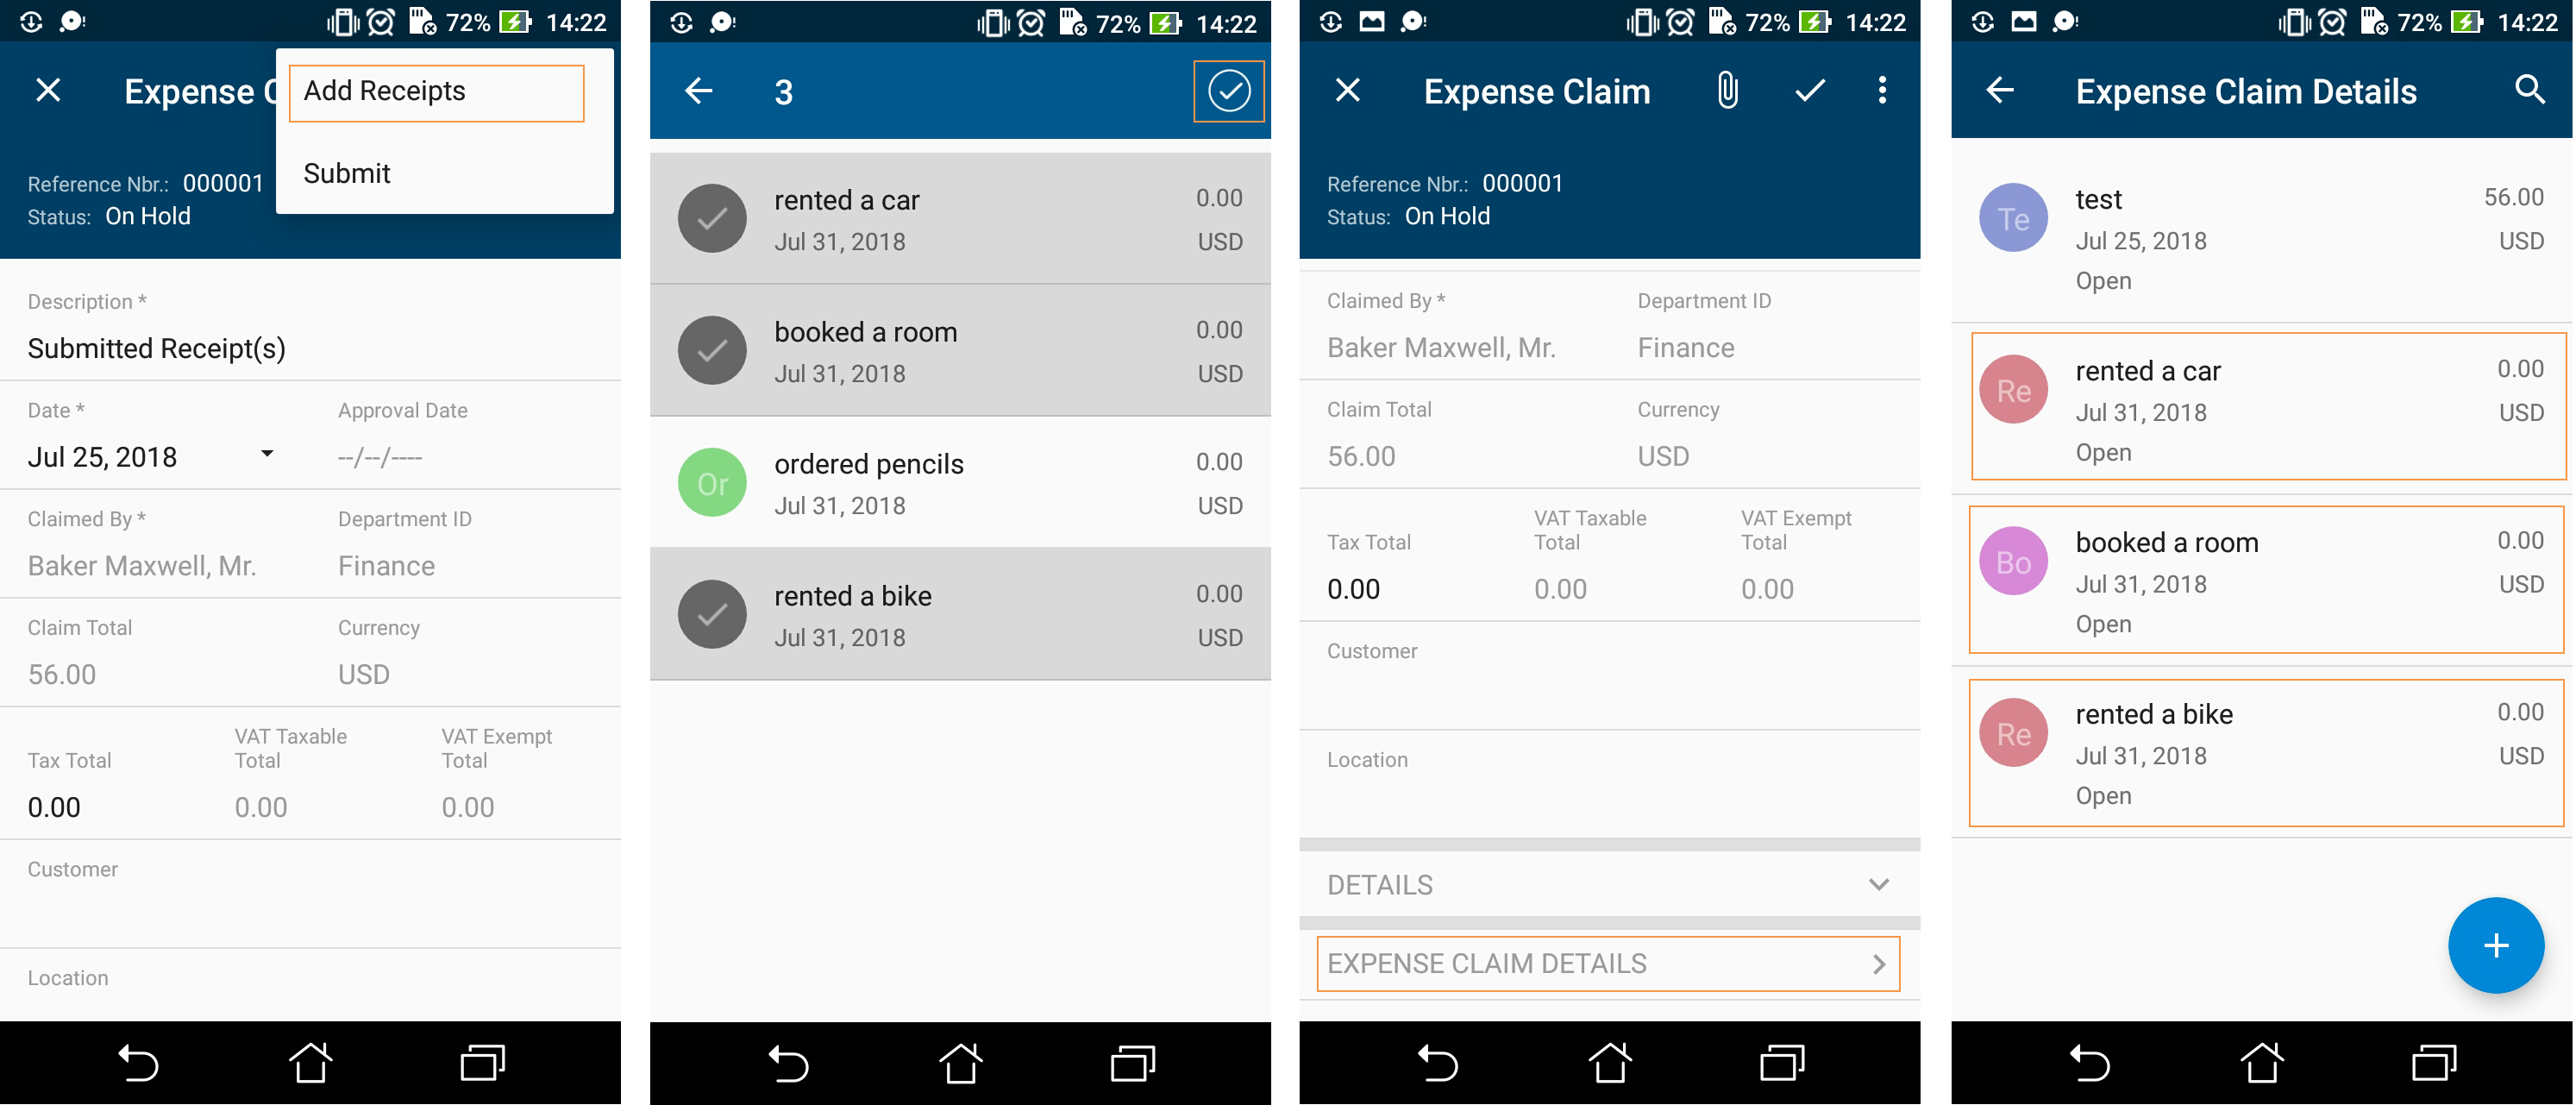
The screenshots below show the resulting screens in the mobile app. Screens with list actions support selecting multiple items.
The first screenshot shows the content of the DocumentSummary container
of the Expense Claims (EP301030) screen and the Add Receipts button,
which corresponds to the listAction "SubmitReceipt".
If a user taps the Add Receipts button, the mobile app displays the content of this container and provides multi-selection, as the second screenshot shows. The user can tap Expense Claim Details, as shown in the third screenshot, to view the Expense Claim Details screen, shown in the fourth screenshot.
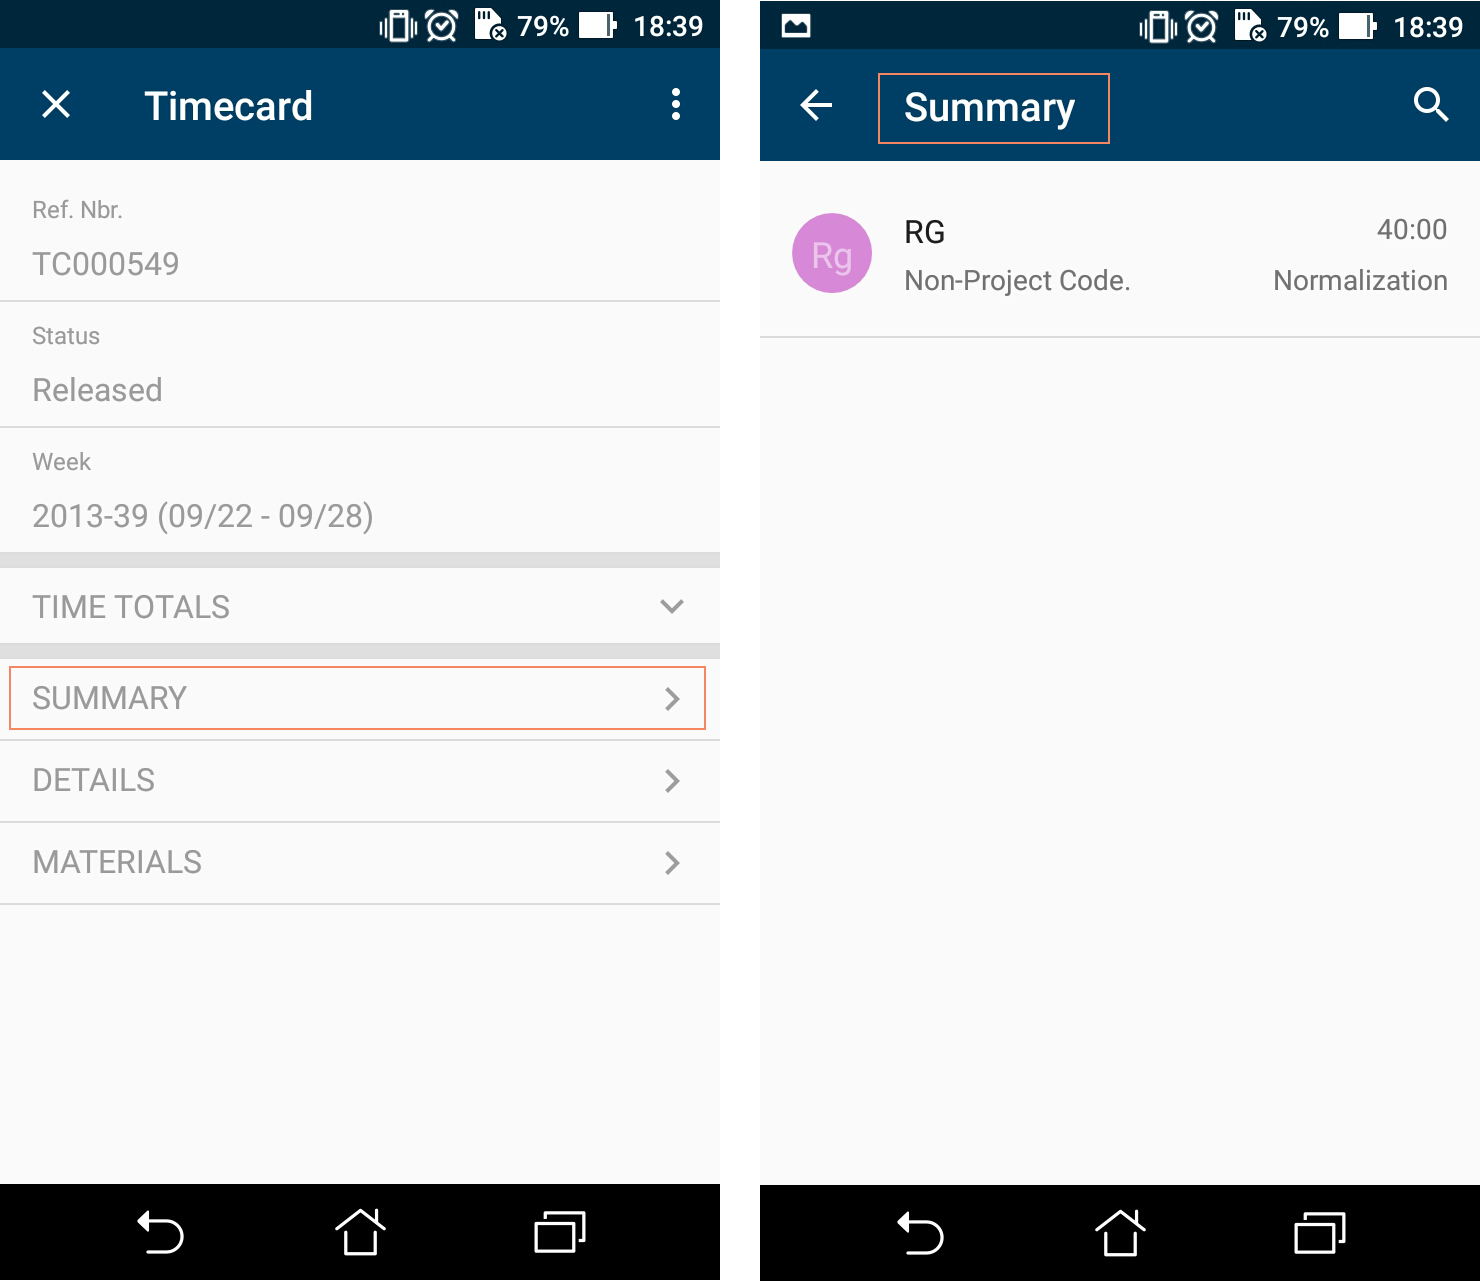
Example: Configuring a Screen with a Container Link
In the mobile app, a container can contain a link to another container on the screen toolbar or on the screen among the fields. To use a container link, do the following:
- Declare the container to which you want to add a link
- Add the containerLink object
See the following code for an example of the creation of a link to the
Summary container.
add screen EP305000 {
  add container "DocumentSummary" {
    …
    add containerLink "Summary" {
      control = "ListItem"
      formPriority = 52
    }
    …
  }
  add container "Summary" {
    …}
  …
}
Based on this code, you can open the Summary screen by using the list entry.
The screenshots below show the Timecard (EP305000) screen with the container links and the opened Summary screen.