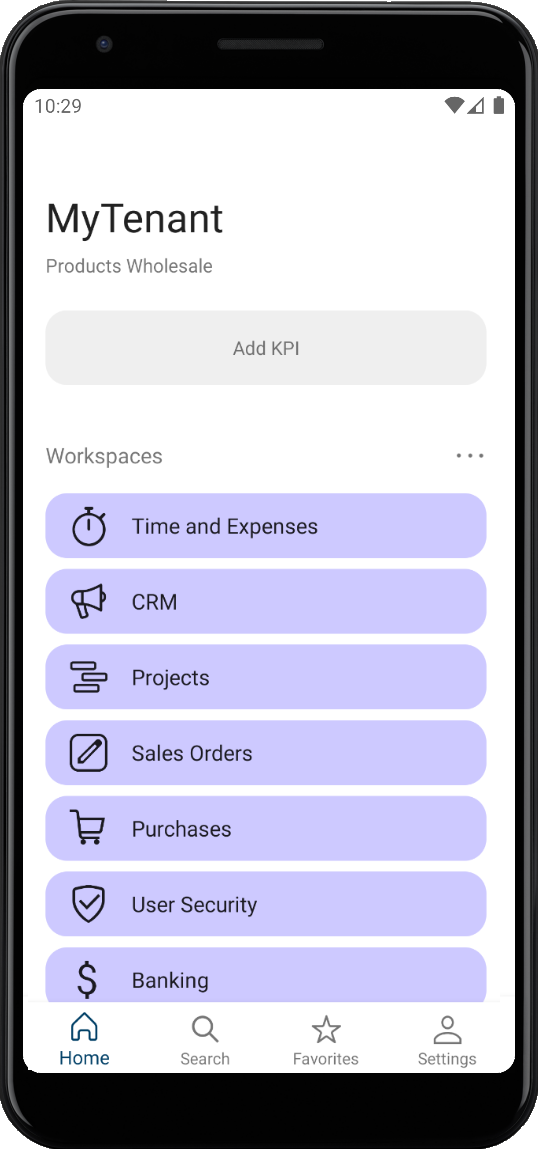
Home Screen
The Home screen of the MYOB Acumatica mobile app consists of workspaces, a placeholder for adding KPI widgets, the list of recently visited screens and records, the list of screens and records marked as favorites, and the bottom menu with the Home, Search, Favorites, and Settings buttons. A user can go to any of these parts of the mobile app by tapping the needed part of the screen.
To add a link to screen (form) so that a user can access it from the Home screen, you perform the following steps:
- Map the screen to the mobile site map, as described in To Add a Screen to the Mobile Site Map (Example)
- Add the screen to the mobile site map, as described in To Update the Site Map of a Mobile App
- Add the screen to a workspace, as described in To Manage the Workspaces of the Mobile App
In this topic, you can read about and perform several simple examples that demonstrate how to build the site map of the mobile application.
Exploring of the Original Code of the Site Map
The code of the site map defines which screens will be accessible from different workspaces on the Home screen. The mobile app's Home screen is shown in the following screenshot.
You can view the original code of the site map of the MYOB Acumatica mobile app by doing the following:
- Open the Customization Projects (SM204505) form, and in the Project Name column, click the link of the customization project. The Customization Project Editor opens.
- Open the Mobile Application page.
- On the More menu of the page, click Update Sitemap.
The Update: SITEMAP page opens. The Update: SITEMAP screen appears in the list of modified screens on the Mobile Application page.
- On the Update: SITEMAP page, explore the original code of the site map in the Result Preview area.
Example: Adding a Screen to a Workspace
Adding a screen to a workspace consists of two actions:
- Adding the new screen to the mobile site map, as described in To Add a Screen to the Mobile Site Map (Example)
- Adding the new screen to a workspace
In this example, you will add the Unreconciled transactions widget of the Controller dashboard to the CRM workspace by using the Mobile Workspaces (AU220012) and Mobile Workspace (AU220013) forms.
To add the widget, perform the following steps:
- Open the Mobile Workspaces form.
- In the Workspace ID column, click CRM.
The Mobile Workspace form opens.
- On the table toolbar of the Widgets tab, click
Add Row, and specify the following settings in the
added row:
- Dashboard: Controller
- Widget: Unreconciled transactions
- Save your changes.
- Sign out of the mobile app, and then sign in again.
- On the Home screen, tap
CRM.
The workspace should look similar to the one shown in the following screenshot:
Figure 2. The CRM workspace with the added widget 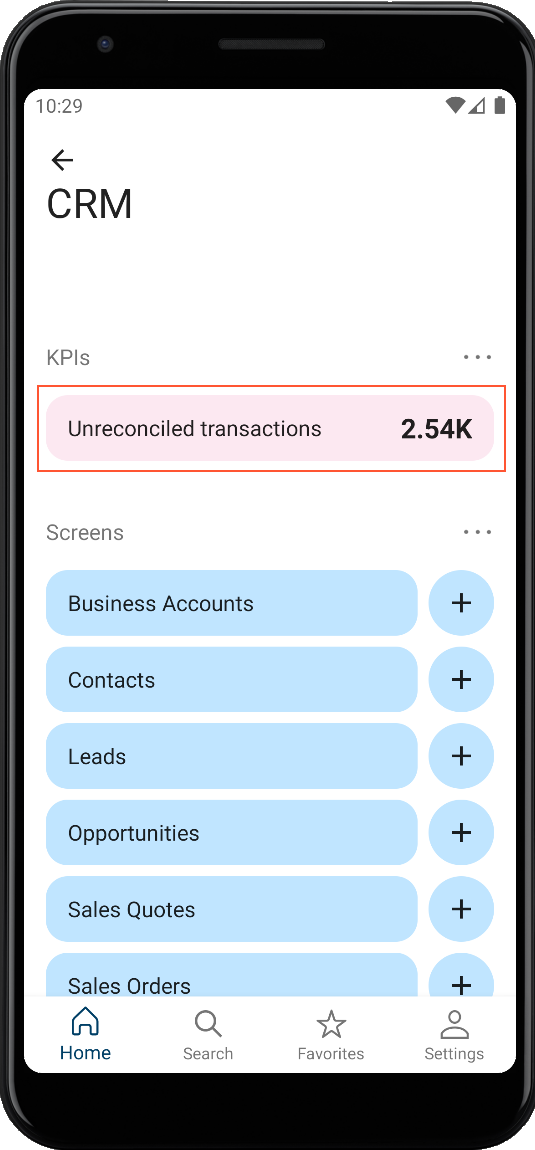
Example: Adding a Screen to a Folder
Adding a screen to a folder consists of two actions:
- Adding a new screen to the mobile site map, as described in To Add a Screen to the Mobile Site Map (Example)
- Adding the new screen shortcut to the main menu.
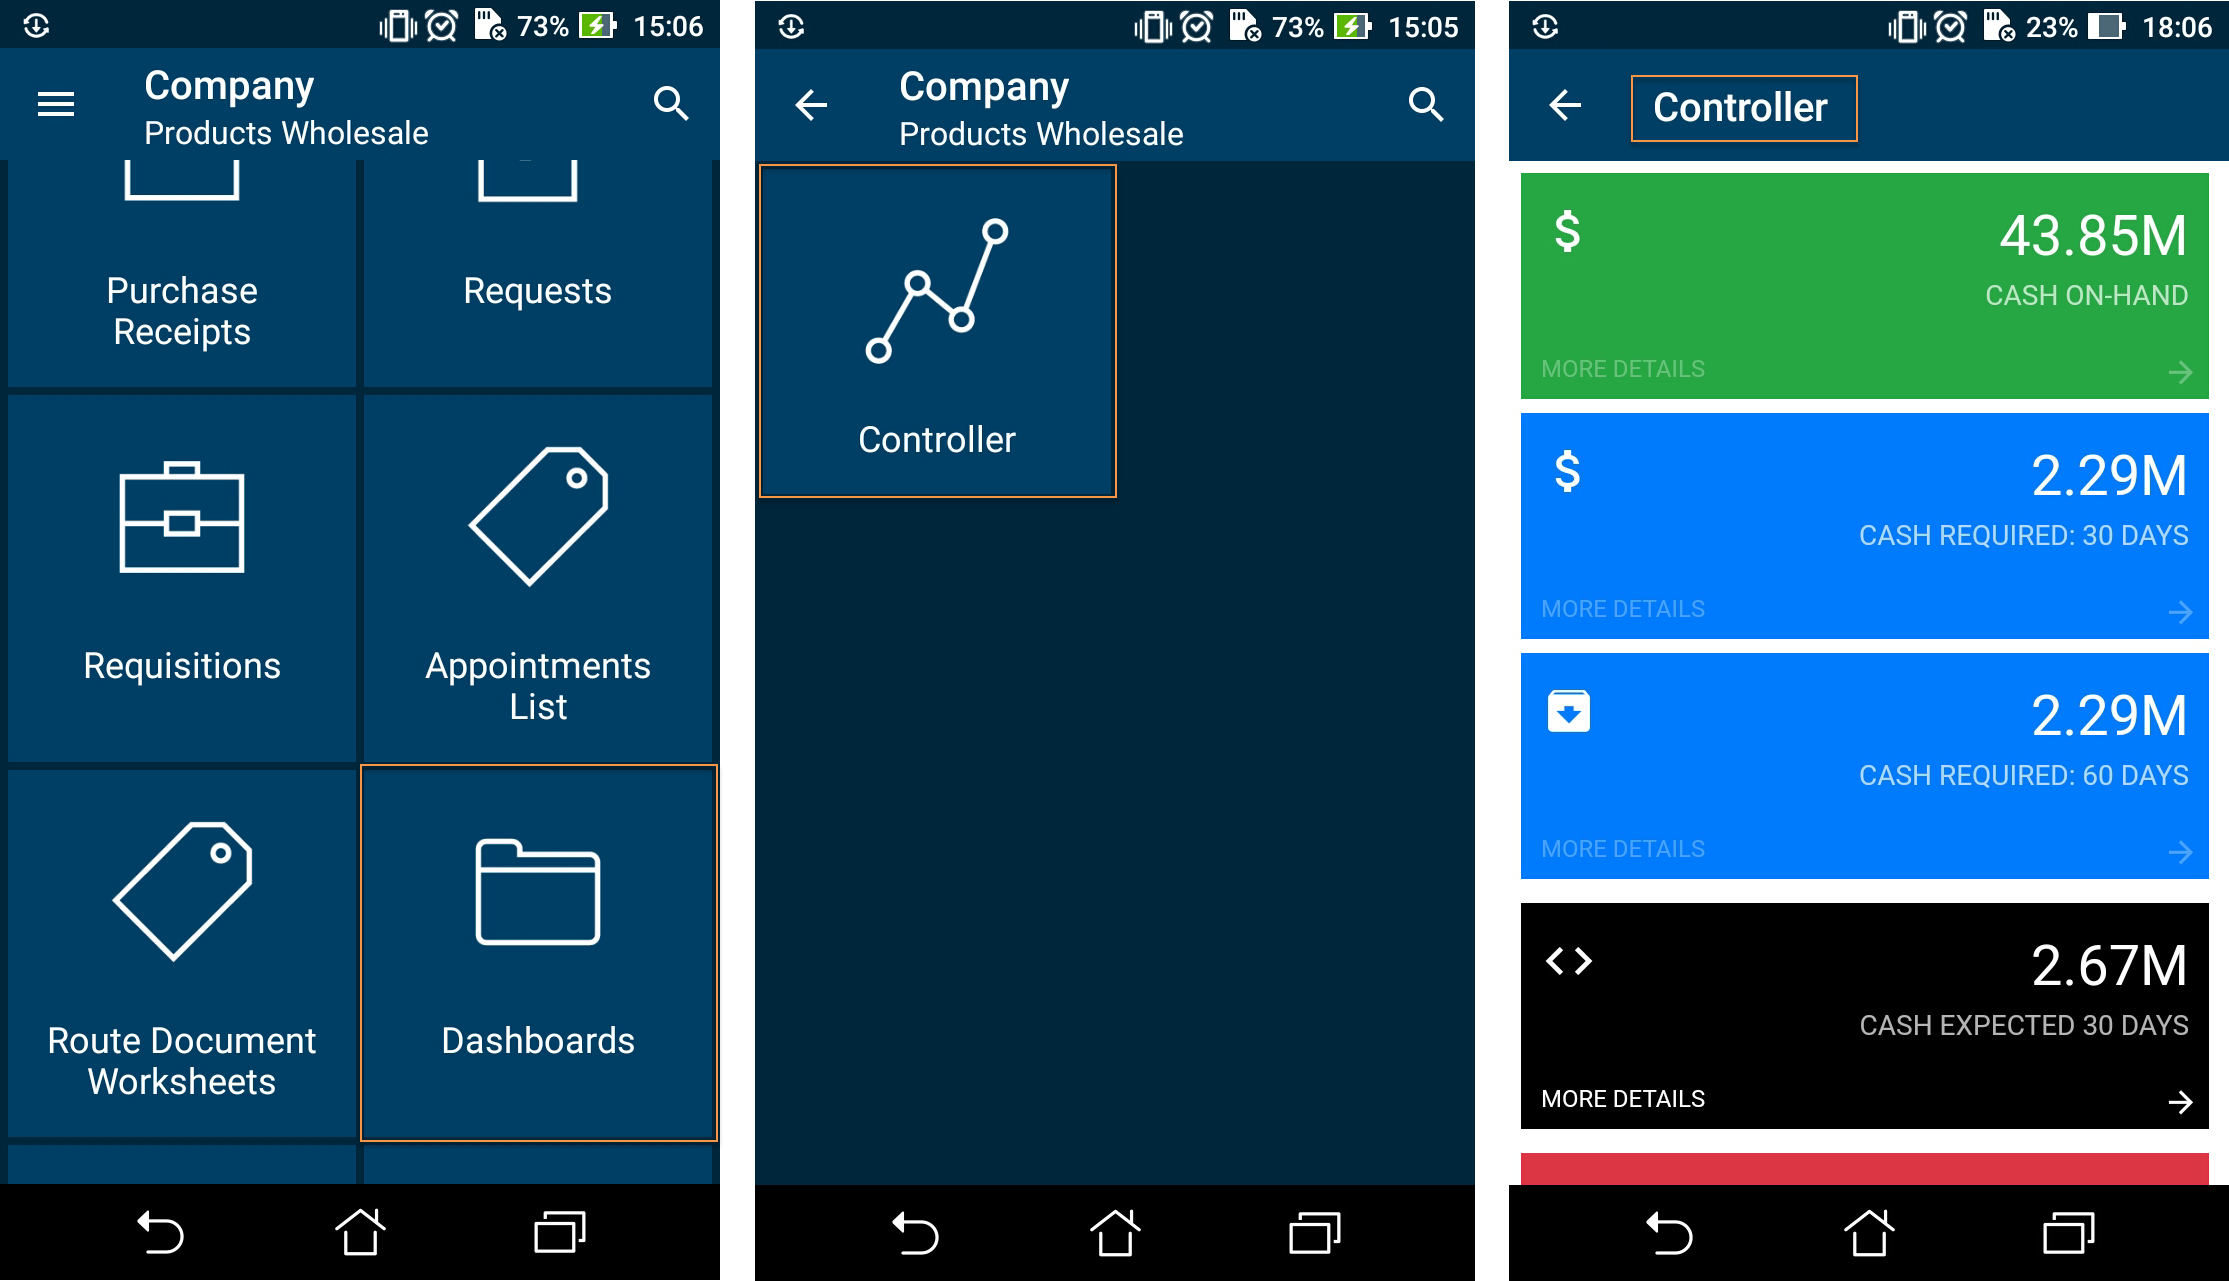
update sitemap {
  add folder "Folder_0" {
    displayName = "Dashboards"
    icon = "system://Folder"
    add item "DB000015" {
      displayName = "Controller"
      icon = "system://Graph1"
    }
  }
}
The screenshots below show the results of this code on the mobile device.
A folder can be of one of the following types, which determine how the folder contents are displayed:
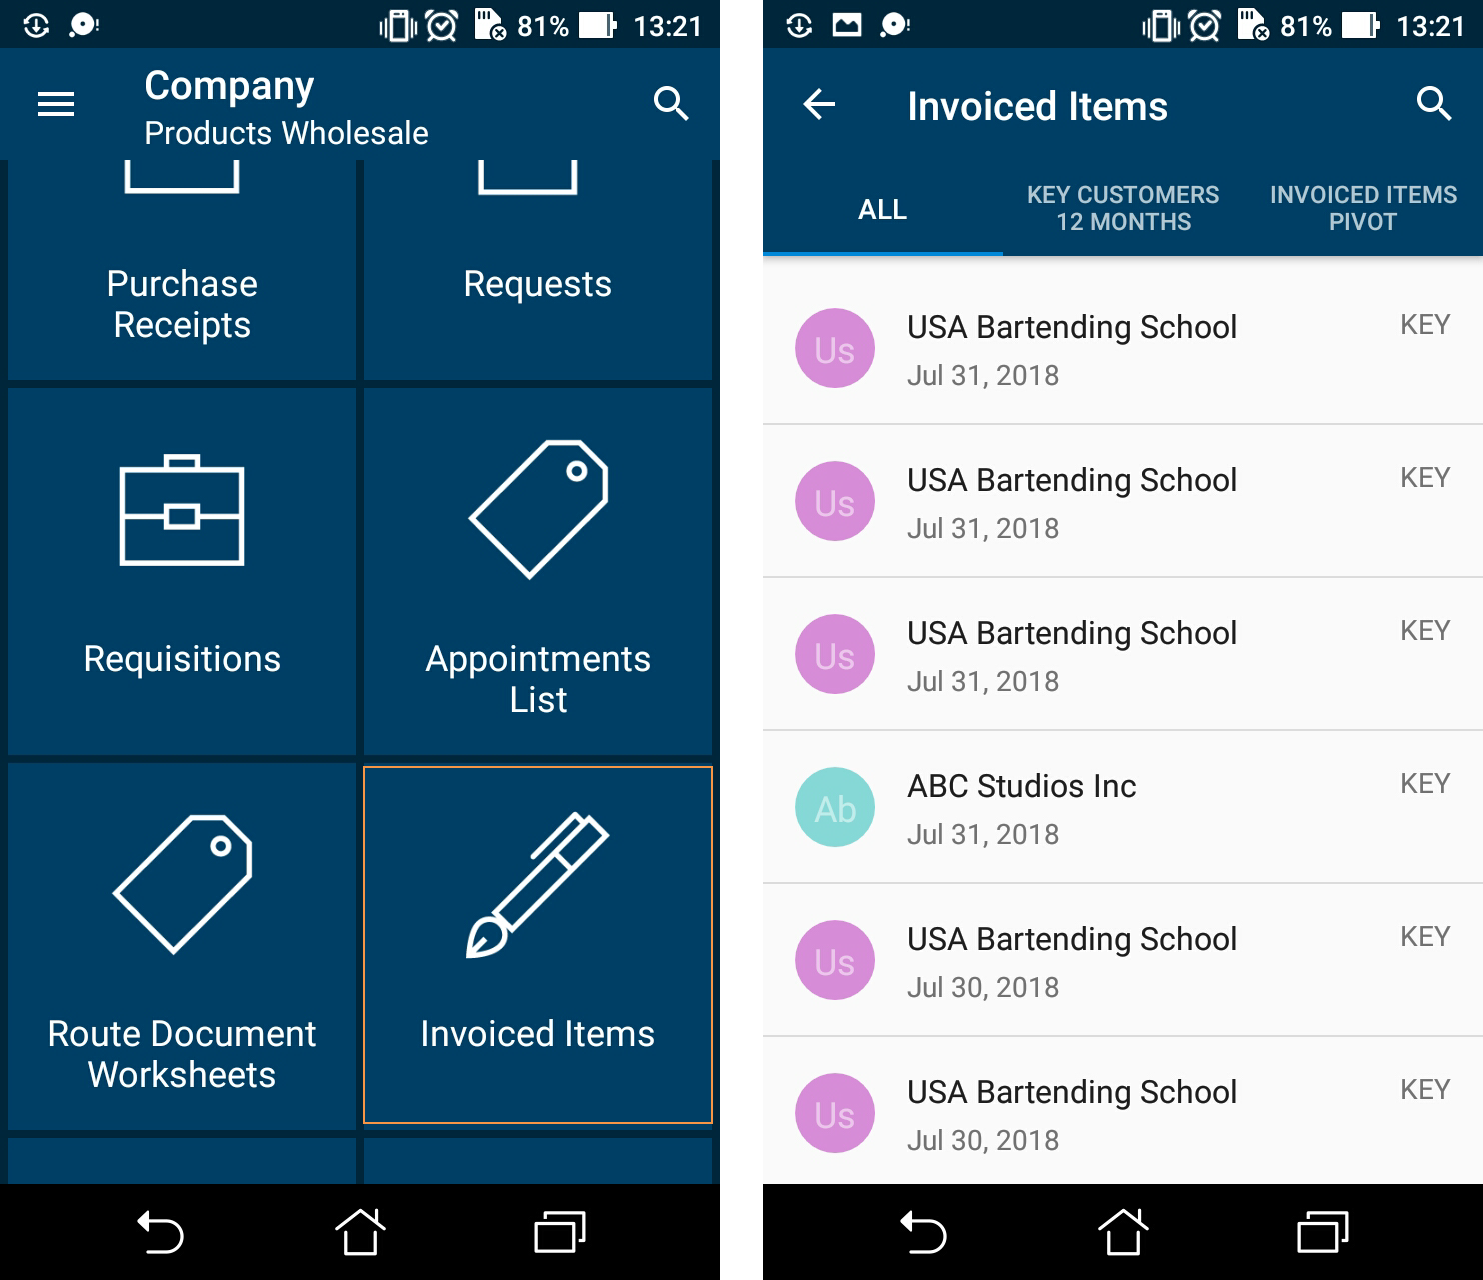
- ListFolder (default): With a folder of this type, folders and screens are represented as tiles with icons (see the first screenshot in the example in this section, shown above). You need to tap an icon to open a folder or screen.
- HubFolder: In a folder of this type (see an example in the right screenshot at the end of the next section), the content of a screen is displayed like a tab item on a form. You swipe left and right to navigate through the contents of the folder.
Example: Configuring Screens for Forms with Tabs
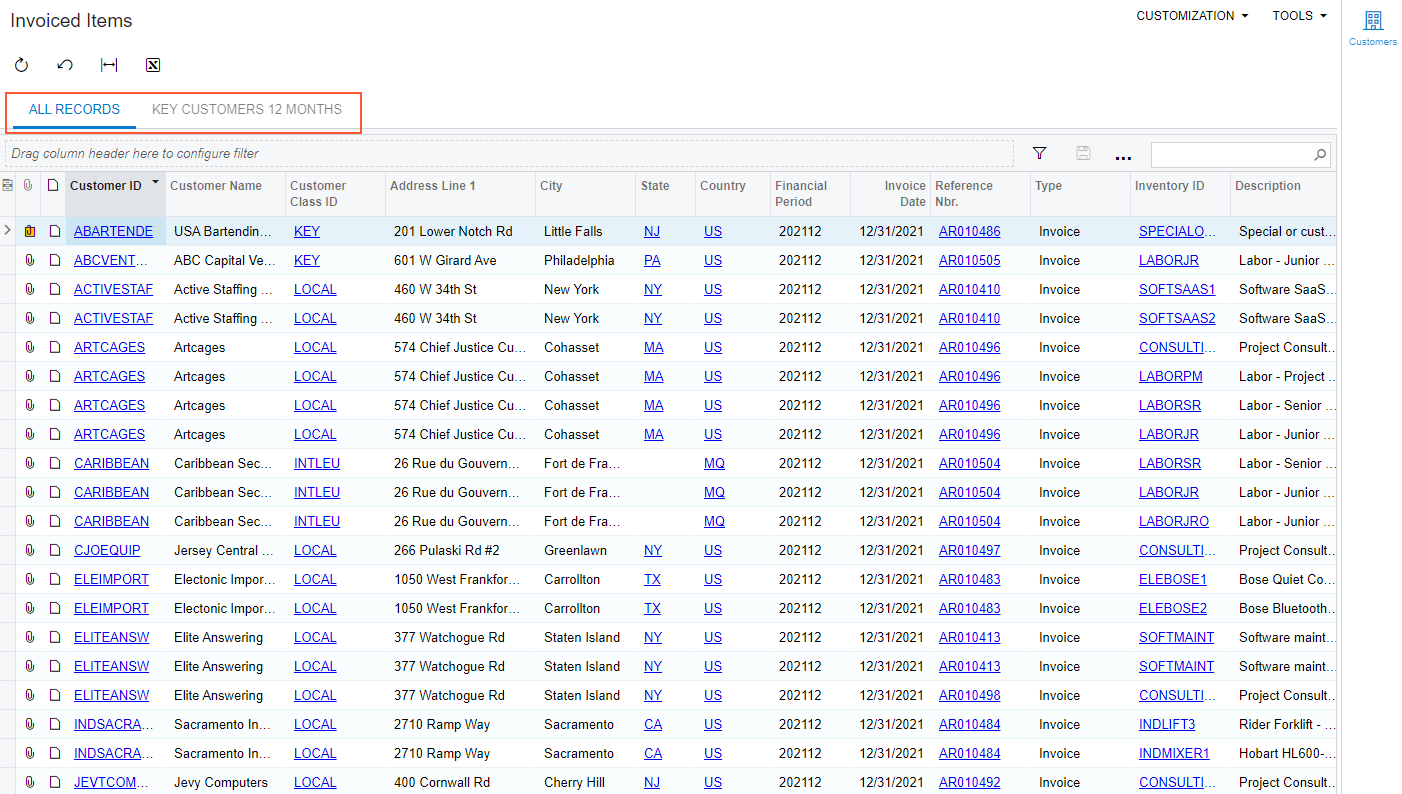
Some MYOB Acumatica forms display lists on multiple tabs (as the following screenshot shows).
In the mobile app, such a form is represented as multiple subscreens, with each subscreen corresponding to a single tab. However, you have to configure only one screen because the mobile API server automatically performs the screen expansion into multiple screens.
To configure a screen for a form, do the following:
- Add the GI000008 screen to the mobile site map by performing the steps described in To Add a Screen to the Mobile Site Map (Example).
- Copy the following code to the Commands area of the Add:
GI000008 page, and save your
changes.
add screen GI000008 { add container "Result" { add field "AccountName" add field "CustomerClassID" add field "InvoiceDate" } } - Update the site map of the mobile app with the following code. For details, see
To Update the Site Map of a Mobile App.
add folder "Invoiced_Items" { type = HubFolder displayName = "Invoiced Items" icon = "system://Pen" add item "GI000008" { displayName = "Invoiced Items" } } - Add the screens to the CRM workspace, as described in To Configure Workspaces in the MYOB Acumatica Instance.
- Publish your customization project, and open the mobile app.
The following screenshots show the result of this code on a mobile device. The first screenshot shows the changes to the main menu. The second screenshot shows the added screen with tabs.