
Form Layout: To Personalize a View of a Form
This activity will walk you through the process of personalizing the user interface on a data entry form.
Story
Suppose that you often use the Invoices and Memos (AR301000) form. You need to personalize this form to better fit the needs of your company.
Process Overview
In this activity, you’ll do the following on the Invoices and Memos (AR301000) form:
- Reorder the most frequently used tabs
- Hide the tabs that you don’t use in your work, and then show one of them again
- Customize the set and order of columns in the table by using the Column Configuration dialog box
- Manage the appearance of groups of elements on the tab
System Preparation
Before you begin performing the steps of this activity, do the following:
- Prepare an MYOB Acumatica instance by performing the Customization Projects: To Deploy an Instance prerequisite activity.
- Create the Yogifon customization project by performing the Customization Projects: To Create a Customization Project prerequisite activity.
- Sign in to the system by using the following credentials:
- Username: baker
- Password: setup
Change the password when the system prompts you to do so.
Step 1: Reordering Tabs
To change the order of tabs and move the most frequently used ones to the front, do the following:
- On the Invoices and Memos (AR301000) form, add a new record.
- Drag the Addresses tab after the
Details tab, as shown below.
Figure 1. Reordering the Address tab 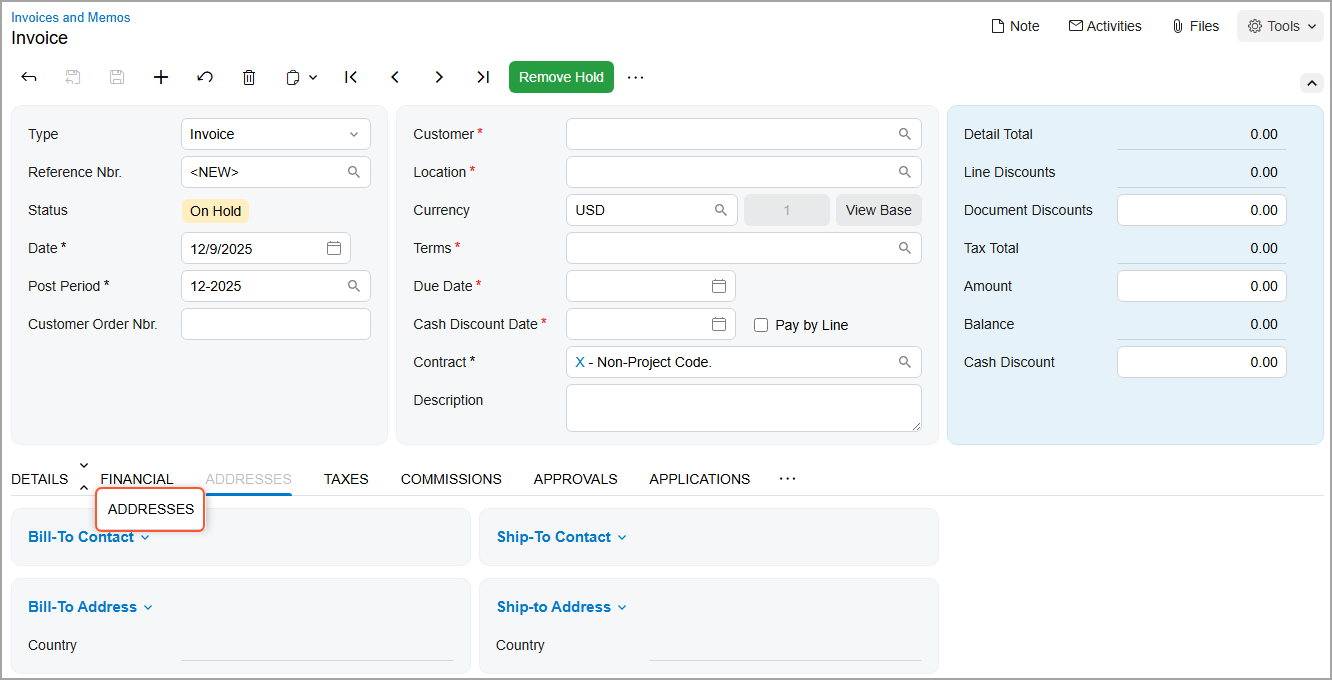
- Drag the Applications tab after the Addresses tab.
Step 2: Changing Tabs’ Visibility
Suppose that you seldom use some tabs and decide to hide two of them. Later, you realize that you need one of these tabs more frequently than you originally thought, so you decide to show it again. To change the visibility of tabs, do the following while you are still on the Invoices and Memos (AR301000) form:
- Drag the Taxes tab to the More button and then move it to
the Hidden Tabs section that appears on the screen (see
below).
Figure 2. Moving a tab to the Hidden Tabs section 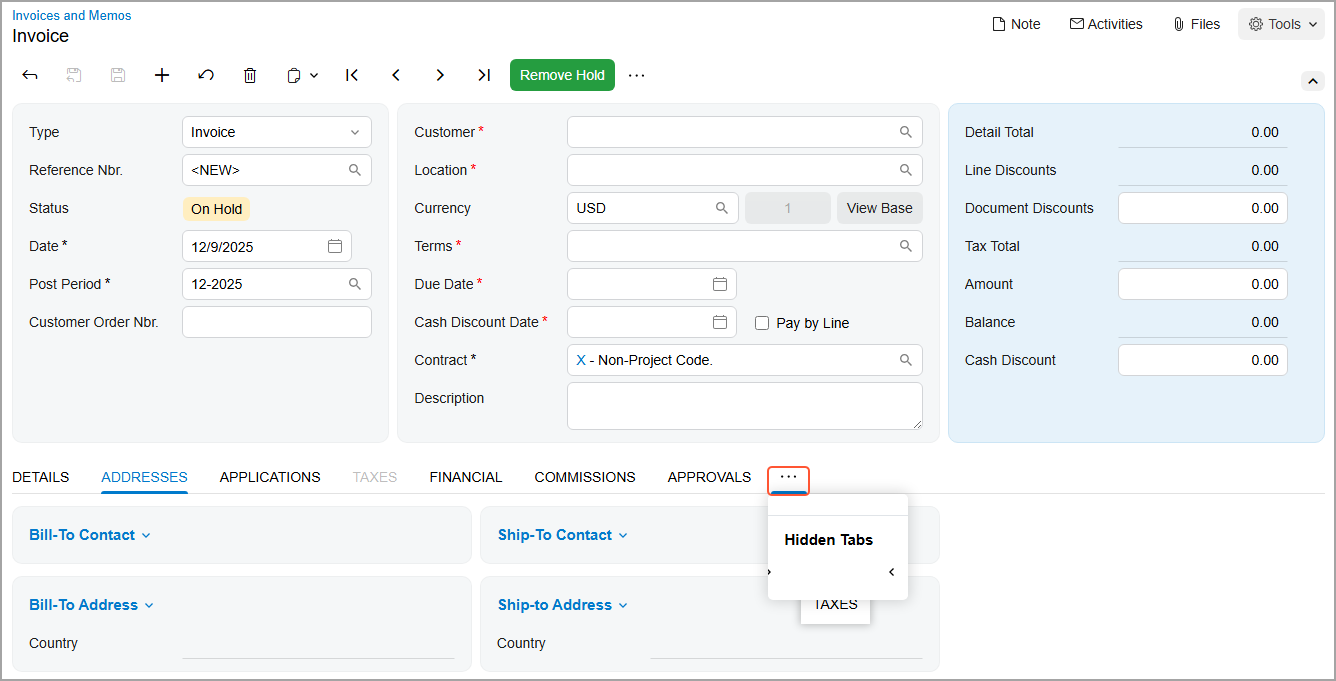
- Similarly, drag the Commissions tab to the Hidden Tabs section.
- To show the Taxes tab again, click the More button. Then
drag the Taxes tab from the Hidden
Tabs section and after the Financial tab
(see below).
Figure 3. Returning a tab from the Hidden Tabs section 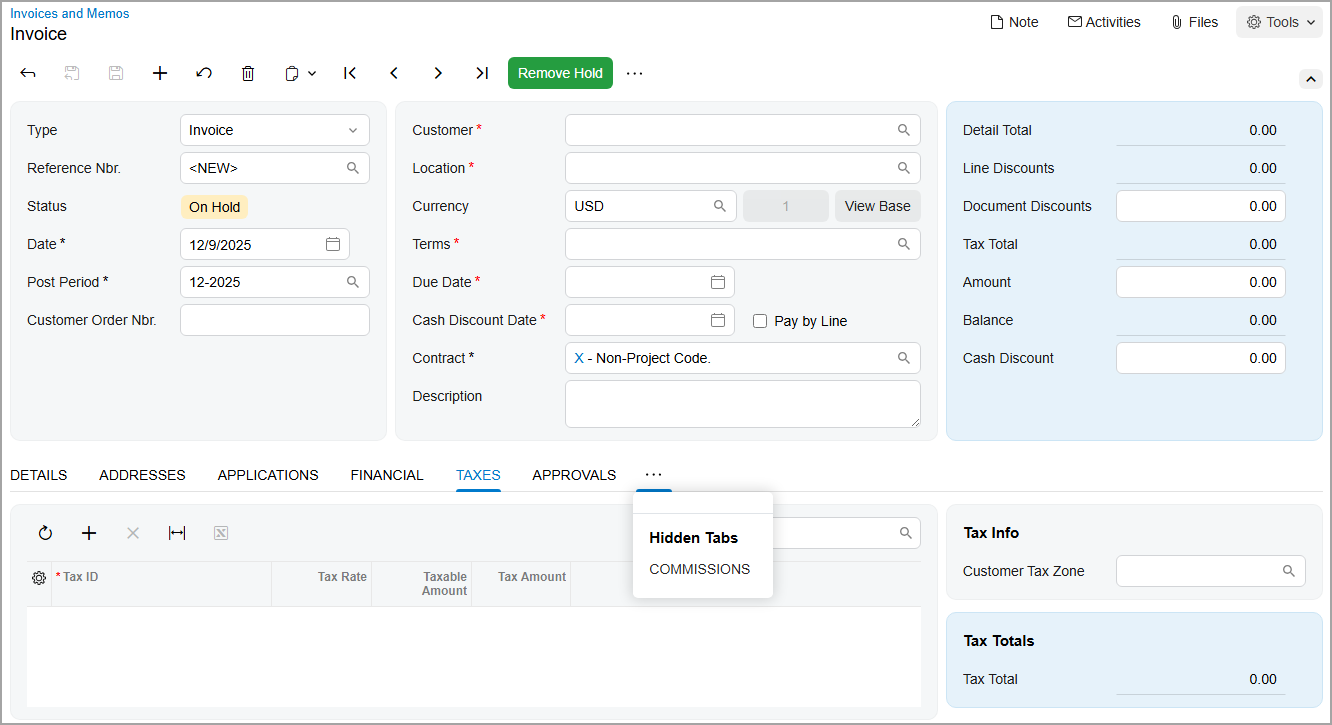
Step 3: Managing Table Columns by Using the Column Configuration Dialog Box
Suppose that you want to personalize the columns on the Details tab of the Invoices and Memos (AR301000) form as follows:
- Add the Manual Price column to the table so that you know whether the price for each service was changed manually
- Hide the unneeded Commissionable column.
- Change the column order by moving the Salesperson ID column after the Branch column
To customize the set and order of these columns, do the following while you are still on the Invoices and Memos (AR301000) form:
- Open the record with the INV000045 reference number.
- Go to the Details tab.
- In the upper-left corner of the table toolbar, click the Settings button. The Column Configuration dialog box opens.
- Select the check box for the Manual Price column.
- Click OK.
The Manual Price column is added to the table (as shown below).
Figure 4. Adding the hidden column to the table 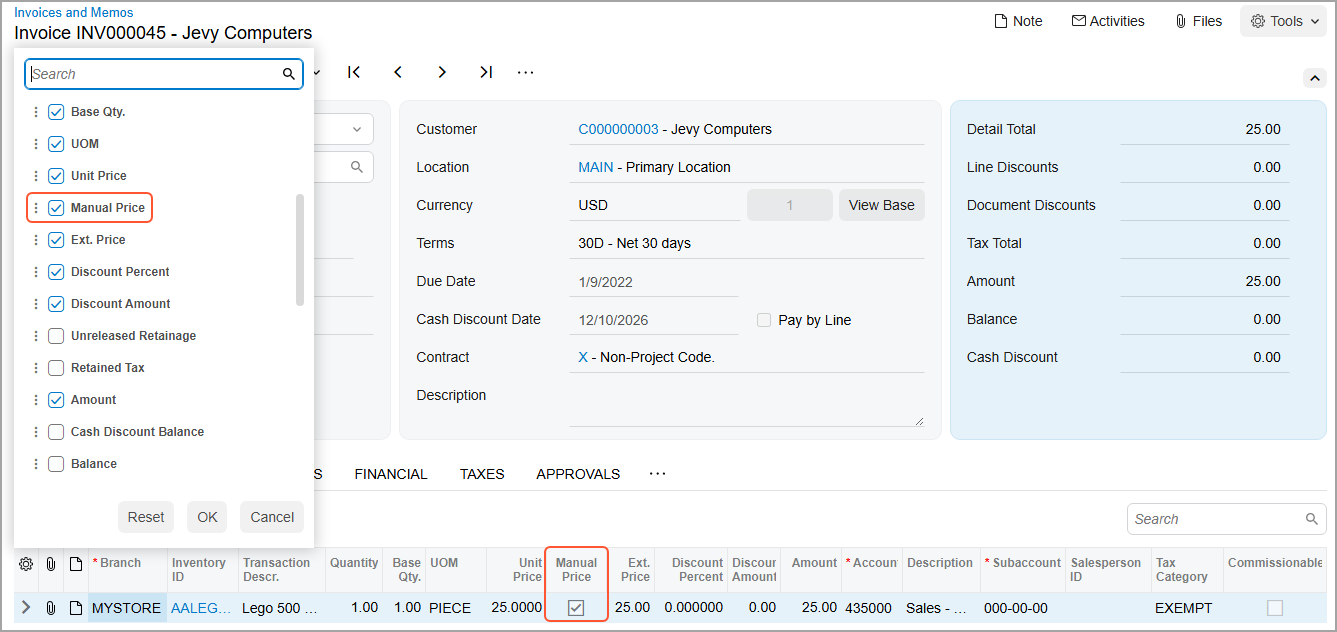
- On the table toolbar, click the Settings button again.
- In the Column Configuration dialog box, which opens, clear the check box for the Commissionable column.
- Click OK. The unneeded columns have been removed from the table.
- Click the Settings button.
- In the Column Configuration dialog box, find the Salesperson
ID column. Drag it upward and place it immediately after the
Branch column, as shown below.
Figure 5. Changing the order of columns in the table 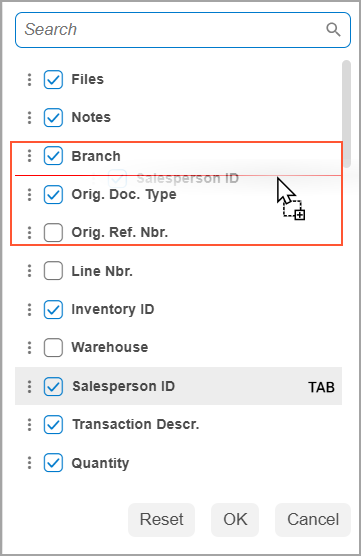
- Click OK
Step 4: Customizing Fieldsets
Suppose that during your work, you don’t need the information displayed in the Bill-To Contact and Bill-To Address sections of the Addresses tab of the Invoices and Memos (AR301000) form. To collapse these sections, do the following while you are still on this form:
- Go to the Addresses tab.
- Hover over the Bill-To Contact section.
- Click the arrow icon that appears to the right of the section name, as shown
below.
Figure 6. The button to collapse the tab section 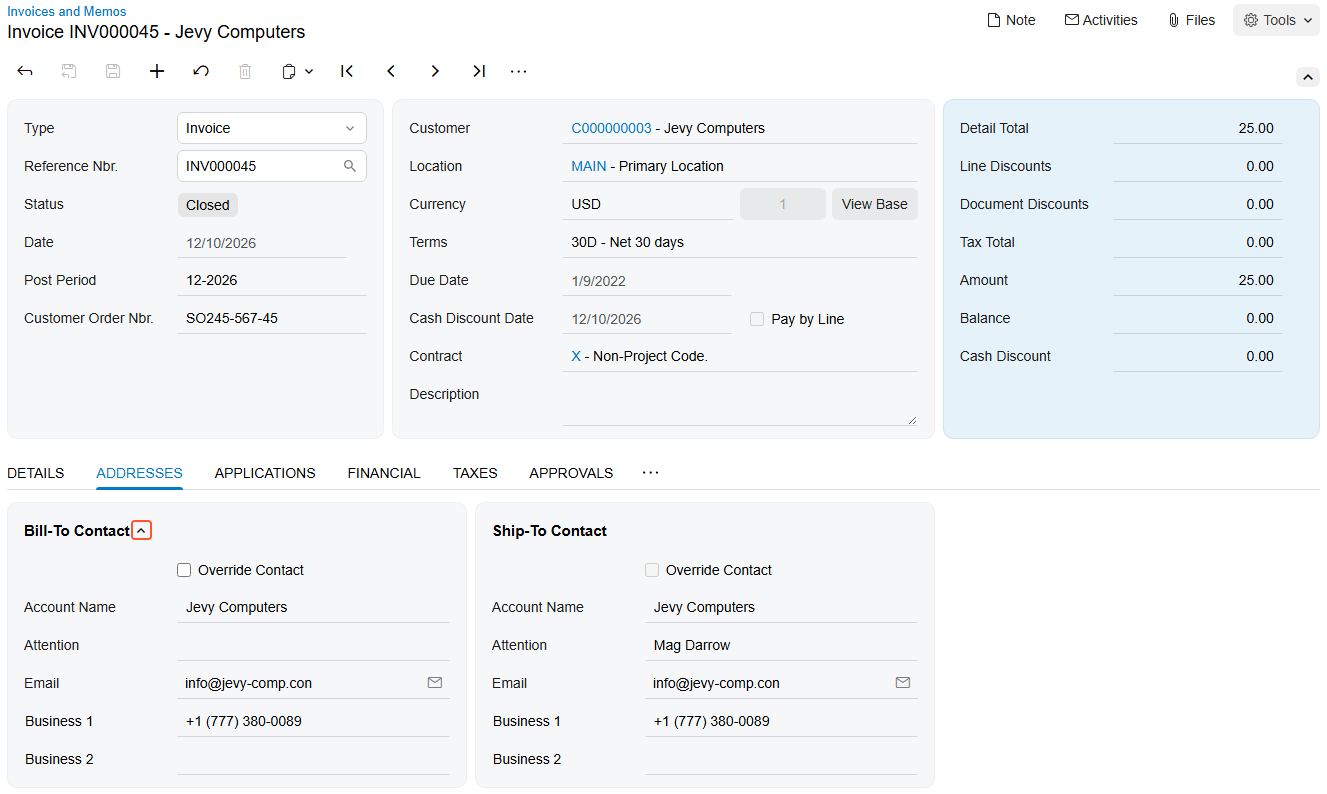
The Bill-To Contact section collapses.
- Hover over the Ship-To Address section.
- Again click the arrow icon that appears to the right of the section name. The
section collapses, as shown below.
Figure 7. The collapsed tab sections 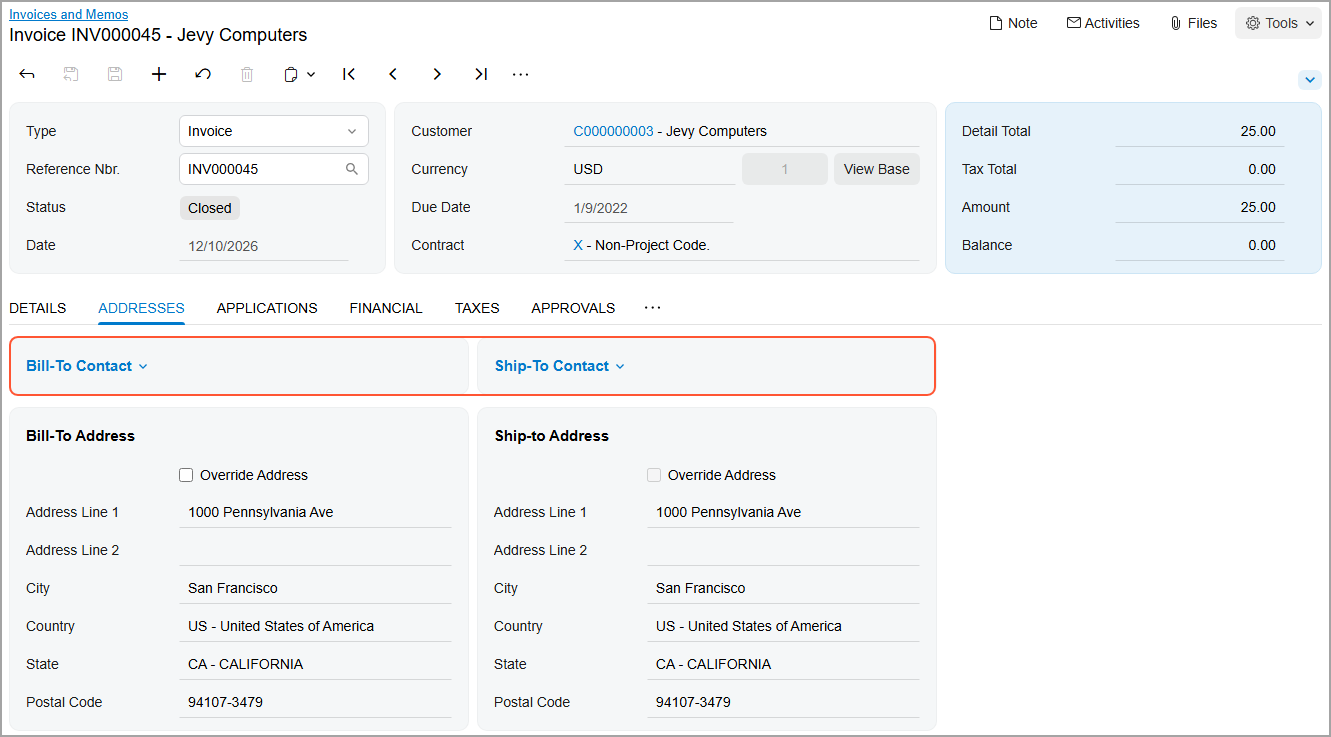
Tip:To expand a collapsed section, click the arrow icon.