Form Layout: To Add a Section to a Tab
The following activity will walk you through the process of adding a section to a tab of a form and then adding UI elements to this section.
Story
Suppose that management has determined that MYOB Acumatica would better fit the needs of your company if employees could find a customer's currency settings more easily on the Financial tab of the Customers form. You need to organize the currency-related UI elements on this tab so that they are grouped in a new Currency section, which should be placed below the Financial Settings section on the tab.
Process Overview
On the Screens page, you will add the Customers (CR303000) form so that it can be customized.
You will do the following to add a new section to a tab:
- By using the Modern UI Editor page, you will add a new Currency section, and move the Currency ID, Curr. Rate Type, Enable Currency Override, and Enable Rate Override boxes to it.
- By using the Modern UI Editor page, you will move the Enable Write-Offs check box next to the Write-Off Limit box.
- By using the Customization Project Editor menu, you will publish the customization project.
- By using Form Configuration mode on the Customers (CR303000) form, you will move the Pay by Line check box above the Currency section and below the Apply Overdue Charges box. You will also remove the duplicate Enable Write-Offs check box.
You will then test the new layout on the Customers (CR303000) form.
System Preparation
Before you begin performing the steps of this activity, do the following:
- Prepare an MYOB Acumatica instance by performing the Customization Projects: To Deploy an Instance prerequisite activity.
- Create the Yogifon customization project by performing the Customization Projects: To Create a Customization Project prerequisite activity.
- On the Customers (CR303000) form, invoke the Element Inspector for the Enable Write-Offs check box to learn its internal name. You will use this name (SmallBalanceAllow) in Step 2.
Step 1: Modifying the List of Customized Screens
To add a section to a tab of the Customers (CR303000) form, you first need to add it to the list of customized screens. Do the following:
- On the Customization Projects (SM204505) form, click Yogifon to open the Customization Project Editor for this customization project.
- In the navigation pane, click Screens.
The Screens page opens.
- On the page toolbar, click Customize Existing
Screen.
The Customize Existing Screen dialog box opens.
- In the Select Screen box of the dialog box, click the magnifier button. In the lookup table, type CR303000 in the Search box, and double-click the Customers form.
- Click OK to close the dialog box.
The Customers (AR303000) form is added to the list of forms on the Screens page, and the Screen Editor: CR303000 (Customers page opens.
Step 2: Adding the Section
To add a new Currency section to the Financial tab of the Customers (AR303000) form, do the following:
- Open any record on the Customers form, activate the Element Inspector, and click the Financial tab.
- In the Element Properties dialog box, which opens, click Customize.
- In the Select Customization Project dialog box, which
opens, select the Yogifon project name, and click OK.
The Screen Editor page opens for the Customers form.
- In the navigation pane, click .
- On the HMTL page of the editor, locate the code for the Financial
Settings fieldset (see the following screenshot).
Figure 1. The groupFinancialSetting fieldset 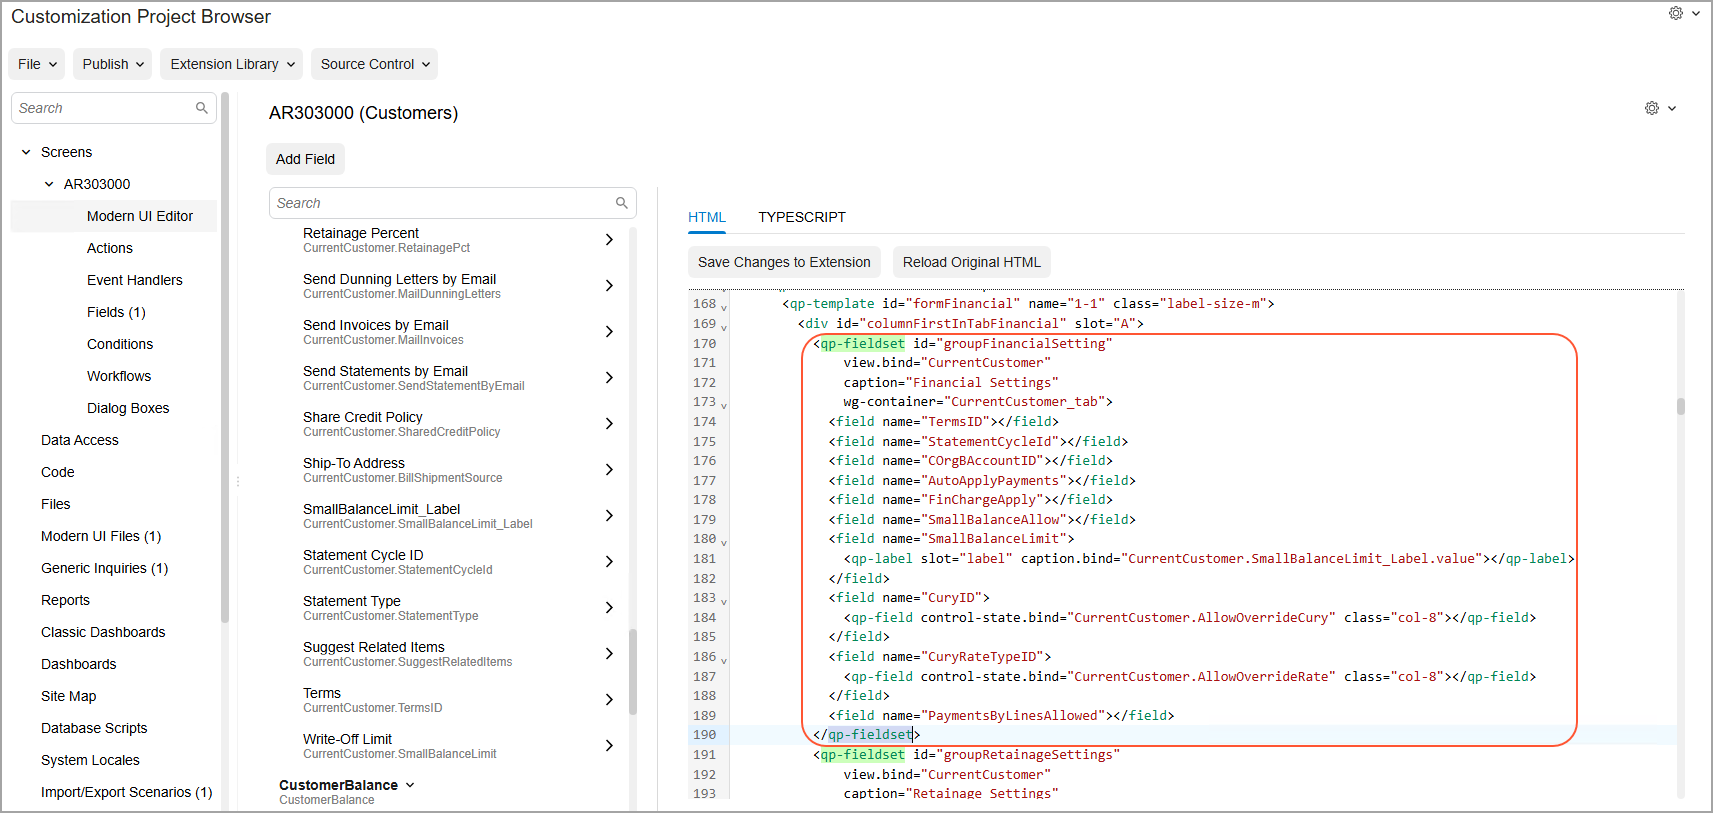
- Add the following code for the Currency fieldset after
the code for the Financial Settings
fieldset:
<qp-fieldset id="groupCurrencySettings" view.bind="CurrentCustomer" caption="Currency" wg-container="CurrentCustomer_tab"> </qp-fieldset> - In the code for the Financial Settings fieldset, cut the
following code, and paste it to code for the Currency
fieldset:
<field name="CuryID">
<qp-field control-state.bind="CurrentCustomer.AllowOverrideCury" class="col-8"></qp-field>
 </field>
<field name="CuryRateTypeID">
 <qp-field control-state.bind="CurrentCustomer.AllowOverrideRate" class="col-8"></qp-field>
 </field>
The resulting code should look as follows:
Figure 2. The code of the Currency fieldset 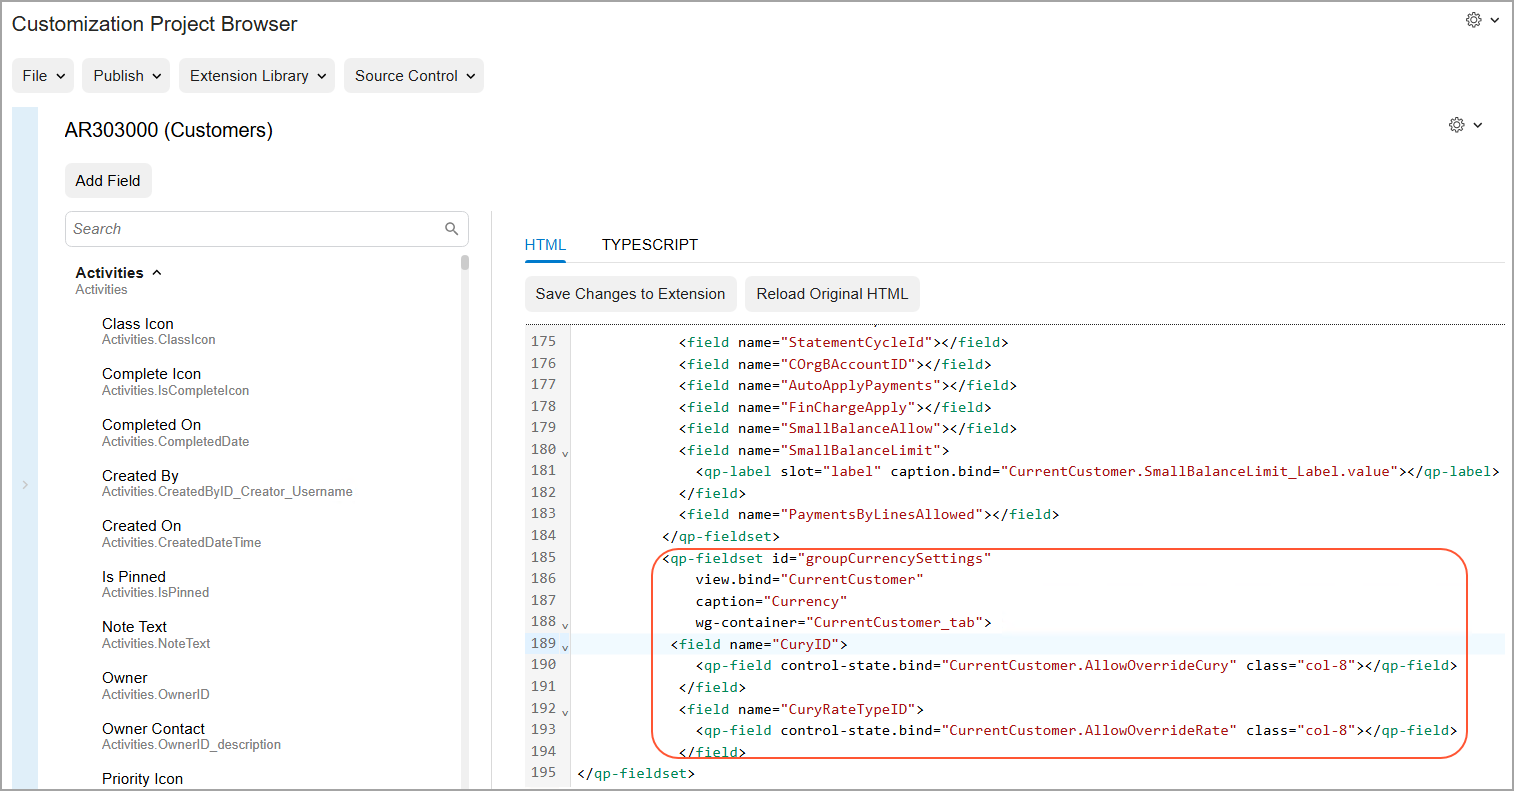
Step 3: Moving the Check Box
To move the Enable Write-Offs check box to the right of the Write-Off Limit box, do the following:
- Locate the code for the SmallBalanceLimit field and update it
as
follows:
<field name="SmallBalanceLimit"> <qp-label slot="label" caption.bind="CurrentCustomer.SmallBalanceLimit_Label.value"></qp-label> <qp-field control-state.bind="CurrentCustomer.SmallBalanceAllow" config-enabled.bind="false"></qp-field> </field>Tip:The SmallBalanceAllow is the internal name of the Enable Write-Offs check box. - Remove the
<field name="SmallBalanceAllow"></field>code line.This line is located above the code that you have just modified.
- On the tab toolbar, click Save Changes to Extension, and in the dialog box that opens, click Save.
- To apply the changes to the instance, on the main menu of the Customization Project Editor, click .
- Wait until the Website updated row appears in the Compilation pane, and click Close Compilation Pane.
Step 4: Adjusting the Position of the Elements
To change the position of the boxes, do the following on the Customers (AR303000) form:
- Open the record with the C000000001 customer ID.Important:If the record is already open, refresh the page.
- On the form title bar, click
- Click Settings for the Financial Settings section.
- In the Section Configuration dialog box, which opens, do
the following:
- Click the Eye icon for the Currency ID, Curr. Rate Type, and Enable Write-Offs fields to hide them.
- Drag the Pay by Line field so that it is located below the Apply Overdue Charges field.
- Click Apply.
- On the form title bar, click Apply to All.
- In the Apply to All dialog box, which opens, click Overwrite Personal Configuration.
Step 5: Testing the Layout
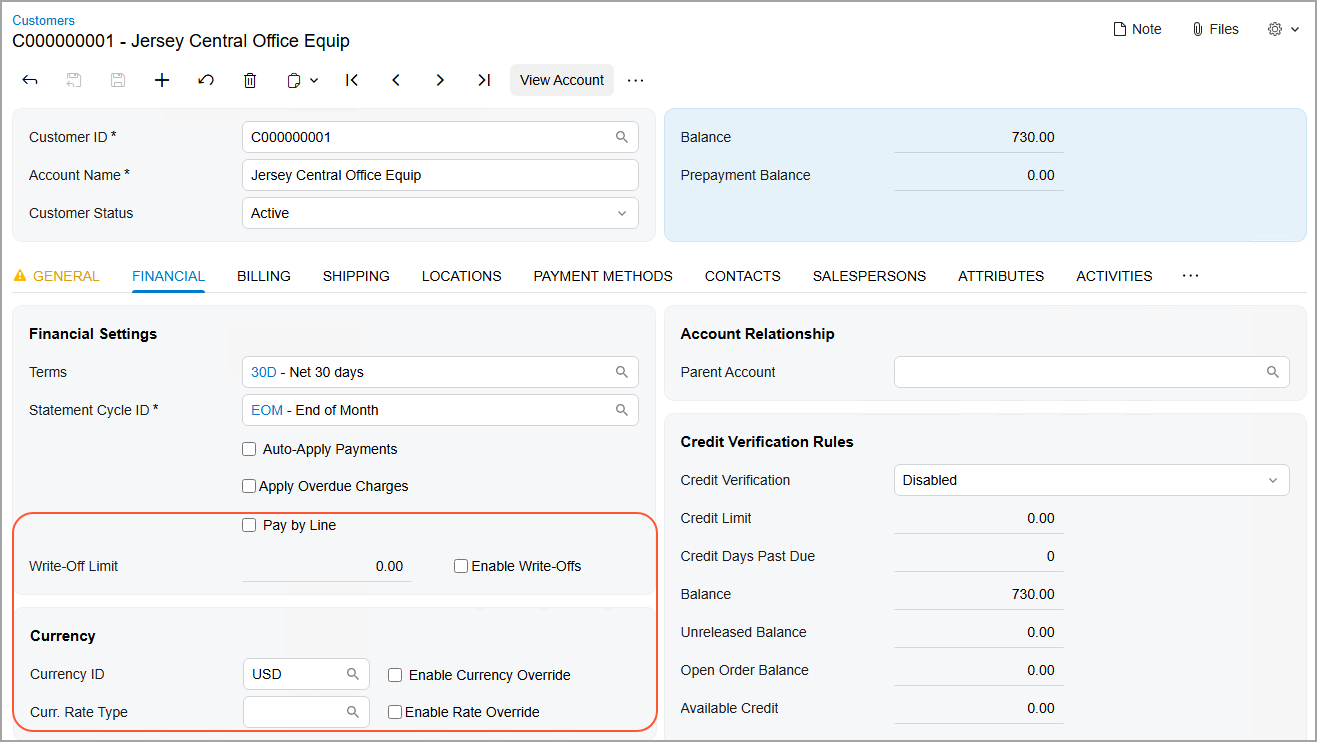
On Customers (AR303000) form, review the layout of the Financial tab and make sure that the following criteria are met
- The Currency section contains the following elements:
- The Currency ID box
- The Curr. Rate Type box
- The Enable Currency Override check box
- The Enable Rate Override check box
- The Financial Settings section has the elements grouped
as follows:
- The Pay by Line check box is located below the Apply Overdue Charges check box.
- The Enable Write-Offs check box is located to the right of the Write-Off Limit box.
The following screenshot shows the modified tab.