- Contents
- Index
- Search

Display results with all search words
Design Tab Menus
The Design tab includes the following functions in its dropdown menus. These menus are also available from the Preview and Detail tabs.
Note: Some of these functions require you to have set up a data source on the Data tab before you can use them.
File Menu
New
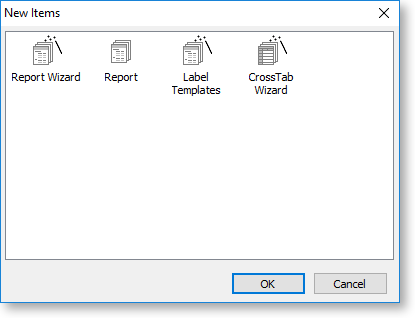
Offers several methods of creating a report:
- Use the Report Wizard to create a new report.
- Create a new blank report.
- Create a new report for printing labels.
- Create a new CrossTab report.
New Report
Creates a new blank report.
Open
Opens a previously saved report
Close
Closes the Exo Clarity application.
Save
Saves the current report.
Save As
Saves the current report, giving you the option to enter a new name for the report and select its report type.

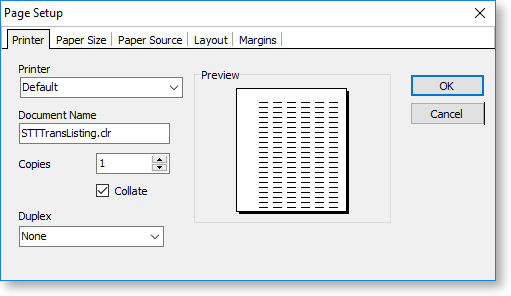
Page Setup
Opens the Page Setup window, where you can set up the page layout to use when printing the report.
Prints a physical copy of the report.
Print to File Setup
Opens the Print to File Setup window, which is used to set up options for exporting the report to Excel.
Edit Menu
The Edit menu contains standard options for undoing edits as well as cutting, copying, pasting and deleting elements. It also contains options for ordering report elements when they are layered on top of each other:
- Bring to Front
- Bring Forward
- Send to Back
- Send Backward
Note: These ordering options are also available on the Format toolbar.
View Menu
The View menu contains options that affect the appearance of the Exo Clarity application:
- Toolbars - this is a sub-menu that lets you turn all of the Design tab toolbars on or off.
- Rulers - lets you turn the rulers around the main report canvas on or off.
- Design Guides - turns on guide lines that appear when clicking on a component and dragging it, to help you align components with each other.
- Grid Options - opens a window that lets you set up the gridlines on the main report canvas.
- Show Data - for report components that will be replaced with real data when the report is run, this option lets you toggle between displaying the components' field names, or the data they will display when the report is run.
- Themes - select a visual theme for the Exo Clarity application.
Report Menu
Data
Exo Clarity needs to know which source on the Data tab represents the primary detail section of your report, i.e. the main table on which you will be building the report. Selecting this option opens the Specify Primary Detail Table window, where you can select the primary table:
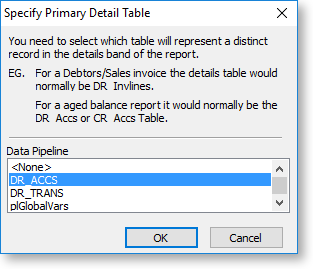
When a report contains one or more sub reports, each sub report can have a different data source from the main report. You can use this window to select the data source for each sub report.
Title / Summary / Header / Footer / Page Summary / Page Style
These options let you turn individual report bands on or off.
Note: The function of the Page Style band is performed by design layers. Enabling the Page Style band from this menu adds a new page layer containing only a Page Style band.
Groups
Opens the Groups window, which lets you set up data grouping in the report.
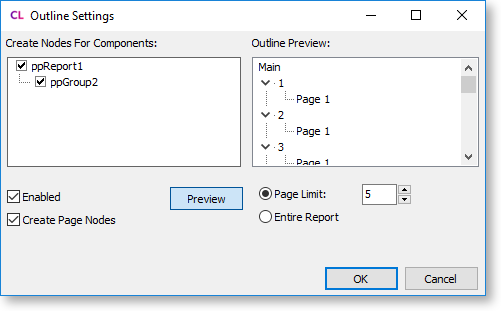
Outline Settings
Opens the Outline Settings window, where you can enable and set up a tree view display of the various groups in the report and optionally the pages they appear on to appear on the Preview tab.
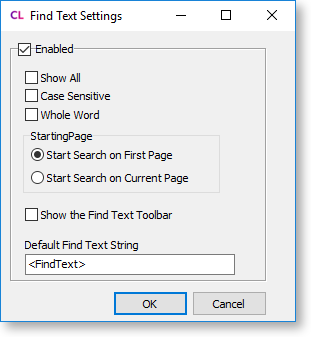
Find Text Settings
Opens the Find Text Settings window, where you can enable and set up the Find Text toolbar on the Preview tab.
Portrait / Landscape
Select the page orientation for the report: portrait or landscape.
Cache Pages
If this option is enabled, all pages generated by the report engine will be saved an re-used. For example, if this setting is enabled and the report is sent to the Print Preview form, Exo Clarity will not regenerate the pages if the report is subsequently sent to the printer - it will just use the cached versions. This can save time when repeatedly generating large, data-intensive reports; however, it can take up a great deal of memory.
Pass Setting
This is an advanced option. If "Two Pass" is selected, Exo Clarity goes through the data twice, performing all calculations on the first pass and then formatting and printing the report on the second pass. If "One Pass" is selected, everything is done in one pass. In most cases, it shouldn't matter which option you choose; however, for more complex reports you may need to take this setting into account to ensure, for example, that variables are not calculated twice (when set to "Two Pass"), or that report totals are calculated correctly before generating (if set to "One Pass").
Units
Select the units that report components' dimensions will be displayed in on the Report Tree.
Tools Menu
Report Manager
By default, MYOB Exo Business opens reports from the directories specified by the profile settings Folder location for standard Clarity forms and Folder location for custom Clarity forms (.CLR,.CLF and .FMT). This may not be suitable in an environment where there is no access to the shared folders on other systems, however. If the Store Clarity report files in database profile setting is enabled, reports can be stored in and accessed from the Exo Business database.
The Report Manager utility lets you import Exo Clarity reports into the Exo Business database, individually or in batches.
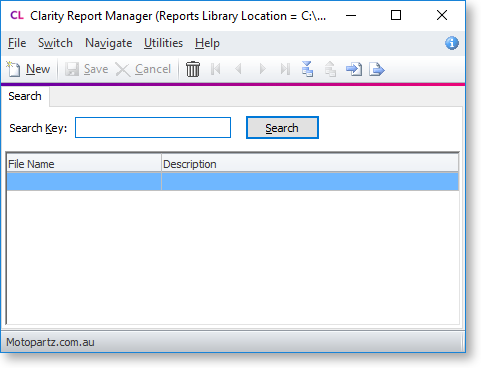
Note: When reports are stored in the database using the Report Manager, there is a consistency in terms of the versions of the reports on all systems, which eliminates problems with report editing/version control, and makes management of reports easier. However, the downloading of reports becomes slower, because reports must be extracted from the database and then run.
Runtime Parameters
Opens the Parameters Editor window, where you can set up parameters for the report.
Convert
The Convert sub-menu provides access to a number of report conversion utilities:
- FMT Conversion - Converts legacy .FMT files to Exo Clarity .CLR files.
- Custom Report Conversion - Create a new custom report by selecting from a predefined set of reports.
- Convert Report (StockCode) - Converts clarity reports to 23 characters stock code.
- Convert Report (IB <---> MSSQL) - Converts a legacy Interbase report to an MSSQL one and vice versa. (Note that Interbase reports are only supported up to MYOB Exo Business version 6.2.)
- GL Report Conversion - Creates clarity forms for reports that were written in the GL Report Writer in Exo Business.
SQL to Report
Opens a utility that generates a report based on a SQL statement. Enter a SQL statement and follow the steps of the utility to generate a report based on it.
Validate Report
This performs a basic check on the validity of the report (fields, links, code, etc.) and gives a message of "No error found" if validation is completed successfully. It is a good idea to run this before you save your reports, although there are still errors and inconsistencies that this tool is not able to warn you about, so you should still check reports manually and preview them.
Summary to Bottom
This option determines whether the Summary report band appears immediately after the last Detail item on your report (not selected), or at the bottom of the page, just above the Footer band (selected).
Switch
Select whether the report is a Standard Report or a Custom Report. This determines whether the report is stored in the Exo Business database as a Custom report or a Master/Standard report, and takes effect when Exo Business is set up to store report definitions in the database rather than in files.
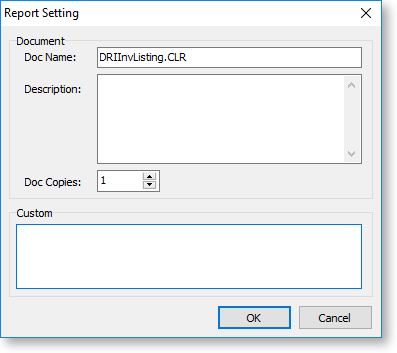
Setting
Opens the Report Setting window where you can enter the report document's name, some descriptive text for the report, the number of copies that should be printed when the report is output to a printer, and a Custom box to set advanced output options.