- Contents
- Index
- Search

Display results with all search words
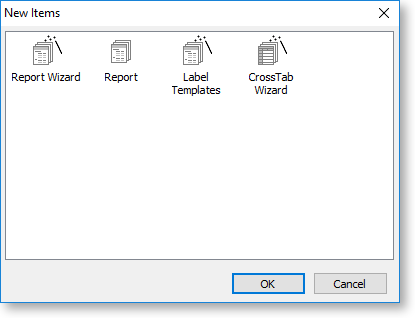
The Report Wizard
The Report Wizard takes you through the basic steps of setting up a simple report. Before running the wizard, you must have set up one or more data sources/pipelines on the Data Tab.
Start the Report Wizard by selecting New from the Design tab's File menu, then selecting Report Wizard from the New Items window.
Select Fields
The first screen of the wizard lets you choose which fields should appear on the report.
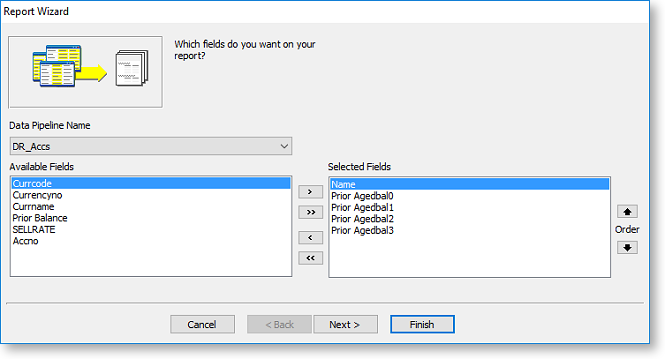
The Data Pipeline Name dropdown contains all data sources set up on the Data tab - select the data source you want to use for this report. All fields in the selected data source appear in the Available Fields section. Move fields between the Available Fields and Selected Fields sections using the following methods:
- Double-click on a field in the Available Fields section to move it to the Selected Fields section (and vice versa).
- Select one or more fields, then click the left and right arrow buttons to move them from one section to the other. You can select multiple fields using the CTRL and SHIFT keys.
- Click the double arrow buttons to move all fields from one section to the other.
Once you've added all of the fields you want to include in the report, you can order them using the Order arrow buttons next to the Selected Fields section. Click Next to go to the next wizard screen.
Group Fields
The next wizard screen lets you group the report by one or more of the fields you selected on the previous screen.
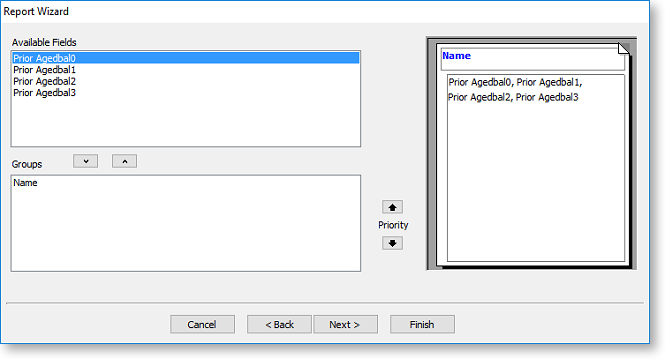
If you want to group the report by a field, double-click on it in the Available Fields pane, or select it and click the down arrow button. The report preview on the right of the window updates to show how the grouping will appear.
If you are grouping by more than one field, you can use the Priority arrow buttons to change the order in which the grouping will be applied.
Once you have set up grouping, click Next to go to the next wizard screen.
Set the Report's Layout
The next wizard screen contains options for how the report should be laid out.

Specify whether the report should be in Portrait or Landscape orientation, then select a layout format. The layout options differ depending on whether or not you set up grouping on the previous screen.
If the report is not grouped, you can choose between a Vertical and Tabular layout. In a vertical layout, report records are arranged vertically, with each record in its own section. In a tabular layout, report records are arranged horizontally in lines with a header line at the top of the report.
If the report is grouped by one ore more fields, a variety of options are available for how the groups should be laid out - the preview at the left of the screen updates as you select each option.
Once you have set up the report's layout, click Next to go to the next wizard screen.
Set the Report's Appearance
The next wizard screen lets you select a visual theme for the report.
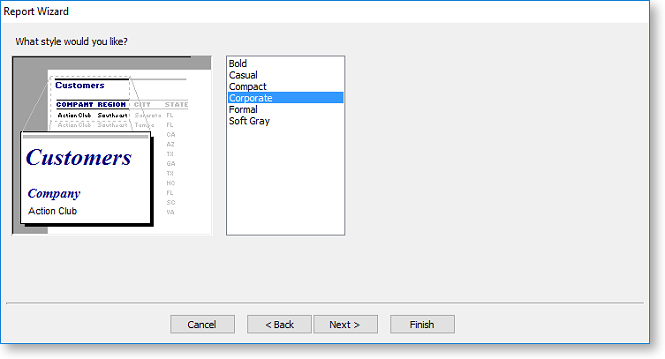
Select a theme from the available options. Each theme has a different combination of fonts and colours.
Click Next to go to the next wizard screen.
Finish the Wizard
Exo Clarity has all the details it needs to create the report.
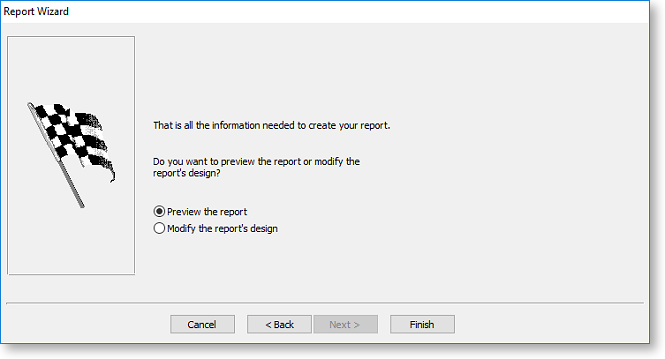
Click Finish to create the new report and perform one of the following actions:
- Display a preview of the report on the Preview tab.
- Open the report on the Design tab where you can continue to edit it.