- Contents
- Index
- Search

Display results with all search words
The Exo Clarity Interface
The Exo Clarity interface is divided into tabs. Each tab has its own menus and toolbars, containing functions specific to the tab.
Data Tab
The Data tab is where you select the database tables and fields that will be used by the report.
Calc Tab
The Calc tab lets you perform more sophisticated calculations on the report's data. It is an advanced feature, which requires knowledge of Delphi to use.
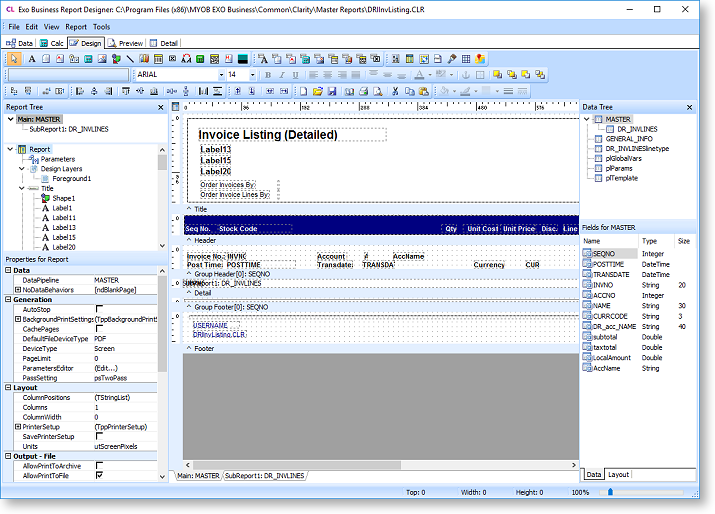
Design Tab
The Design tab is displayed when MYOB Exo Clarity is first opened. It is where the majority of the work of building the report is done.
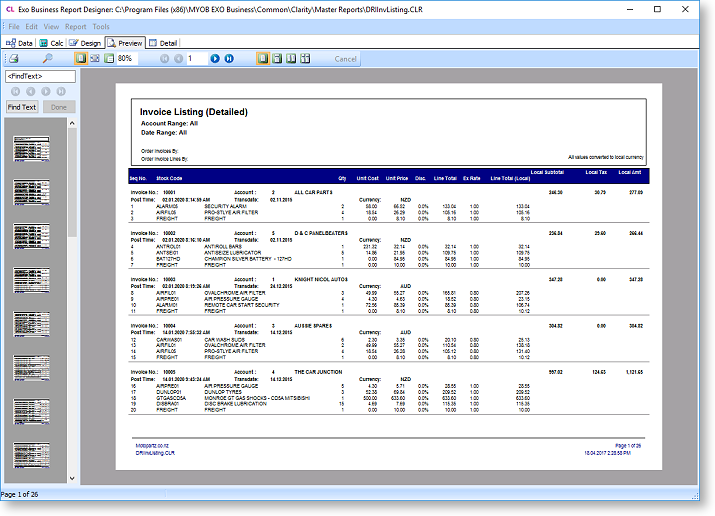
Preview Tab
The Preview tab displays the report as it will look when printed. Referring to this tab regularly will let you see how the report is taking shape, and will highlight any changes or corrections that need to be made.
Toolbar buttons and thumbnails on this tab let you view each page of the report, zoom in to get a better look at a specific page and search for text in the report. You can browse on screen or you can print the report from the Preview tab.
Note: You can enable and configure the thumbnail and text search controls by editing the report's properties in the Report Tree - edit the TextSearchSettings and ThumbnailSettings properties under User Interface. You can also edit the text search settings by selecting Find Text Settings on the Report menu of the Design tab.
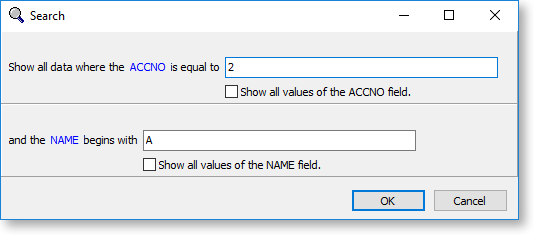
If the report has any search
criteria with the AutoSearch
option enabled, a Search button (  ) is available on the Preview tab's toolbar. Clicking this button opens
a window where you can filter the data displayed on the preview using
the available search criteria:
) is available on the Preview tab's toolbar. Clicking this button opens
a window where you can filter the data displayed on the preview using
the available search criteria:
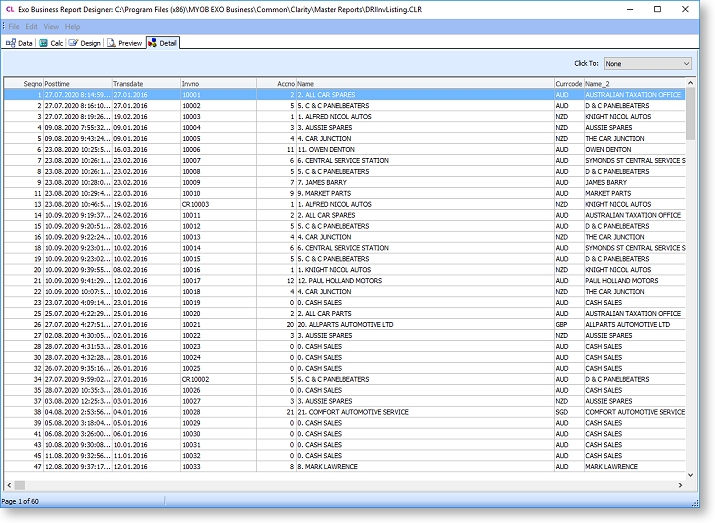
Detail Tab
This tab displays the data from the data source that has been selected for the primary detail. You can use it to ensure that your report is returning the data you want it to.
Select an option from the Click To dropdown and double-click on a line to open the selected record for that line, e.g. in the report below, if you selected "Debtor Account" from the dropdown, then double-clicking on a line would open the Debtor Account Details window, showing the Debtor account from that line.