
Integration with Microsoft Teams
You integrate Microsoft Teams with MYOB Acumatica to enable user collaboration within a single platform and to eliminate the need for users to switch between multiple applications.
Requirements
Before you integrate Microsoft Teams with MYOB Acumatica, your company must be signed up for a Microsoft cloud service, such as Azure or Office 365, with the Microsoft Entra ID instance configured. For more information, see Microsoft Entra ID on the Microsoft Azure Portal and Integration with Microsoft Entra ID.
You need to have a Microsoft Teams account, as well as the Teams desktop application or the ability to use Teams on the web. Also, appropriate Microsoft roles need to be assigned to you and to everyone involved in or using the integration. These roles include Global Administrator, Application Administrator, and Teams Administrator. (For details on roles, see Azure RBAC documentation.)
To configure the Microsoft Teams integration in MYOB Acumatica, you must be signed in to a user account with one of the following roles Acumatica Support, Administrator, CR Sales & Marketing Admin, or CR Support Admin. (For details on MYOB Acumatica roles, see Configuring User Roles.) Also, MYOB Acumatica administrators must be assigned both the Teams Administrator role and the Global Administrator role.
Configuration Steps
You can configure integration with Teams when you implement MYOB Acumatica or at any later time. To integrate an instance of MYOB Acumatica with Teams, you perform the following general steps:
- You perform the needed configuration actions on the Microsoft Entra ID instance. That is, you register your MYOB Acumatica instance with the Microsoft Entra ID instance, and you obtain the needed credentials, as described in To Configure Microsoft Azure for Teams Integration.
- You configure your MYOB Acumatica instance and Teams application, as described in To Configure MYOB Acumatica for Teams Integration.
Sharing of Records
Before you can share MYOB Acumatica records through Teams, you need to add a new activity type on the Activity Types (CR102000) form. A user selects this activity type to send a link to a record to a Teams channel or a Teams member. The menu commands that correspond to the created activity type then appear on the appropriate parts of the forms as follows:
- For forms that have the Activities tab: The Create
Teams command on the Create Activity menu (see the
following screenshot).
Figure 1. The Create Teams Message command on the Create Activity tab 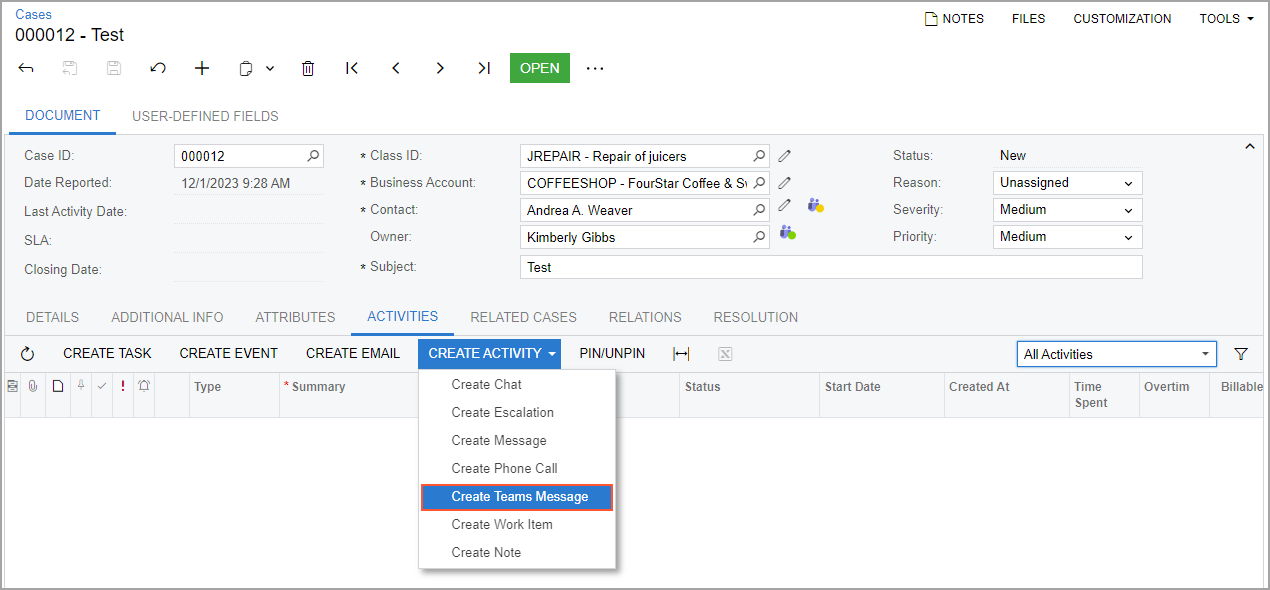
- For forms that do not have the Activities tab: The
Teams command on the Add Activity menu of
the Tasks & Activities dialog box (see the following
screenshot). This dialog box opens when you click Activities on the
form title bar.
Figure 2. The Teams Message command on the Create Activity menu 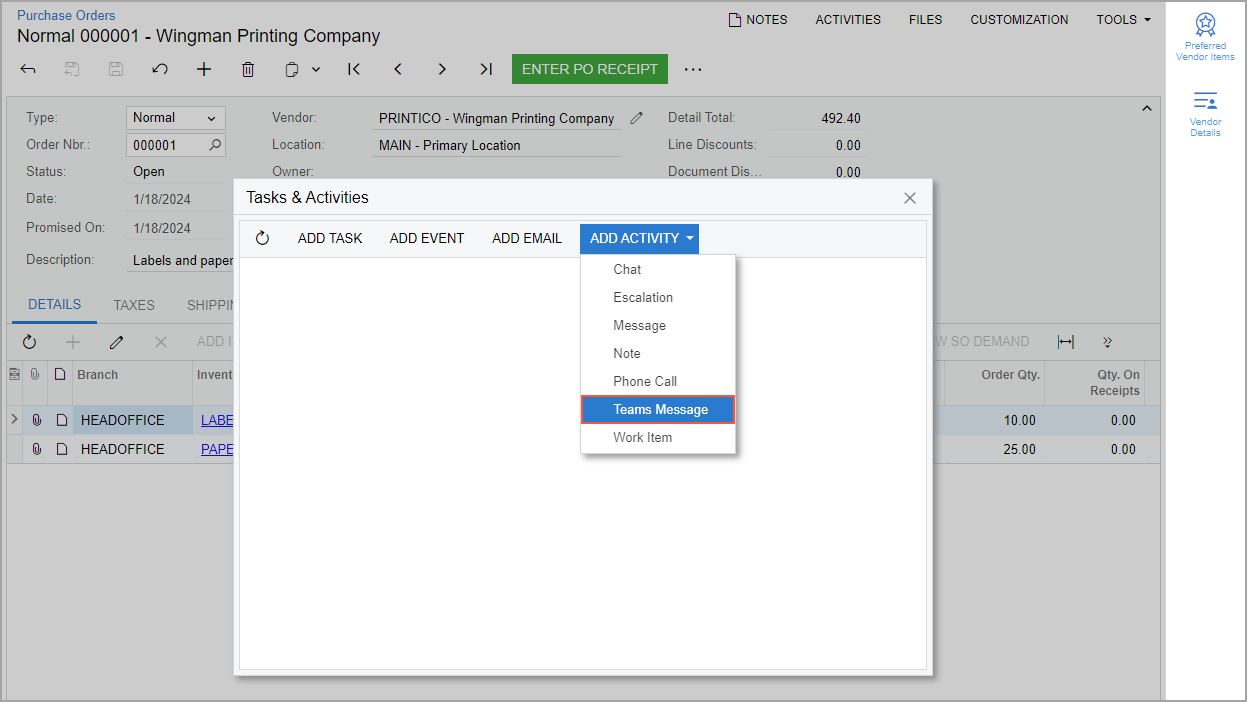
Channel Synchronization
To be able to receive messages from MYOB Acumatica in Microsoft Teams channels, you need to configure each of the channels to which you want to send messages. As a system administrator, you perform this activity once for the entire company.
Before you start the configuration of the channels, you need to synchronize them. You perform the synchronization of channels and members on the Teams Channels (SM305000) form. During this process, the system also maps the contacts in MYOB Acumatica with the members of the Teams channels. The system does that by comparing the email addresses in the Teams accounts with users' email addresses specified on the Contact Info section of the General tab of the Employees (EP203000) form and in the Contact section of the General tab of the Contacts (CR302000) form. If an email address on one of these forms is the same as the email address in a Teams account, the system maps the user in Teams with the employee or contact in MYOB Acumatica.
If for a Teams member, no employee or contact has been found in MYOB Acumatica, you can specify it manually on the Teams Members (SM305030) form. On this form, you can also run the mapping again by clicking Map Contacts & Employees on the form toolbar. (You might need to do this if the email addresses of any users have changed.)
For each Teams channel to which you want to send messages, you need to add a webhook. To generate the webhook URL, you create a flow by using Microsoft Power Automate. You then specify the generated URL on the Channels pane of the Teams Channels form.
Status of Teams Contacts
If a contact or employee that is selected in one of the applicable boxes on a supported form is a member of a Teams channel, MYOB Acumatica displays the Teams icon to the right of this box. The following screenshot shows the Cases (CR306000) form with the Teams icons to the right of the Contact box (see Item 1 in the screenshot) and the Owner box (Item 2).
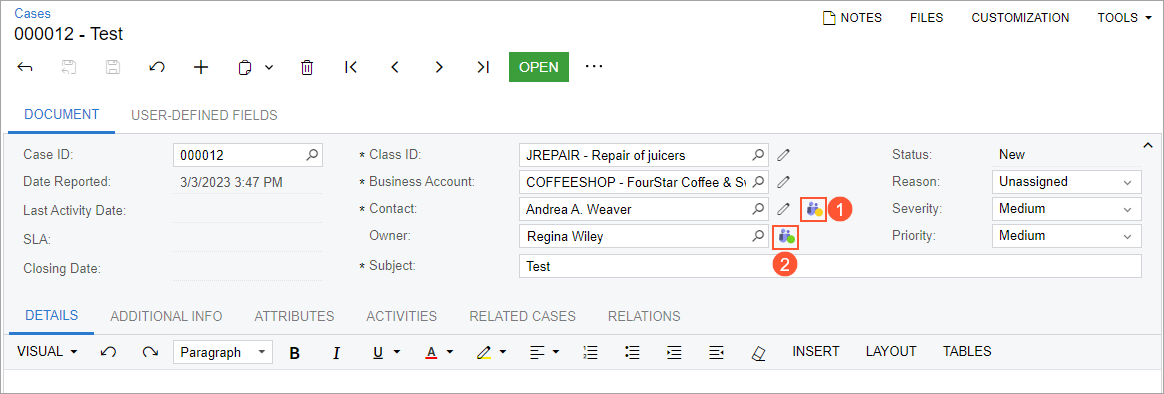
The Teams icon contains a dot of one of the following colors that indicates the status of the user as follows:
- Green: Available
- Yellow: Away
- Red: Busy, In a call, or In a meeting
- Gray: Unavailable
The following table lists the forms and boxes on these forms for which the Teams icons are displayed.
| Form | Location | Box |
|---|---|---|
| Cases (CR306000) | Summary area | Contact (a contact of the
customer) Owner (an employee of the company who owns the case) |
| Leads (CR301000) | Summary area | Contact (a contact that the lead is associated
with) Owner (an employee of the company who owns the lead) |
| Opportunities (CR304000) | Summary area | Contact (a representative to be contacted about the
opportunity) Owner (an employee assigned to the opportunity) |
| Business Accounts (CR303000) | Summary area | Owner (a person assigned to work with the business account) |
| Name (the full name of the primary contact associated with the business account) | ||
| Contacts (CR302000) | Summary area | Owner (an owner of the contact) Contact ID (the unique identifier of the contact) |
| Customers (AR303000) | Name (the full name of the primary contact associated with the customer) | |
| Vendors (AP303000) | Name (the full name of the primary contact associated with the vendor) |