
To Configure MYOB Acumatica for Teams Integration
After you configure Microsoft Azure for Teams Integration, you need to specify the required settings in your MYOB Acumatica instance. You also need to configure webhooks in Microsoft Power Automate. The following sections provide detailed instructions to perform this configuration.
Before You Proceed
Before you begin, make sure that the following conditions are met:
- You have configured Microsoft Azure for Teams integration, as described in To Configure Microsoft Azure for Teams Integration.
- You have enabled the Teams Integration feature on the Enable/Disable Features (CS100000) form.
Step 1: To Configure Teams Preferences
On the Teams Preferences (SM220000) form, do the following:
- In the Tenant ID box, enter the Directory (tenant) ID value that you have generated in Step 1 of To Configure Microsoft Azure for Teams Integration.
- In the Client ID box, enter the Application (client) ID value that you have generated in Step 1 of To Configure Microsoft Azure for Teams Integration.
- In the Client Secret box, enter the client secret that you generated in Step 2 of To Configure Microsoft Azure for Teams Integration—which was shown in the Value column of the Client secrets pane.
- On the table toolbar, click Add Permissions.
The system adds to the table the permissions that you have specified in Step 3 of To Configure Microsoft Azure for Teams Integration (see the following screenshot).
Figure 1. The added permissions on the Teams Preferences form 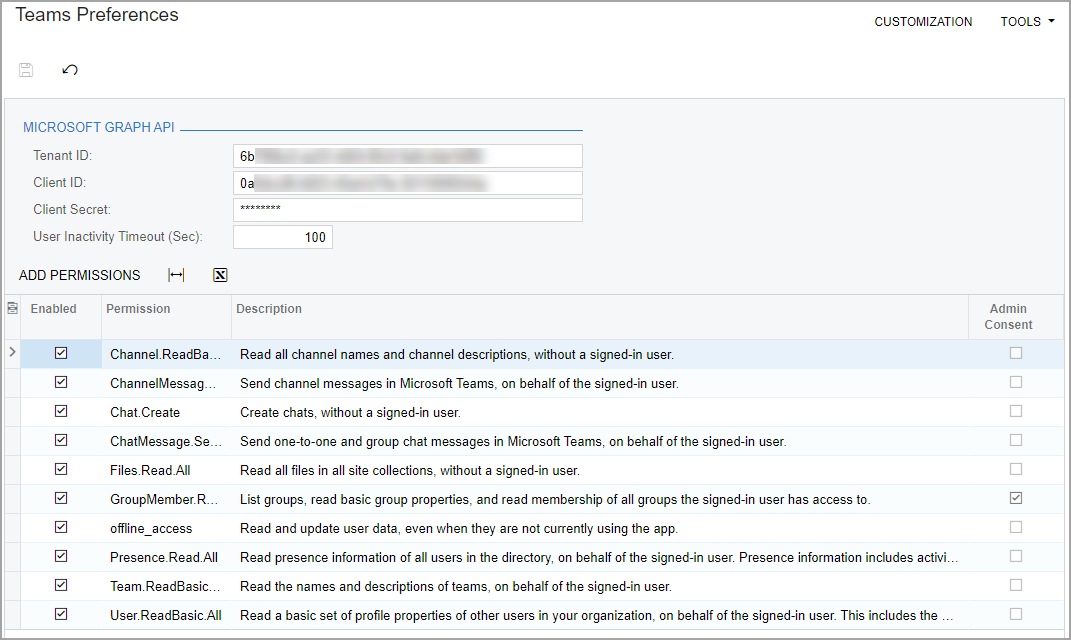
- On the form toolbar, click Save.
Step 2: To Add a New Activity Type
To add a new activity type, do the following:
- On the form toolbar of the Activity Types (CR102000) form,
click Add New Record, and specify the following settings
in the added row:
- Type ID: TM
- Description: Teams Message
- Active: Selected
- Originated By: ERP Users (inserted automatically)
- Image: main@success
- On the form toolbar, click Save.
- On the More menu of the Apply Updates (SM203510) form, click
Reset Caches.
The system resets the caches, and is now ready for Teams channel synchronization.
Step 3: To Configure an Incoming Webhook
To configure an incoming webhook for a Teams channel, you need to create a connection and a flow by using Microsoft Power Automate. Do the following:
- Download the PostToChannelWhenWebhookReceived.zip file that you will use to configure the flow.
- Open the Microsoft Power Automate page and on the More menu on the left pane, click Connections.
- On the Connections in <Company_Name> page, which opens, click Create a connection.
- On the New connection page, which opens, locate the Microsoft Teams connector and click Create.
- In the dialog box that opens, click
Create.
The connector is added to the Connections in <Company_Name> page.
- On the left pane, click My flows and on the page toolbar of the Flows page, which opens, click .
- On the Import package page, which opens, click Upload, and select the PostToChannelWhenWebhookReceived.zip file that you have downloaded.
- In the Related resources table, click the Select during import link.
- On the Import setup side panel, which opens, click the connection to Teams that you have created, and click Save.
- On the Import package page, click Import, and wait for the process to complete.
- In the confirmation message that appears when the import is completed, click the Open Flow link.
- In the diagram with the flow, which opens, click the Post message in a chat or channel box.
- In the Team and Channel boxes on the side panel that opens, remove the default values and select the team and its channel, respectively, to which you want to send notifications.
- In the diagram with the flow, click the When a Teams webhook request is received box and on the side panel that opens, copy the link in the HTTP URL box.
- On the page toolbar, click Save, and then click Back to return to the My flows page.
- On the page toolbar of the My flows page, click Turn On.
Step 4: To Sign In to the Teams Account
Do the following to sign in to the Teams account:
- In the User menu, click My Profile.
The User Profile (SM203010) form opens.
- In the Teams User Type box of the Teams
Settings tab (Authentication Token),
select the user type with which you want to sign in (Administrator or
Member),
and click Sign In.
The system signs you in to the Teams account.
- In the Authentication Token section, click Test Connection.
- In the pop-up window that opens, enter your Teams credentials, and click Sign In.
- On the form toolbar, click Save.
Step 5: To Specify Additional Teams Settings
To specify additional Teams settings for your account, do the following on the Teams Settings tab of the User Profile (SM203010) form:
- In the Override Teams ID box of the Teams Preferences section, enter the email address that the system should use to find the Teams identifier of the user instead of the email address specified in the Contact Info section of the General tab on the Employees (EP203000) form, or in the Contact section of the General tab on the Contacts (CR302000) form.
- In the Teams Client box, select the Teams client you want to use (Desktop or Web).
- On the form toolbar, click Save.
Step 6: To Synchronize Teams Channels and Members
To synchronize your Teams channels and members, do the following on the Teams Channels (SM305000) form:
- On the form toolbar, click Synchronize, and wait for the
operation to complete.
The system adds the Teams channels to the table on the form (see the following screenshot).
Figure 2. The synchronized Teams channels 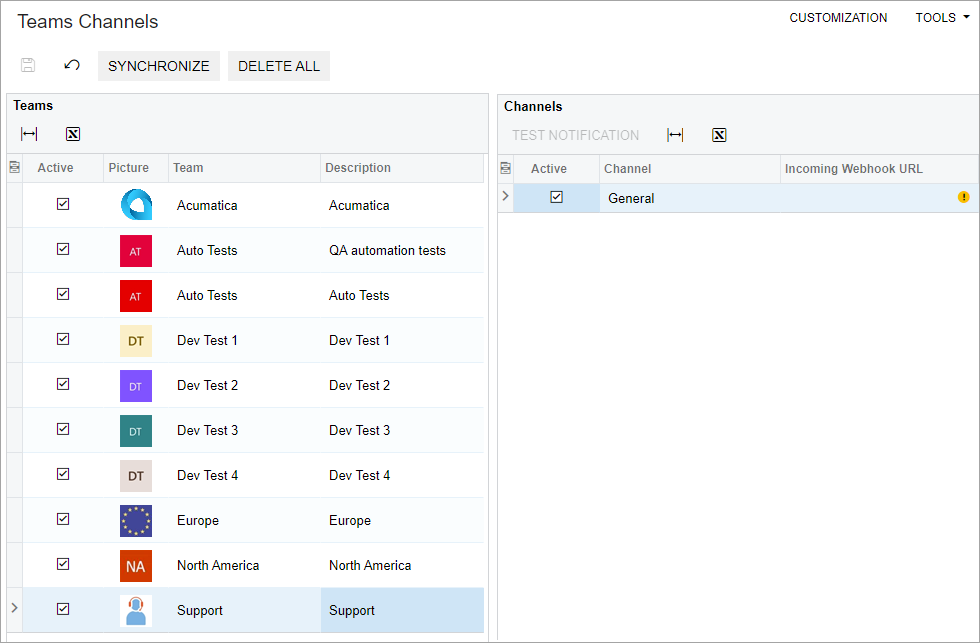
- On the Teams pane, click the team that contain the channel to which you want to send messages.
- On the Channels pane, click the needed channel.
- In the Incoming Webhook URL column, enter the URL you
have copied in Step
3
(see the following screenshot).
Figure 3. The incoming webhook URL 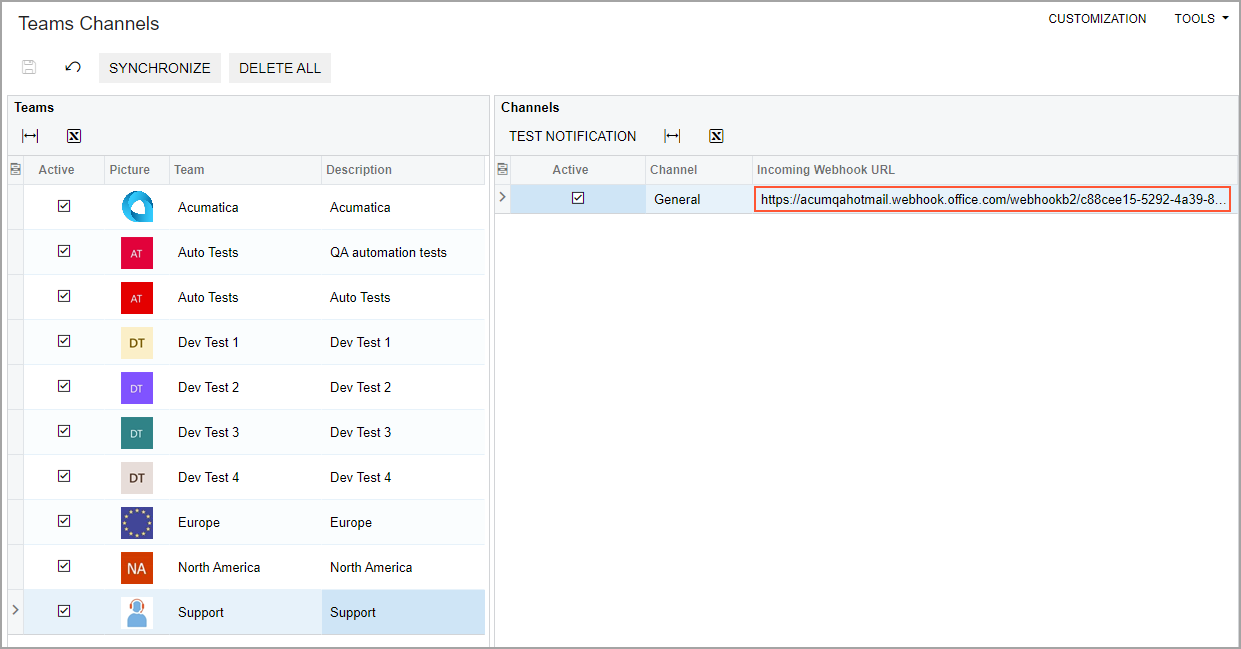
- On the form toolbar, click Save.
- On the pane toolbar of the Channels pane, click
Test Notification to send a test message to the
channel in Teams (see the following screenshot).
Figure 4. The Test Notification button 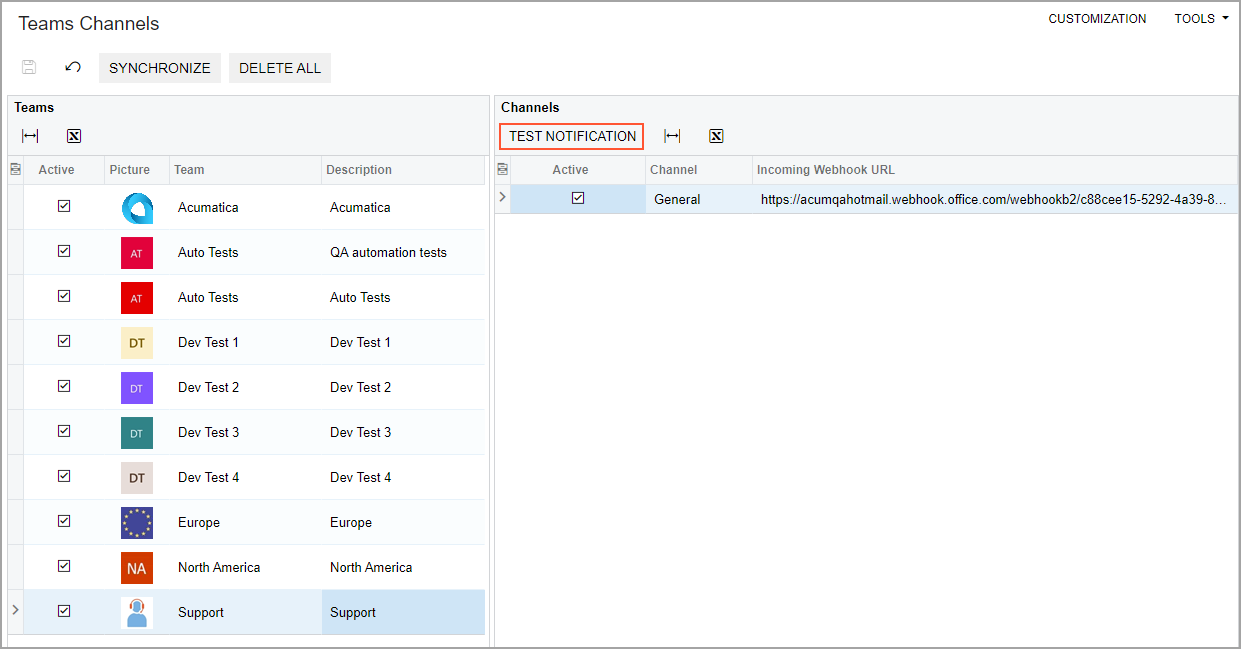
- In the channel in Teams, make sure that the message is displayed (see the
following screenshot).
Figure 5. The received message in the Teams channel 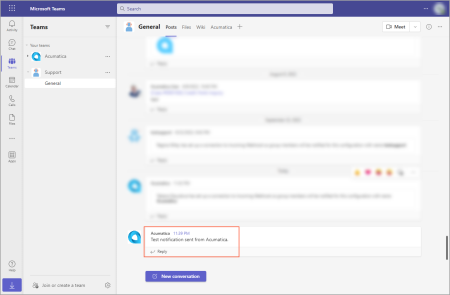
Step 7: Mapping the Contacts or Employees
To map the contacts in the Teams channel with the contacts or employees in MYOB Acumatica, do the following:
- In MYOB Acumatica, open the Teams Members (SM305030) form.
- On the form toolbar, click Map Contacts &
Employees.
Wait for the system to complete the mapping.
- If for a team member, the system has not specified an MYOB Acumatica contact or employee, click the magnifier icon in the Acumatica ERP Contact/Employee column, and select the needed contact or employee.
- On the form toolbar, click Save.