
To Configure Microsoft Azure for Teams Integration
To configure Microsoft Azure for the integration of Microsoft Teams with your MYOB Acumatica instance, you perform the following actions in the Microsoft Azure portal:
- Registering your MYOB Acumatica instance, and copying the registration parameters for further use.
- Obtaining the client secret and copying it.
- Configuring API permissions.
- Specifying your MYOB Acumatica instance redirect URI.
Each of which is described in a section of this topic.
- The procedure below is designed for the most common usage scenarios. If you are implementing a more complicated scenario and you encounter difficulties, contact MYOB Acumatica technical support.
- The vendor of the third-party software may change the user interface and settings. Therefore, the screen elements and setting names that you see may differ from the ones described in the procedure.
- The procedure will be updated to describe new common scenarios and changes in the user interface and settings.
Before You Proceed
Before you begin, make sure that the following conditions are met:
- You have created Microsoft Teams users and Teams Administrator users.
- Your company has a Microsoft Entra ID instance configured. For more information, see Integration with Microsoft Entra ID.
- Your company has a Microsoft Azure subscription so that you can register your MYOB Acumatica instance in Microsoft Entra ID.
Step 1: To Register the Graph Application
To register your application on the Microsoft Azure portal, perform the following instructions:
- Sign in to the Microsoft Azure portal.
- In the Azure services section, click App registrations.
- On the pane toolbar, click New registration.
- On the Register an application page, which is opened (see
the following screenshot), specify the name of your application in the
Name box, and click
Register.
Figure 1. The name of the application on the Azure portal 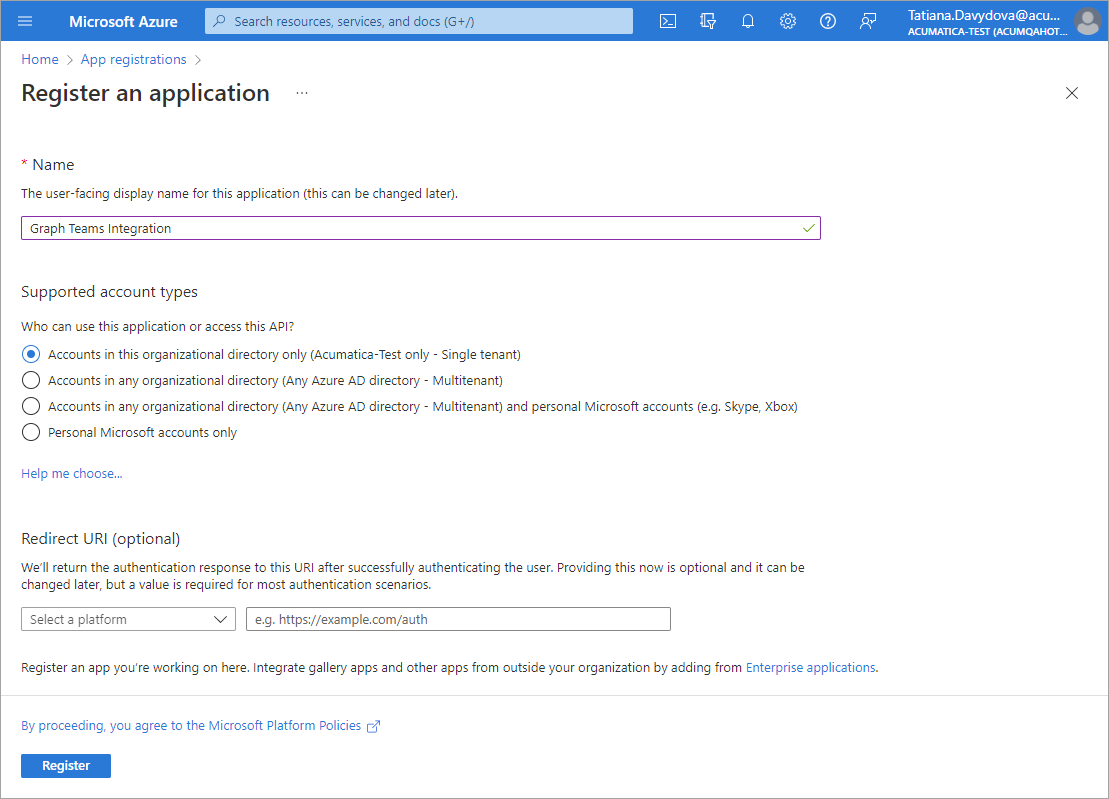
A page opens with the name you entered for the application, which indicates that your MYOB Acumatica instance is registered with Microsoft Entra ID. Notice that the Application (Client) ID and Directory (tenant) ID values have been generated, as shown in the following screenshot.
Figure 2. The generated Application and Directory IDs on the Azure portal 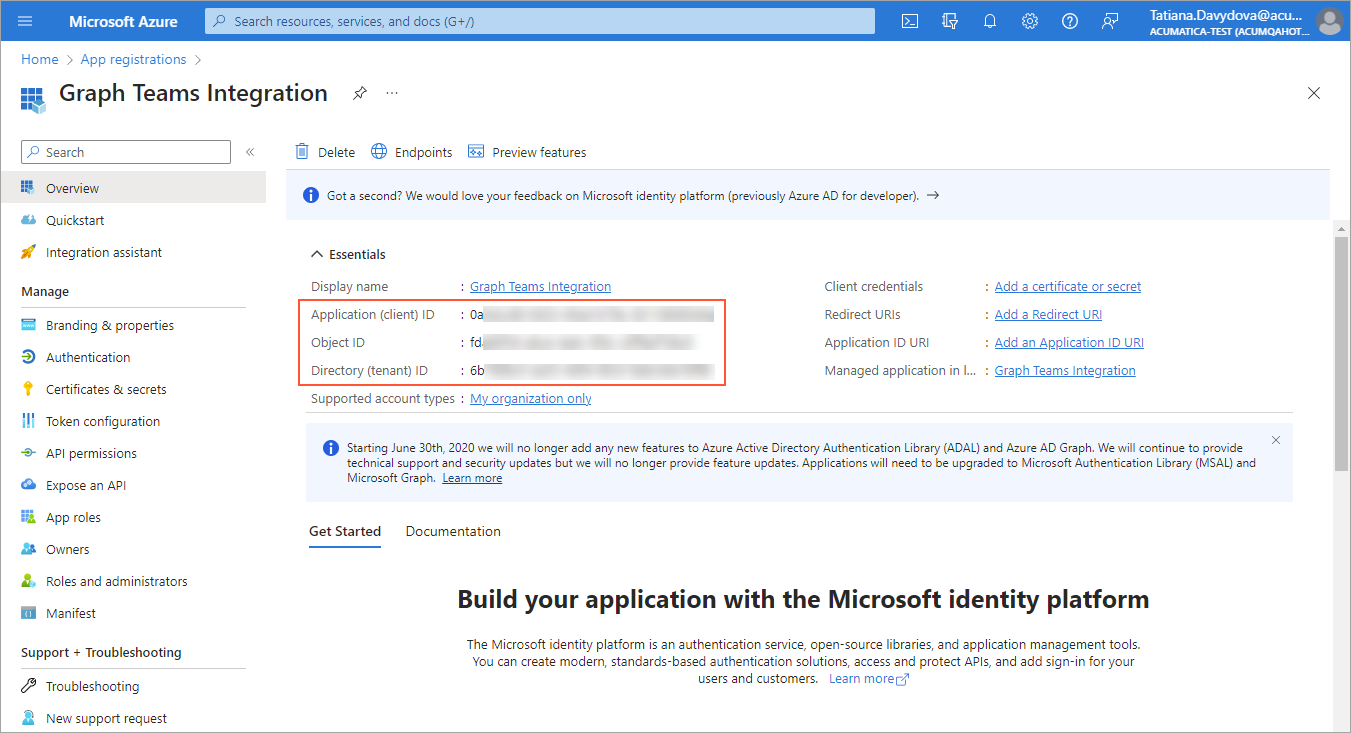
- Copy the Application (Client) ID, Object ID, and Directory (tenant) ID values.
Step 2: To Create the Client Secret
To create the client secret on Microsoft Azure portal, while you are still in the page with the name of your application, perform the following instructions:
- In the left pane, click Certificates & secrets.
- On the Client secrets tab, click New client
secret (see the following screenshot).
Figure 3. Creation of a client secret on the Azure portal 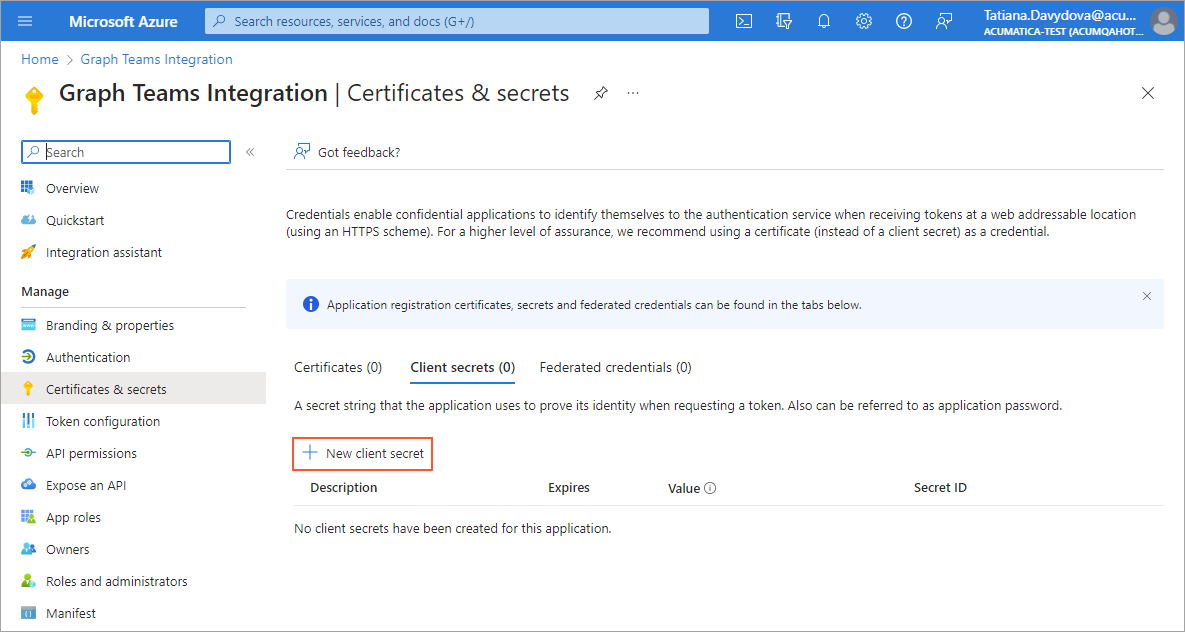
- In the Description box of the Add a client secret pane, type the description of the client secret.
- In the Expires box, select the appropriate option for the
secret's duration (see the following screenshot).
Figure 4. The settings of the client secret 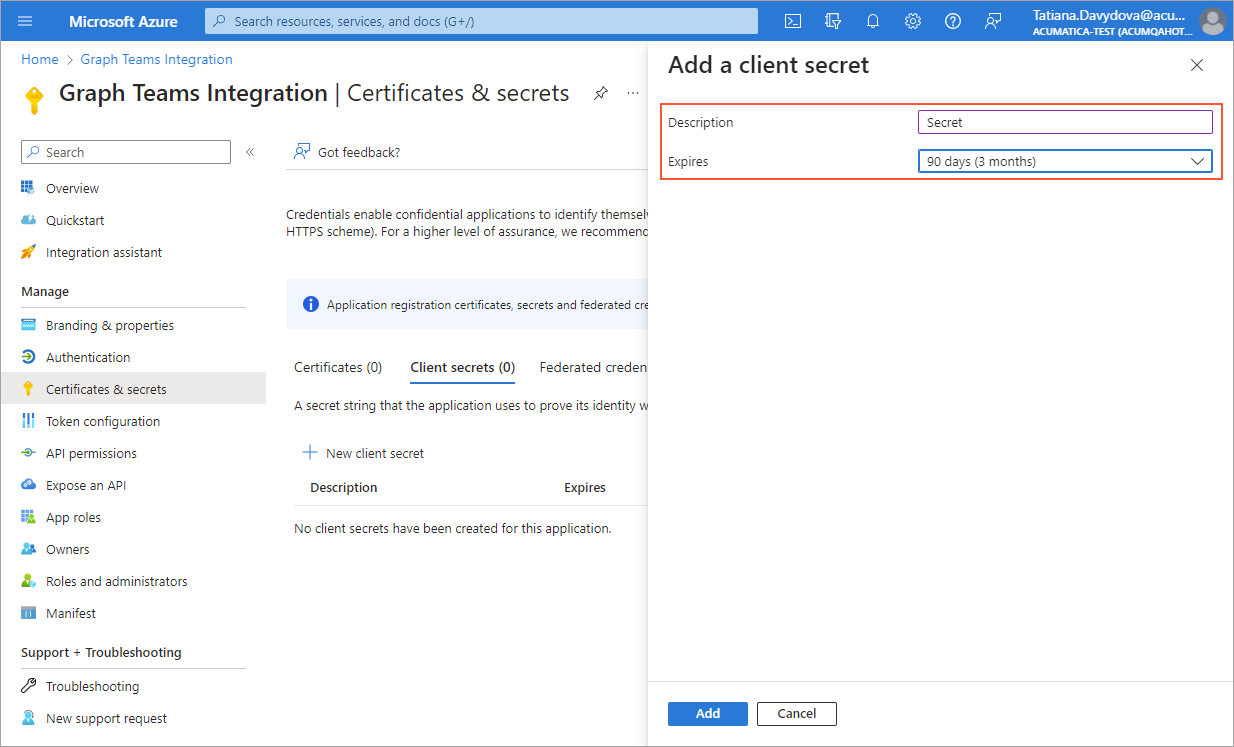
- Click Add to create a secret and close the pane.
- Immediately copy the value of the client secret, which appears in the
Value column of the Client
secrets pane (see the following screenshot), to use it as a
client secret in MYOB Acumatica.Important:You must copy the client secret value right after clicking Add and before you leave the page. The value will be hidden after you leave the page and will not be shown anymore.
Figure 5. The generated client secret 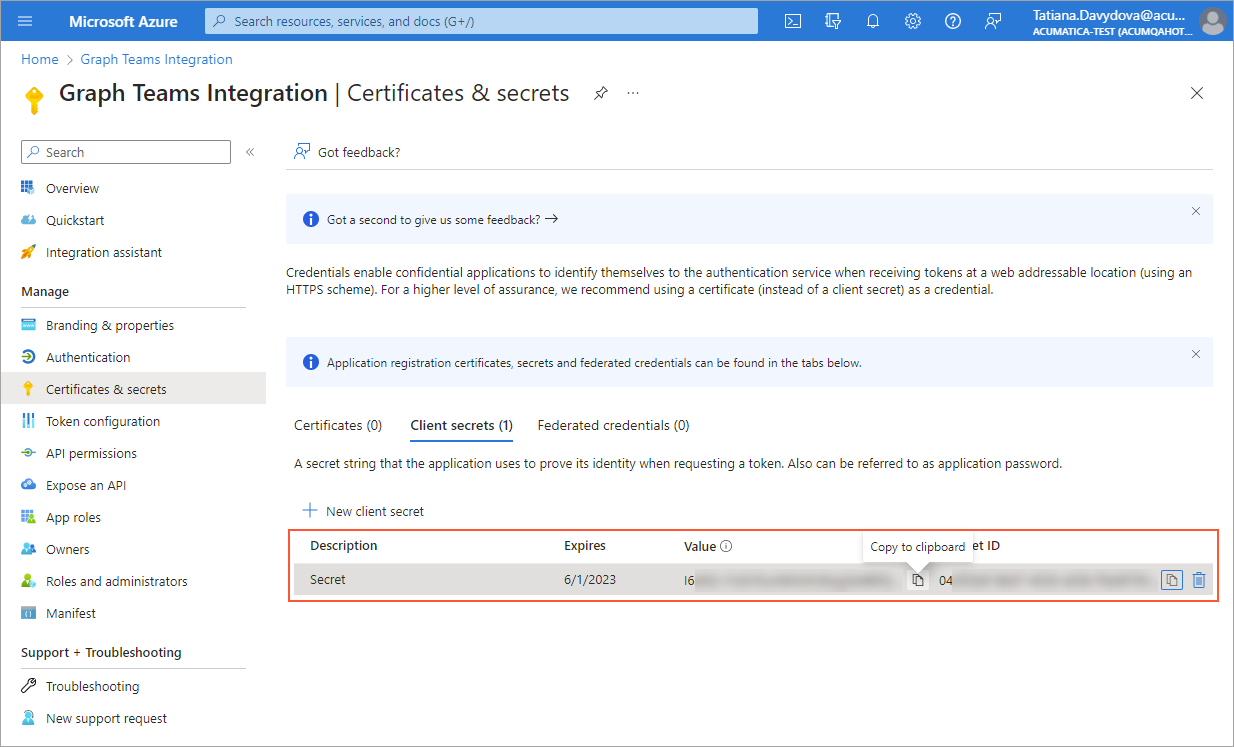
You have obtained the client secret for further use in your application. Now you can specify API permissions.
Step 3: To Add the Graph API Permissions
To add graph API permissions for your application, do the following:
- On the left pane, click API permissions.
- On the API permissions pane, click Add a
permission (see the following screenshot).
Figure 6. The addition of an application permission 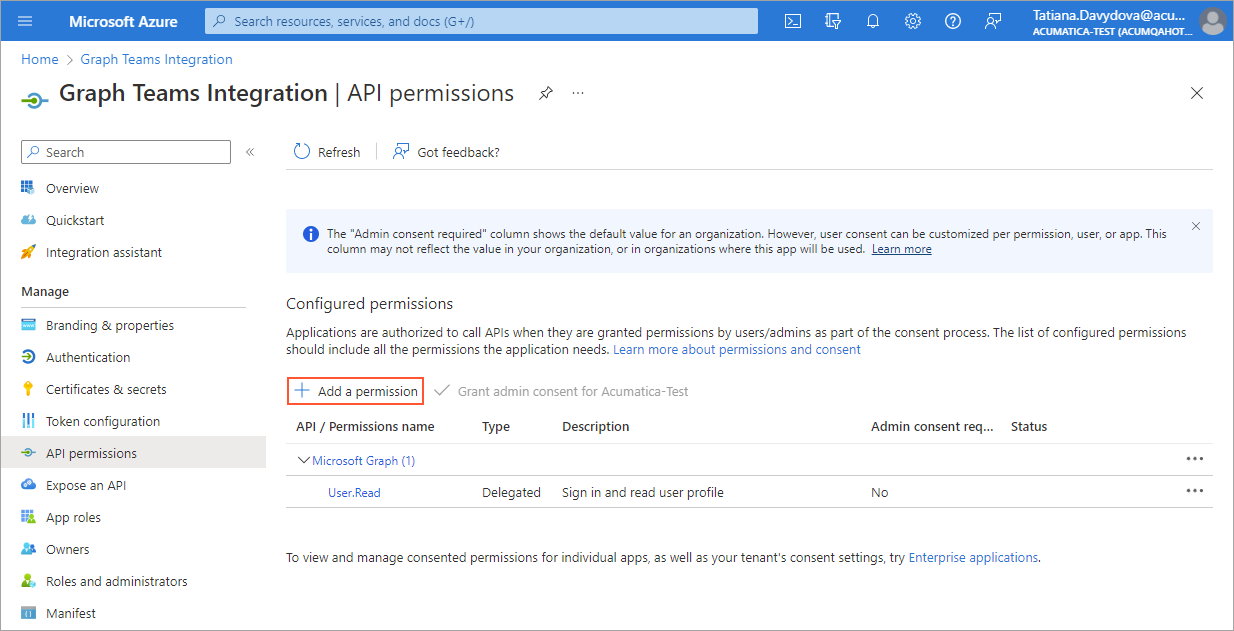
- On the Request API Permissions pane, click .
- In the Channel group, select the
Channel.ReadBasic.All permission (see the following screenshot). At
the bottom of the page, click Add permissions.
Figure 7. Selection of permissions 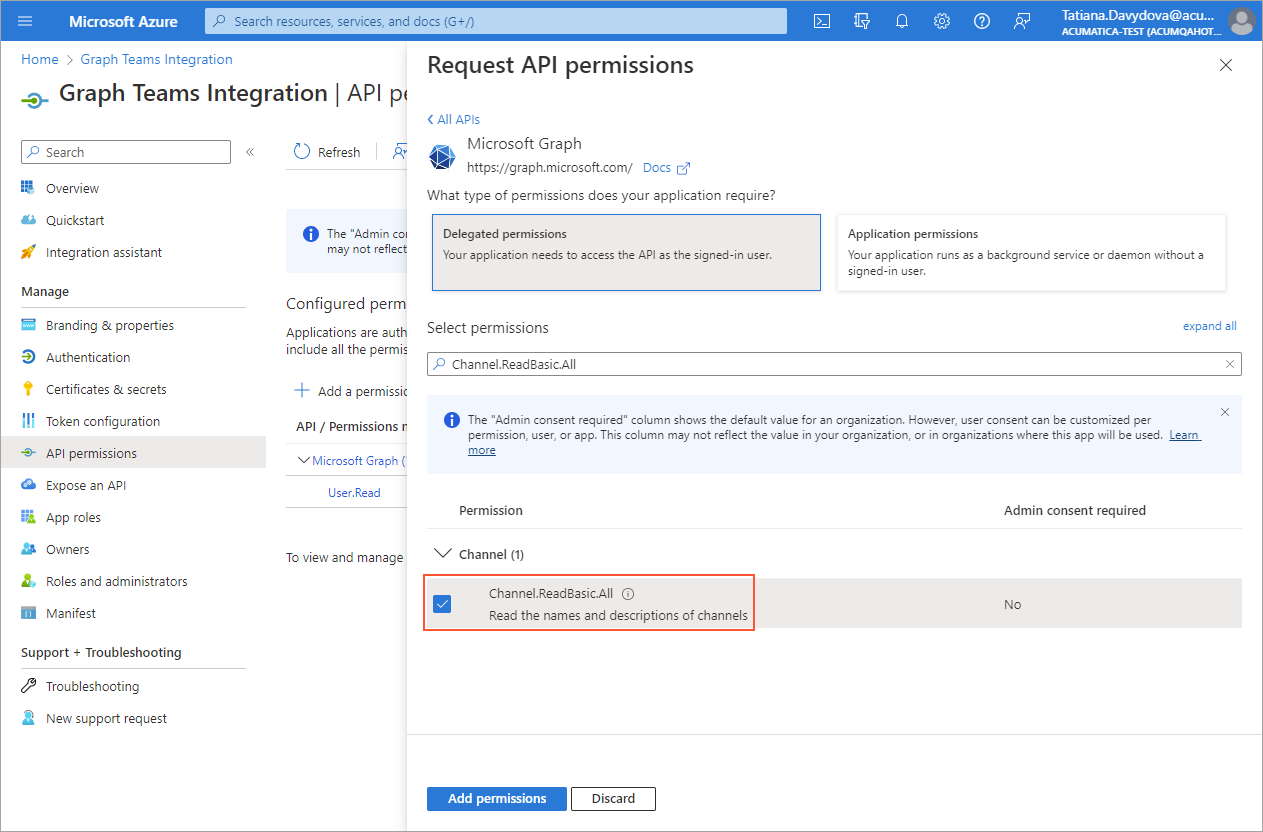
- By repeating the previous instruction, add the following permissions for your
application:
- ChannelMessage.Send
- Chat.Create
- ChatMessage.Send
- Files.Read.All
- GroupMember.Read.All
- offline_access
- Presence.Read.All
- Team.ReadBasic.All
- User.ReadBasic.All
- Click Grant admin consent for <Application_Name>.Important:To grant consent, you must have administrative access rights. Otherwise, you need to ask the instance administrator to grant this consent.
- Confirm your action by clicking Yes. The status of the
permission has been changed to Granted for <Azure_Instance_Name> (see
the Status column in the following screenshot).
Figure 8. Granted permissions 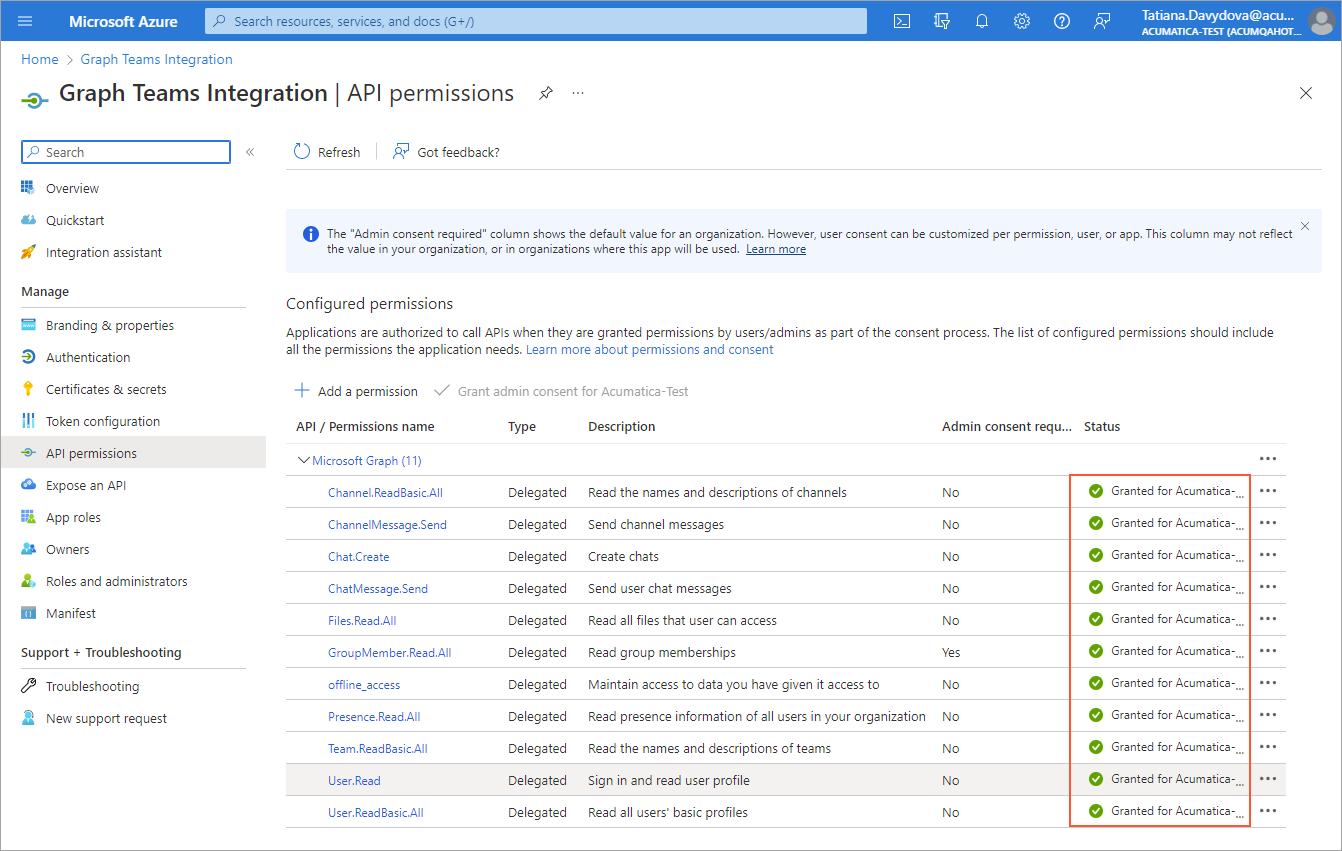
You have configured API permissions. Now you can specify your application ID URI.
Step 4: To Add the Redirect URI
The redirect URI is used as the destination when authentication responses (tokens) are returned after Microsoft Azure successfully authenticates users. To specify the redirect URI for your application, do the following:
- On the left pane, click Authentication.
- In the Platform configuration section, click Add a platform.
- On the Configure platforms pane, click Web.
- In the Redirect URIs box, type the URI of your MYOB Acumatica instance with /OAuthAuthenticationHandlerTeams added at the
end—that is,
Full_Acumatica_Instance_URL/OAuthAuthenticationHandlerTeams(see the following screenshot). For example, it could be http://localhost/Acumatica192000078/OAuthAuthenticationHandlerTeams.Figure 9. The specification of the redirect URI 
- Click Configure.Tip:It can take several minutes for the system to add the redirect URI.
You have specified the redirect URI of your MYOB Acumatica instance.