Business Events: To Automate Sending of a Notification on Data Change
This activity will walk you through the process of configuring a business event to monitor data changes using a data entry form as data source and email notification as a subscriber.
Story
Suppose that a sales manager needs to inform the employee who has been assigned to be the owner of an opportunity—that is, the employee that has been selected in the Owner box in the Summary area of the Opportunities (CR304000) form.
Acting as the system administrator, you need to configure a business event to automate the sending of notifications about the assignment.
Process Overview
To monitor a business event that is based on a change in a field on a specific form, you will initiate the creation of the business event from this form. Thus, you will open the Opportunities (CR304000) form and click on the form title bar.
In the Business Events dialog box, which opens, you will click Create Business Event, enter the name of the event in the dialog box, and click OK. The system will open the Business Events (SM302050) form with the data entry form selected as a data source.
On the form, you will trigger conditions and subscriber for the event. After the business event is configured and triggered, you will verify that the notification email appears on the All Records tab of the All Emails (CO409070) form.
System Preparation
Launch the MYOB Acumatica website, and sign in to a tenant with the U100 dataset preloaded as system administrator Kimberly Gibbs. You should sign in by using the gibbs username and the 123 password.
Step 1: Creating a Business Event Triggered by a Record Change
To configure a business event to monitor when an owner is assigned to an opportunity, do the following:
- Open the Opportunities (CR304000) form, and click on the form title bar.
- In the Business Events dialog box, which opens, click
Create Business Event, type Owner
Assigned in the dialog box, and click OK.
The system opens the Business Events (SM302050) form with an active business event for which the Opportunities form is selected as the data source in the Screen Name box and the event name you entered is specified in the Event ID box. Also, the system has populated the Type and Raise Event boxes with the options available only for a data entry form.
- In the Description box, type Owner Assigned.
- On the Trigger Conditions tab, add two rows with the
following values:
-
Row 1:
- Operation: Field Changed
- Table Name: Opportunity
- Field Name: Owner (OwnerID)
- Operator: And
-
Row 2:
- Operation: New Field Value
- Table Name: Opportunity
- Field Name: Owner (OwnerID)
- Condition: Is Not Empty
-
- On the form toolbar, click Save.
- On the Subscribers tab, click .
- On the Email Templates (SM204003) form, which opens, in the
Notification ID box of the Summary area, leave the
system-inserted value.
Notice, that the Attach Activity check box is selected by default. It means that the system will attach the email to each opportnunity that triggers the business event.
- In the Description box, type Owner Assigned.
- In the From box, select system@sweetlife.com.
- In the To box, open the selection dialog box, switch to the Screen Fields tab, select Entity -> Opportunity-> Owner-> Email and click Select.
- In the Subject box, type Owner Assigned to the ((Opportunity.OpportunityID)) Opportunity.
- In the Message area, type the following text:
Dear ((Opportunity.OwnerID.FirstName)),
You've been assigned to be the owner of the ((Opportunity.OpportunityID)) opportunity. Good luck!.
- On the form toolbar, click Save & Close.
Step 2: Assigning an Owner and Verifying that the Notification Works Correctly
You have configured a business event for which the responsible employee should receive an email when they are assigned to be owner. To test this event, you will assign an opportunity to an employee, David Chubb, and see if the notification works correctly. Do the following:
- Open the Opportunities (CR3040PL) generic inquiry form.
- On the All Records tab, click any record, and open the Opportunities tab on the side panel. On the tab, the system displays the Opportunities (CR304000) form with the details of the selected opportunity.
- In the Owner box of the Summary area, select David Chubb.
- On the form toolbar, click Save.
- Open the All Emails (CO409070) form.
- On the All Records tab, verify that a record with the
following settings is listed in the table:
- Summary: Owner Assigned to the 000012 Opportunity (the opportunity number may differ depending on which opportunity you have changed)
- From: "System" <system@sweetlife.com>
- To: chubb@sweetlife.com
Tip:You may need to refresh the inquiry results multiple times until the record appears. To do this, you click Refresh on the form toolbar. - Click the email to view its details on the Email Activity
(CR306015) form. Notice that the system has replaced the placeholders with the
data copied from the opportunity (see the following screenshot).
Figure 1. An email generated by the business event 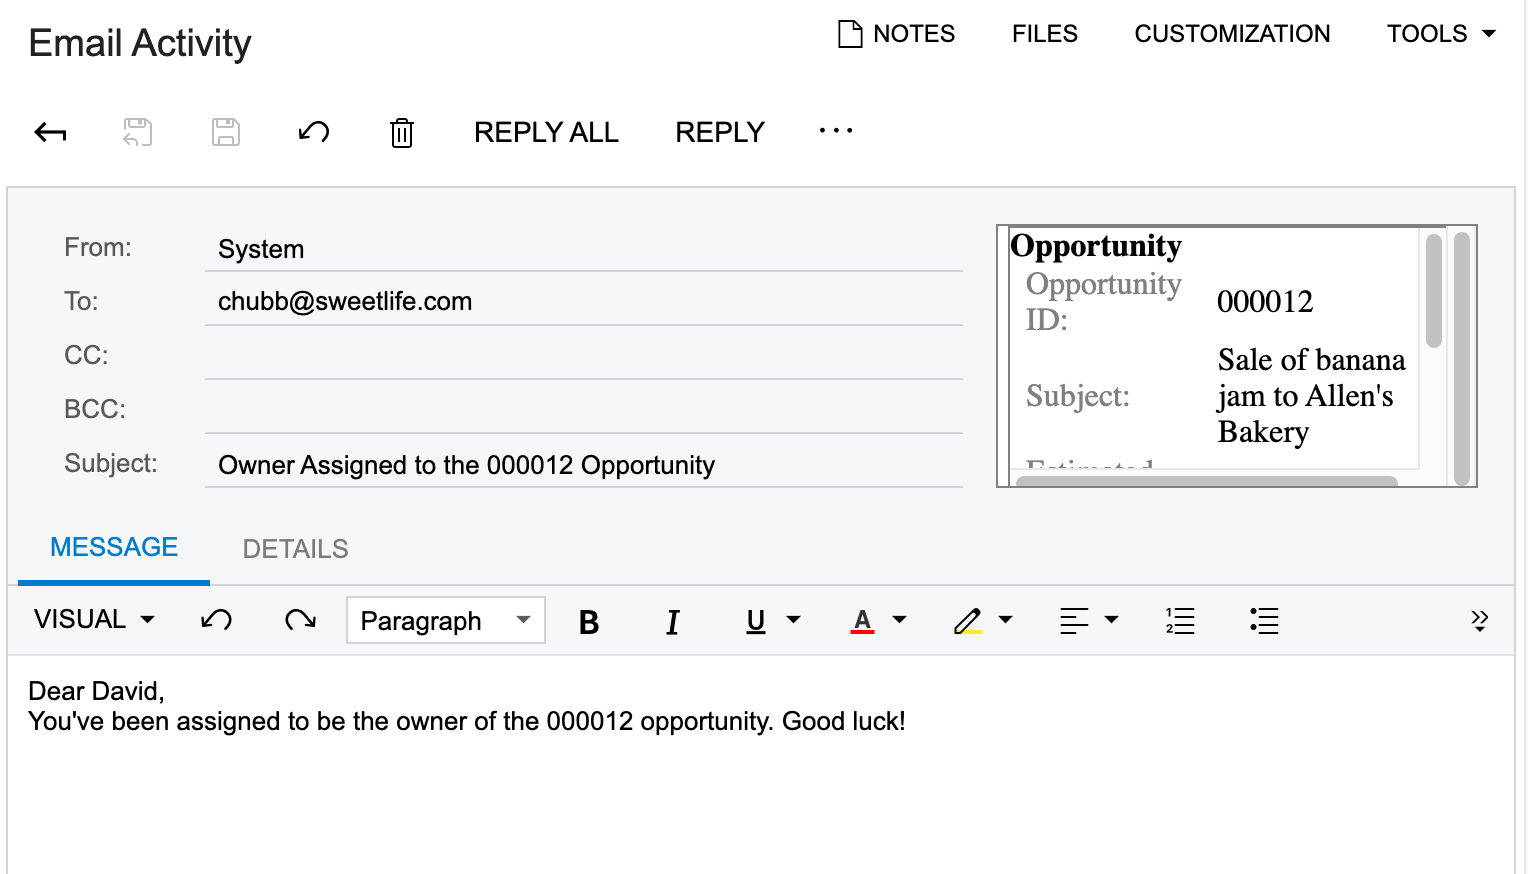
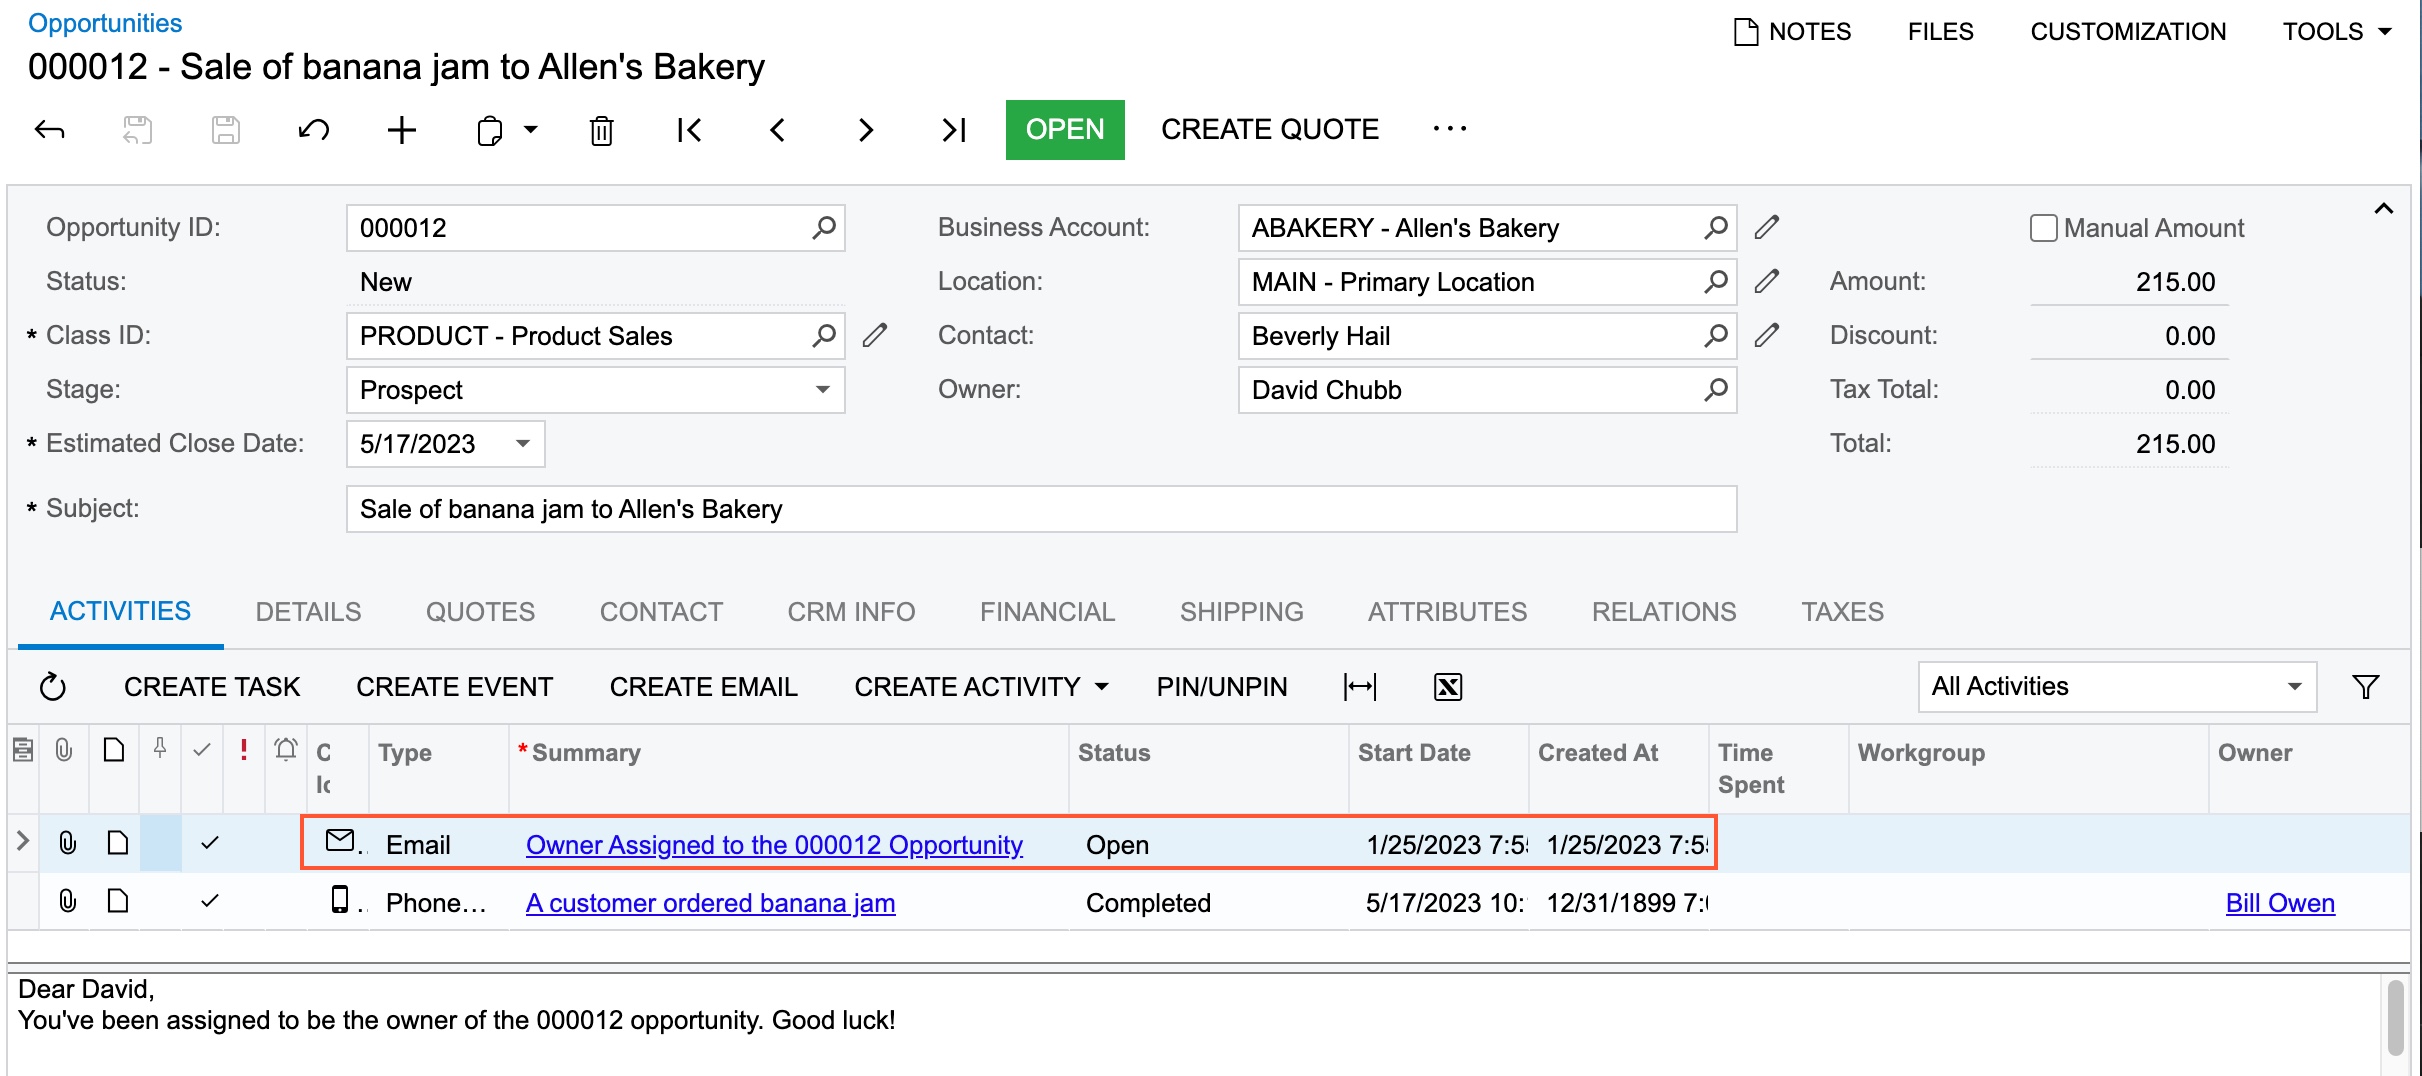
- Optional. You can view the email details on the
Activities tab of the Opportunities (CR304000) form for the opportunity (see the following screenshot). The
system attached the email as an activity to the opportunity because the
Attach Activity check box was selected for the email
template configured as subscriber.
Figure 2. An email activity generated and attached by the business event