
To Add a Box for a Data Field
- PXTextEdit
- PXNumberEdit
- PXMaskEdit
- PXDateTimeEdit
- PXCheckBox
- PXDropDown
- PXSelector
- PXSegmentMask
- PXTreeSelector
You can add a box for a data field without restrictions immediately to a PXFormView or PXTabItem element that has the DataMember property defined. Also, you can add a box for a data field to a PXPanel or PXGroupBox container that has the DataMember property inherited from the parent container.
Also, you can add a box for a data field to a RowTemplate element of a PXGrid container that is bound to a data view whose BQL statement refers to the data access class that contains the field declaration.
- Open the parent container in the Screen Editor, as described in To Open a Container in the Screen Editor.
- Ensure that the container node is selected in the Control Tree of the editor. Click the arrow left of the node to expand the node if needed.
- Click the Add Data Fields tab item (see the screenshot below).
- If you need to create a control for a data field that is not accessible through the data
view specified for the container in the DataMember property but is
accessible through another data view of the same graph, and if the Data
View box is available, select the needed data view in this box. (For
details, see Use of Multiple Data Views for Boxes in Containers
in the MYOB Acumatica Framework Guide.)Note:On the Add Data Fields tab item of the Screen Editor, if you change the predefined data view in the Data View box and create a control for a data field from the field list for the selected data view, the editor concatenates the data view name with the field name in the DataField property of the created control.
- On the tab item, click the All, Visible, or
Custom filter for the fields provided by the data view to view
the appropriate field list.Note:You can create a custom field immediately on the Add Data Fields tab item by clicking the New Field action and then using the Create New Field Dialog Box.
- Find the required data field in the list, and if the field is not used (the check box in the
Used column is cleared for the field), select the check box for
the field in the first (unlabeled) column, as the following screenshot shows.
Figure 1. Selecting a data field for which a box to be created 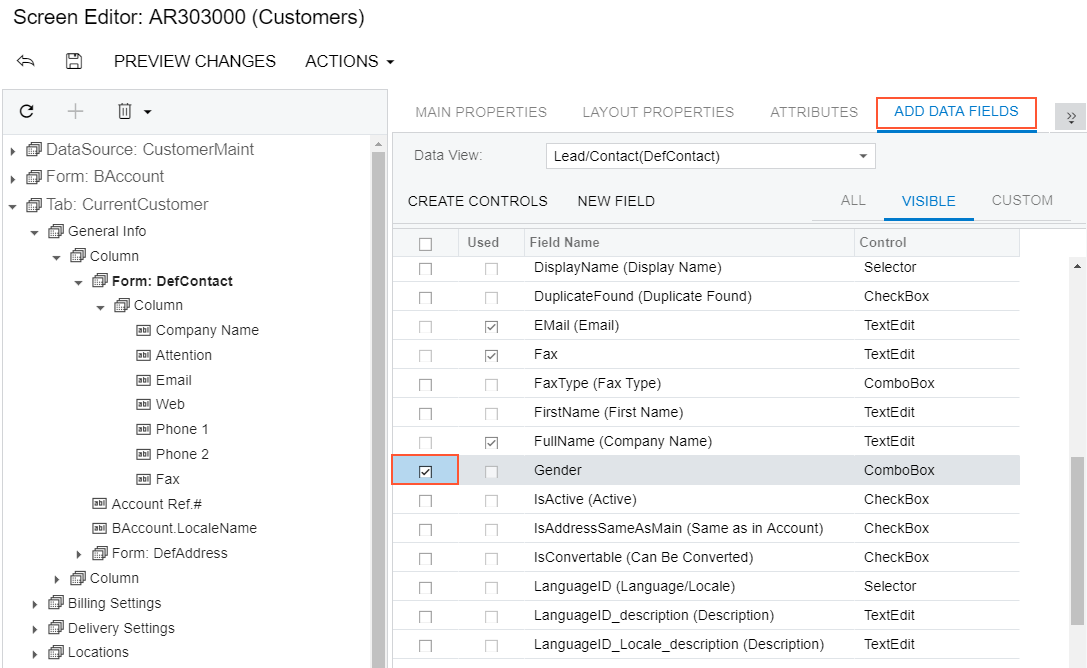
Note:You can select multiple data fields to create multiple boxes simultaneously. - On the list toolbar, click Create Controls.
The platform creates a box for the selected data field and adds a node for the box to the Control Tree.
- Click Save to save the changes in the customization project.
You can change the location of a control in a container. See To Reorder Child UI Elements for details.
For more information about boxes, see Box (Control for a Data Field).