Sales from Multiple Warehouses: Process Activity
In the following activity, you will process a sales order with items allocated in multiple warehouses.
Story
Suppose that the FourStar Coffee & Sweets Shop customer ordered cherry jam in 32-ounce jars and lemon jam in 96-ounce jars at SweetLife’s retail store. When entering this sales order, a sales manager has noticed that the 32-ounce jars of cherry jam are currently out of stock in the retail warehouse, and has decided to allocate the unavailable quantity of jam in the SweetLife’s wholesale warehouse.
To complete the customer’s request, acting as sales manager of the SweetLife store Regina Wiley, you need to enter the sales order and allocate the needed items, process a transfer of cherry jam from the wholesale warehouse to the SweetLife store's warehouse, and then process the sales order to completion.
Configuration Overview
In the U100 dataset, for the purposes of this activity, the following tasks have been performed:
- On the Enable/Disable Features (CS100000) form, the following features
have been enabled:
- Inventory and Order Management, which provides the standard functionality of inventory and order management
- Inventory, which gives you the ability to maintain stock items by using forms related to the inventory functionality and to create and process sales and purchase documents that include stock items
- Multiple Warehouses, which provides the ability to process transfers of items between warehouses
- On the Warehouses (IN204000) form, the WHOLESALE and RETAIL warehouses have been created.
- On the Customers (AR303000) form, the COFFEESHOP customer has been created.
- On the Stock Items (IN202500) form, the CHERJAM32 and LEMJAM96 stock items have been created.
- On the Order Types (SO201000) form, the TR order type has been configured.
Process Overview
In this activity, to perform a sale of stock items from multiple warehouses, you will create a sales order on the Sales Orders (SO301000) form, select the customer to which the items are being sold, and add items to the order. Then you will allocate the unavailable items in the warehouse in which these items are currently on hand.
To transfer items from the source warehouse to the destination warehouse, you will create a transfer order on the Create Transfer Orders (SO509000) form. Then you will process the transfer order to completion as follows:
- Process the related shipment between warehouses (which causes the items to be issued from the source warehouse) on the Shipments (SO302000) form.
- Process the related transfer receipt (which records the receipt of the items to the destination warehouse) on the Purchase Receipts (PO302000) form. After you process the transfer receipt, all the items required for the sales order become available in the destination warehouse, so that you can process the initial sales order to completion.
On the Shipments form, you will create a shipment document for the sales order and confirm the shipment. You then will use the Invoices (SO303000) form to prepare the corresponding invoice for the customer and release it.
System Preparation
Before you start performing a sale of stock items from multiple warehouses, you should do the following:
- Launch the MYOB Acumatica website with the U100 dataset preloaded, and sign in as purchasing manager Regina Wiley by using the wiley username and the 123 password.
- In the info area, in the upper-right corner of the top pane of the MYOB Acumatica screen, make sure that the business date in your system is set to today’s date. For simplicity, in this activity, you will create and process all documents in the system on this business date.
- On the Company and Branch Selection menu in the top pane of the MYOB Acumatica screen, select the SweetLife Store branch.
- Make sure that you have completed the Sales Order Types: To Activate the TR Order Type.
Step 1: Creating the Sales Order
To create the sales order, do the following:
- On the Sales Orders (SO301000) form, add a new record.
- In the Summary area, specify the following settings:
- Order Type: SO
- Customer: COFFEESHOP
- Description: Sale of cherry jam and lemon jam
- On the Details tab, add rows with the settings shown in
the following table.
Branch Inventory ID Warehouse Quantity Unit Price RETAIL CHERJAM32 RETAIL 10 16.89 RETAIL LEMJAM96 RETAIL 3 49.49 Notice that the system displays a warning in the Quantity column of the CHERJAM32 line indicating that the specified quantity is not available in the selected warehouse.
- On the form toolbar, click Save. The sales order is saved with the Open status.
Now you can reserve 32-ounce jars of cherry jam, which are not available in the SweetLife Store warehouse, in a warehouse which has a sufficient quantity of the item.
Step 2: Allocating the Items in Another Warehouse
To allocate the items that are not available in the RETAIL warehouse, while you are still viewing the sales order on the Sales Orders (SO301000) form, do the following:
- On the Details tab, click the CHERJAM32 line, and on the table toolbar, click Line Details.
- In the Line Details dialog box, which opens, do the
following:
- In the only line, select the Allocated check box.
- In the Alloc. Warehouse box, select WHOLESALE.
- Click OK to save your changes and close the dialog box.
Notice that the warehouse in the line on the Details tab has not changed, but in the table footer, the Allocated quantity is now equal to 10.
- On the form toolbar, click Save.
Now you can create a transfer order to move the items from the Wholesale warehouse to the SweetLife's Store warehouse.
Step 3: Creating the Transfer Order
To create the transfer order for the allocated items from the sales order, do the following:
- While you are still viewing the sales order on the Sales Orders (SO301000) form, click Create Transfer Order on the More menu.
- On the Create Transfer Orders (SO509000) form, which opens, select the unlabeled check box in the line with SO Allocated specified as the Plan Type and CHERJAM32 specified as the Inventory ID. This line is the transfer request related to the line of the sales order that you have allocated in another warehouse. In the line, make sure that WHOLESALE is specified as the From Warehouse and RETAIL is specified as the To Warehouse.
- On the form toolbar, click Process to process the transfer request you have selected. The system creates a transfer order of the TR order type and opens it on the Sales Orders form.
- In the Description box in the Summary area, type Transferred goods for sales order from COFFEESHOP.
- On the form toolbar, click Save.
Now you can process the created transfer order to completion.
Step 4: Processing the Transfer Order
To process the transfer order to completion, do the following:
- While you are still viewing the transfer order that you have created on the Sales Orders (SO301000) form, on the form toolbar, click Create Shipment.
- In the Specify Shipment Parameters dialog box, which opens, make sure that today's date and the WHOLESALE warehouse are selected, and click OK. The system creates a shipment with the Transfer type and opens it on the Shipments (SO302000) form.
- Review the Summary area of the shipment, and make sure that Warehouse ID is WHOLESALE and To Warehouse is RETAIL. Also, review the only line included in the shipment, and make sure its details are correct.
- On the form toolbar, click Confirm Shipment. The shipment is assigned the Confirmed status.
- On the form toolbar, click Update IN to generate the inventory transfer transaction that issues the items from the source warehouse to the destination warehouse. The shipment is assigned the Completed status.
- On the Orders tab, click the link in the Inventory Ref. Nbr. column in the only row.
- On the Transfers (IN304000) form, which opens in a pop-up window, make sure that the generated inventory transfer has the Released status.
Step 5: Processing the Transfer Receipt
To process the transfer receipt, do the following:
- On the Purchase Receipts (PO302000) form, add a new record.
- In the Summary area, specify the following settings:
- Type: Transfer Receipt
- Warehouse: RETAIL
- On the table toolbar of the Details tab, click Add Transfer. The Add Transfer Order dialog box opens. It shows the list of completed transfer orders with completed shipments whose items have not been received to the destination warehouse yet.
- In the dialog box, select the unlabeled check box for the transfer order you have processed earlier, and click Add & Close to close the dialog box and return to the Purchase Receipts form.
- On the Details tab, review the details of the added line with the CHERJAM32 item.
- On the form toolbar, click Release to release the transfer receipt.
- On the Other tab, click the IN Ref. Nbr. link to open the related inventory receipt transaction on the Receipts (IN302000) form.
- Make sure the inventory receipt has the Released status, which means that the items have been received to the RETAIL warehouse and are now available for shipping. Close the pop-up window.
Now you can finish processing the sales order, because all of the ordered items are on hand in the SweetLife’s Store warehouse.
Step 6: Processing the Shipment
To create and process the shipment that is associated with the sales order, do the following:
- On the Sales Orders (SO301000) form, open the sales order of the SO type that you have created in Step 1, and on the form toolbar, click Create Shipment.
- In the Specify Shipment Parameters dialog box, which opens, make sure that today's date and the RETAIL warehouse are selected, and click OK. The system creates a shipment and opens it on the Shipments (SO302000) form.
- On the Details tab, make sure that both order lines have been included in the shipment and that the shipped quantity in both lines is equal to the ordered quantity.
- On the More menu, click Confirm Shipment.
The shipment is assigned the Confirmed status, and now you can prepare the invoice to bill the customer and increase the customer's debt in the system.
Step 7: Processing the Sales Invoice for the Customer
To complete the processing of a sale, you need to generate an invoice to the customer. Do the following:
- While you are still viewing the shipment that you have created on the Shipments (SO302000) form, on the form toolbar, click Prepare Invoice.
- On the Invoices (SO303000) form, which opens, review the details of the invoice to make sure that both items have been included in the invoice.
- On the form toolbar, click Release to release the invoice.
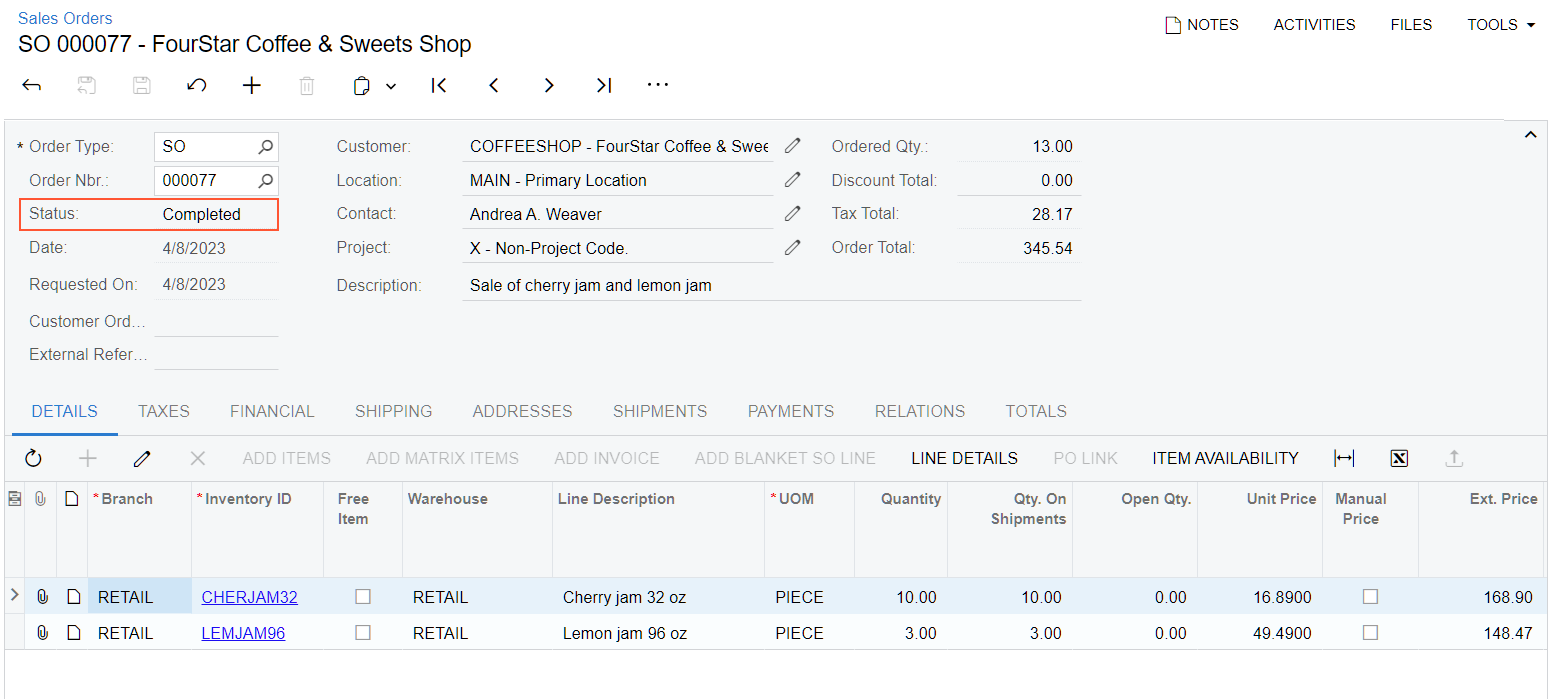
- Return to the sales order of the SO type on the Sales Orders (SO301000) form that you created in Step 1, and
notice that the order is now assigned the Completed status, as shown in
the following screenshot.
Figure 1. Sale from multiple warehouses completed