
Integration with LLM Providers: Creation of LLM Prompts
Once you’ve connected to your LLM provider, you define the instructions that tell the model what to do. These instructions are stored as prompts. The system uses each prompt to generate the full request sent to the LLM when a user runs a command or test.
After you activate a prompt, AI Automation adds a new command to the corresponding MYOB Acumatica form. Users can click this command to generate content automatically—for example, to create product descriptions or closure notes.
In this topic, you’ll learn how to configure prompt settings, write instructions for the model, specify output formatting, test your prompts with sample data, and test the generated command.
Creating a Prompt
You create a prompt on the LLM Prompts (ML202000) form, which is shown below. The prompt defines the full structure of the request sent to the LLM—including instructions, input data, and output formatting.
In the Summary area of the form, you specify the basic settings of the prompt. You use the Prompt Testing section when you're ready to test it (as described later in this topic).
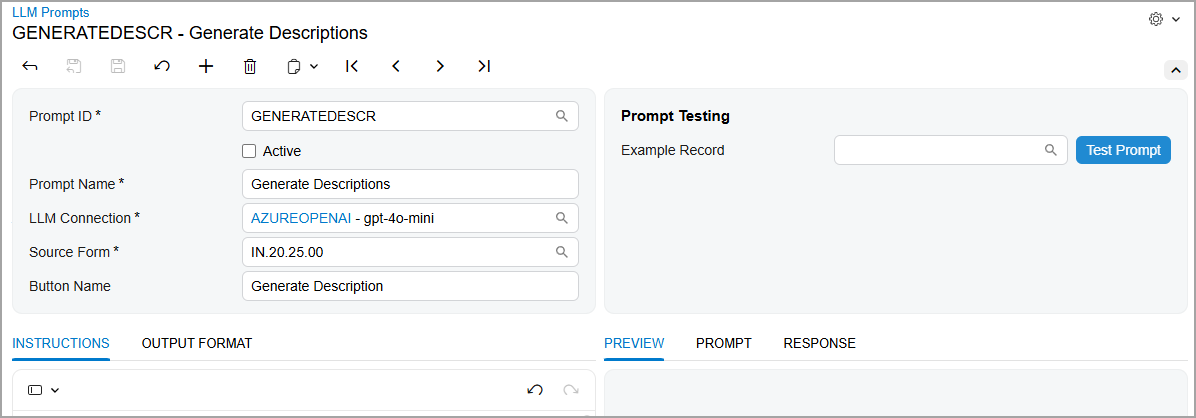
You specify the following basic settings:
- Prompt ID: The internal identifier of the prompt.
- Active:
A check box that you
select to create the command on the source
form.
The command appears on the form after you select this check box and save your changes.
- Prompt Name: The prompt’s display name. This name is also used for the command (and button) if the Button Name box is left blank.
- LLM Connection: The name of the connection you are going
to use.
Although
you can create a prompt without a connection, you need a connection to test and
use it.Tip:The lookup table in the LLM Connection box displays only connections that have been tested—that is, connections with the Active status.
- Source Form: The data entry form for which the button and command will be created.
- Button Name (optional): The name of the command on the
More menu that the model will generate.
If you leave this box empty, the system will use the prompt name as the command and button name.
Adding Instructions for the Model
In the prompt, which you create on the LLM Prompts (ML202000) form, you specify how the LLM should process data and what data it should return.
On the Instructions tab of the bottom left pane, shown below, you enter instructions for the LLM, providing as much relevant detail as possible. By default, the tab contains three sections—which you should preserve for best results:
- Context Instructions: General instructions for the model,
such as the business context, the role for which the prompt is executed (for
example, write like a sales manager), or the tone and style of the output
text.Important:These instructions affect the results and the correct execution of the prompt. Avoid removing them; instead, adjust them as needed.
- Instructions with Input Data: A description of what the model should do and what data it should use. You can use only data fields from the source form as input data.
- Output Data Field: Which
fields
(elements on the form) the model should fill in, how it should fill them in, and
what constraints apply to the task this command will help the user perform. You
can specify only fields from the source form.Important:If the instructions don’t include output fields, the system displays an error when you try to generate an example or test the prompt.
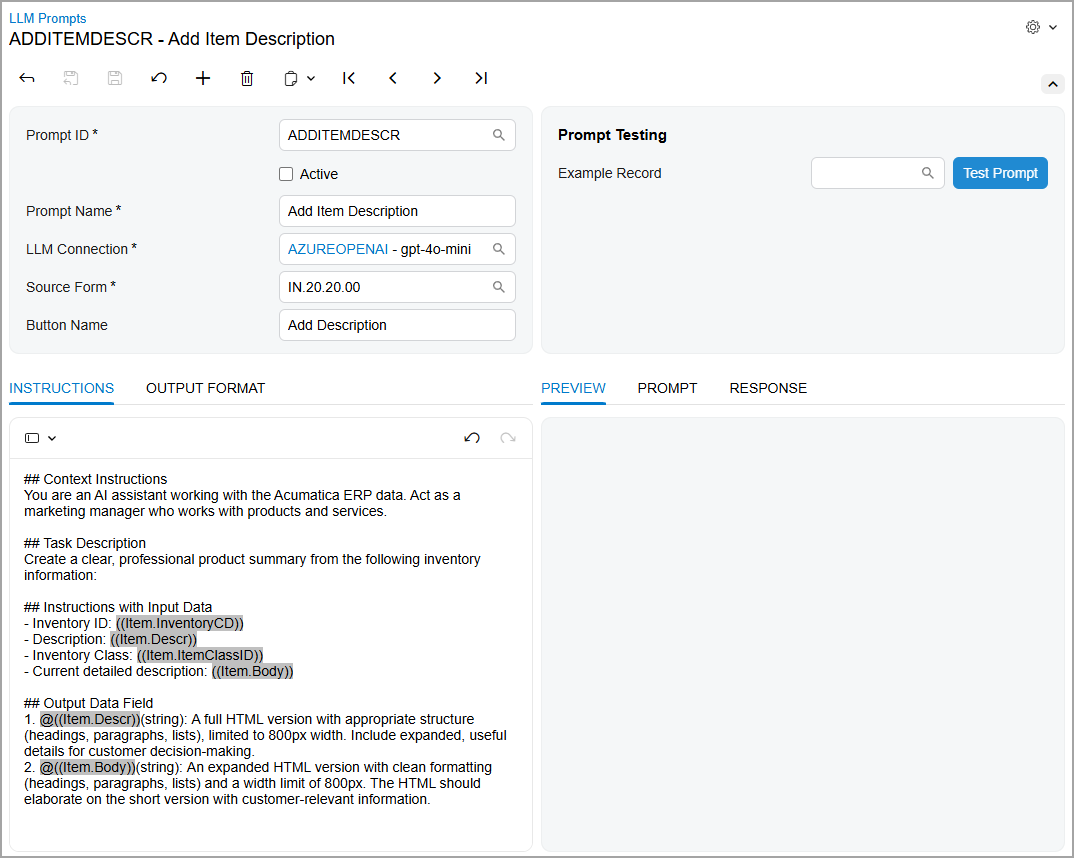
You can also add your own sections to refine the instructions; existing sections can
be modified or
removed.
Optionally, you can precede the name of each new section with ## or
any other notation.
Specifying the Output Format
On the Output Format tab of the LLM Prompts (ML202000) form (bottom left pane), shown below, you specify how the model should format the data it returns:
- Output Format Example: An example of the data the model should return.
- Important Note: Information about how the returned data
should be formatted.Attention:Avoid removing this section. It provides guidance on what data the model should return and how this data should be formatted, which significantly improves the quality of the results.
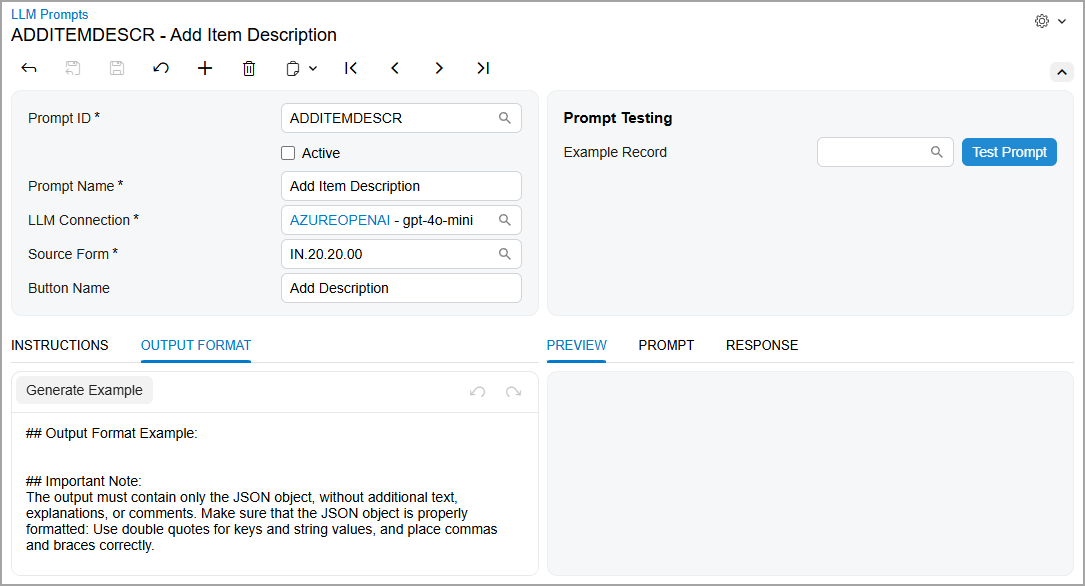
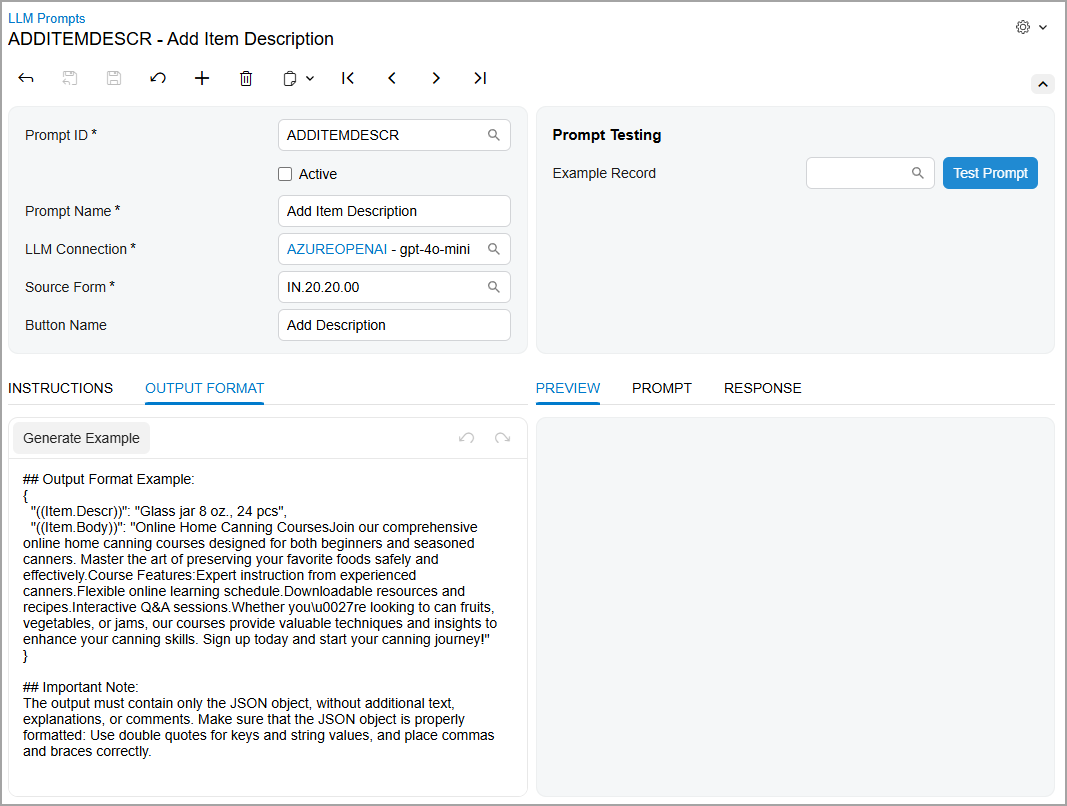
To see an example of the returned data, you click Generate Example on the formatting toolbar. The system generates sample output (see below) based on the output fields specified on the Instructions tab. For these fields, the system uses randomly chosen values from the database. You can edit the example, if needed.
Testing the Prompt
After you configure the prompt, you need to test it on the data from your instance. In the Prompt Testing section of the LLM Prompts (ML202000) form:
- In the Example Record box, select a record of the source
form.
The system adds the full prompt—the data from the Instructions and Output Format tabs—to the Prompt tab of the bottom right pane. It replaces placeholder fields with real values. For example, notice that the system has replaced the
Item.InventoryCDinput field (Item 1 below) with the ID of the record selected in the Example Record box (Items 2 and 3).Figure 5. Testing the prompt 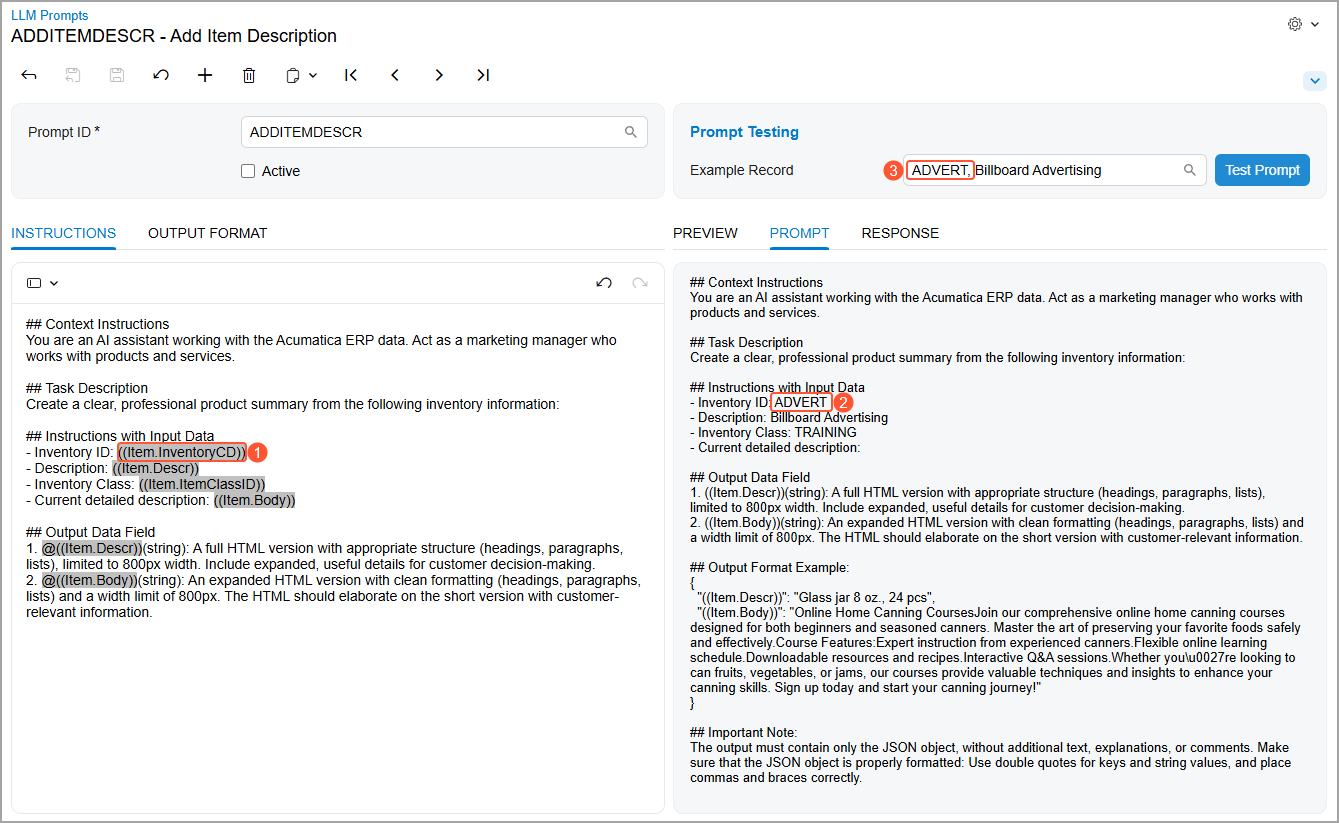
- Click Test Prompt.
The system sends the instructions to the LLM. The Response tab (bottom right pane) displays the returned data in JSON format (shown below).
Figure 6. The response from the model 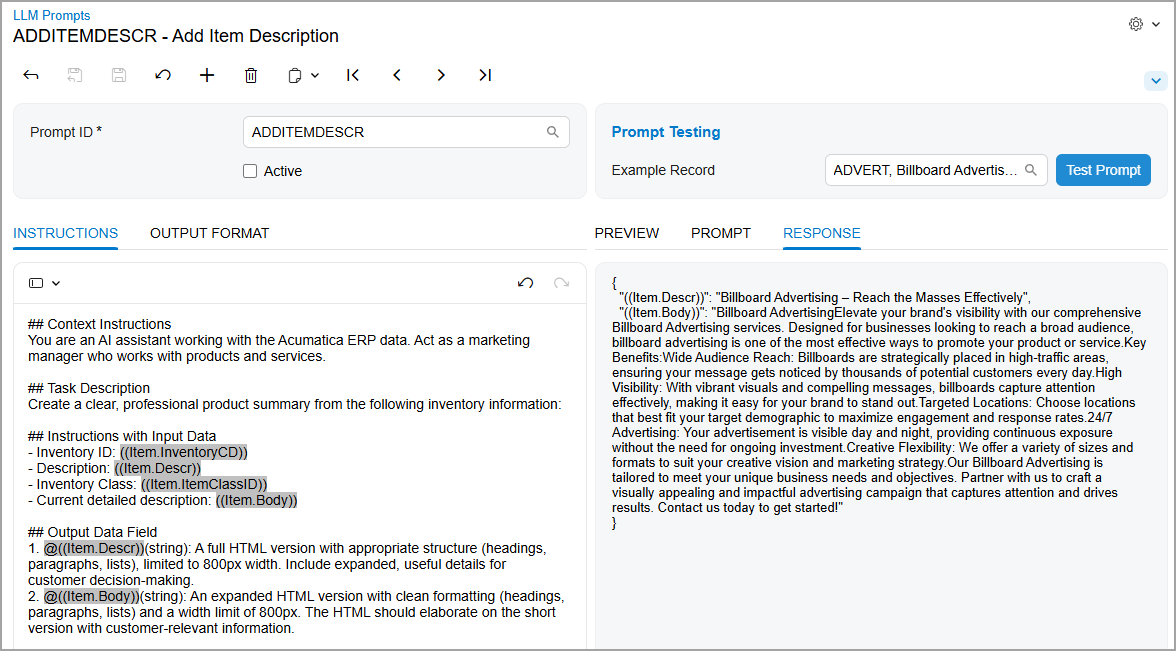
- Review the Preview tab (bottom right pane) to see how
this data will be displayed on the corresponding form (see below).
Figure 7. The preview of the generated description 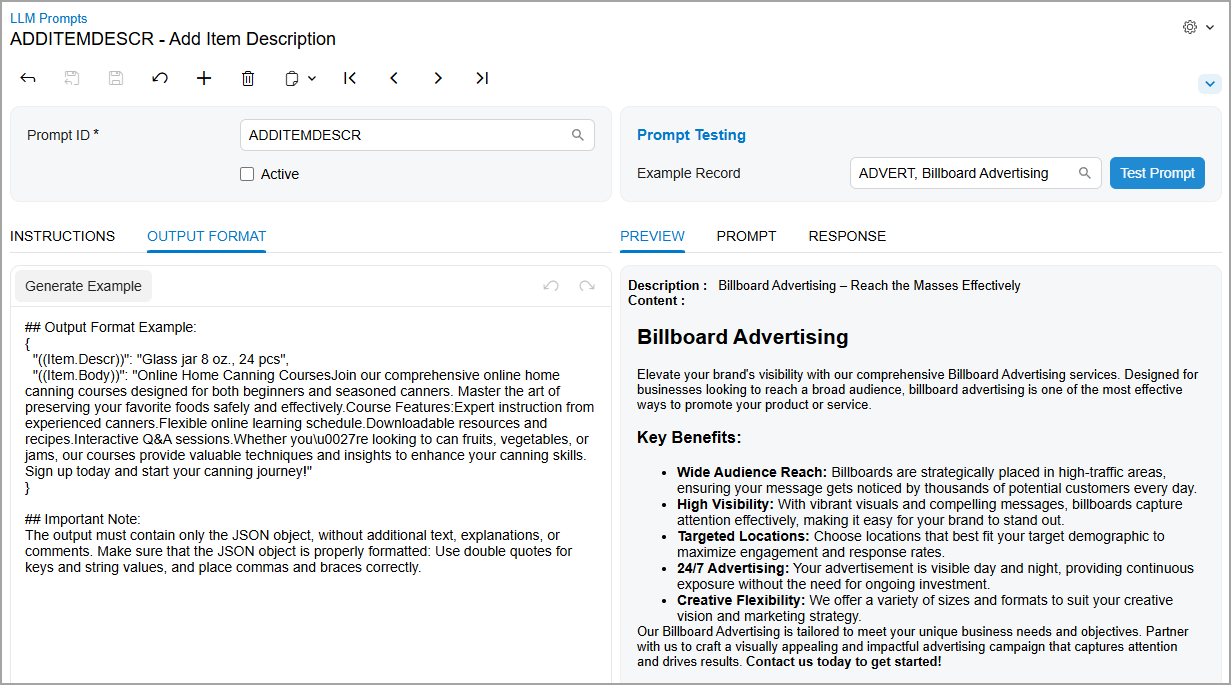
If you aren’t satisfied with the results, you can modify the prompt and test it again.
- To go live, select the Active check box in the Summary area and save your changes. Selecting this check box adds the LLM command to the source form.
Testing the LLM Command
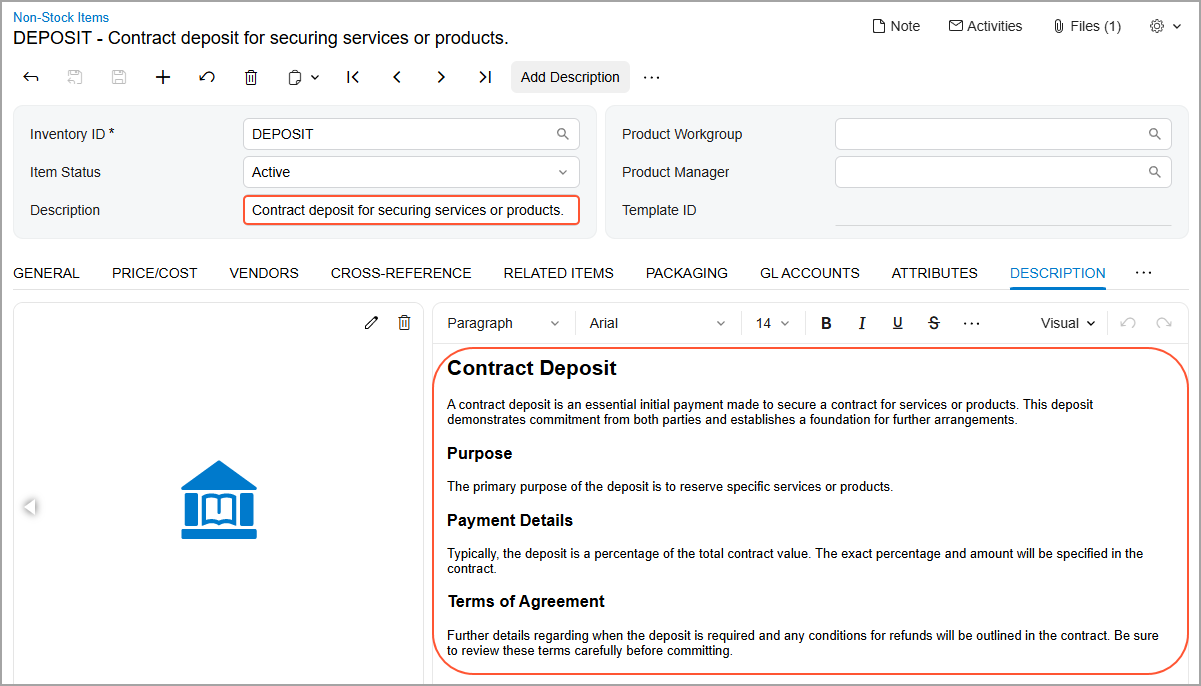
Now you need to test the new command (Item 1 below), which is shown on the More menu of the corresponding form—the Non-Stock Items (IN202000) form in this example. Before you click this command, the Description box (Item 2) and the Description tab (Item 3) may contain some text or may be empty.
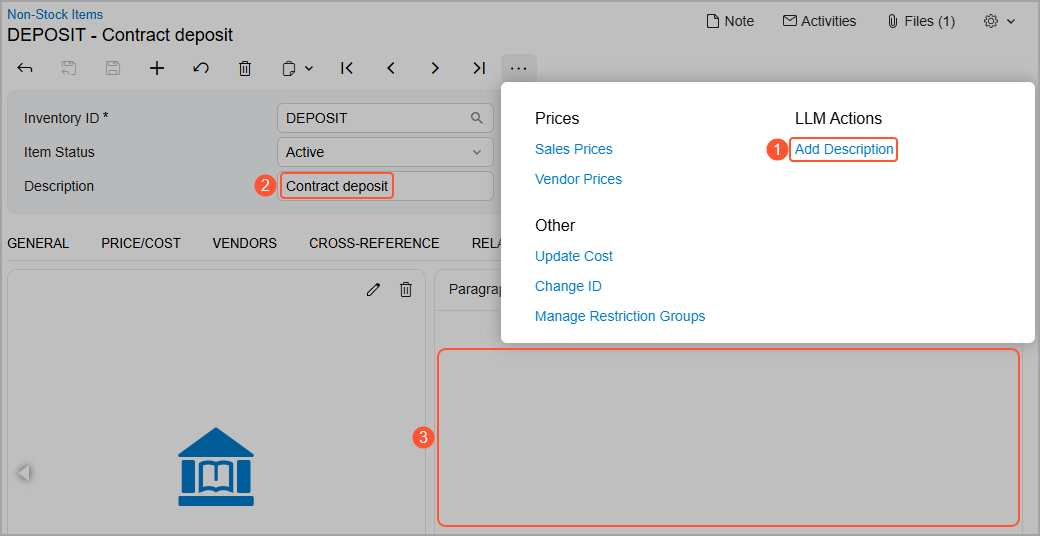
When you click the command or the button, the system updates the text in the Description box and adds a detailed description to the tab (shown below).
If you aren’t satisfied with the generated descriptions, you can:
- Edit the generated text
- Click the button again to cause the system to generate new text