
Actions on Forms: General Information
When you customize a form, you might need to add actions that invoke certain operations.
Learning Objectives
In this chapter, you will learn how to do the following:
- Add actions to a form, which appear on the form as buttons on the form toolbar and commands on the More menu
- Test the buttons and commands associated with the added actions
Applicable Scenarios
You add actions to a form in the following cases:
- The default commands on the More menu and buttons on the form toolbar do not provide the needed functionality
- You want to give users quick access to operations that they need to perform regularly
Configuration of Actions for a Form
Before you start configuring actions for a particular form, you need to make sure that this form has been added to the customization project on the Screens page. You can configure the following types of actions:
- Actions that redirect a user to a different form or report
- Actions that open a side panel with supplementary information
- Actions defined in a graph
- Workflow actions that change the state of the applicable record
In this chapter, you will learn about the configuration of actions of the first two types. You can create graph actions only in the code (see Action Customization: General Information for details). For details on how to add actions that perform transitions in a workflow, see topics in the Configuring Actions and Implementing Workflow Actions chapters.
Use of the Actions Page
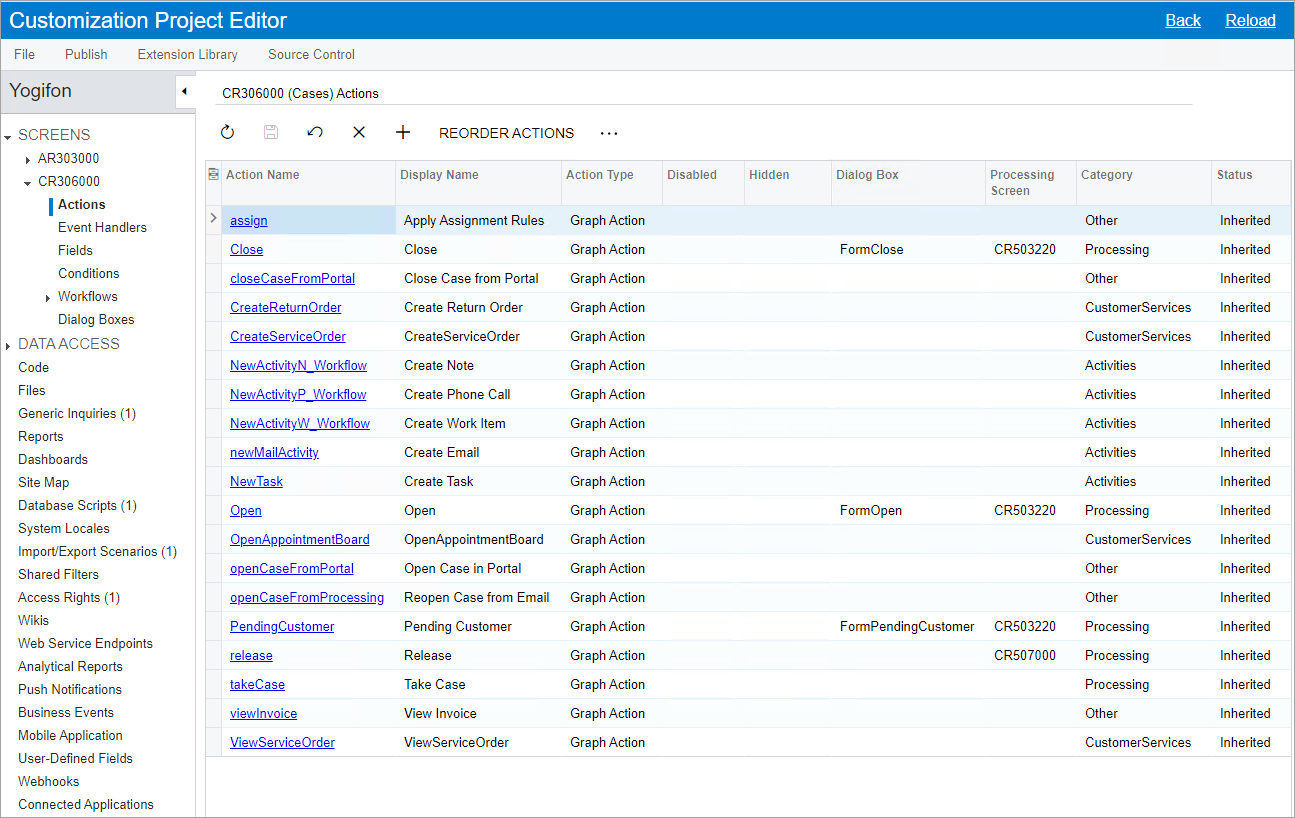
When you want to add an action to a form, you use the Actions page of the Customization Project Editor. The following screenshot shows the Actions page for the Cases (CR306000) form. This page contains predefined actions—that is, actions that are defined for the form in the out-of-the box system.
Modification of the Form's Actions
You modify a form's actions in any of the following ways:
- Add predefined actions that are not listed on the Actions page. These are actions that are predefined in the system for this form but that MYOB developers have not added to the form's workflow.
- Add actions that you create to meet your users' specific needs.
- Modify the properties of any action defined for the form (and thus listed on the page), regardless of whether it is predefined or created by a customizer.
To understand which of the listed actions are predefined and which are new, you review the Status column for each action. Predefined actions that MYOB developers have added to this page for this form have the Inherited status. All actions that you have added to the Actions page (including existing graph actions) have the New status. If you have modified a predefined action, its status changes to Modified.
On the Actions page, you add an action by clicking Add New Action on the page toolbar, and specifying the action settings in the Action Properties dialog box. Depending on the type of the action, you can specify any of the following settings for it:
- The dialog box that the system should display when a user invokes the action
- An indication of whether the action is disabled or hidden on the form
- The category of the More menu in which the menu command associated with the action should be displayed
- An indication of whether the action should be displayed on the form toolbar as a button
- The connotation for the action
- The access rights that a user needs to invoke the action and to be able to view it on the form
Additionally, you can specify the navigation parameters for the action, and the fields that the system should update when the user invokes this action. For the graph actions, on the Action Parameters tab, you can specify a set of action parameters and their values; these values should be assigned before the action method is invoked.
If you add an existing action to the form, some of the boxes in the Action Properties dialog box are unavailable for editing.
You can also change the order in which the menu commands associated with the actions are displayed under categories of the More menu, and manage categories of the More menu. If no category is specified for an action, its command will be listed under the Other category. For details, see Action Configuration: General Information.
If you have modified any predefined actions, you can view the changes by clicking View Changes on the More menu of the Actions page. You can also return the action properties to the original predefined state by clicking Reverse Changes on the More menu (under Changes).
Addition of Actions Defined in the Graph
For a particular MYOB Acumatica form, you can add actions that are defined in the graph that corresponds to the form. To add such action, you click Add Existing Action on the More menu of the Actions page opened for the form. By default, these actions are displayed on the form according to the properties of the PXButton attribute specified for the action, which the As Configured in Graph option in the Action Properties Dialog Box indicates.