
Integration with LLM Providers: General Information
Employees in your company often need to repeat the same set of tasks every day. This could be adding descriptions for stock and non-stock items, assigning opportunities to workgroups, or writing closure notes for cases.
If you’ve deployed an LLM through a provider, you can configure it to generate the text in MYOB Acumatica. With AI Studio, your organization can connect its large language model (LLM) to MYOB Acumatica without separate security validation. The LLM can then generate helpful, task-specific content right in the system.
Setting up AI Studio is quick and easy. You'll create a connection to your LLM, create a prompt definition with instructions for what you want it to do, and test everything before you go live. With the integration in place, AI Studio adds a new command to the More menu, a user clicks it, and the LLM takes care of the rest.
Learning Objectives
In this chapter, you will learn how to do the following:
- Create a connection to the LLM and test this connection
- Create a prompt definition with the instructions for the model
- Test the prompt definition
- Test the generated command
Applicable Scenarios
You configure the connection to an LLM provider in the following cases:
- You are a system administrator responsible for integration with external systems.
- You are a customizer who works on simple customizations.
Preparation for the Integration
Before you begin creating prompt definition for the LLM, make sure that the following is true:
- You've enabled the AI Studio feature on the Enable/Disable Features (CS100000) form.
- You have an account with an LLM provider.
- You've deployed an LLM on this provider's website.Important:AI Studio sends potentially sensitive data to your chosen LLM provider. The provider processes this data but does not store it. Ensure that this aligns with your company's data handling policies before using this functionality.
MYOB Acumatica supports the following LLM providers:
- Azure
- Amazon Bedrock (AWS)
- OpenAI
- Anthropic
Creation of an LLM Connection
You start the setup process by configuring the connection between the LLM and the system on the LLM Connections (ML201000) form, which is shown below. This includes specifying the following settings:
- Connection ID: A unique identifier of your connection.
- Connection Name: The display name of the LLM, which you can use to identify your connection. (You can use the name specified on the LLM provider's website.)
- LLM Provider: The name of the LLM provider that you are
going to use. Tip:You click Refresh to the right of this box to load the up-to-date list of available providers.
- Connection Parameters: The parameters that are used to connect to the LLM. The list of parameters depends on the provider and the model that you're using. You copy the needed values from the model’s page on your provider's website.

To make sure the connection works, you click Test Connection on the form toolbar. The system sends a request to the LLM provider, which verifies the connection data.
Once the system verifies the connection and its status becomes Active (shown below), you proceed to the next step.

Creation of Prompt Definitions
You create prompt definition on the LLM Prompts (ML202000) form, which is shown below. A prompt definition establishes the full structure of a prompt—including instructions, input data, and output formatting. The system uses this definition to generate actual prompts when users click a command or run a test.
The form has two panes: You use the left pane for specifying the settings and the right one for testing the prompt definition.
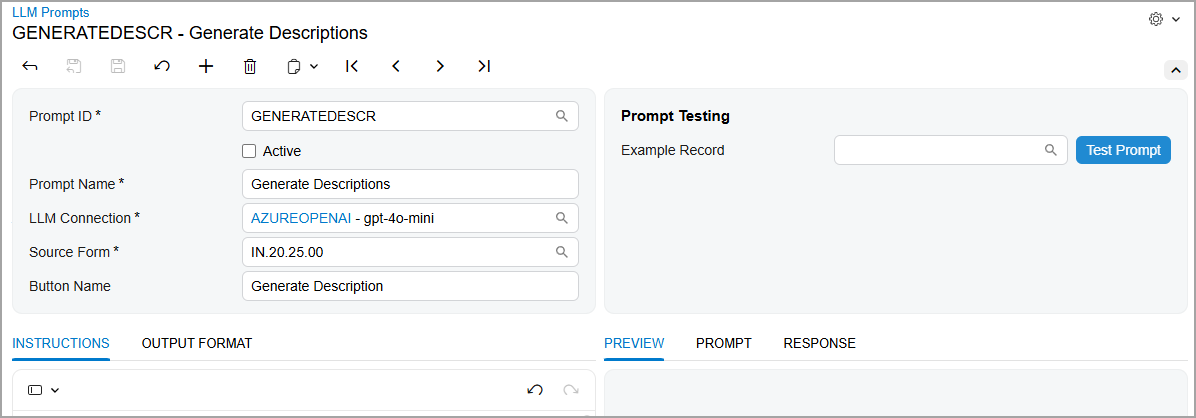
On the left pane, you specify the following settings:
- Prompt ID: The internal identifier of the prompt definition.
- Active: The check box that you select to create the command on the source form.
- Prompt Name: The prompt definition’s display name. This name is also used for the command (and button) if the Button Name box is left blank.
- LLM Connection: The name of the connection that you've
created in the previous step.
You
can create a prompt definition without a connection; however, you need a
connection to test this definition and use it.Tip:The lookup table in the LLM Connection box displays only connections that have been tested—that is, connections with the Active status.
- Source Form: The data entry form for which the button and command will be created.
- Button Name (optional): The name of the command on the
More menu that the model will generate. If a user marks the command as a
favorite, the system also adds it to the form toolbar as a button.
If you leave this box empty, the system will use the prompt name as the command and button name.
Adding of Instructions for the Model
In the prompt definition, you specify how the LLM should process data and what data it should return.
On the Instructions tab of the LLM Prompts (ML202000), which is shown below, you enter instructions for the LLM, providing as much relevant detail as possible. By default, the tab contains three sections—which you should preserve for best results:
- Context Instructions: You enter general instructions for
the model. These could include the business context, the role for which the
prompt is executed (for example, write like a sales manager), or the tone
and style of the output text.Important:Context instructions affects the results and the correct execution of the prompt. Avoid removing these instructions; instead, edit them to fit your task.
- Instructions with Input Data: You describe what the model should do and what data it should use. As input data, you can use the fields from only the source form.
- Output Data Field: You specify which
fields
the model should fill in, how it should fill them in, and what limitations apply
to the task. You can specify fields from only the source form.Important:If the instructions do not contain output fields, the system displays an error when you try to generate an example or test the prompt.
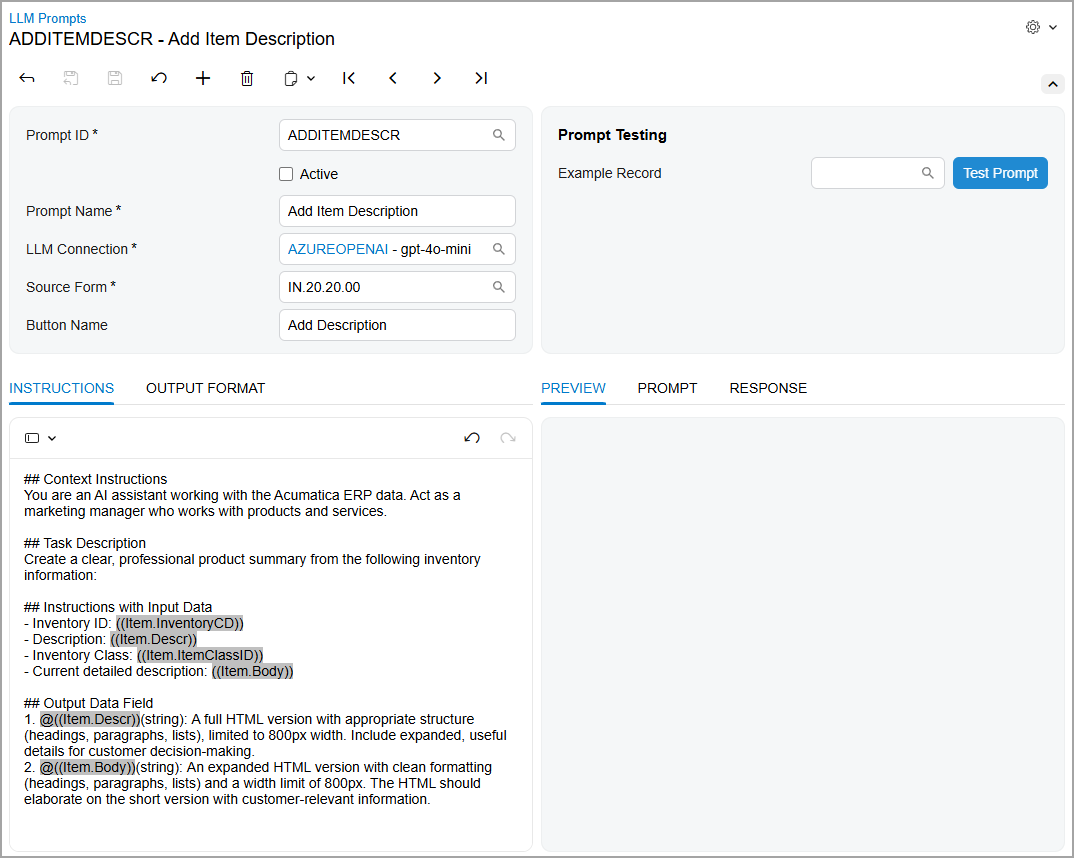
You can also add your own sections to refine the instructions, modify existing
sections, or
remove
them. You can optionally precede the name of each new section
with the ## notation or any other notation.
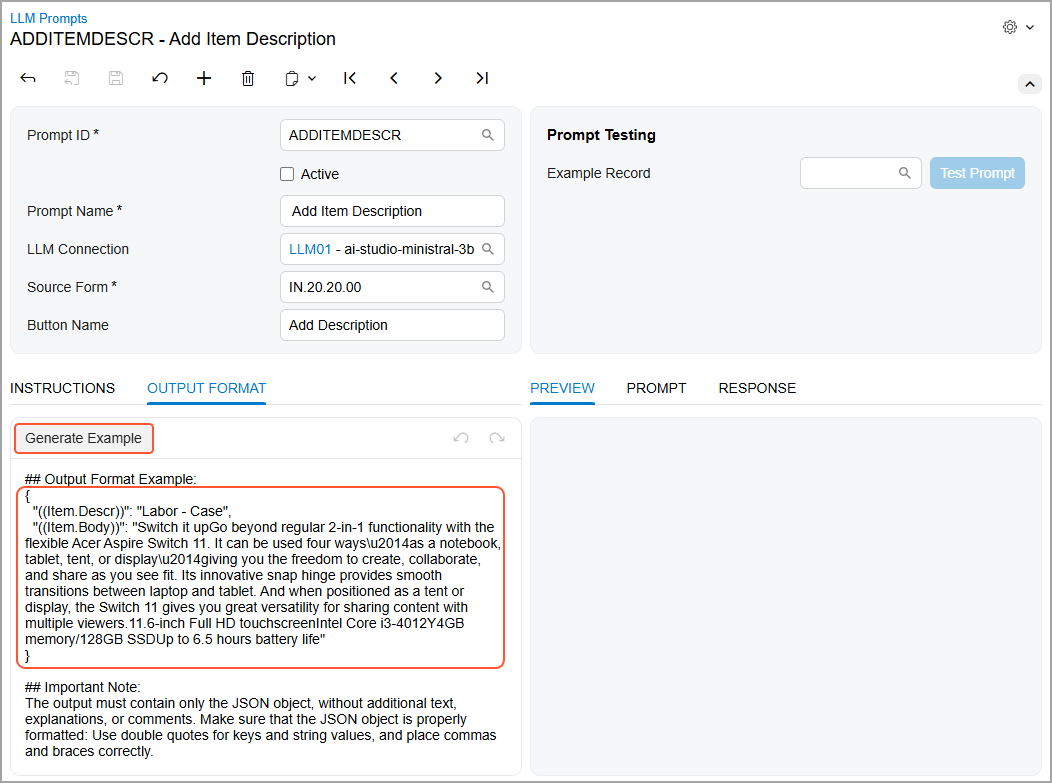
Specifying of the Output Format
On the Output Format tab of the LLM Prompts (ML202000) form, which is shown below, you specify how the data that the model returns should be formatted in the following sections:
- Output Format Example: An example of the data the model should return.
- Important Note: Information about how the returned data
should be formatted.Important:Avoid removing this section. It provides guidance on what data the model should return and how this data should be formatted, which significantly improves the quality of the results.
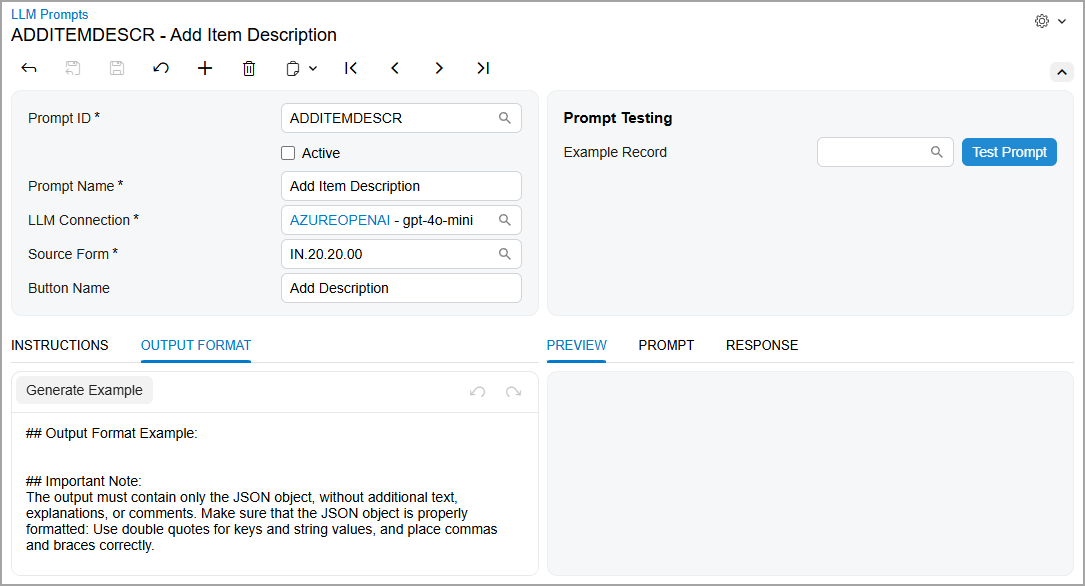
To see an example of the returned data, you click Generate Example on the formatting toolbar. The system generates an output example for the model (see below) by using the output fields specified on the Instructions tab. The system uses randomly chosen values for these fields from the database. You can edit the example to refine it, if needed.
Testing of the Prompt Definition
After you specify all the needed settings, you need to test the prompt definition on the data from your instance. You use the right pane of the LLM Prompts (ML202000) form for the testing as follows:
- You select a record in the Example Record box in the
Prompt Testing section.
The system adds the full prompt to the Prompt tab. (This prompt is the combination of the data from the Instructions and Output Format tabs.) It replaces placeholder fields with real values. For example, notice that the system replaces the
Item.InventoryCDinput field (Item 1 below) with the ID of the record that you’ve selected in the Example Record box (Items 2 and 3).Figure 7. Testing the prompt 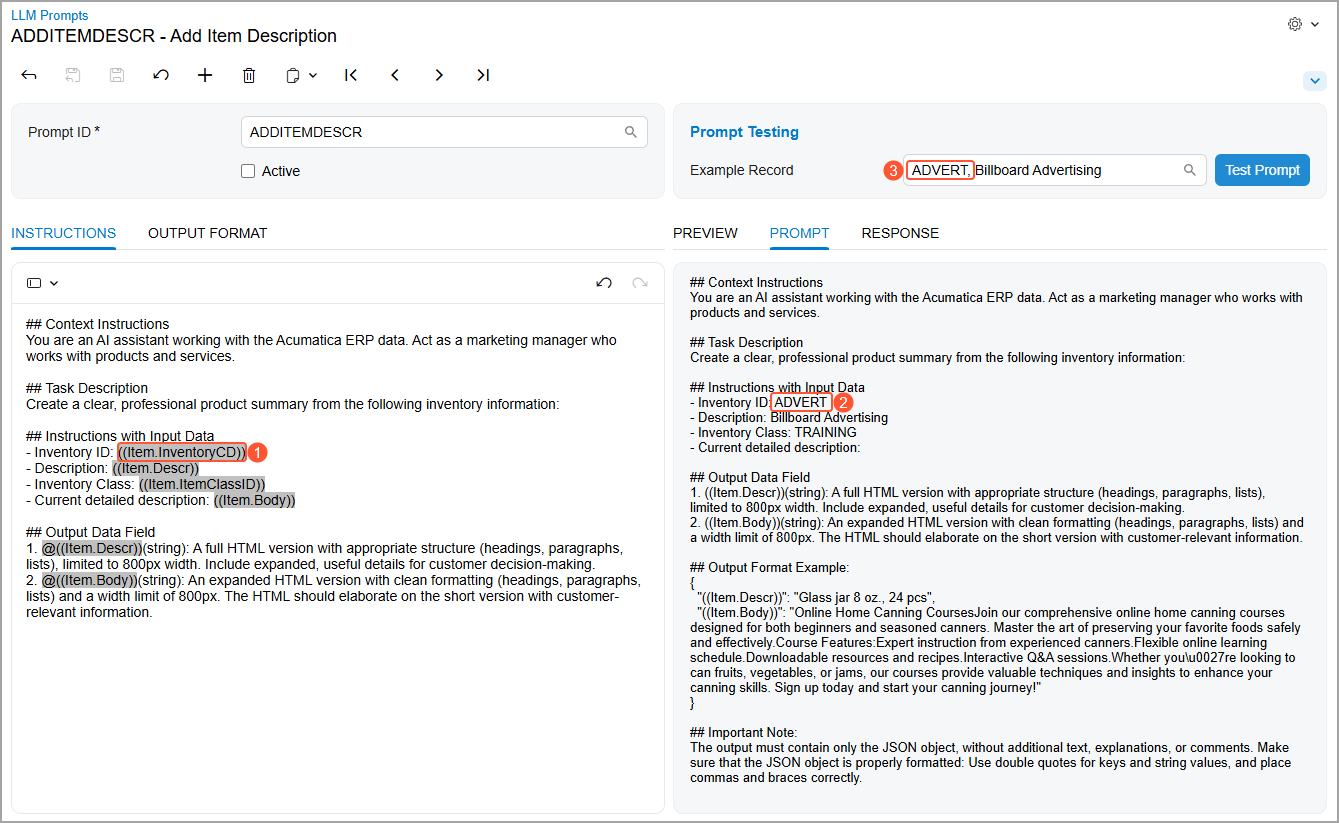
- You click Test Prompt.
The system sends the instructions to the LLM. The Response tab displays the returned data in JSON format (shown below).
Figure 8. The response from the model 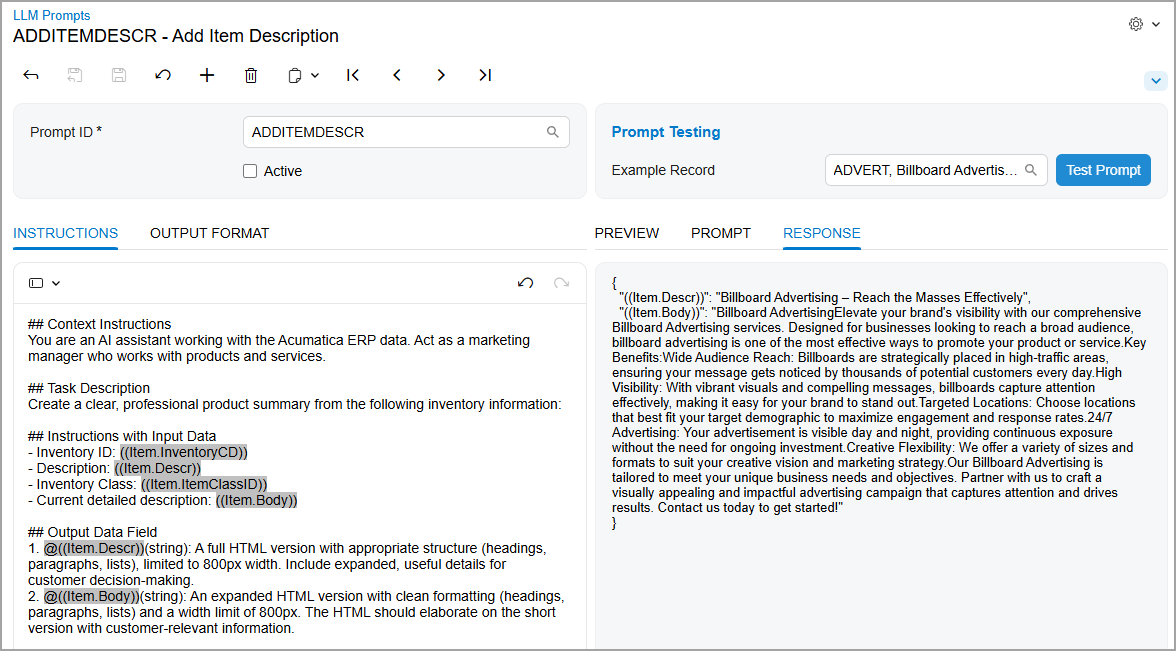
- You review the Preview tab to see how this data will be
displayed on the corresponding form (see below).
Figure 9. The preview of the generated description 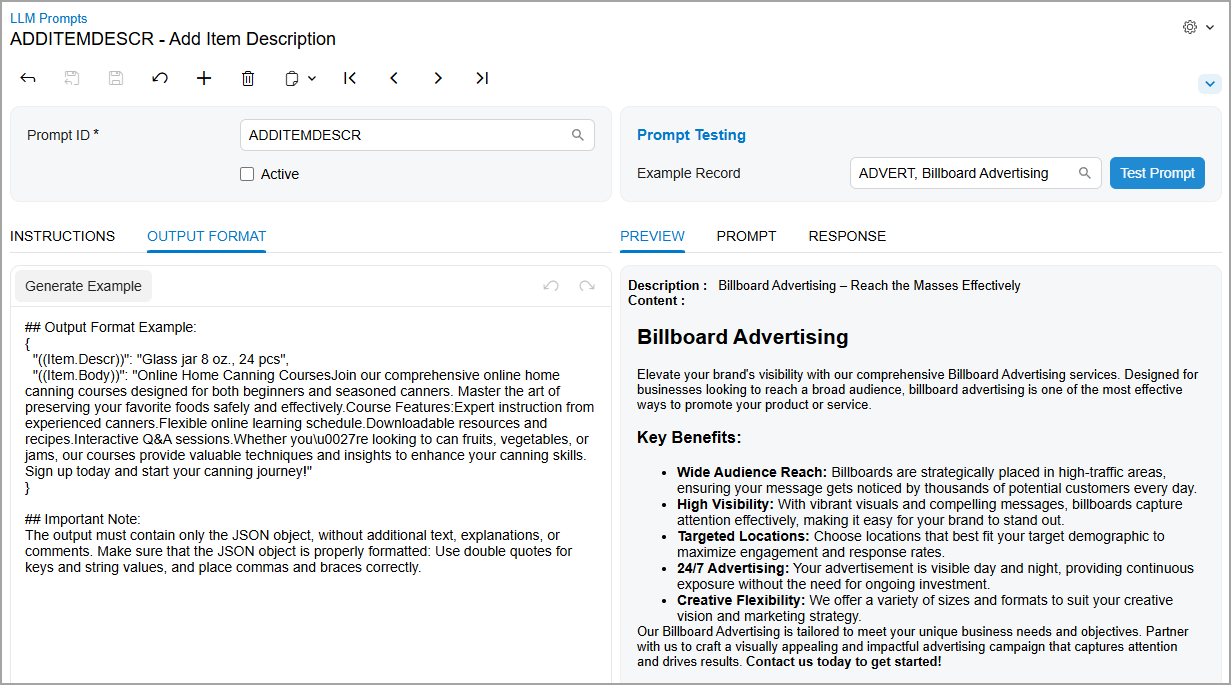
If you are not satisfied with the results, you can modify the definition and test it again.
- To go live, you select the Active check box in the Summary area and save your changes. Selecting this check box adds the LLM command to the source form.
Testing of the LLM Command
After you select the Active check box and save your changes on the LLM Prompts (ML202000) form, the system adds the new command (Item 1 below) to the More menu of the corresponding form—the Non-Stock Items (IN202000) form in this example. Before you click this command, the Description box (Item 2) and the Description tab (Item 3) may contain some text, or they can be empty.
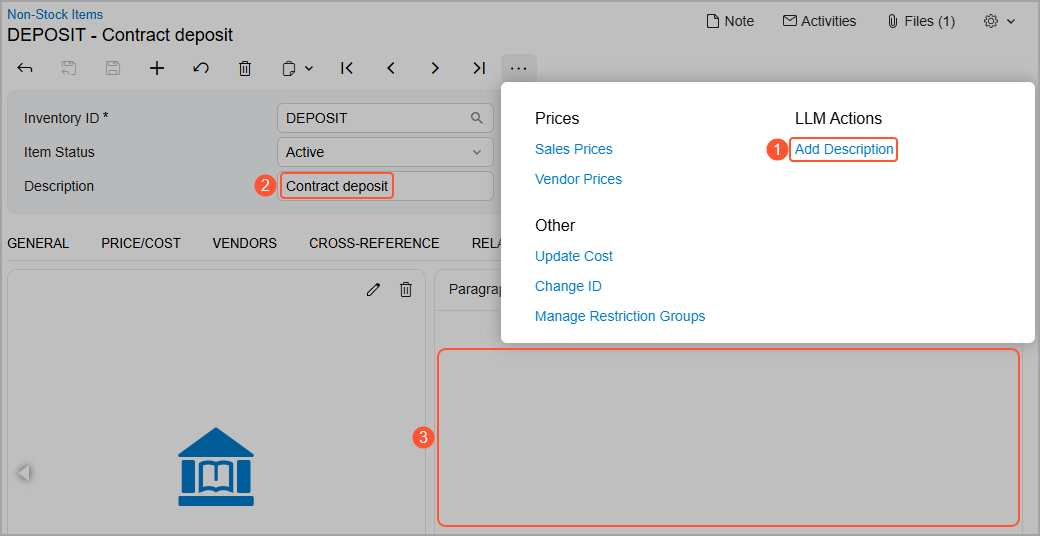
You then click the command on the More menu or the button on the form toolbar. The system updates the text in the Description box and adds a detailed description to the tab (shown below).
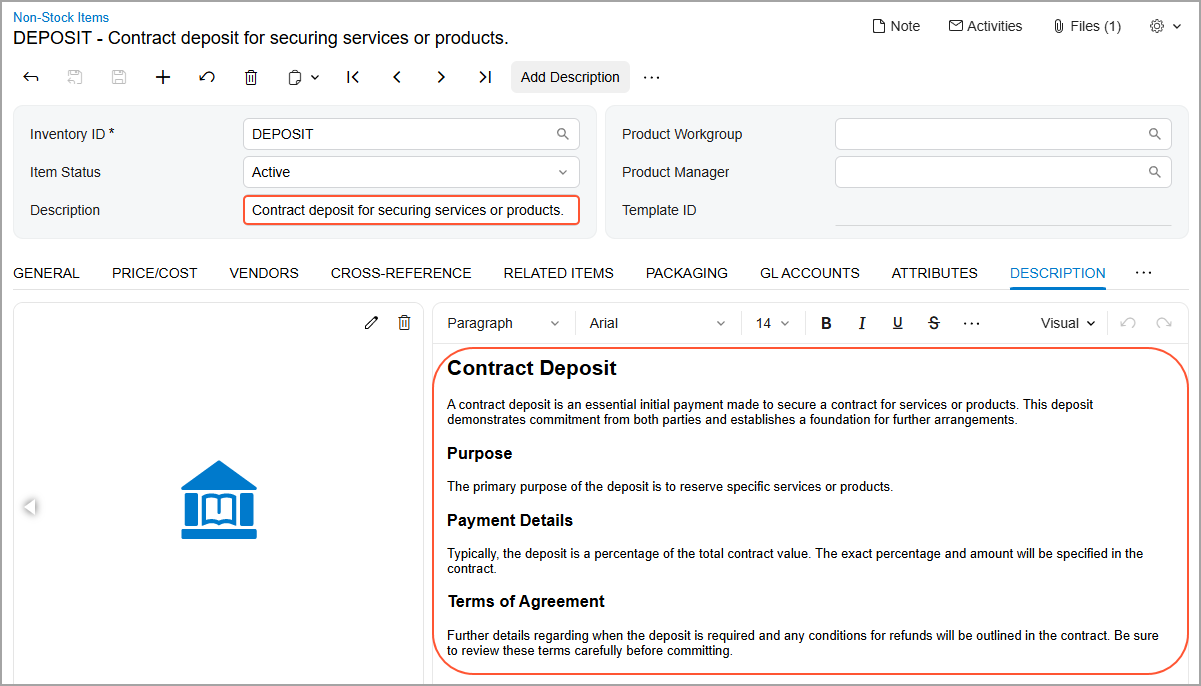
If you are not satisfied with the generated descriptions, you can click the button again to cause the system to generate new text. (Alternatively, you can edit the generated text.)
Built-In Prompt Definitions
The following three prompt definitions are available in an out-of-the-box system:
- Closure Notes: Creates comprehensive closure notes that summarize the outcome of the case for knowledge management and auditing. It uses related case records and logged activities to add text to the Closure Notes tab of the Cases (CR306000) form.
- Stock Item Desc: Uses inventory details to generate clear and professional product descriptions for the Description box and Description tab of the Stock Items (IN202500) form.
- Refine Reply: Uses an entire thread on the Email Activity (CR306015) form and generates a reply
to the most recent email. It can generate a reply from scratch or refine an
existing draft.Tip:The respective command is added to the Email Activity (CR306015) form, which you open by clicking Create Email on the Activities tab of the Cases (CR306000) form.
To use a built-in prompt definition, you do the following:
- Create an LLM connection on the LLM Connections (ML201000) form
- Specify this connection in the LLM Connection box on the LLM Prompts (ML202000) form
- Test the definition
- Mark it as Active
Prompt Example
Below is an example of a prompt definition.
| Section | Instructions |
|---|---|
| Context Instructions | You are an AI assistant working in MYOB Acumatica. Act as a marketing manager who works with products and
services. |
| Task Description | Create a clear, professional product summary from the
inventory information from the sections listed
below. |
| Instructions with Input Data | Use the following fields in the description:
|
| Output Data Field | Generate both a short summary and a detailed HTML
description with proper formatting and customer-relevant
details:
|
By using the command related to this prompt, users can take 15 seconds to generate consistent, professional product descriptions—a process that previously took 15 minutes.
- Only the
(( ))and@(( ))notations are supported in the prompt definition. - The generated command can modify only the output fields that you can edit manually on the form.