
UI Navigation Options: Tiles and Links to Forms in a Workspace
Workspaces are used in the system to organize related links to forms, reports, and dashboards in a way that is convenient to users. Each predefined workspace in the system contains tiles and links. Tiles are buttons that users can click to quickly access frequently used forms, possibly with common settings filled in. A workspace also has links to forms, reports, and dashboards with related functionality. These links are grouped into categories, such as Profiles, Reports, and Preferences.
MYOB Acumatica gives you the ability to change the sets of MYOB Acumatica forms, reports, and dashboards in workspaces so that they optimally support the organization’s processes. You can also change the tiles available in a workspace.
Adding and Reordering Tiles
A tile is a special button on a workspace that a user clicks to open a form or report with predefined settings (or, for a data entry form, with most settings blank so that a user can define a new record). For example, a tile could be added that a user can click to open the Cash Transactions (CA304000) form to create a new cash entry.
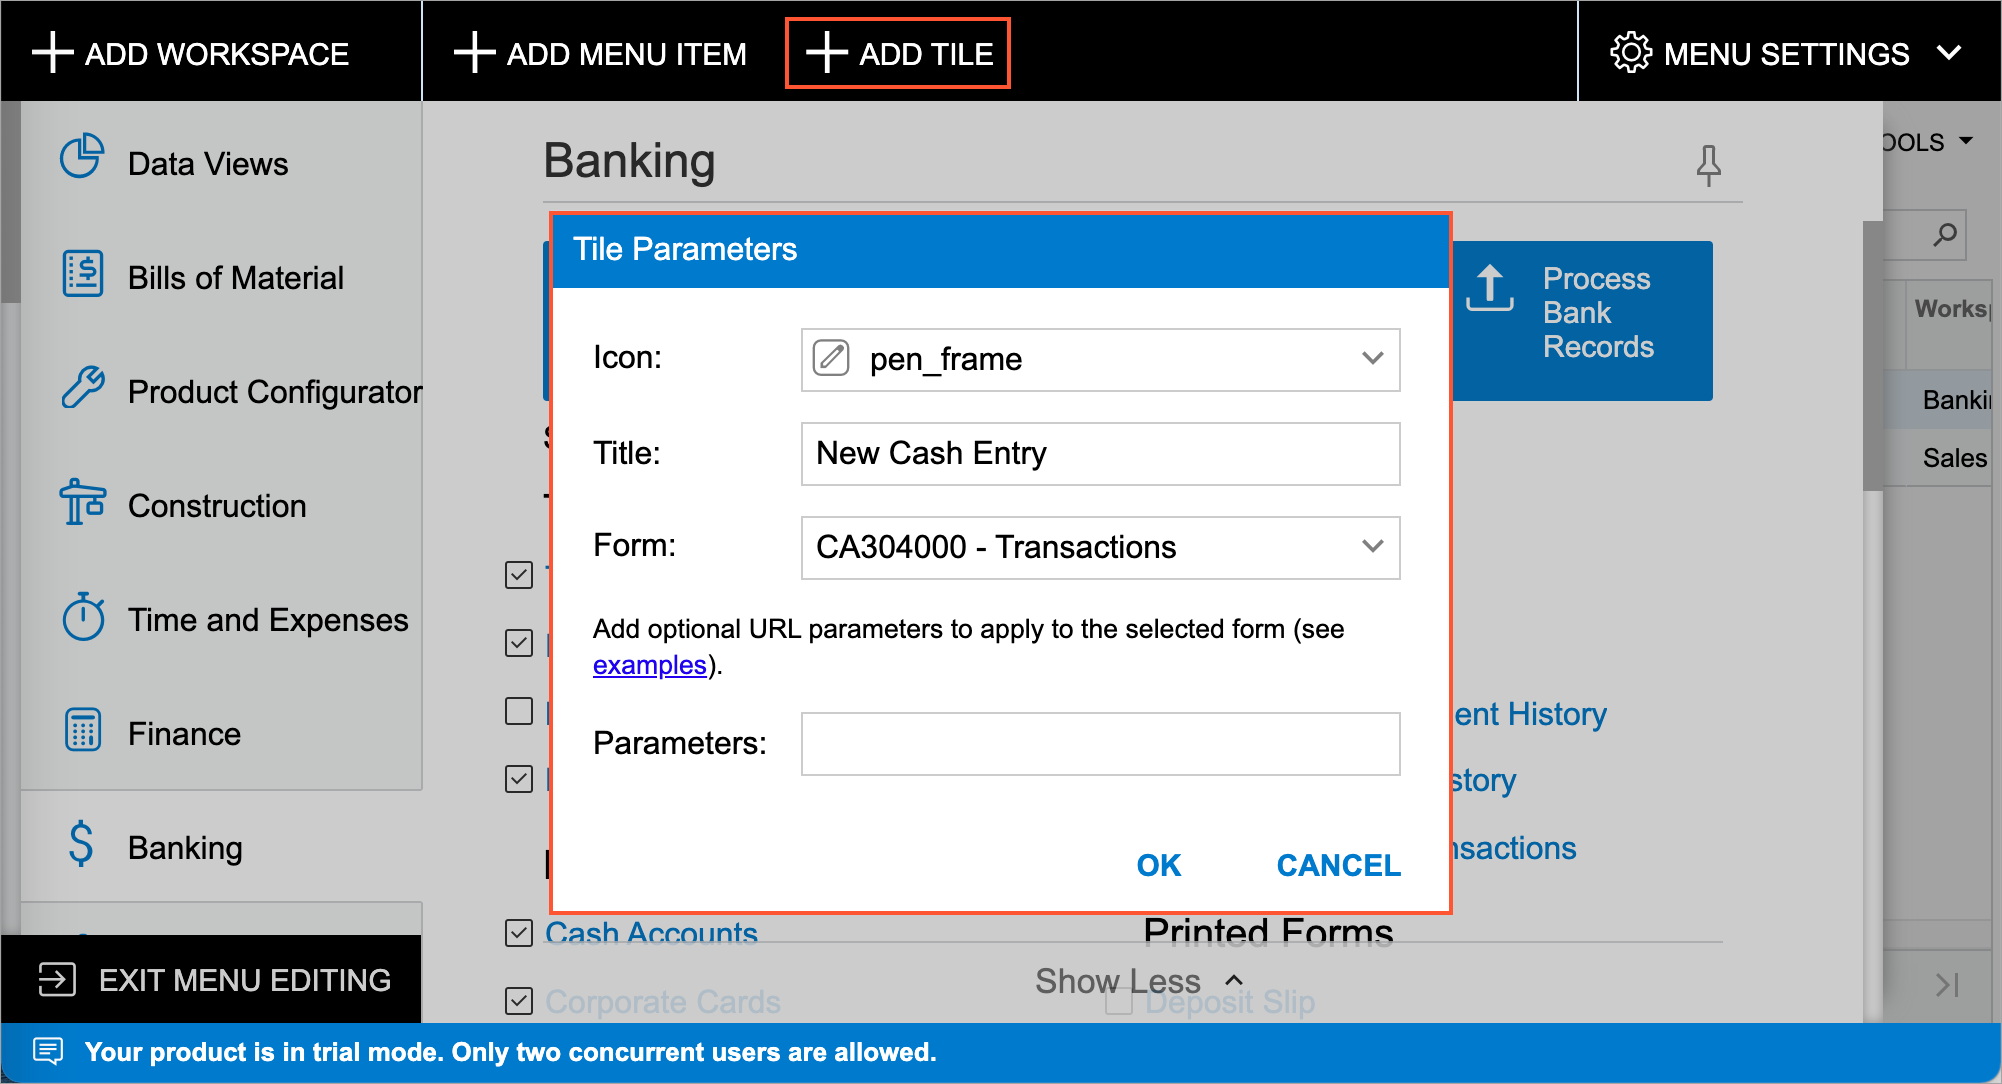
To create a tile, you switch to Menu Editing mode and open the needed workspace. You click Add Tile on the top toolbar, and the system opens the Tile Parameters dialog box. In the dialog box, you specify the icon and title to be displayed on the tile, as well as the form that the system should open when a user clicks the tile (see the following screenshot). You can also add tile parameters, as described in the next section. You then click OK to close the dialog box and add the tile.
You can also reorder the tiles in a workspace. To do this, in Menu Editing mode, you drag any tile to the needed position.
Using Tile Parameters
If the employees of your organization frequently create records with a particular set of settings or enter particular settings to limit the data in an inquiry form, you can make this operation faster by adding a tile that includes the needed settings. For example, a tile could be added that a user can click to open the Vendor Details (AP402000) form with a particular vendor selected in the Vendor box.
To indicate the elements and values that need to be provided to the system when a user clicks the tile, you specify fields and their values as URL parameters in the Tile Parameters dialog box for the tile. You can add multiple parameters separated by &.
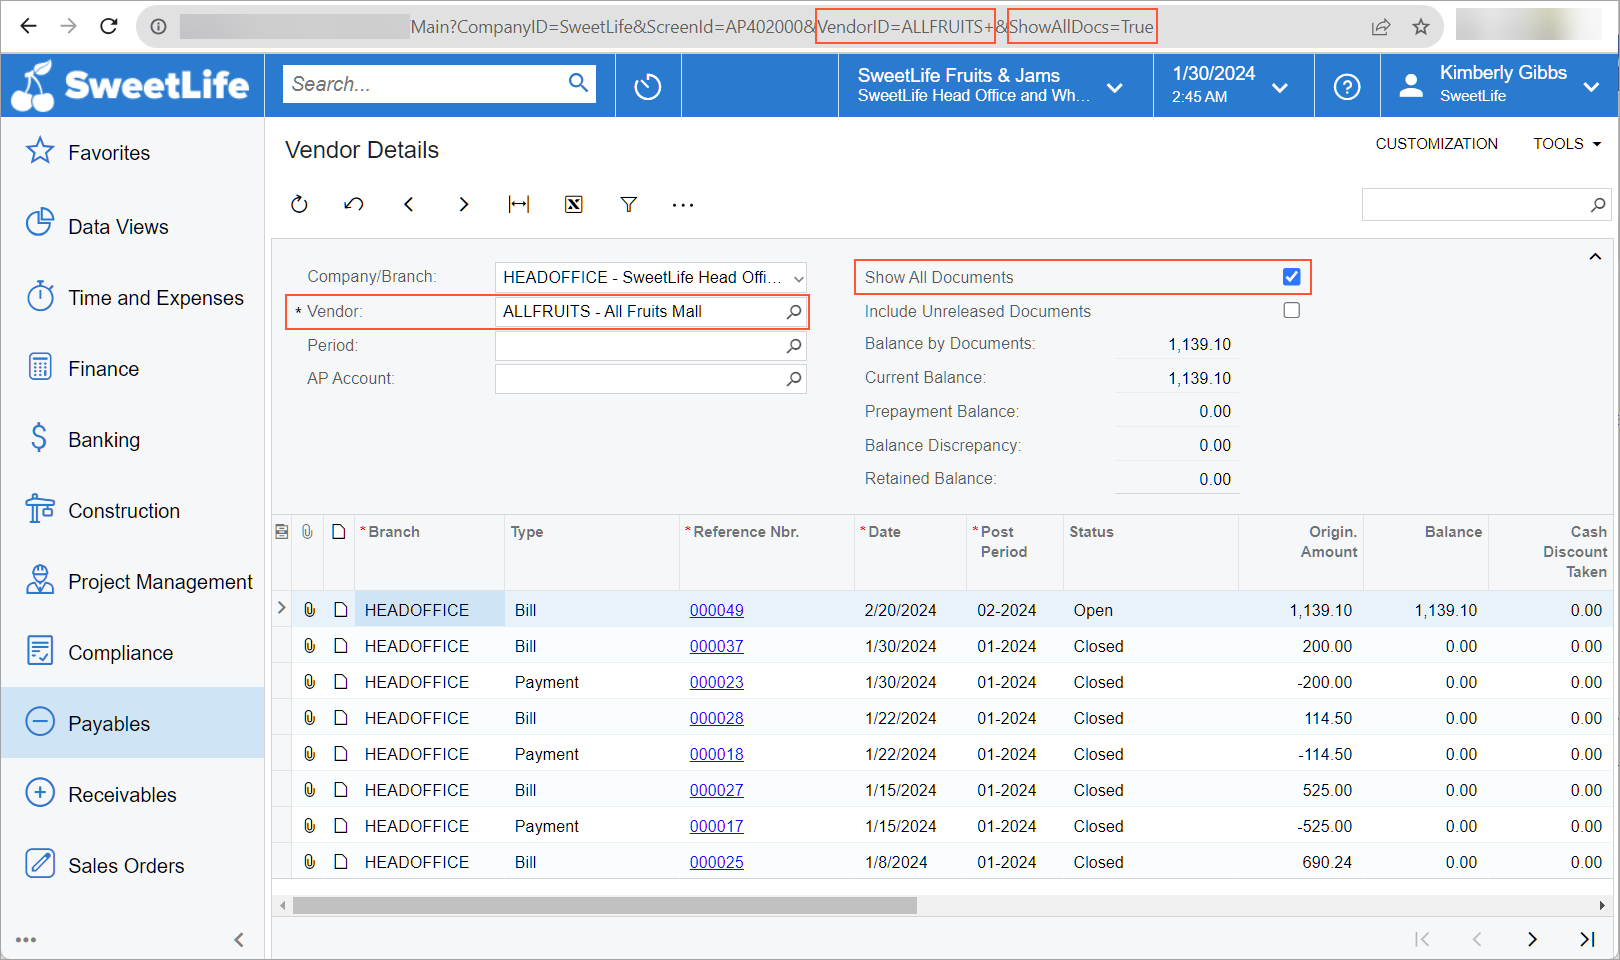
To determine the URL parameters for elements located in the Summary or Selection area of a form, you can open the form, select the box value in the area, and look at the form's URL. The system adds to the URL the parameter that corresponds to the box on a form with the selected value. (See the following screenshot.)
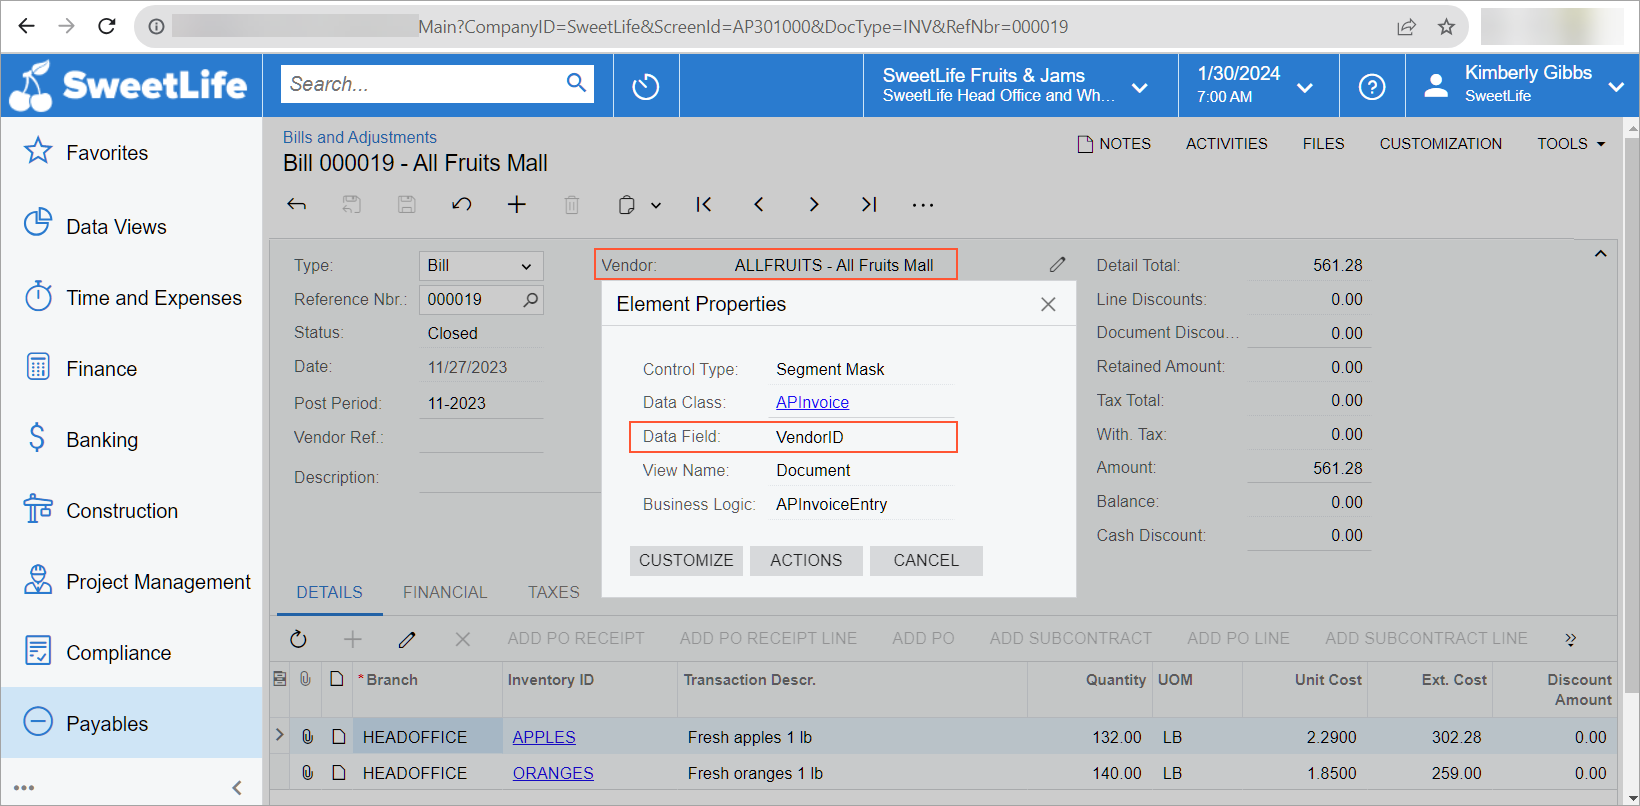
In the Element Properties dialog box, which opens, you copy the value specified in the Data Field box, as the following screenshot shows for the Vendor box of the Bills and Adjustments (AP301000) form. In the URL shown in the screenshot, notice that the system added to the URL only the document type and its reference number, because these two values explicitly identify the document, and adding other parameters to the URL is not needed.
After you find out which data fields correspond to all the elements whose settings
you want to provide to the system when a user clicks the tile, you add the
parameters for the tile. In Menu Editing mode with the workspace open, you point to
the tile and click Edit Tile Parameters (![]() ) on the pop-up toolbar for the tile. In the Tile
Parameters dialog box, which opens, you specify these parameters in
the Parameters box (see the following screenshot) and click
OK.
) on the pop-up toolbar for the tile. In the Tile
Parameters dialog box, which opens, you specify these parameters in
the Parameters box (see the following screenshot) and click
OK.

You can also use the Tile Parameters dialog box to change a tile, including its name, icon, and parameters.
Deleting Unnecessary Tiles
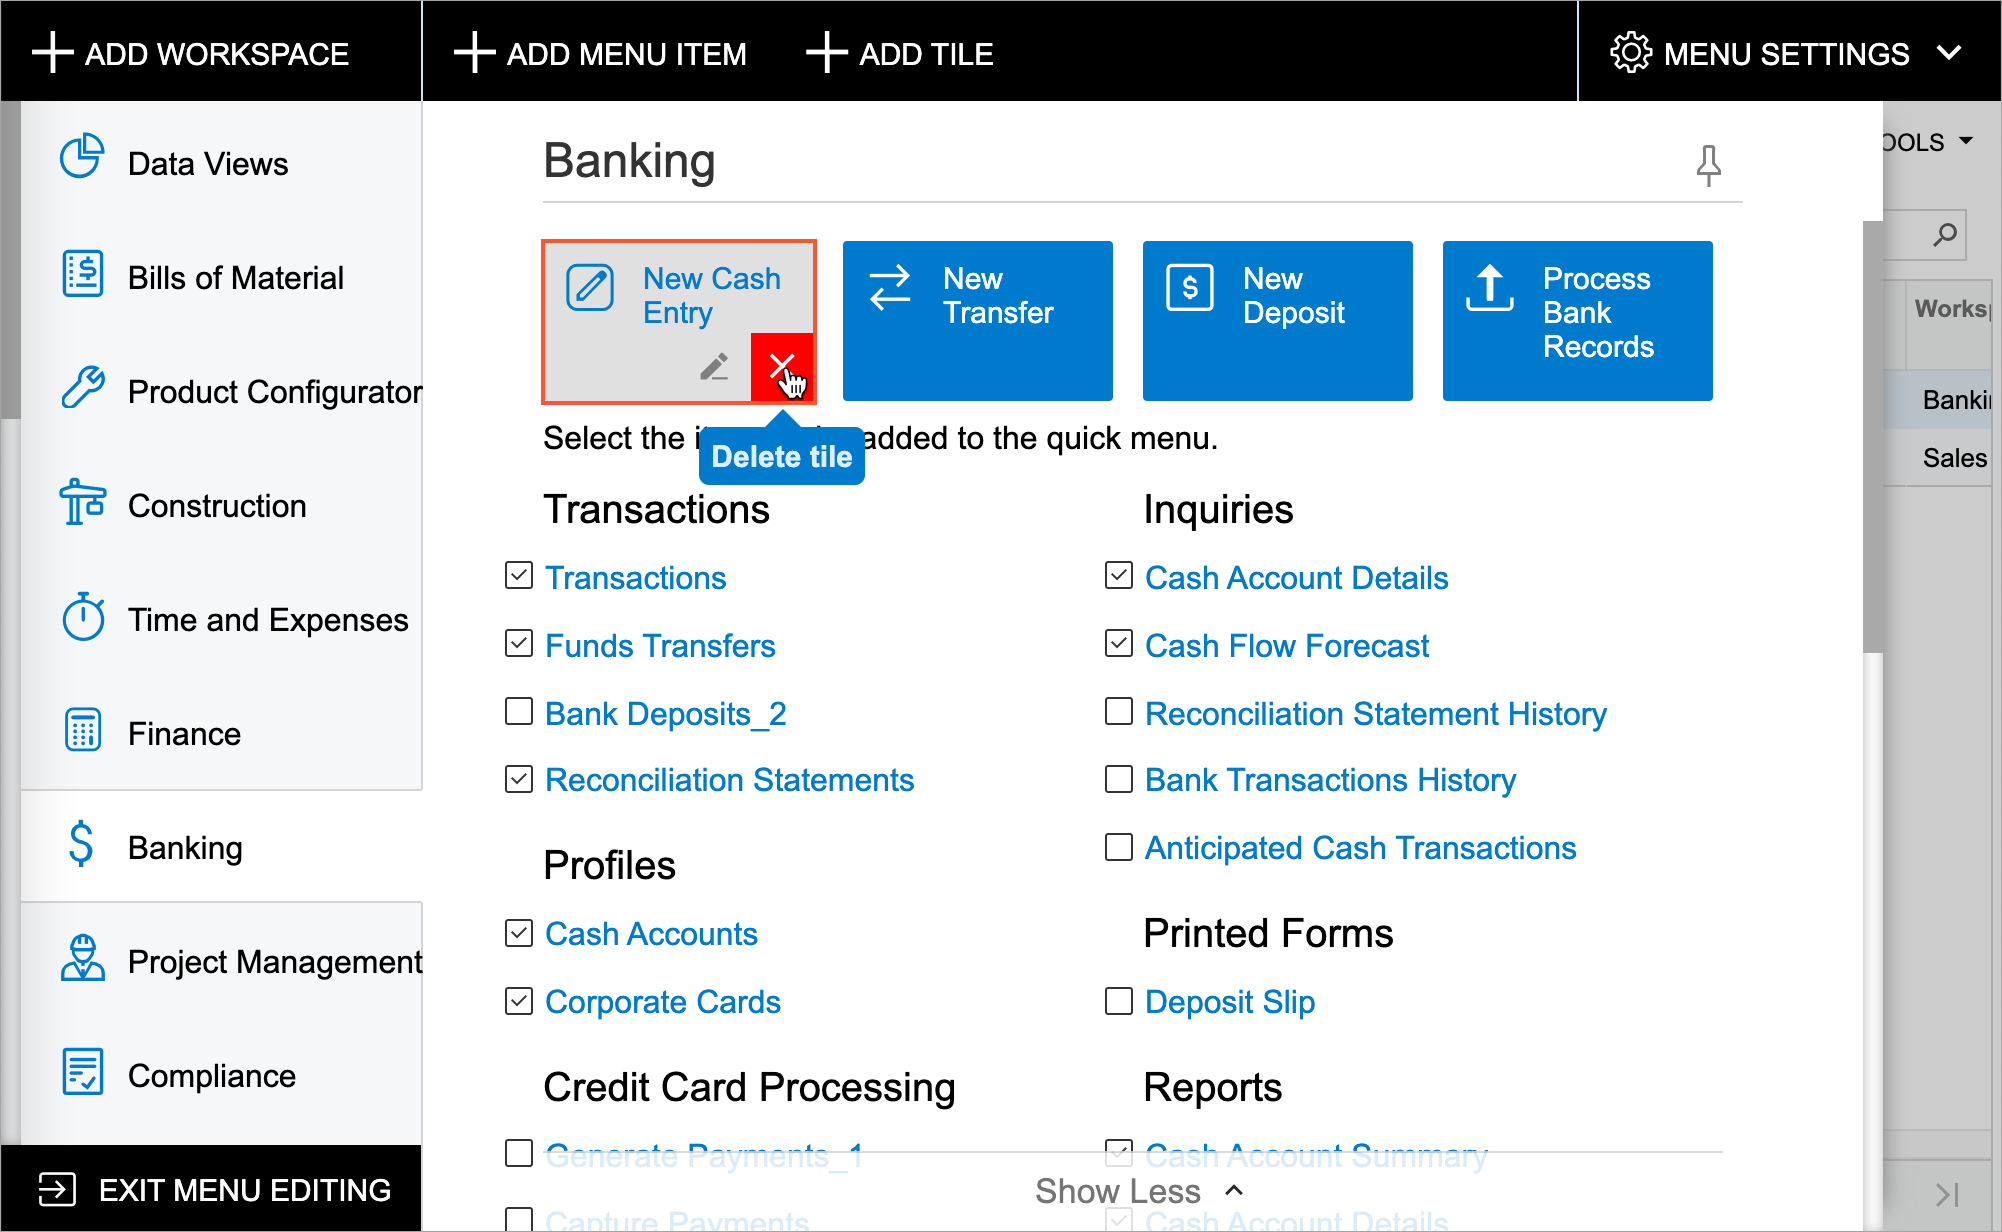
If the employees of your organization do not use the predefined tiles, you can delete
any tile from a workspace. To delete a tile, you switch to Menu Editing mode, open
the needed workspace, and point at the tile. On the pop-up toolbar of the tile,
click Delete Tile (![]() ); see the
following screenshot.
); see the
following screenshot.
Configuring a Quick Menu
When a user opens a workspace, the system displays its quick menu, which consists of only those links to the forms, reports, and dashboards that were configured to be displayed on this menu, which includes the most frequently accessed items that users need. To view the rest of the forms, reports, and dashboards, the user clicks Show All in the workspace footer.
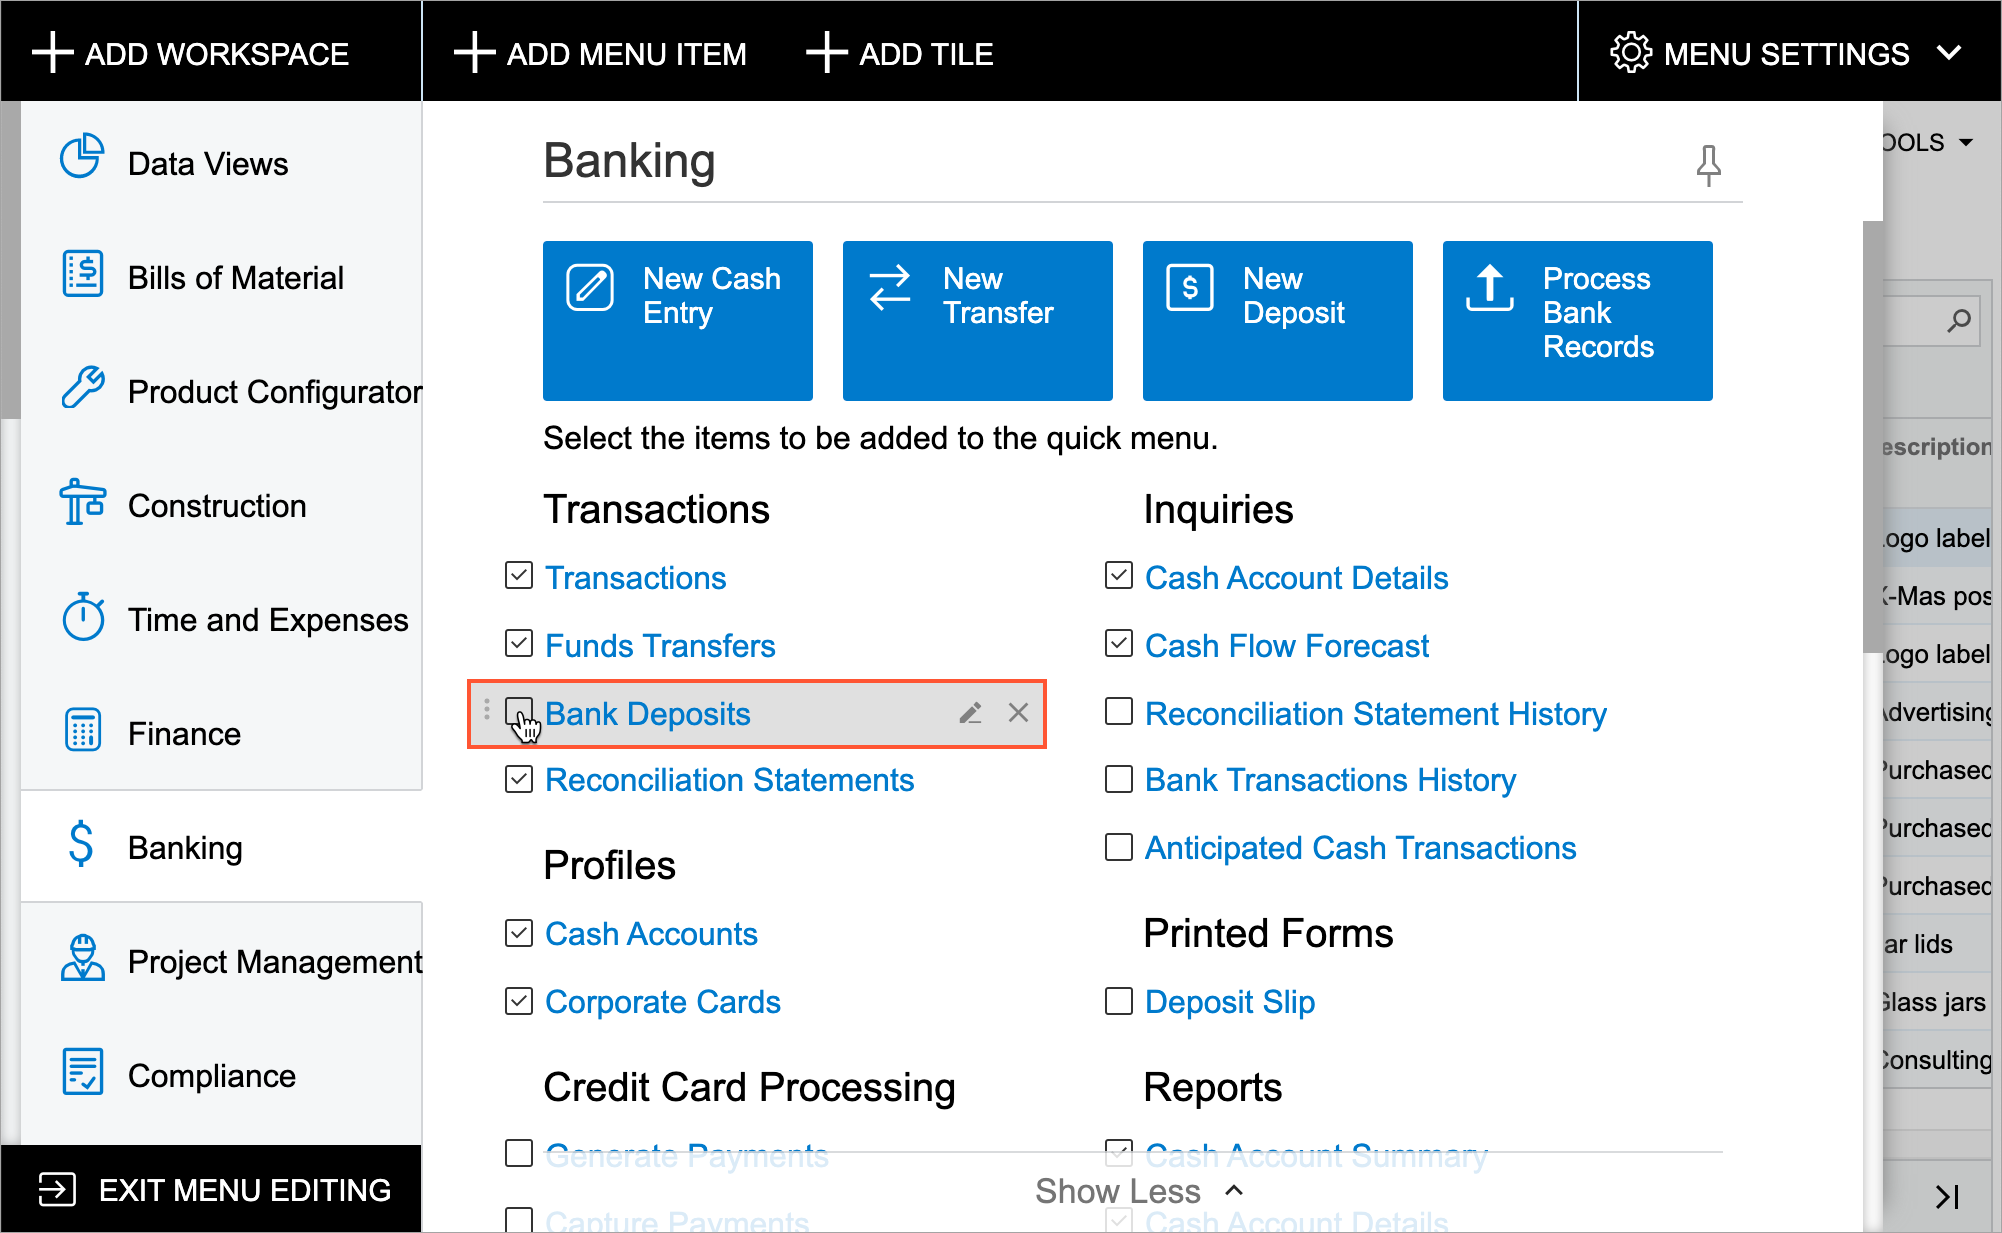
When you tailor the workspace, you can configure the set of links to be available in the quick menu by default. You switch to Menu Editing mode and open the needed workspace. In the workspace, you select the check boxes next to the forms that should be displayed on the quick menu. (See the following screenshot.) You clear the check boxes for those forms that are not displayed on the quick menu; they should be displayed only when a user clicks Show All.
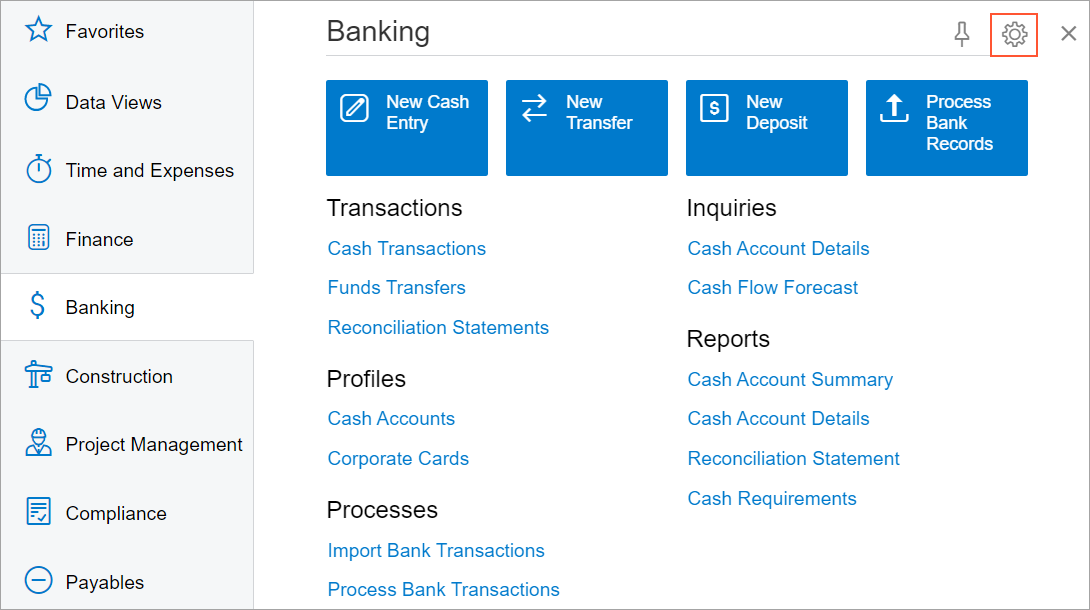
Users of your system can configure their own set of links on the quick menu of a
workspace if the quick menu configured in the system does not meet their needs. On
the workspace title bar, they click Configure Quick Menu
(![]() ), which is shown in the following
screenshot, to switch to Configuration mode.
), which is shown in the following
screenshot, to switch to Configuration mode.
In this mode, they can select check boxes for the forms, reports, and dashboards whose links will be displayed on the quick menu (and clear check boxes for items to not be displayed).
Removing Links to Forms, Reports, and Dashboards
If you are sure that users will not need a particular link to a form, report, or dashboard in a workspace, you can remove this link from the workspace. The form, report, or dashboard will remain in the system and can be added to a workspace.
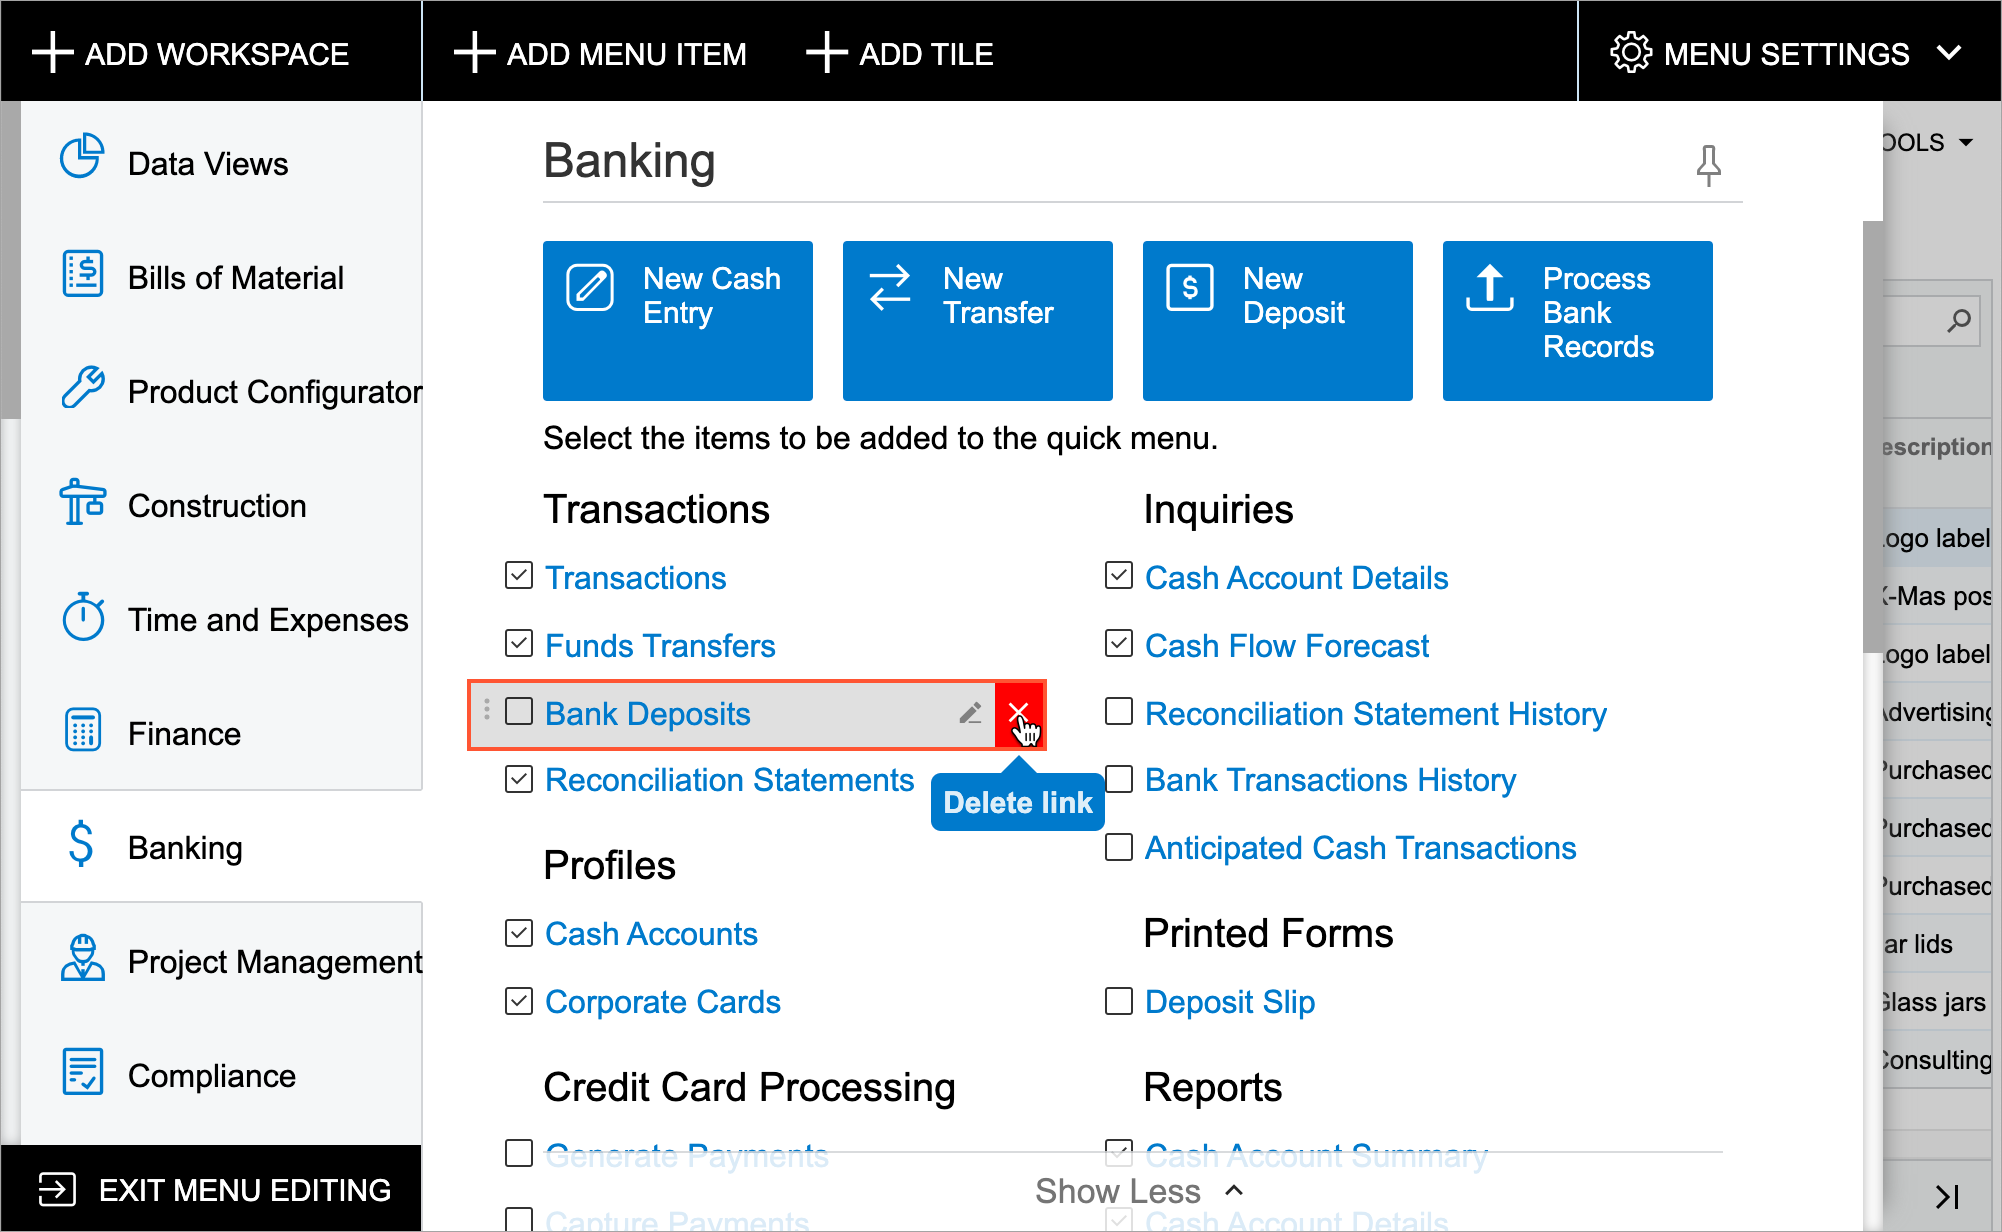
To remove a link, you switch to Menu Editing mode and open the needed workspace. In
the workspace, you point to the form, report, or dashboard to be deleted; on the
pop-up toolbar of the item, you click Delete Link (![]() ), as shown in
the following screenshot, and confirm your action.
), as shown in
the following screenshot, and confirm your action.
Adding Links to Workspaces
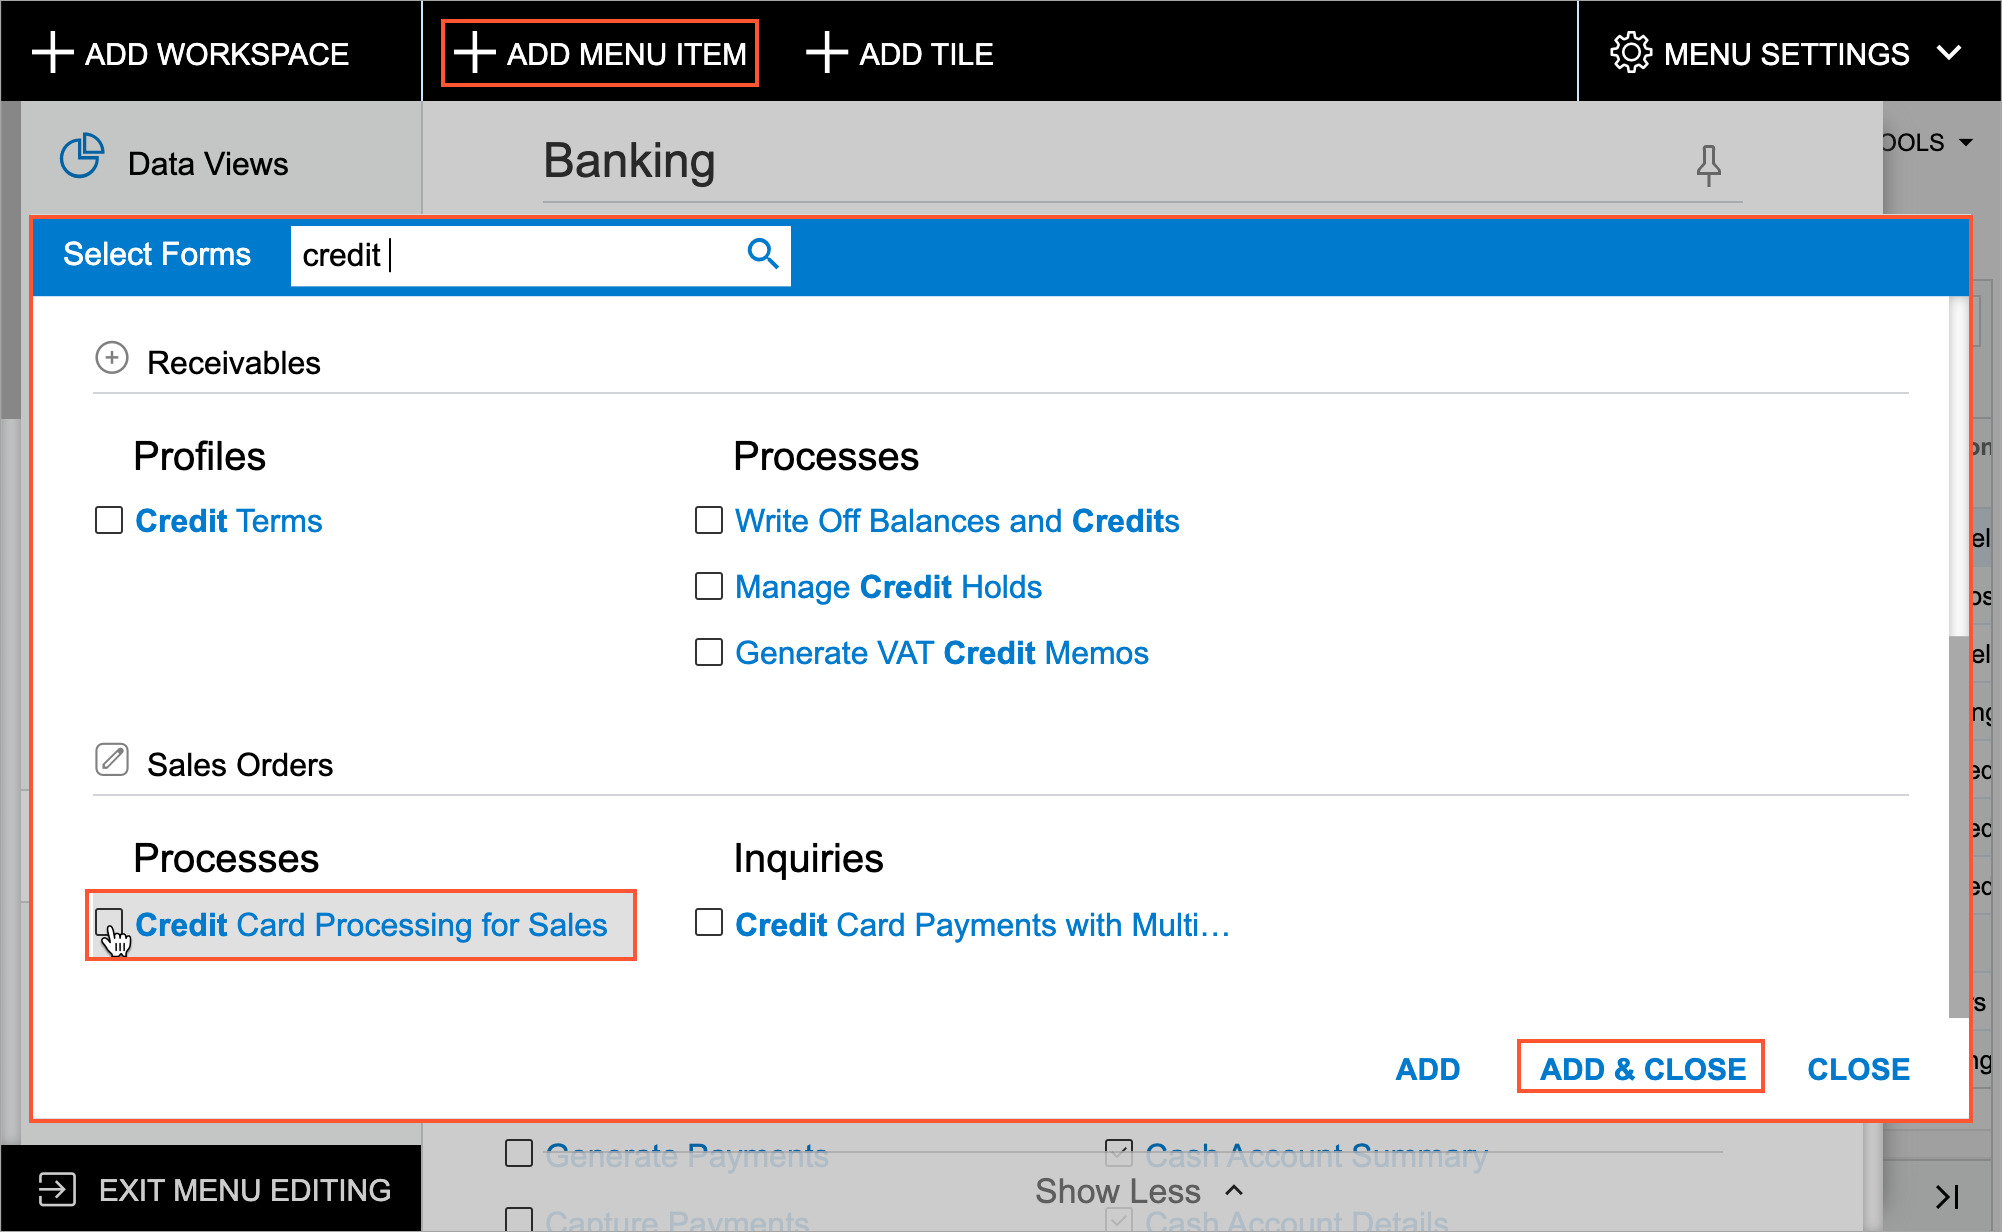
In Menu Editing mode, you open the needed workspace. You click Add Menu Item on the top toolbar. In the Select Forms dialog box, which opens, you search for the needed form, report, or dashboard by typing its name or identifier in the Search box. To add the item, you select the check box next to it and click Add and Close to exit the dialog box (see the following screenshot).
Managing Categories
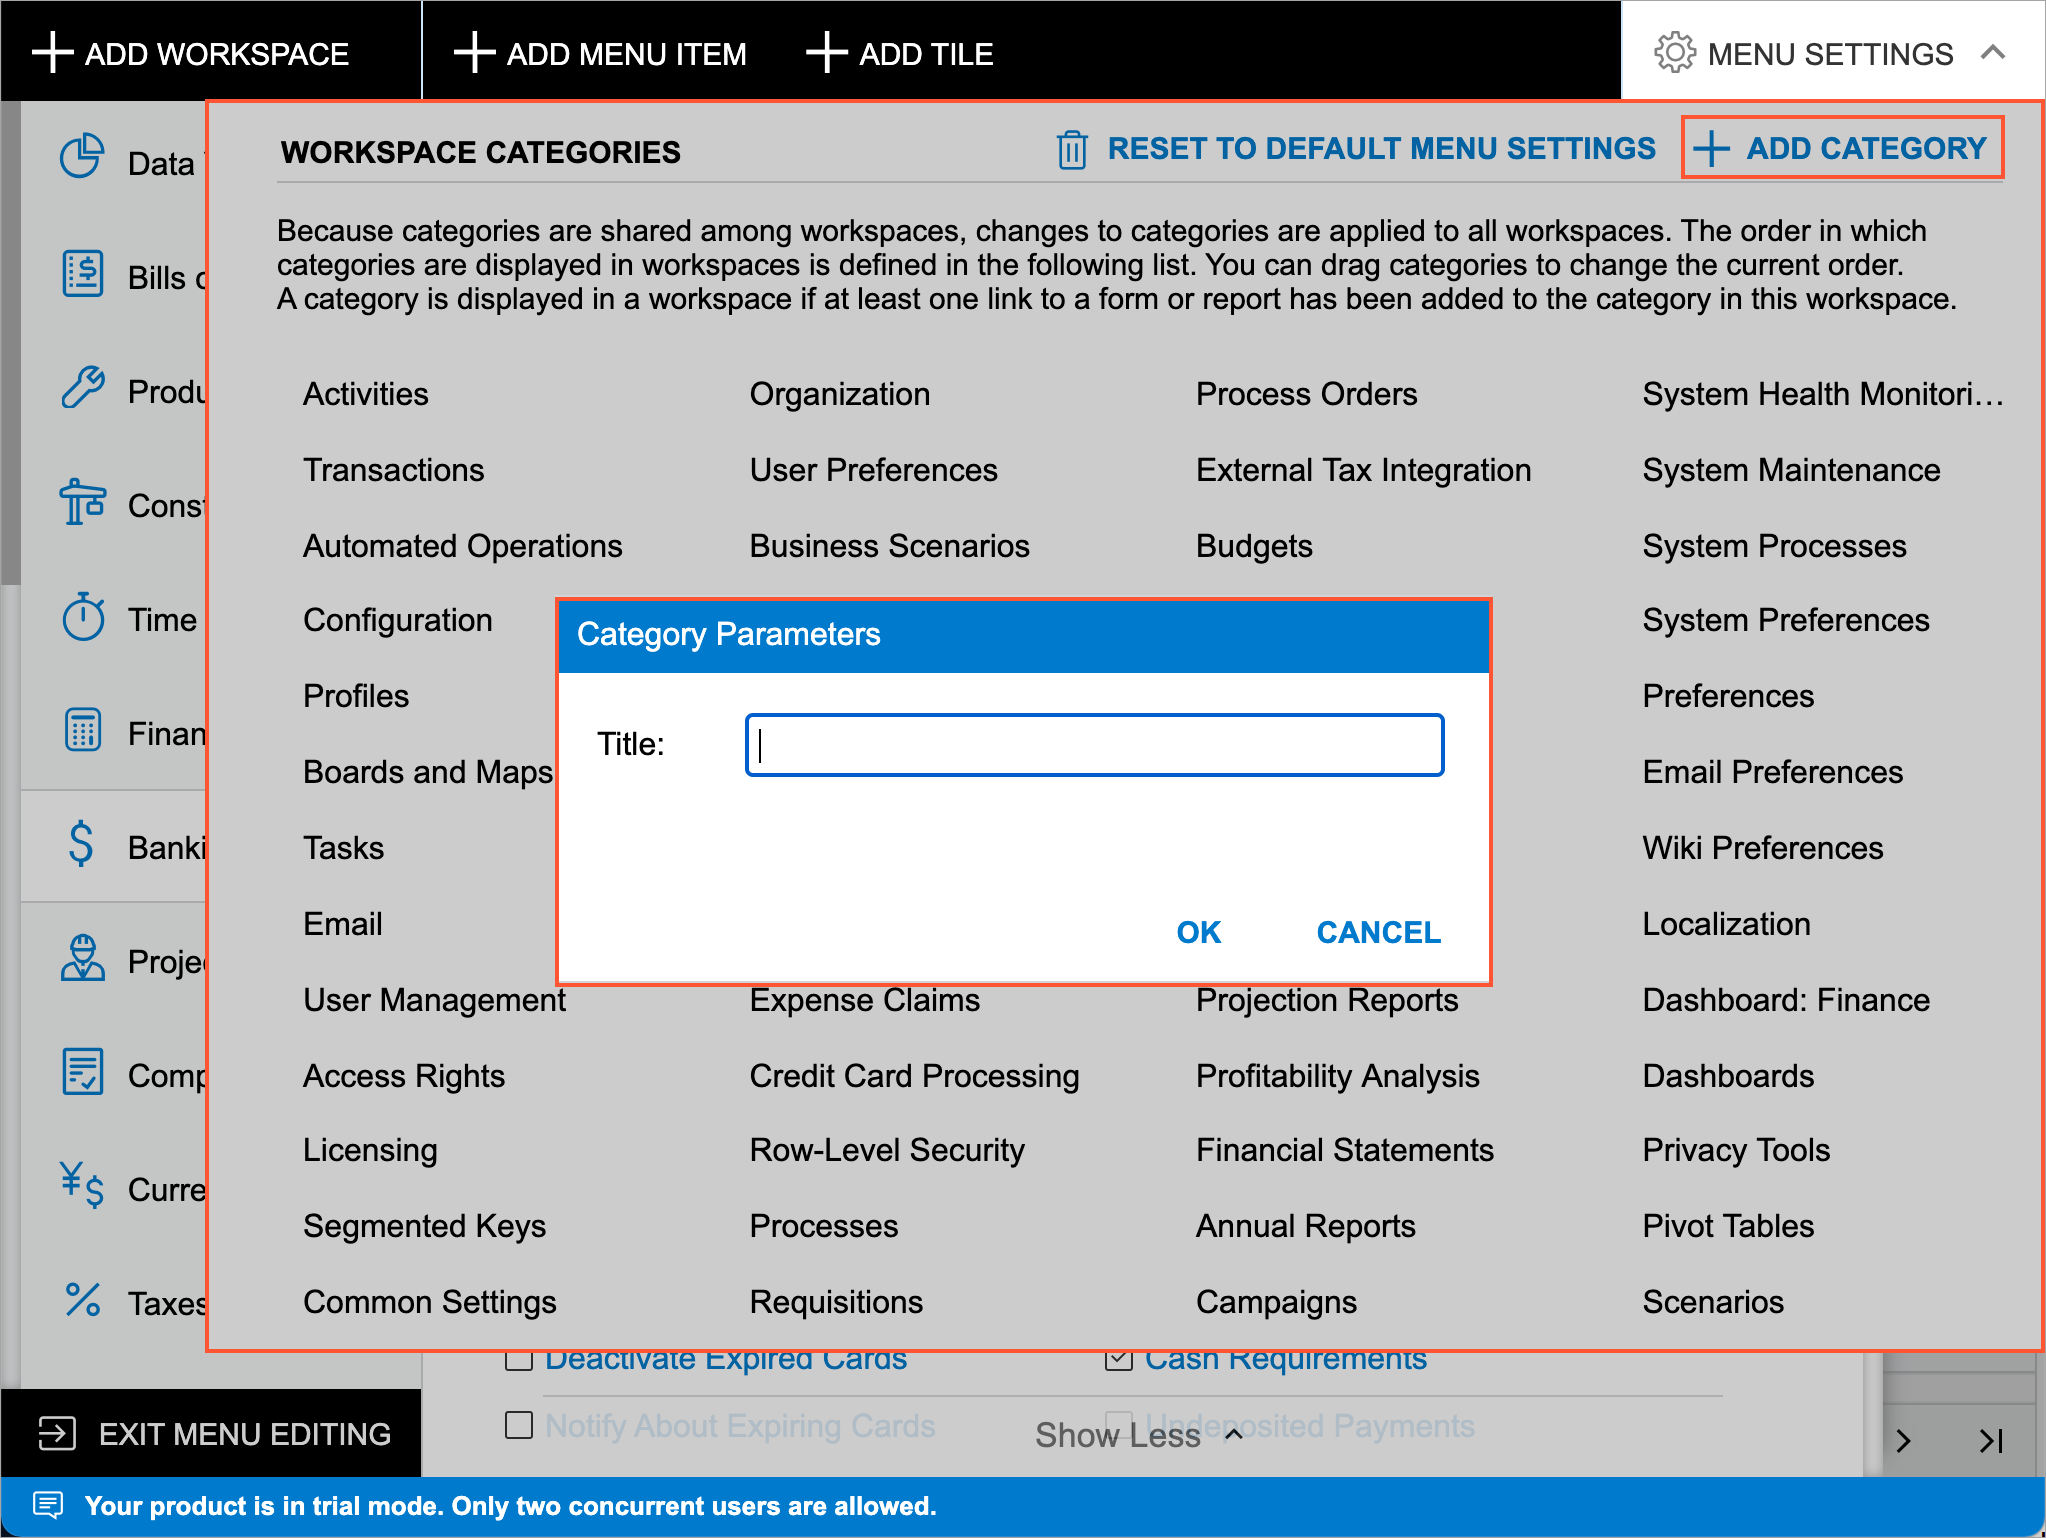
In a workspace, the links to the forms, reports, and dashboards are grouped by categories. In Menu Editing mode, you can review the list of available categories by clicking Menu Settings in the upper right corner to open the Workspaces Categories menu. Because categories are shared among workspaces, changes to categories are applied to all workspaces. The order in which categories are displayed in workspaces is defined in this list. You can drag categories to change their order. A category is displayed in a workspace if at least one link to a form or report has been added to the category in this workspace.
If the available set of categories does not work for your employees, you can create a category that fits the terminology used by your company. To do this, in the Workspaces Categories menu, you click Add Category, and in the Category Parameters dialog box, you type the category name and click OK. (See the following screenshot.)
Moving Links Within and Between Categories
If the default grouping of links to forms, reports, and dashboards in a workspace is inconvenient for the employees of your organization, you can move links within a category or to other categories. To move a link within a category, in Menu Editing mode with a workspace open, you can drag the link to the needed position.
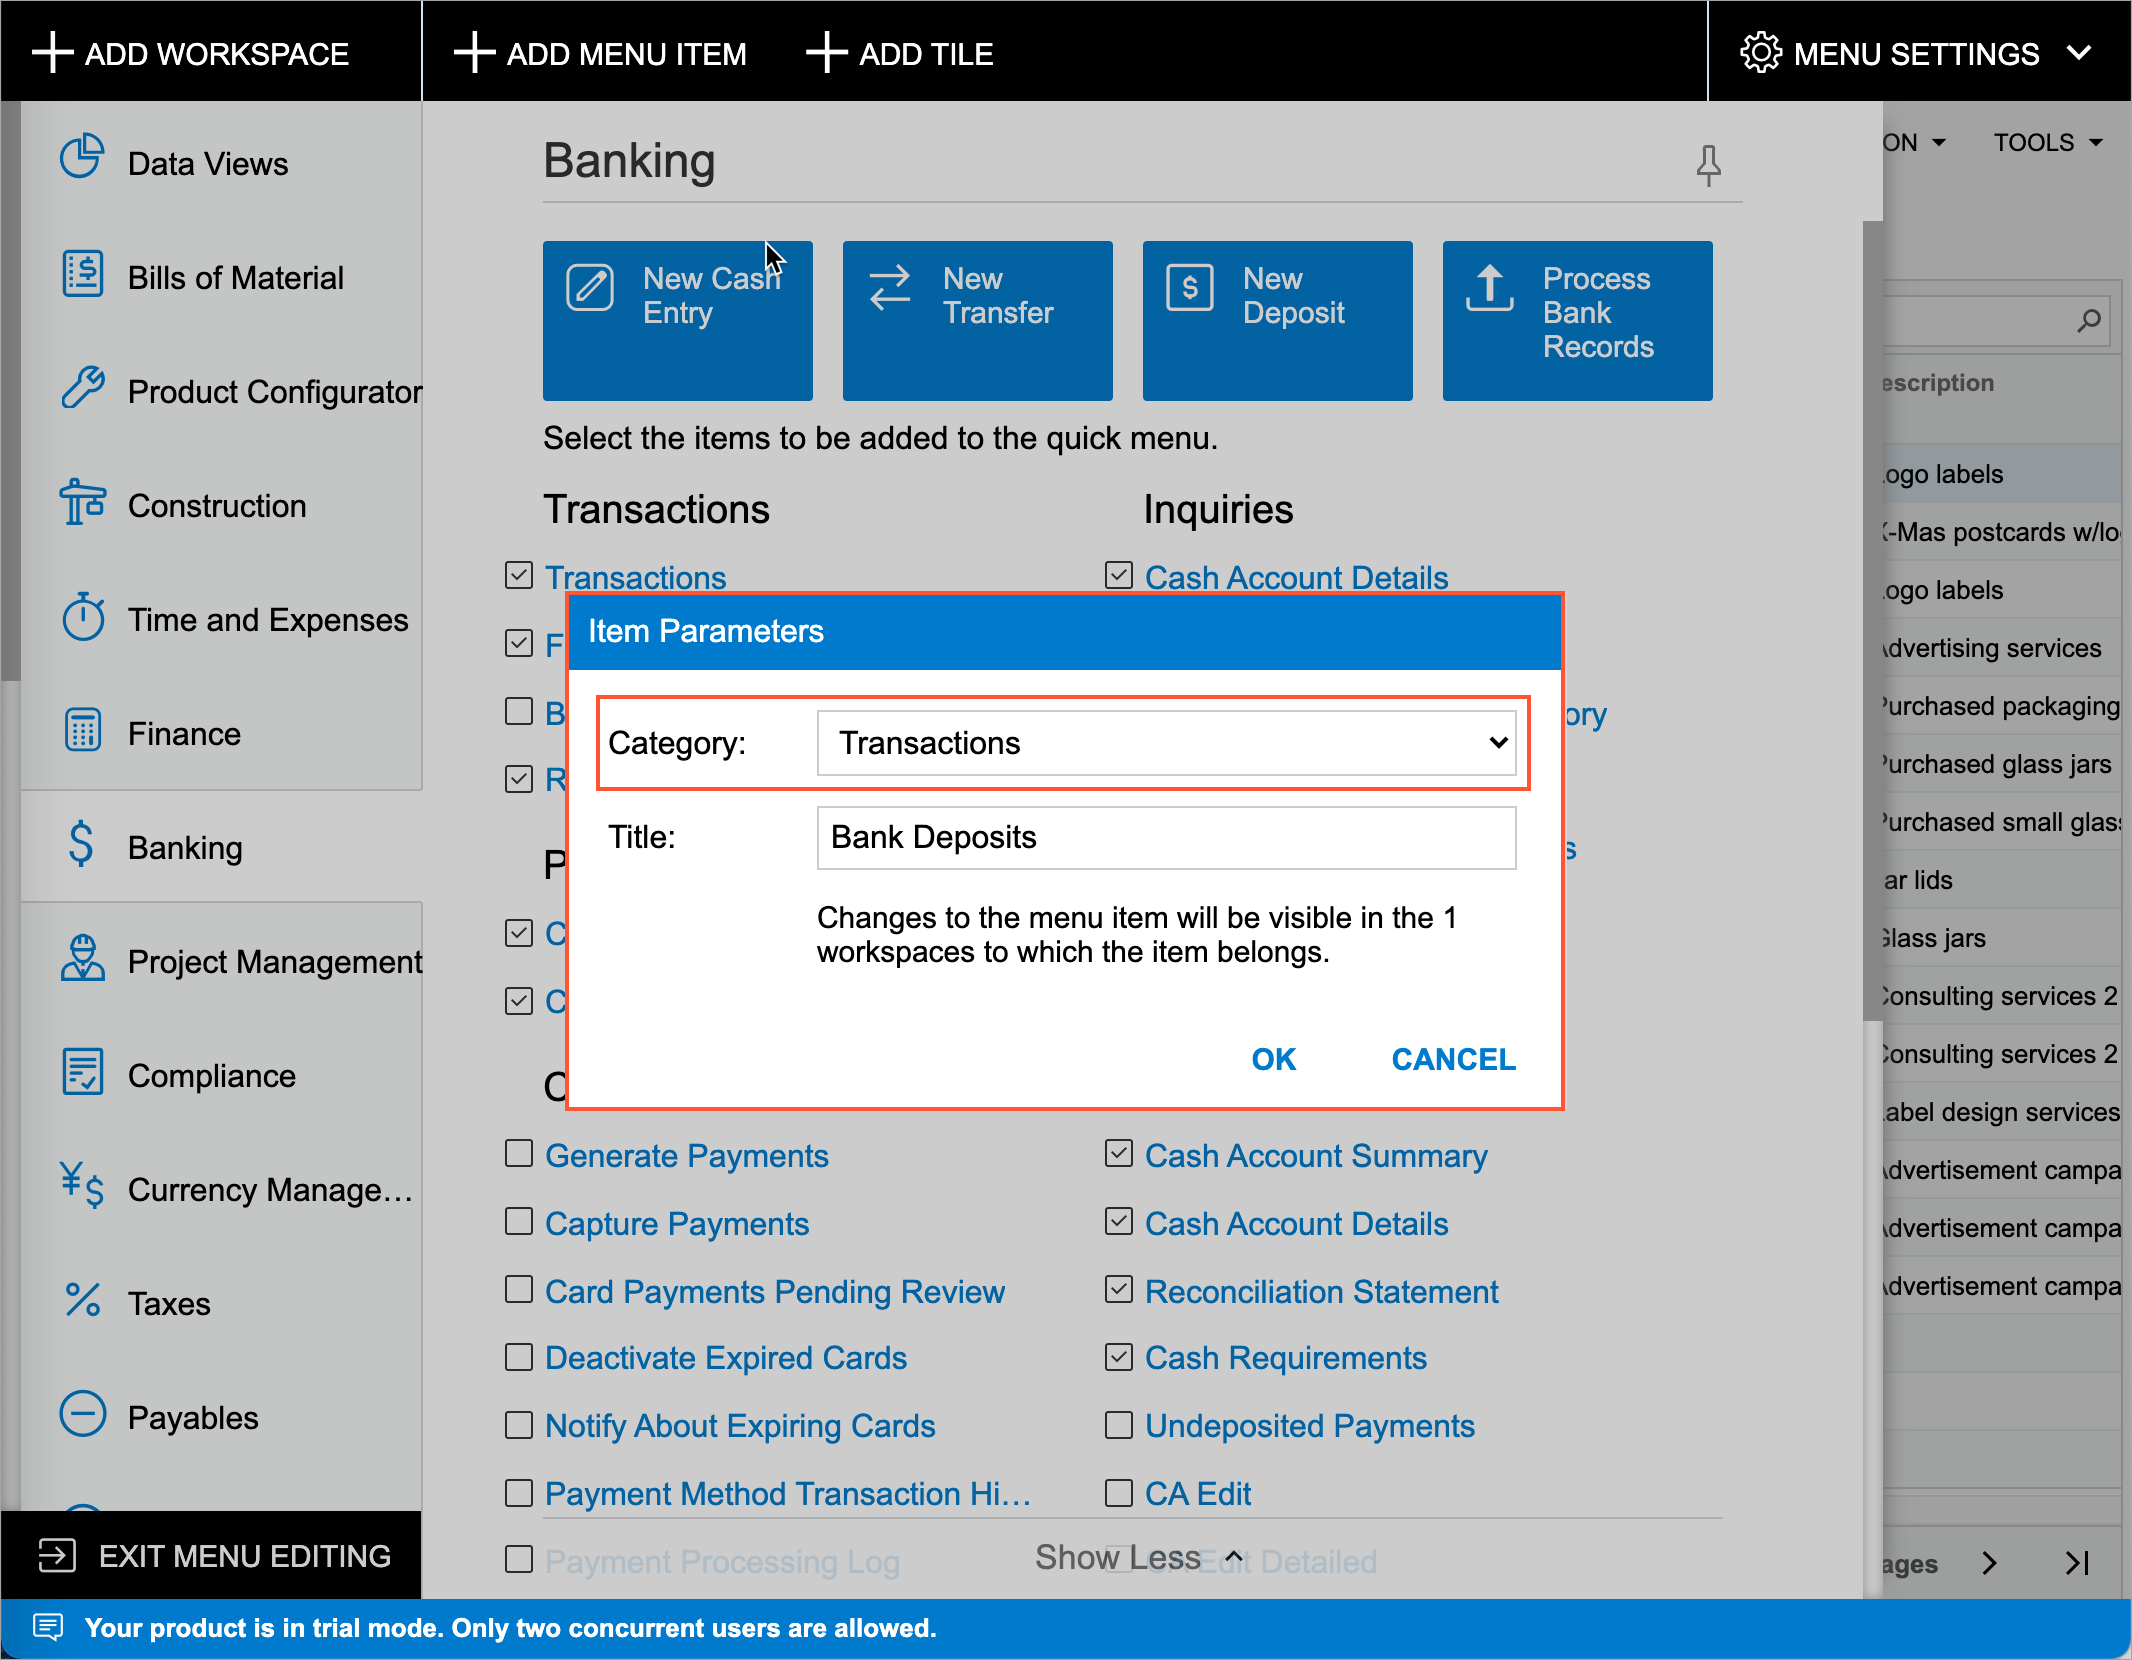
If you need to move a link to an existing category that is displayed in a workspace,
in Menu Editing mode with the workspace open, you can simply drag the link to the
category. Alternatively, you can change a category, by editing the link parameters.
You point at the form, report, or dashboard to be moved to another category; on the
pop-up toolbar of the item, you click Edit Link Parameters
(![]() ) next to the
link. The system opens the Item Parameters dialog box, where
you can select another category for the link in the Category
box (see the following screenshot) and then click OK.
) next to the
link. The system opens the Item Parameters dialog box, where
you can select another category for the link in the Category
box (see the following screenshot) and then click OK.
Changing a Form's Title
If a title of a form is not optimal for your company's users, you can change the title to one your users are accustomed to. The new title will be used for the form throughout the whole system rather than just in the workspace from which you change it.
To do this, in Menu Editing mode, you open the needed workspace. You point to the
form, report, or dashboard to be renamed; on the pop-up toolbar of the item, you
click Edit Link Parameters (![]() ) next to the
link to the form. The system opens the Item Parameters dialog
box, where you can type the new name of the form in the Title
box and click OK to close the dialog box.
) next to the
link to the form. The system opens the Item Parameters dialog
box, where you can type the new name of the form in the Title
box and click OK to close the dialog box.