
UI Navigation Options: Workspaces
The main menu is the primary navigation tool for users as they use MYOB Acumatica. The system provides a predefined list of workspaces whose menu items are displayed on the main menu. The list of workspaces that a user can see by default is determined by the features enabled (which are based on the MYOB Acumatica license) and the access rights of the user roles assigned to the particular user account.
Renaming a Workspace
If a title of any existing workspace is not optimal for your company's users, you can
change the title to help users easily find the forms, reports, and dashboards they
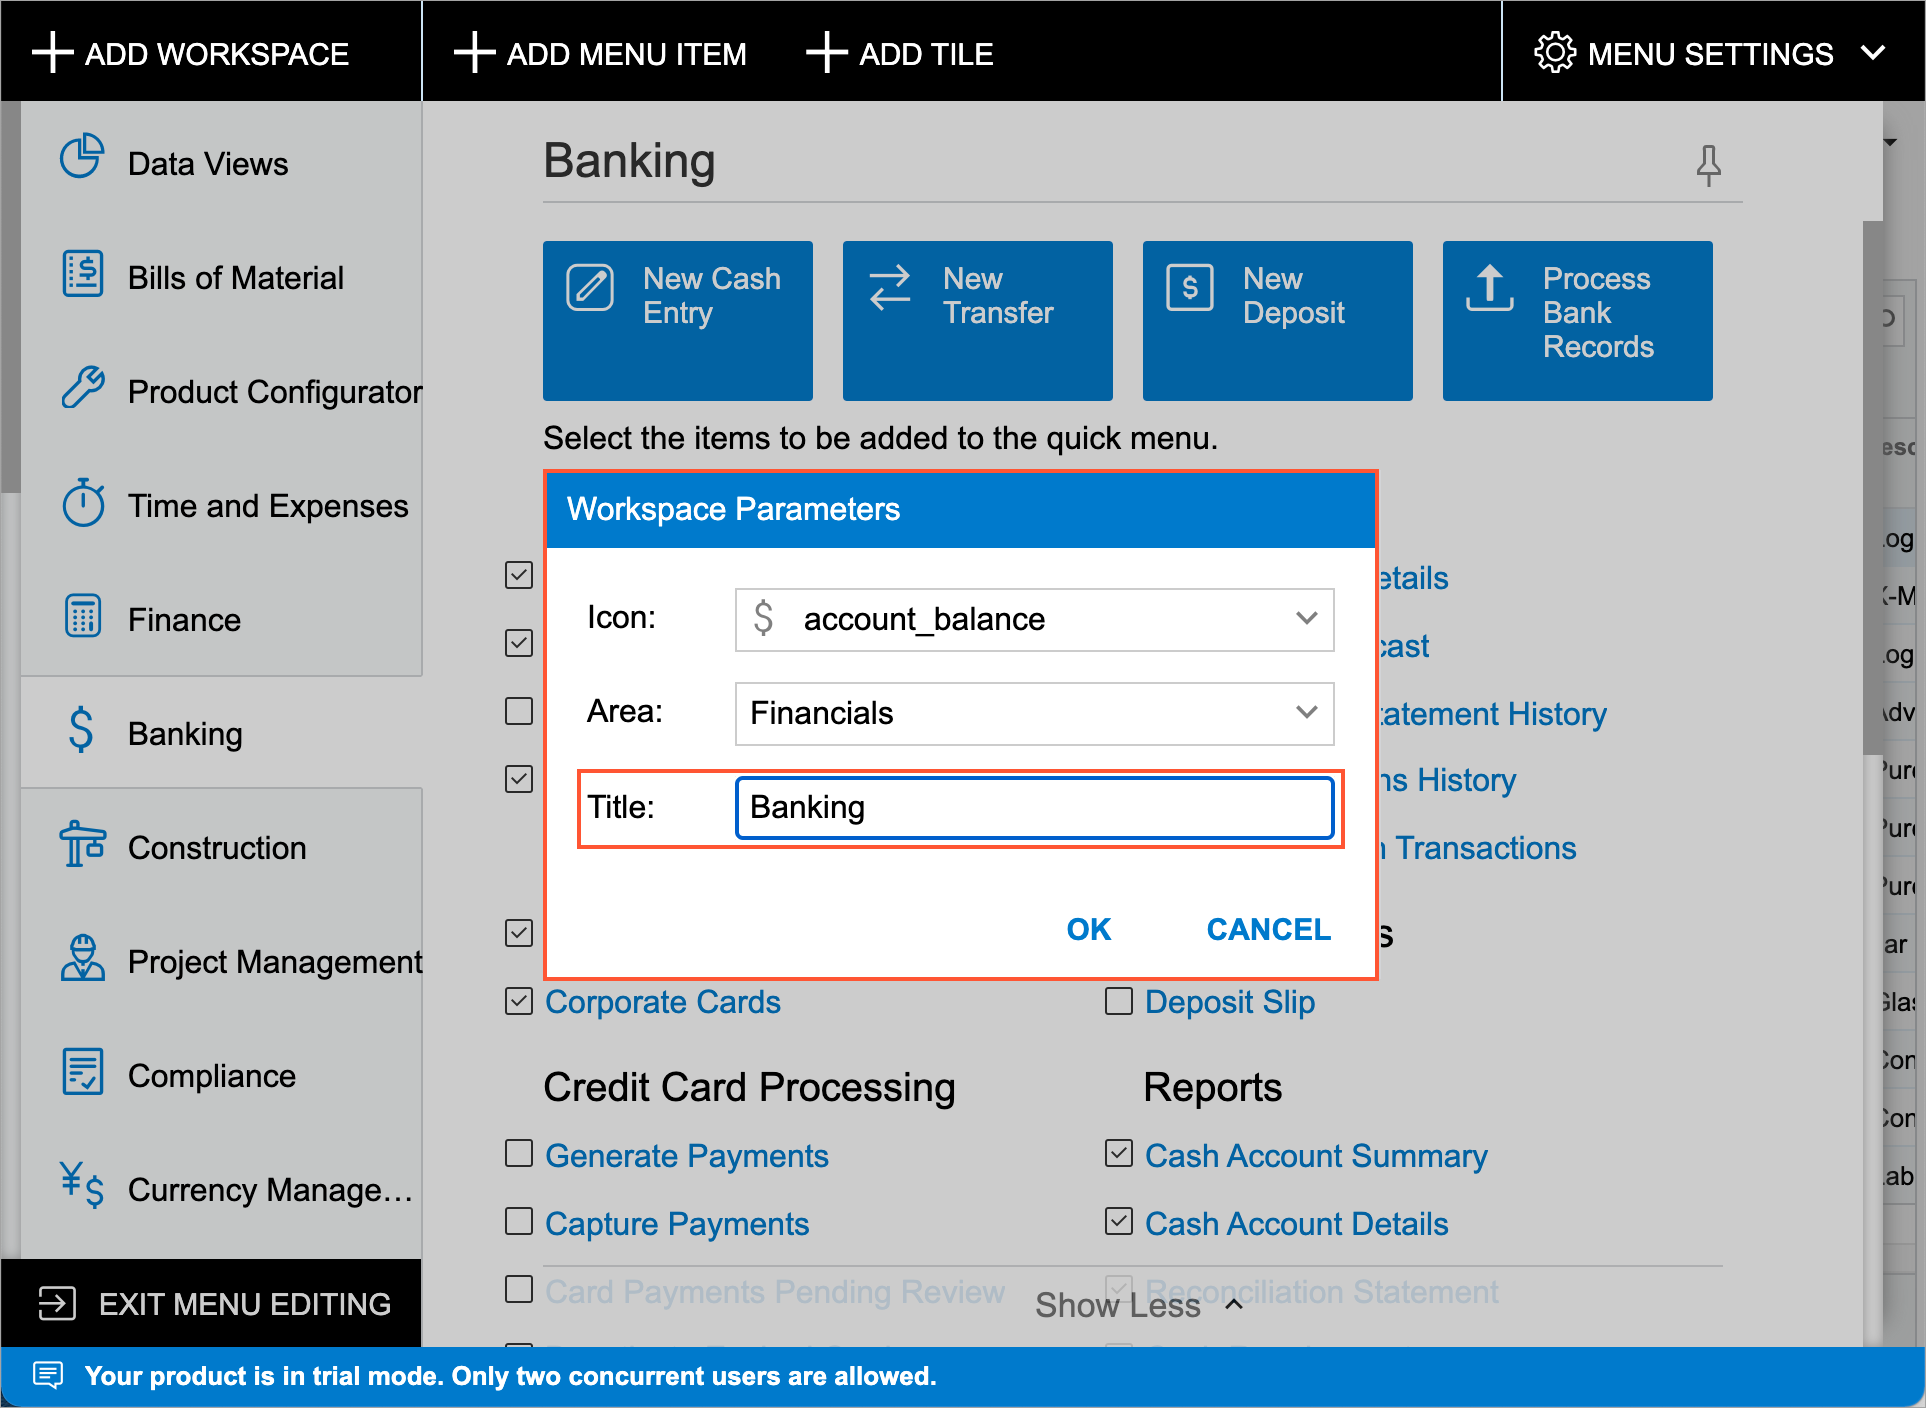
need. To do this, you switch to Menu Editing mode; you then point at the workspace
and click Edit Workspace Parameters (![]() ) to open the
Workspace Parameters dialog box. In the
Title box of the dialog box, you type the new title of
the workspace, as shown in the following screenshot, and click
OK.
) to open the
Workspace Parameters dialog box. In the
Title box of the dialog box, you type the new title of
the workspace, as shown in the following screenshot, and click
OK.
Removing a Workspace from the Main Menu
If a predefined workspace does not fit the business processes of your organization and will never be needed by system users, you can remove it from the main menu, including from the More Items menu. When you remove a workspace, the system deletes the tiles that belonged to the workspace, but the forms, reports, and dashboards that belonged to the workspace remain in the system. You can add to other workspaces links to these forms, reports, and dashboards.
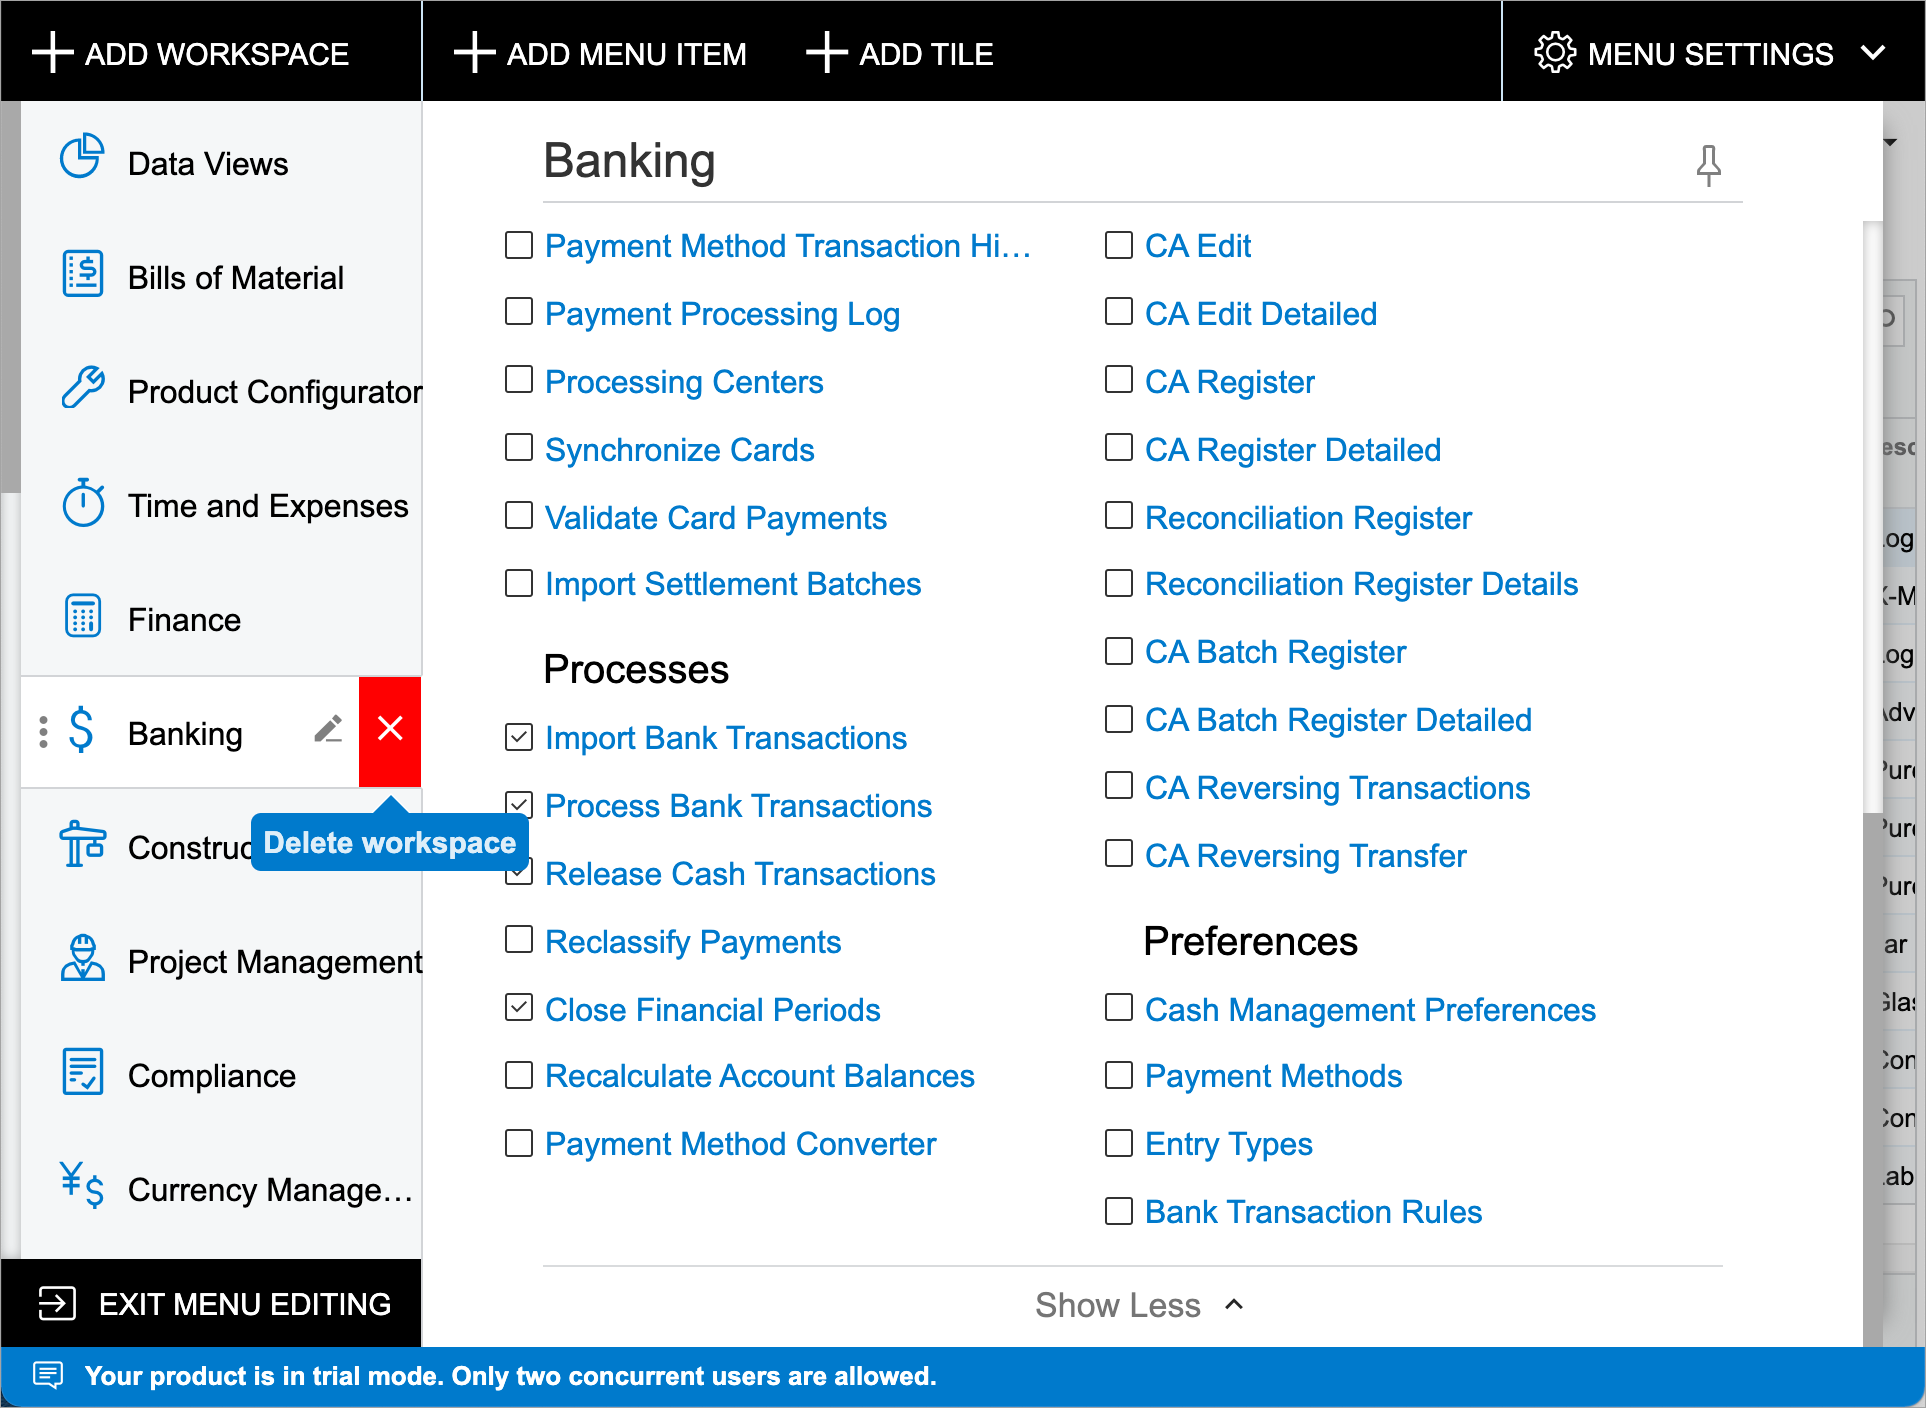
To remove a workspace, you switch to Menu Editing mode, point at the workspace, and
click Delete Workspace (![]() ), as shown in
the following screenshot.
), as shown in
the following screenshot.
Defining the Displayed Menu Items
The pinned workspaces have corresponding menu items in the main menu panel (so that users can quickly access them), and the unpinned workspaces do not have corresponding menu items but can be found on the More Items menu.
You define for all users whether a workspace is displayed as menu item in the main menu panel or can be found on the More Items menu by pinning and unpinning them as follows:
- To pin a workspace and move it to the main menu, you switch to Menu Editing
mode, open the workspace and click the Pin to Main Menu
Panel (
 ) button.
 - To unpin a workspace and move it to the More Items menu,
you switch to Menu Editing mode, open the workspace, and click the
Unpin from Main Menu Panel (
 ) button.
The users of your system may personalize the list of the workspaces displayed for their user account by pinning and unpinning workspaces by themselves.
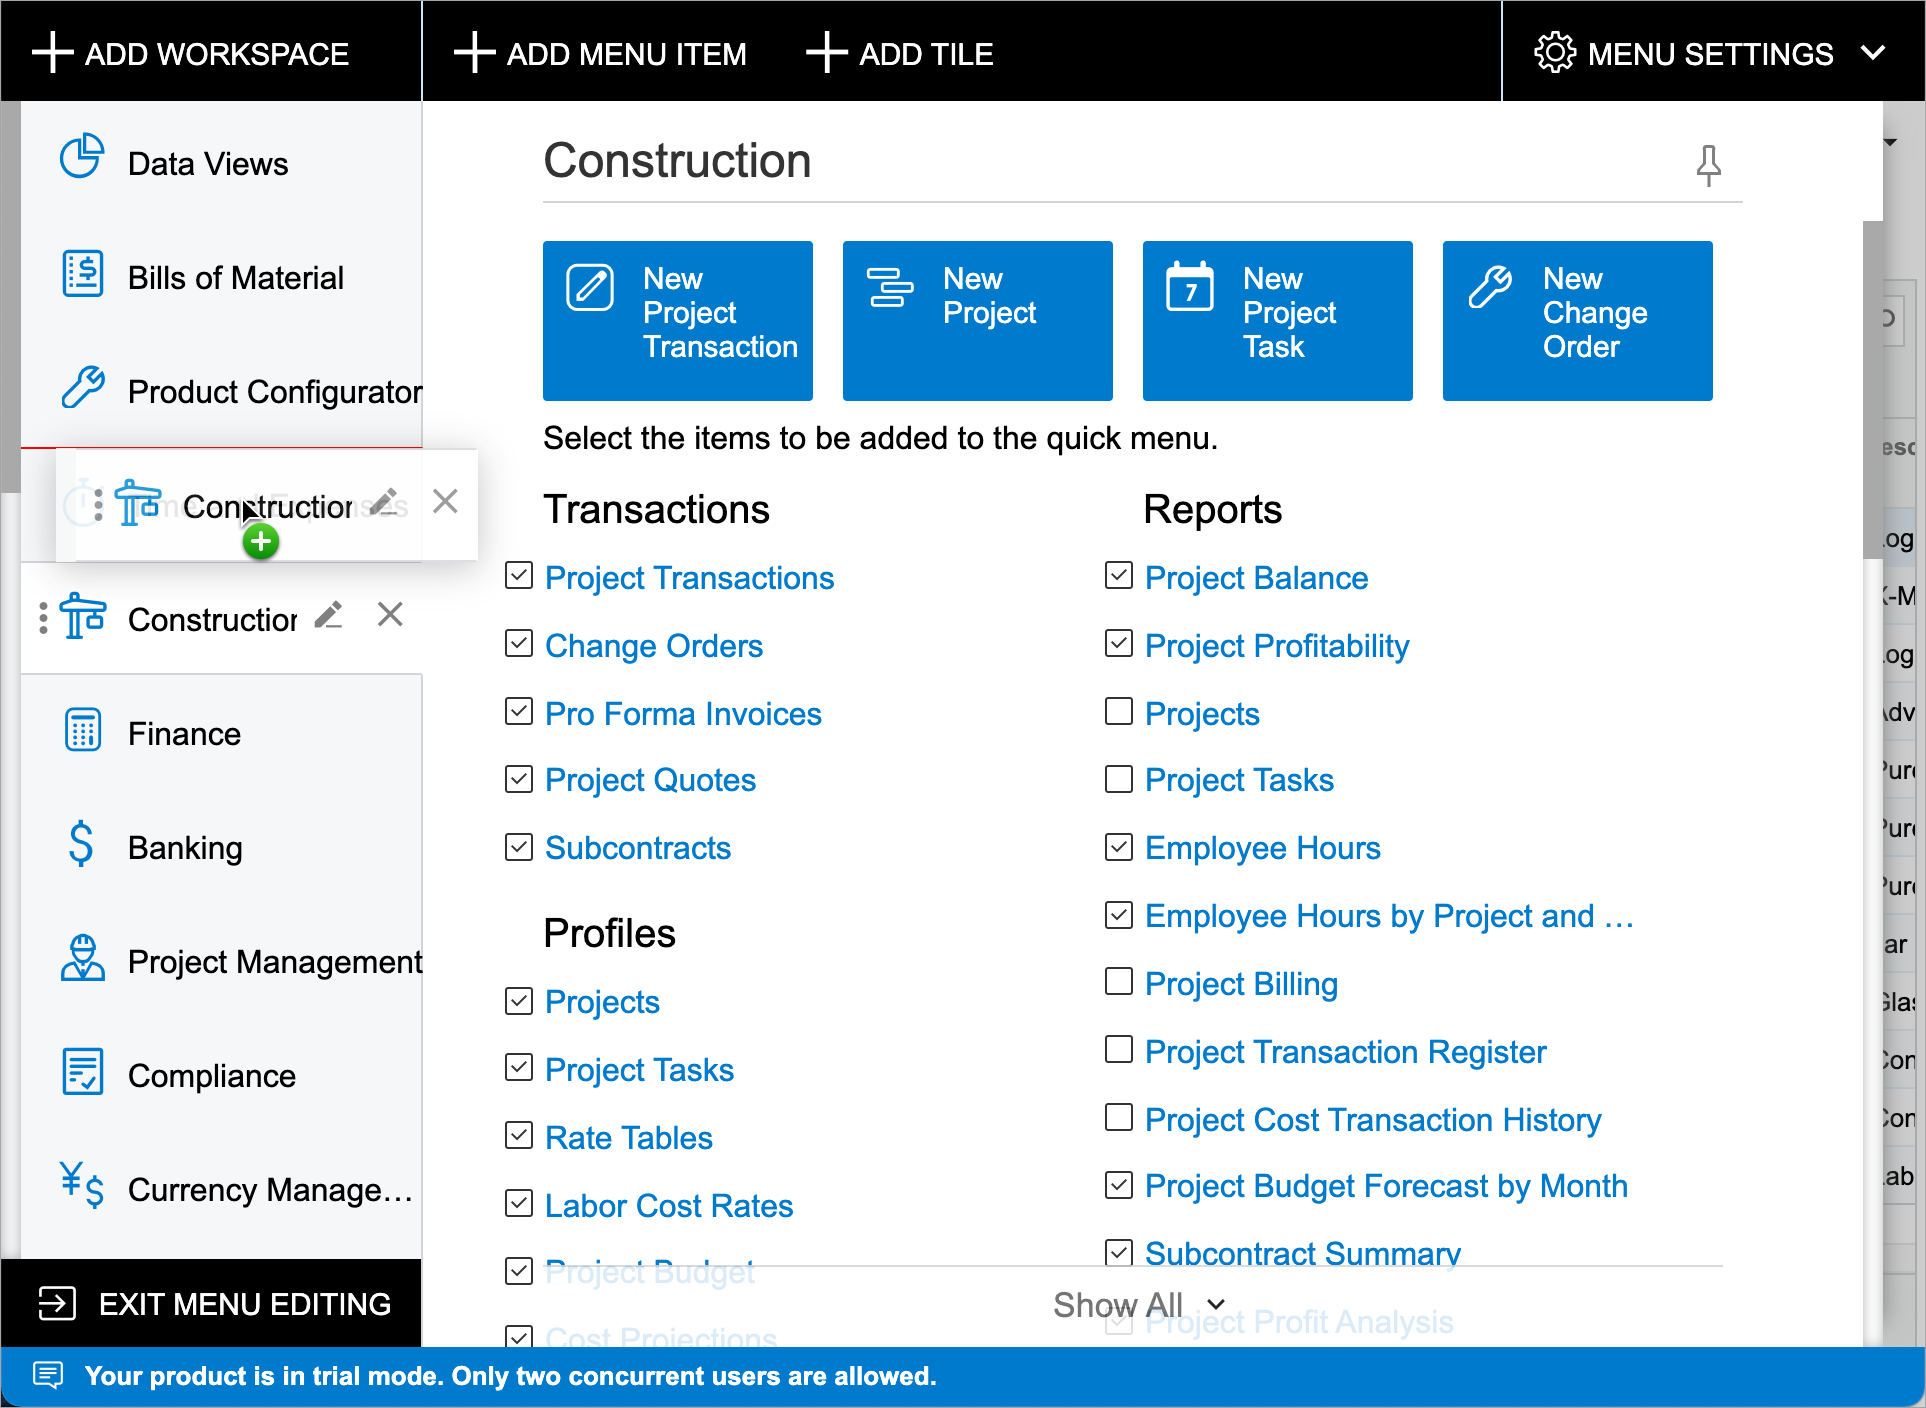
Reordering the List of Pinned Menu Items
If the predefined order of the pinned menu items does not work for your company processes, you reorder the menu items.
Adding a Custom Workspace
If your organization has a specific business process that requires forms, reports, and dashboards from different functional areas to be gathered on one workspace for employees' convenience, you can create a custom workspace and pin it to the main menu panel.
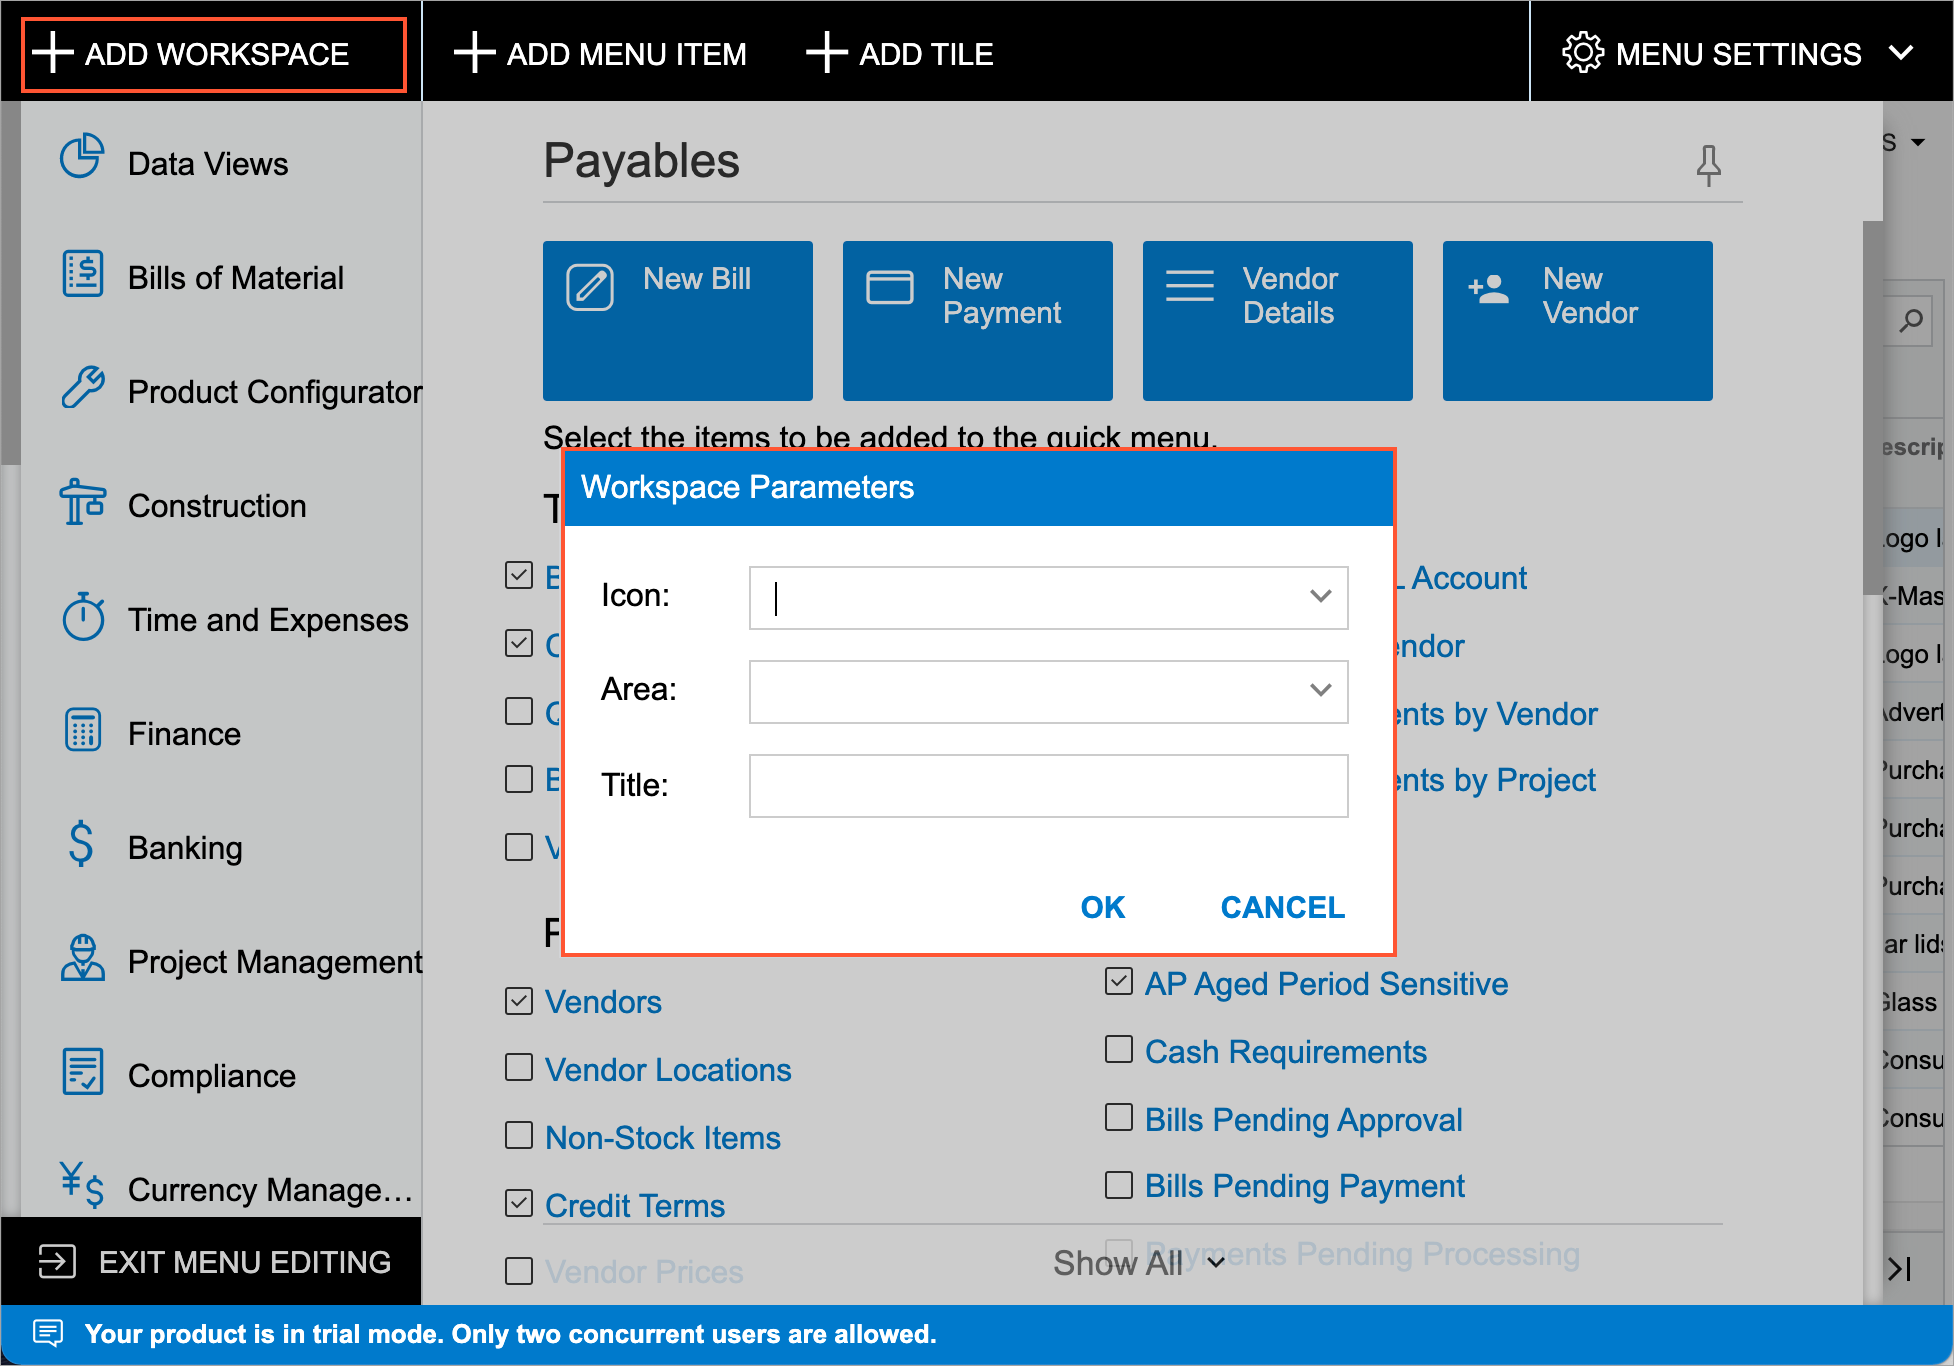
In Menu Editing mode, you click Add Workspace in the upper left corner of the screen (see the screenshot below). In the Workspace Parameters dialog box, which opens, you do the following:
- From the set of predefined icons, you select the icon to be displayed next to the workspace.
- From the set of predefined areas, you select the area under which the system will display the workspace on the More Items menu.
- You type the title of the workspace.
- You click OK to save the parameters and close the dialog box.
After you have added the workspace, you proceed with populating it with links to forms, reports, and dashboards.
Also, if you want to display a menu item for the workspace on the main menu, in the workspace title bar, click the Pin to Main Menu Panel button.