
UI Navigation Options: To Configure a Workspace
The following activity will walk you through the process of creating and configuring a workspace in MYOB Acumatica.
Story
Suppose that a customer support manager of the Muffins & Cakes company has asked you, the system administrator, to create a new workspace for quick access to the forms that customer support representatives use most often. You have been asked to initially include the Customers (AR303000) and Cases (CR306000) forms in this workspace. The workspace should be pinned to the main menu panel by default.
Also, the manager has requested that you add a new tile for the quick creation of cases from Allen's Bakery, the company's highest-priority customer, for juicer repair (that is, with the case class for juicer repair specified). To do this, you need the Cases form to open with the appropriate customer and case class filled in.
Configuration Overview
In the U100 dataset, the following tasks have been performed to support this activity:
- On the Companies (CS101500) form, the Muffins & Cakes (MUFFINS) company has been configured.
- On the Case Classes (CR206000) form, the JREPAIR case class has been configured.
- On the Customers (AR303000) form, the ABAKERY customer account has been configured.
Process Overview
You will inspect the Case Class and Business Account elements on the Cases (CR306000) form to find the corresponding data fields. On the Case Classes (CR206000) form and Customers (AR303000) form, you will find the URL parameters for the needed customer and case class.
You will switch to Menu Editing mode and will create the Customer Cases workspace. You will add the New Allen's Bakery Case tile to the workspace. Then you will add links to the Customers and Cases forms to this workspace.
System Preparation
Before you begin configuring a workspace, do the following:
- Launch the MYOB Acumatica website, and sign in to a company with the U100 dataset preloaded; you should sign in as system administrator by using the gibbs username and the 123 password.
- On the Company and Branch Selection menu in the top pane of the MYOB Acumatica screen, make sure that the Muffins Head Office & Wholesale Center branch is selected. If it is not selected, click the Company and Branch Selection menu button to view the list of branches that you have access to, and then click Muffins Head Office & Wholesale Center.
Step 1: Preparation for the Configuration of the Tile
To gather the data you will need to configure the tile, do the following:
- Open the Cases (CR306000) form.
- Press Ctrl+Alt, and click the Case Class element in the
Summary area of the form.Tip:As an alternative, you can click on the form title bar and then click the needed UI element.
- In the Element Properties dialog box, which opens, note the value in the Data Field box, which is CaseClassID; close the dialog box.
- Press Ctrl+Alt, and click the Business Account element in the Summary area of the form.
- In the Element Properties dialog box, which opens, note the value in the Data Field box, which is CustomerID; close the dialog box.
- Open the Case Classes (CR2060PL) form. Review the case class descriptions in the Description column, and locate the class with the Repair of juicers description (JREPAIR).
- In the Case Class ID column, click JREPAIR.
The system opens the Case Classes (CR206000) form with the JREPAIR class selected.
- In the address bar of your browser window, note the value of the CaseClassID URL parameter, which is JREPAIR.
- Open the Customers (AR3030PL) form. Review the customer descriptions in the Description column, and locate the customer record with the Allen's Bakery description (ABAKERY).
- In the Customer ID column, click ABAKERY.
The system opens the Customers (AR303000) form with ABAKERY (Allen's Bakery) selected.
- In the address bar of your browser window, note the value of the
AcctCD URL parameter, which is
ABAKERY+++.Tip:The identifiers of customer accounts have a fixed length. If an identifier's length is less than the fixed one, the system replaces the missing symbols with spaces, which are transformed to + in a URL address.
You have collected the information needed for adding the requested URL parameter to the new tile, which is CaseClassID=JREPAIR&CustomerID=ABAKERY+++.
Step 2: Adding the Workspace
To create the new workspace, do the following:
- On the main menu of MYOB Acumatica (lower left), click the Open Configuration Menu button (...), and then click Edit Menu to switch to Menu Editing mode.
- On the top toolbar (upper left), click Add Workspace.
- In the Workspace Parameters dialog box, which opens,
specify the following settings:
- Icon: phone_iphone
- Area: Other
- Title: Customer Cases
- Click OK to save your changes and close the dialog box.
- In the upper right corner of the workspace title bar, click the Pin
to Main Menu Panel button. Notice that the Customer
Cases menu item has been added to the main menu, as shown in the
following screenshot.
Figure 1. The Customer Cases workspace in Menu Editing mode 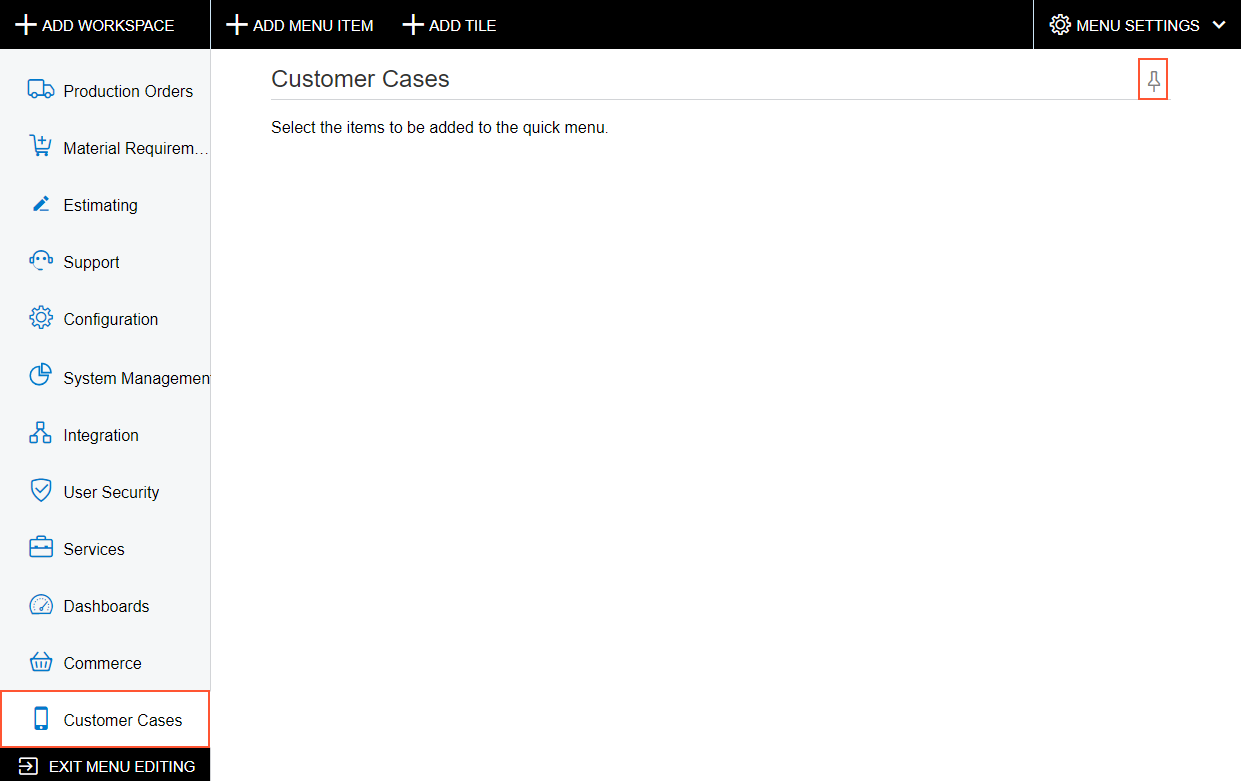
Step 3: Adding the Tile with Parameters
Now you will add the new tile for users to quickly create cases for juicer repair from Allen's Bakery. To add the requested tile with the needed tile parameters to the workspace, while you are still reviewing the Customer Cases workspace in Menu Editing mode, do the following:
- On the top toolbar, click Add Tile.
- In the Tile Parameters dialog box, which opens, specify
the following settings:
- Icon: add
- Title: New Allen's Bakery Case
- Form: CR306000 - Cases
- Parameters: CaseClassID=JREPAIR&CustomerID=ABAKERY+++
- Click OK to save your changes and close the dialog
box.
The following screenshot shows the workspace in Menu Editing mode with the newly added tile.
Figure 2. The new tile on the Customer Cases workspace in Menu Editing mode 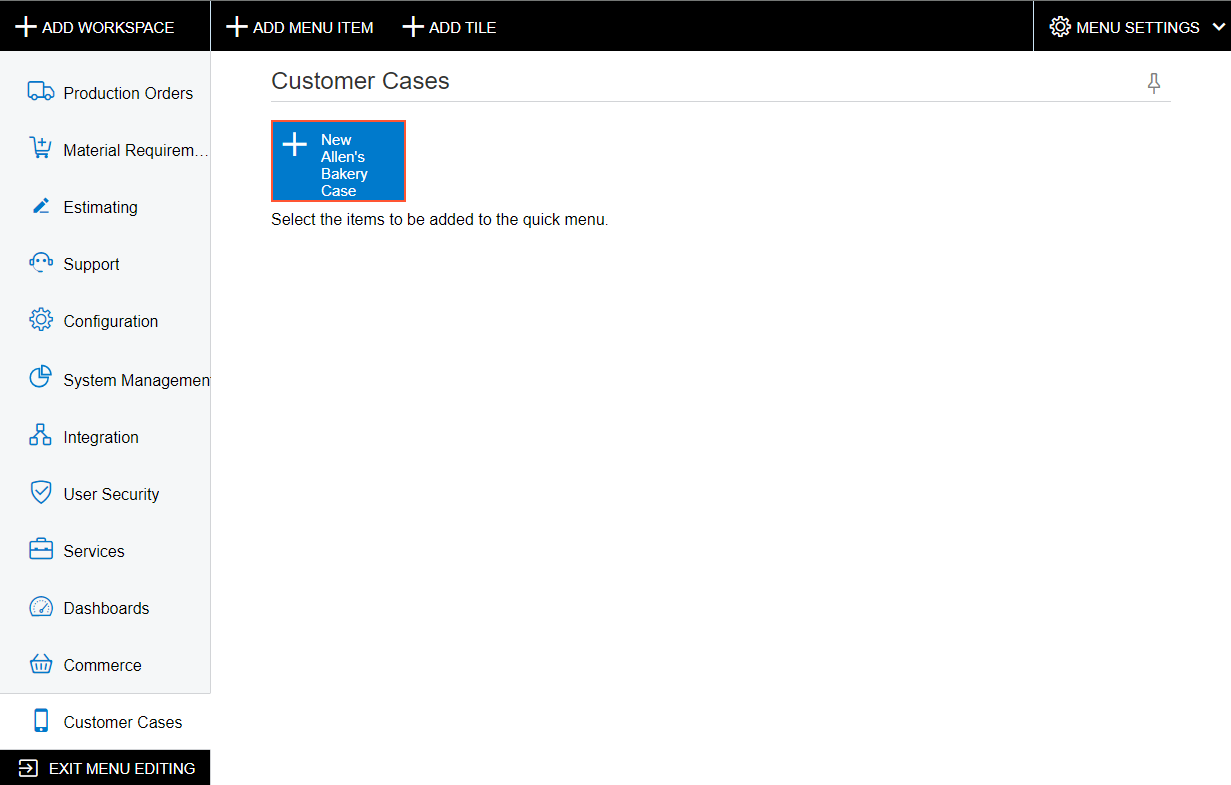
Step 4: Adding Links to the Workspace
To add links to forms to the Customer Cases workspace, do the following:
- In Menu Editing mode of MYOB Acumatica, while you are still reviewing the Customer Cases workspace, on the top toolbar, click Add Menu Item.
- In the Select Forms dialog box, which opens, search for
the Customers (AR3030PL - Customers) item in the
Profiles category of the
Receivables workspace, and select the unlabeled check
box for it, as shown in the following screenshot.
Figure 3. The selection of the Customers item in the Select Forms dialog box 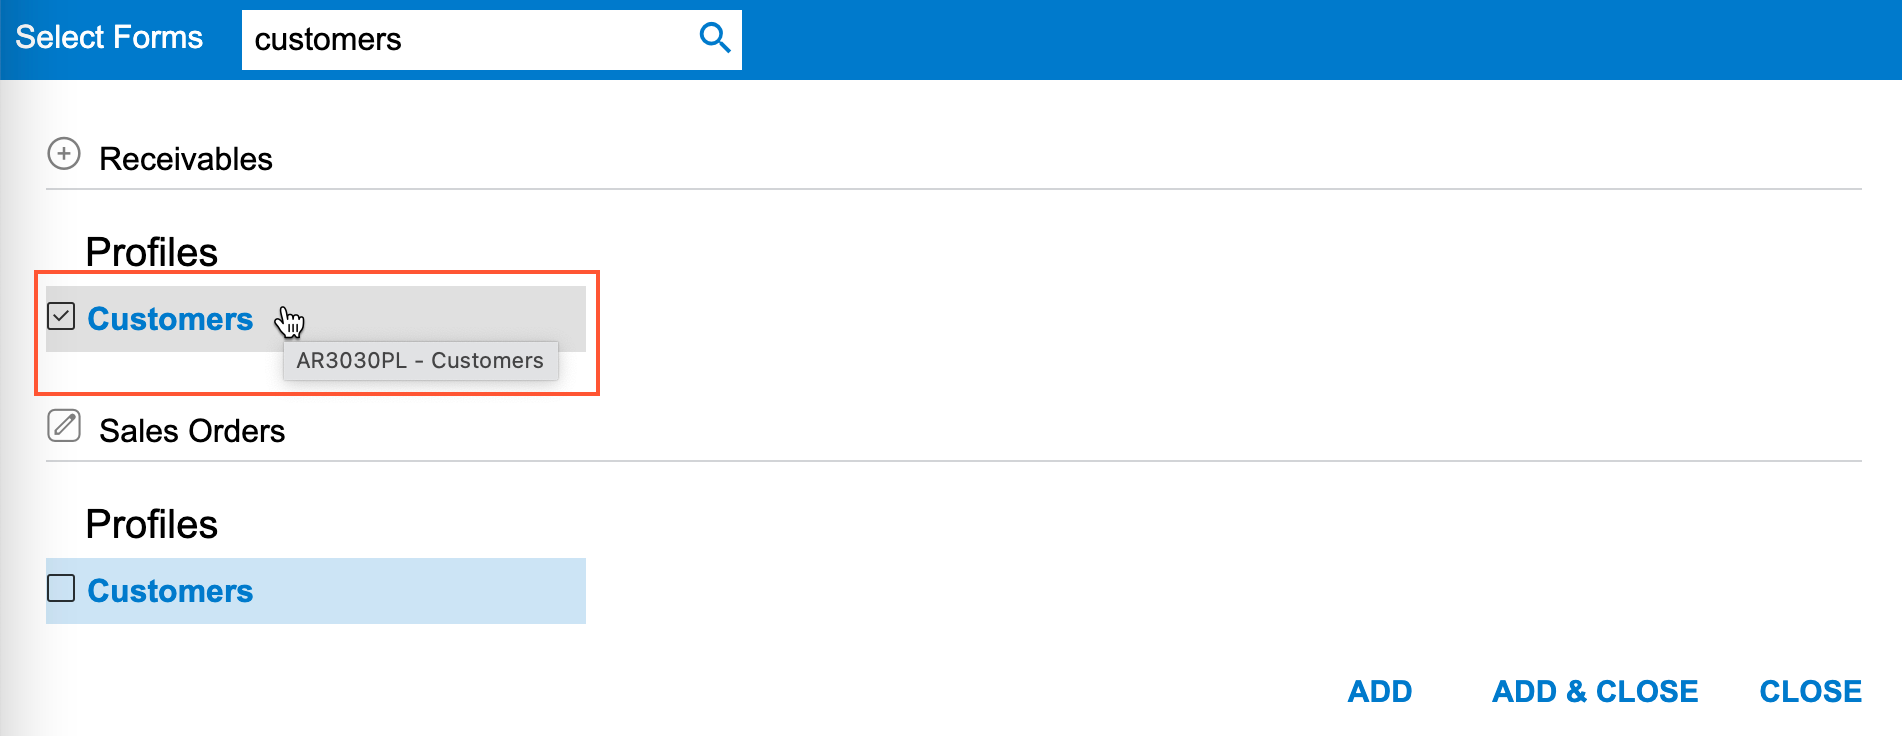
- Click Add to add the link to the form.
- While you are still viewing the Select Forms dialog box, search for the Cases (CR3060PL - Cases) item in the Activities category of the Support workspace, and select the unlabeled check box for it.
- Click Add & Close.
- In the lower left corner of the screen, click Exit Menu
Editing to save your changes and exit Menu Editing mode.
The Customer Cases workspace should look as shown in the following screenshot.
Figure 4. The Customer Cases workspace 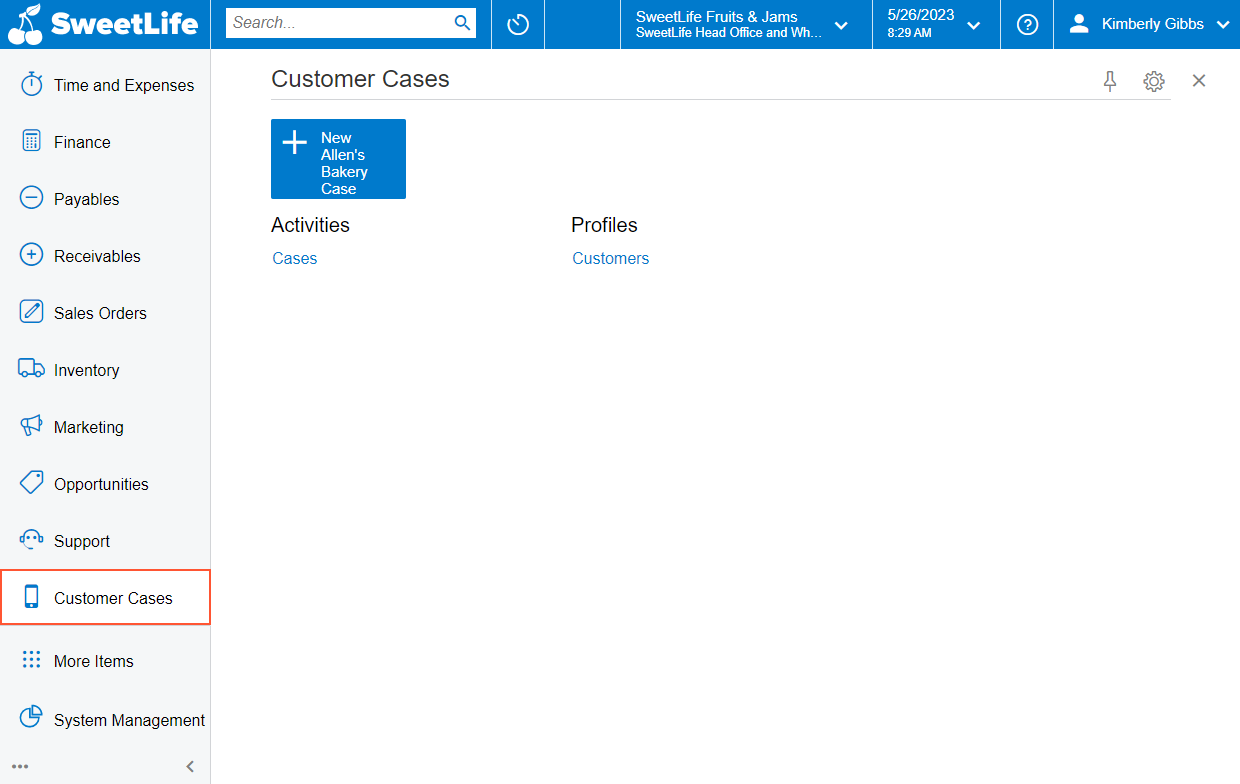
- While you are still viewing the Customer Cases workspace, click the tile.
- Verify that the system opens the Cases
(CR306000) form with the following settings filled in:
- Case Class: JREPAIR - Repair of juicers
- Business Account: ABAKERY - Allen's Bakery
In this activity, you have added a new workspace, pinned it to the main menu panel, and populated it with a tile and links to the frequently accessed forms.