Refunds: To Void a Refund
In this activity, you will learn how to void a refund.
Story
Suppose that a refund for HM’s Bakery & Cafe (HMBAKERY) that you created in the previous activity has to be voided (because the date is incorrect) so that a new refund can be created.
Acting as the chief accountant of SweetLife, you need to void the refund.
Configuration Overview
For the purposes of this activity, the following features have been enabled on the Enable/Disable Features (CS100000) form:
- Standard Financials, which provides the standard financial functionality
- Multibranch Support, which supports multiple branches in your instance of MYOB Acumatica
- Multicompany Support, which supports multiple companies within one tenant.
On the Accounts Receivable Preferences (AR101000) form, the Hold Documents on Entry check box has been selected in the Data Entry Settings section.
On the Customers (AR303000) form, the HMBAKERY (HM’s Bakery & Cafe) customer has been defined.
Process Overview
In this activity, you will void a refund on the Payments and Applications (AR302000) form, and review the document that the system creates.
System Preparation
Before you perform the steps of this lesson, do the following:
- Launch the MYOB Acumatica website, and sign in as an accountant by using the following credentials:
- Username: johnson
- Password: 123
- In the info area, in the upper-right corner of the top pane of the MYOB Acumatica screen, make sure that the business date in your system is set to 1/30/2025. If a different date is displayed, click the Business Date menu button and select 1/30/2025. For simplicity, in this activity, you will create and process all documents in the system on this business date.
- On the Company and Branch Selection menu, also on the top pane of the MYOB Acumatica screen, make sure that the SweetLife Head Office and Wholesale Center branch is selected. If it is not selected, click the Company and Branch Selection menu button to view the list of branches that you have access to, and then click SweetLife Head Office and Wholesale Center.
- Make sure that you have created a refund as described in Refunds: To Create a Refund and Apply a Credit Memo to It.
Step 1: Voiding the Refund
To void the refund with the incorrect date, do the following:
- Open the Payments and Applications (AR302000) form.
- In the Type box of the Summary area, select Refund.
- In the Reference Nbr. box, select the reference number of the refund that you need to void (the refund you created in the Refunds: To Create a Refund and Apply a Credit Memo to It activity).
- On the form toolbar,
click
Void.
The system does the following:
- Reverses the refund in full.
- Changes the status of the refund to Voided. (The original refund is not shown on the form.)
- Creates a document with the Voided Refund type that has the same reference number as the refund has. (You will use this document in the remaining instructions of this activity.)
- In
the Application Date box of the Summary area, change the
date of the voided refund to 1/31/2025.
The date specified in this box should be the date when the voided refund is released (Payment Date) and when the related batch was created (Transaction Date).
Step 2: Releasing the Voided Refund
To release the voided refund, do the following:
- On the form toolbar, click Remove Hold.
- On the form toolbar,
click
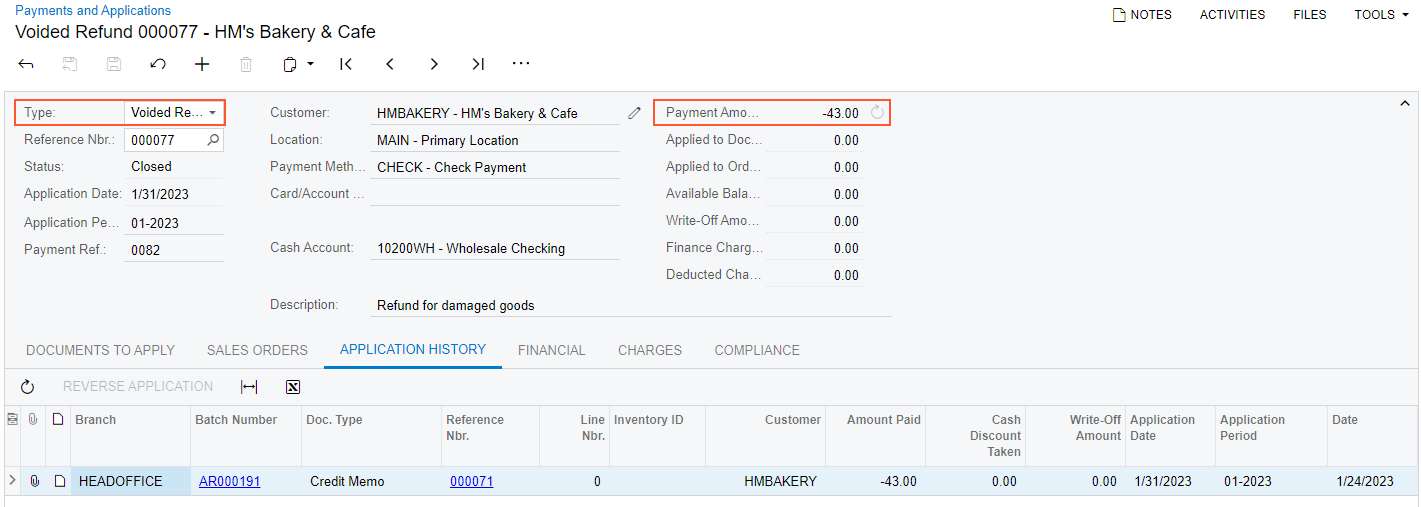
Release. The following screenshot shows
the released voided refund.
Figure 1. The voided refund for the HMBAKERY customer