
To Set Up Plaid Integration
You perform the following instructions to set up the integration of MYOB Acumatica with Plaid. You use the Retrieve Bank Feed Transactions (CA507500) form as a starting point and then specify the settings of the bank feed on the Bank Feeds (CA205500) form.
Before You Proceed
Make sure that the Bank Feed Integration feature has been enabled on the Enable/Disable Features (CS100000) form.
To Set Up Plaid Integration
To set up Plaid integration, do the following:
- Open the Retrieve Bank Feed Transactions (CA507500) form.
- On the form toolbar, click Add New Record.
- On the Bank Feeds (CA205500) form, which is opened, specify
the following settings:
- Bank Feed ID: PLAID
- Bank Feed Type: PlaidTip: If you want to set up a connection to the Plaid sandbox, you should select the Test Plaid type. Cash accounts mapped to bank accounts in Test Plaid bank feeds will also be counted by the license and will reduce the number of available bank feed accounts.
- Import Start Date: The date starting from which you want to import transactions
- On the form toolbar, click Connect, as shown in the
following screenshot.
Figure 1. Clicking Connect on the Bank Feeds form 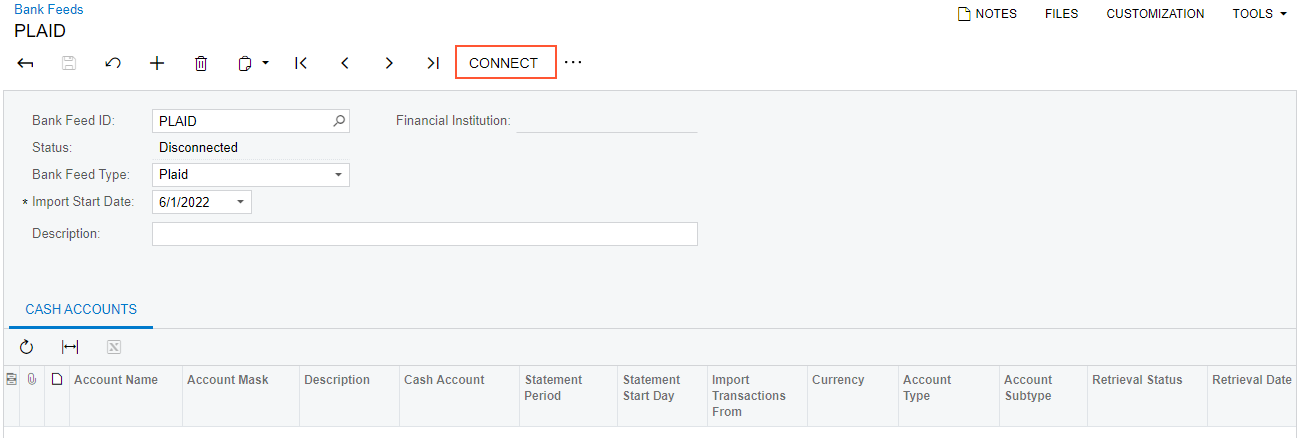
- In the dialog box that is opened, which is shown in the following screenshot,
click Continue.
Figure 2. Continuing the connection 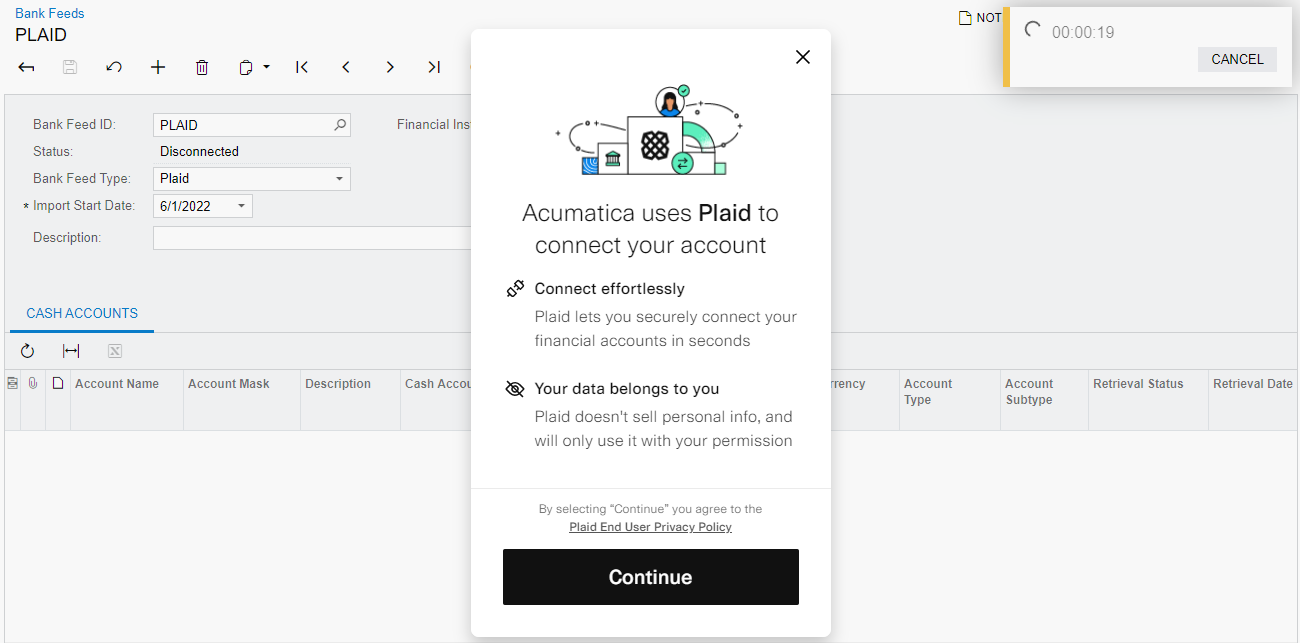
Attention: The dialog box shown in the previous screenshot and the dialog boxes shown later are hosted forms supported by Plaid and are subject to change. (Plaid might change the view and steps required for the user before selecting the financial institution.) Once the user selects a bank, the authorization path will also depend on the bank's setup. - In the next dialog box, which is shown in the following screenshot, select a
bank. (In this example, Chase is selected.)
Figure 3. Selecting a bank 
- In the next dialog box, which is shown in the following screenshot, enter the
username and password, and click Submit.
Figure 4. Entering Plaid user credentials 
- In the next dialog box, which is shown in the following screenshot, select an
account or multiple accounts in Plaid, and click
Continue.
Figure 5. Selecting accounts in Plaid 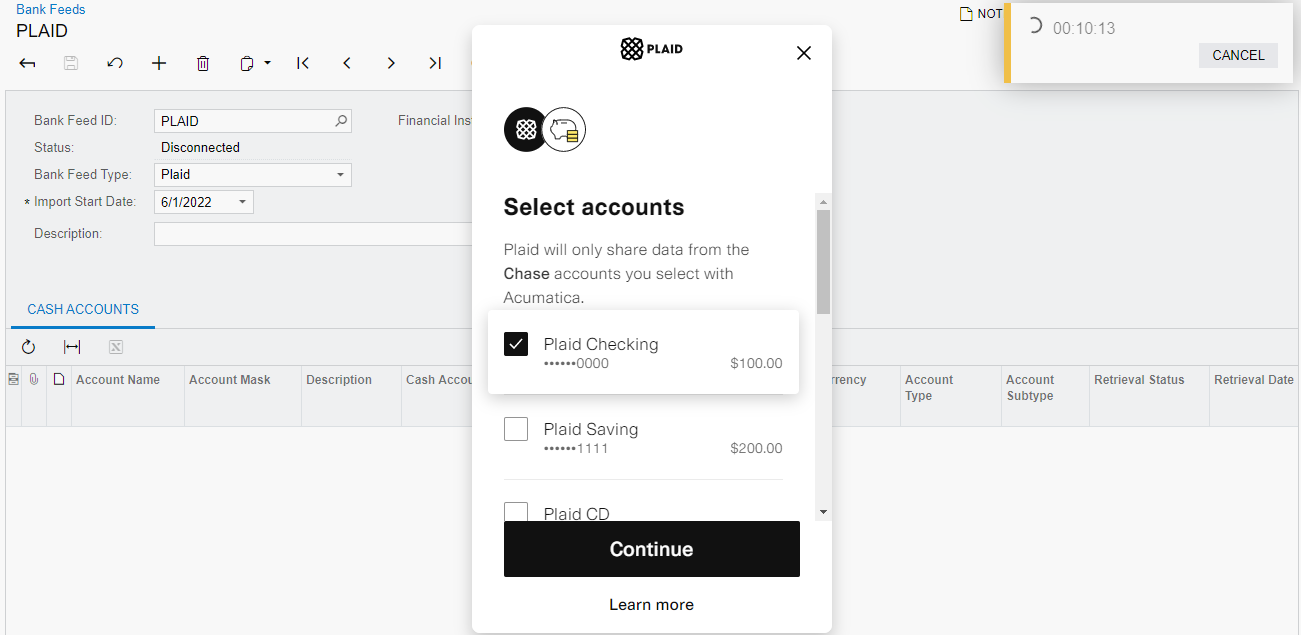
- In the next dialog box, which is shown in the following screenshot, click
Continue to complete the linking of the account.Tip: When you click Continue in this dialog box, the system will check whether the selected accounts have been linked in other bank feeds and display an error message if they have.
Figure 6. Completing the connection to Plaid 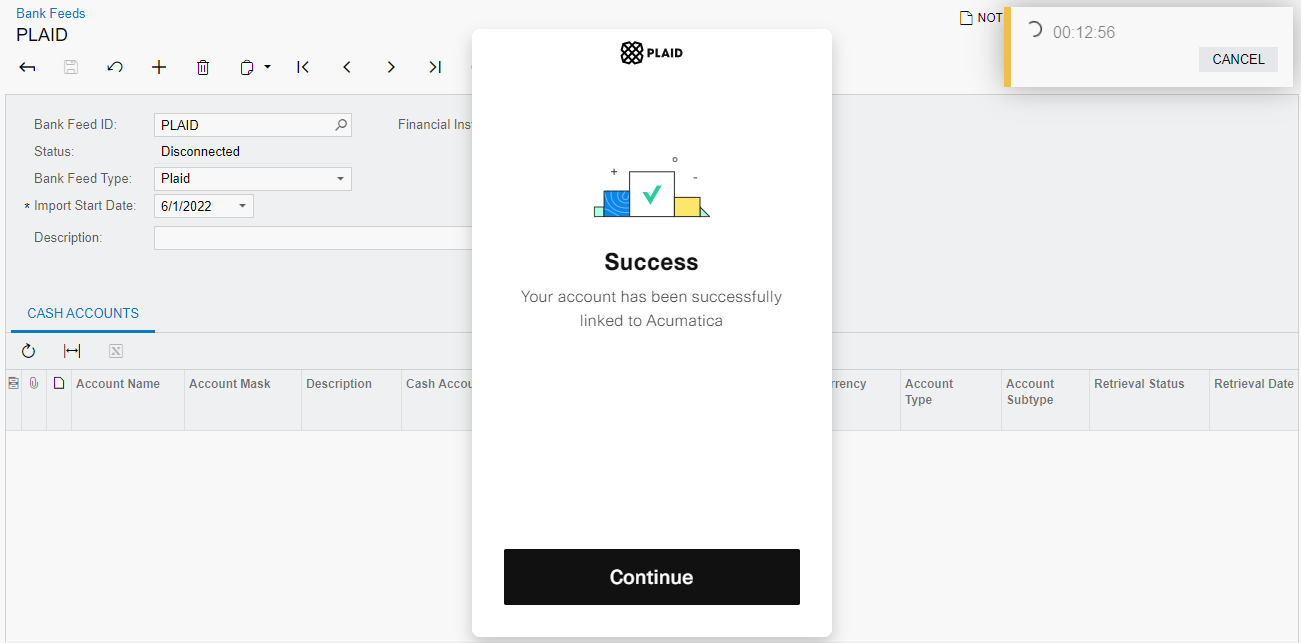
Once the connection has been established, the dialog box is closed, and the status of the bank feed changes to Setup Required, as shown in the following screenshot. This status indicates that you need to specify a cash account for at least one listed account in order to import transactions for the bank feed.
Figure 7. Reviewing the updated status 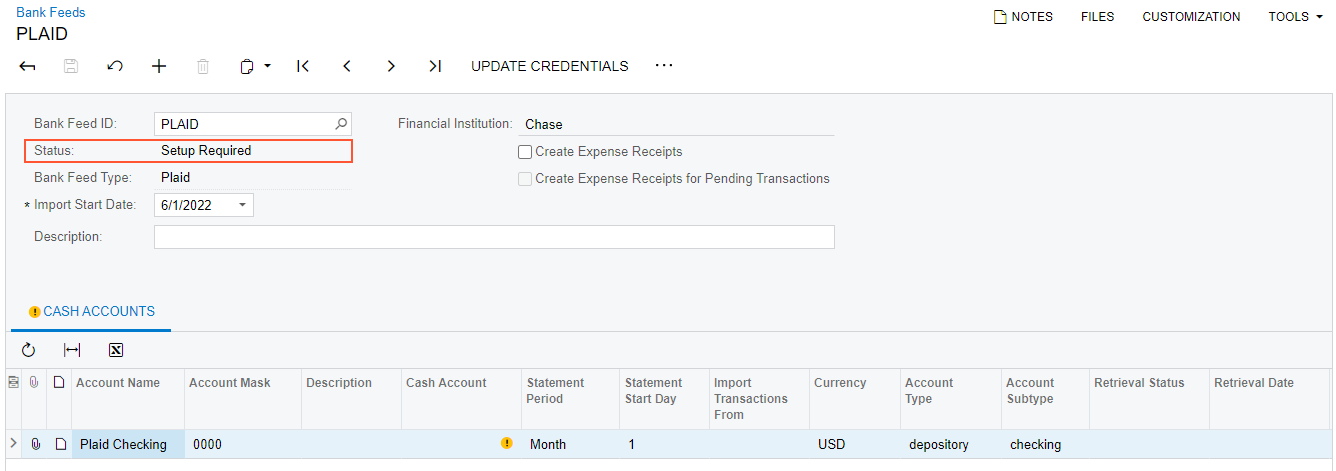
- Optional: If the Mapping of Multiple Accounts for Bank Feeds feature is enabled on the Enable/Disable Features (CS100000) form, select the Map Multiple Bank Accounts to One Cash Account check box in the Summary area.
- On the Cash Accounts tab, specify a cash account for at
least one listed account, as shown in the following screenshot. Once you do
this, the status of the bank feed changes to Active. When you import
transactions for the bank feed, they will be imported for only those accounts
for which a cash account is selected.
Figure 8. Selecting a cash account 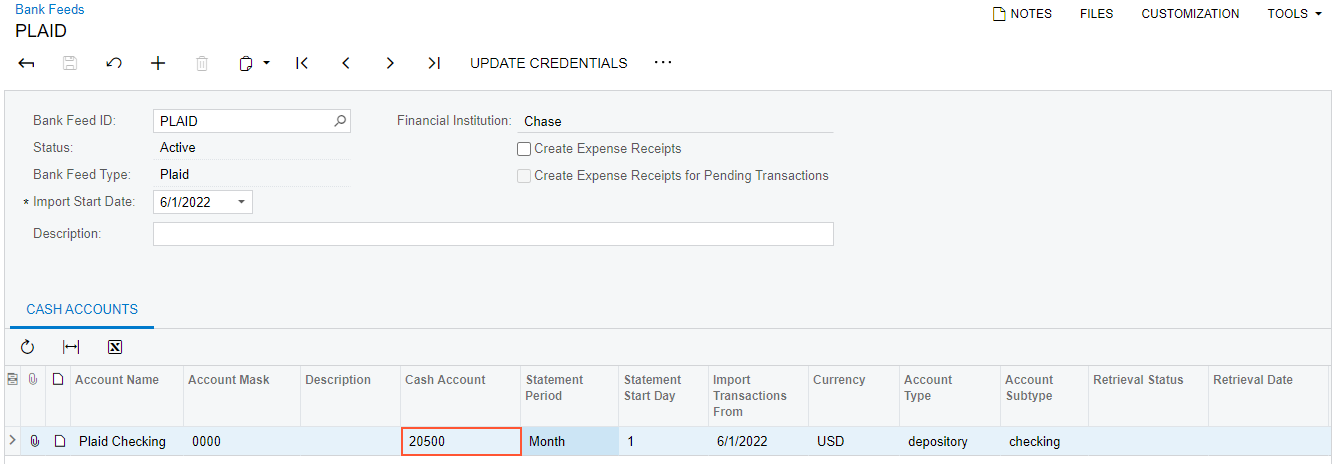
Tip: If you have selected the Map Multiple Bank Accounts to One Cash Account check box, you can specify the same cash account for multiple bank feed accounts. - If you need to create expense receipts, select the Create Expense
Receipts check box in the Summary area, as shown in the
following screenshot. The Corporate Cards and
Expense Items tabs appear on the form.
Figure 9. Selecting the Create Expense Receipts check box 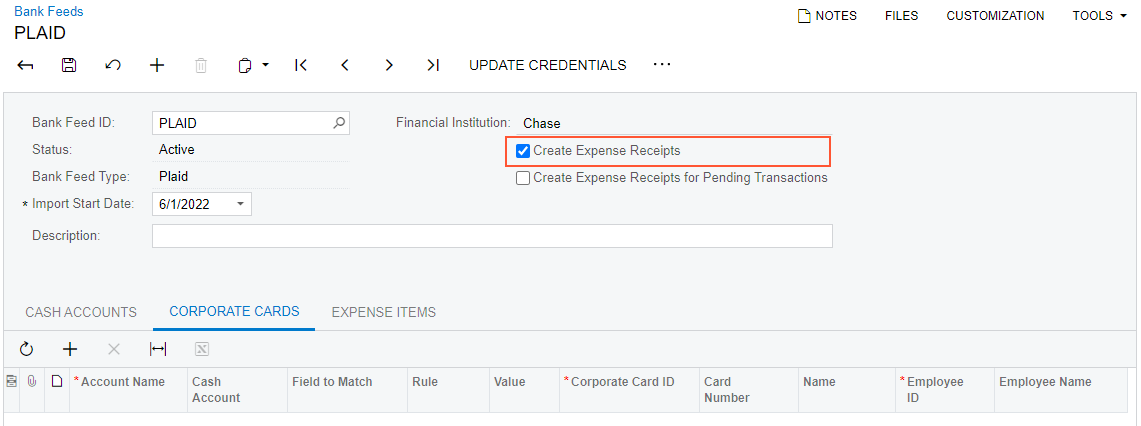
- On the table toolbar of the Corporate Cards tab, click
Add Row, and select a corporate card in the
Corporate Card ID column of the row, as shown in the
following screenshot.
Figure 10. Selecting a corporate credit card on the Corporate Cards tab 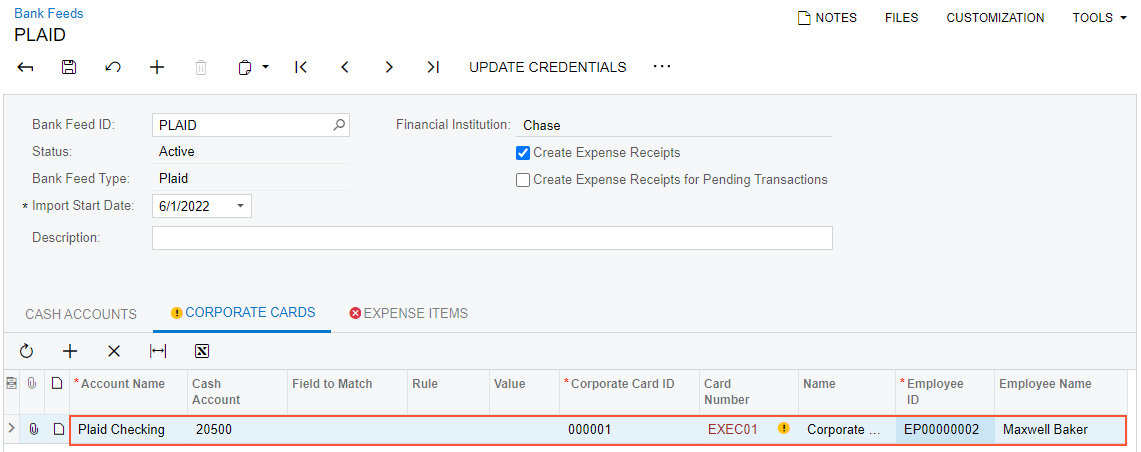
Attention: When you select the Create Expense Receipts check box and specify a corporate card, the system displays an error message that a default expense item must be selected; otherwise, your changes cannot be saved. - On the Expense Items tab, select an item in the
Default Expense Item box, as shown in the following
screenshot. You typically select a non-stock item with the Expense type
and the Expenses item class.
Figure 11. Selecting the default expense item on the Expense Items tab 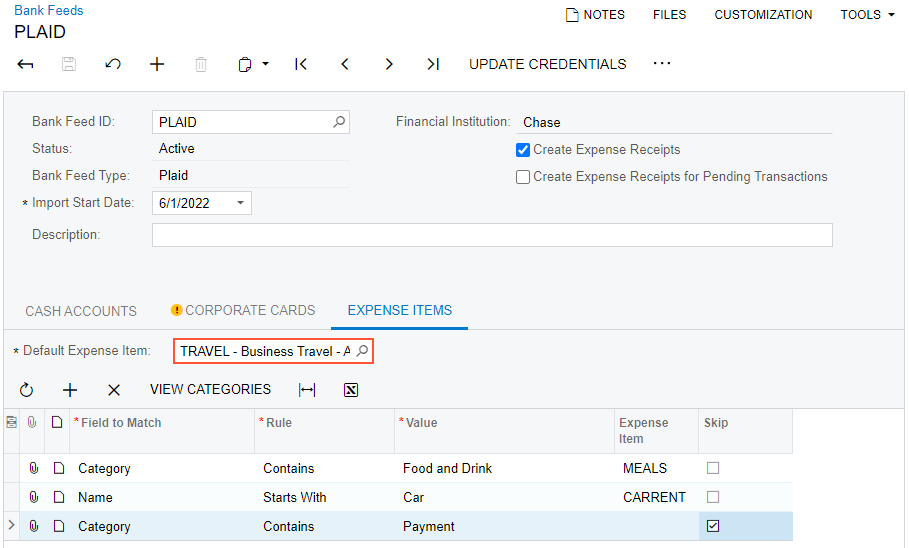
- Optional: Add a row to the table for each expense category (with Category selected in the Field to Match column), and specify the rule for matching it.
- Click Save to save the settings of the bank feed.