
User-Defined Fields in Customization Projects: Process Activity
The following activity will walk you through the process of adding a user-defined field to the Customer Locations (AR303020) form and then adding this field to a customization project.
Story
Suppose that for each customer location in the system, you want the user to specify the network type that this customer is using. The box that corresponds to the network type does not yet exist in the system. You need to add it as a user-defined field and make this field part of the customization project.
Process Overview
By using the Attributes (CS205000) form, you will create an attribute. In Form Configuration mode for the Customer Locations (AR303020) form, you will associate a user-defined field that is based on the created attribute with the form, and then add this field to the form. In the Customization Project Editor, you will then add the user-defined field to the User-Defined Fields page.
System Preparation
Before you begin performing the steps of this activity, do the following:
- Prepare an MYOB Acumatica instance by performing the Customization Projects: To Deploy an Instance prerequisite activity.
- Create the Yogifon customization project by performing the Customization Projects: To Create a Customization Project prerequisite activity.
Step 1: Defining the Attribute
To add a new attribute that holds the network type of the customer location, do the following on the Attributes (CS205000) form of MYOB Acumatica:
- Add a new attribute and specify the following settings for it:
- Attribute ID: NETTYPE
- Description: Network
Type
The description will be used as the name of the element on the User-Defined Fields tab of the Customer Locations (AR303020) form.
- Control Type: Combo
- In the table, enter the values that will be available for selection in the
Network Type combo box by adding rows and entering
the settings listed in each of the following rows.
Value ID Description Sort Order 5G 5th generation mobile network 1 EDGE Enhanced Data Rates for GSM Evolution 2 LTE Long-Term Evolution 3 WiMAX Worldwide Interoperability for Microwave Access 4 - On the form toolbar, click Save.
Step 2: Associating the User-Defined Field with a Form
Now you will associate the user-defined field with the Customer Locations (AR303020) form. The field is based on the attribute that you created in the previous step. On this form, do the following:
- On the form title bar, click .
- On the form title toolbar, click Manage User-Defined
Fields.
The Manage User-Defined Field Fields dialog box opens.
- On the table toolbar of the Added User-Defined Fields pane, click Add Row.
- In the lookup table for the added row, select NETTYPE.
- Click Apply. The dialog box is closed, and the new field (with the specified attribute) becomes associated with the Customer Locations form.
Step 3: Adding the User-Defined Field to the Form
While you are still working in Form Configuration mode, do the following to add the new user-defined field to the Customer Locations (AR303020) form:
- Click the Settings button in the top-right corner of the Other
Settings fieldset.
The Section Configuration dialog box opens.
- In the Available Elements section, click the Network Type field under the User-Defined Fields node, and then click the arrow button to add the field to the Selected Elements pane.
- Click Apply.
- On the form title bar, click Apply to All.
- In the Apply to All dialog box, which opens, click
Overwrite Personal Configuration.
The new field is added to the form, and the list of its values is the same as for the underlying attribute (see the following screenshot).
Figure 1. The Network Type box 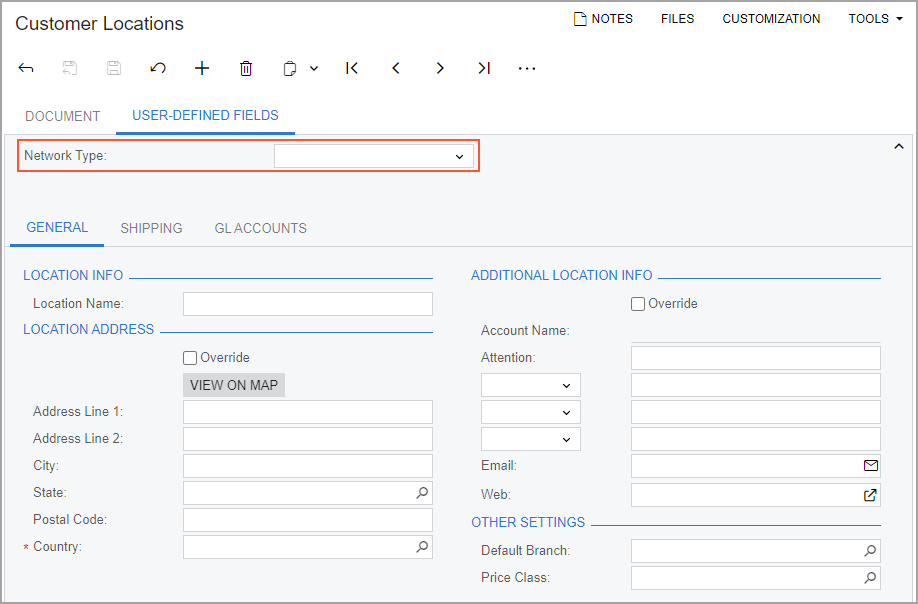
- In the Network Type box, select Long-Term Evolution.
- On the form toolbar, click Save.
Step 4: Adding the User-Defined Field to the Customization Project
To add the Network Type user-defined field to the Yogifon customization project, do the following:
- On the Customization Projects (SM204505) form, click Yogifon to open the Customization Project Editor for this customization project.
- In the navigation pane of the Customization Project Editor,
click User-Defined Fields.
The User-Defined Fields page opens.
- On the page toolbar, click Add New Record.
- In the Add User-Defined Fields dialog box, which opens,
select the unlabeled check box in the row with the NETTYPE attribute ID,
as shown in the following screenshot.
Figure 2. The Add User-Defined Fields dialog box 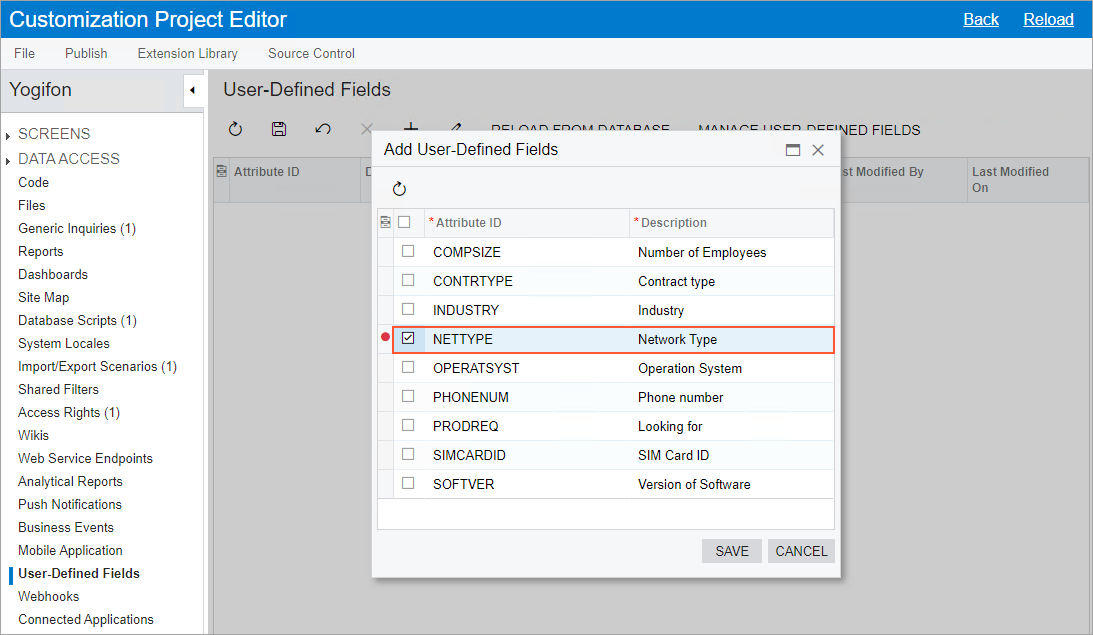
- Click Save.
The dialog box closes, and a new row with the settings of the Network Type user-defined field (including the associated attribute and the form ID) appears on the User-Defined Fields page.