
To Configure the AD FS Relying Party Trust
To configure communication between your Active Directory Federation Services (AD FS) server and your MYOB Acumatica instance, you should add a relying party trust for your MYOB Acumatica instance. For a description of all steps required for integrating MYOB Acumatica with AD FS, see Integration with AD FS.
The procedure below illustrates this process on Microsoft Windows 2012 R2.
Attention: Note the following:
- The procedure below covers the most common usage scenarios. If you’re implementing a more complicated scenario and you encounter difficulties, contact MYOB Acumatica technical support.
- The vendor of the third-party software may change the user interface and settings. The labels you see in the UI may differ from the ones described in the procedure.
- The procedure will be updated to describe new common scenarios and UI changes arise.
To Add a New Relying Party Trust
- Sign in to the AD FS server and open the AD FS Management tool.Attention: To configure AD FS, you must be a member of the Domain Admins group in the domain to which the federation server belongs.
- In the left pane, right-click Relying Party Trusts, and
then select Add Relying Party Trust (as shown in the
screenshot below).
Figure 1. AD FS Management tool 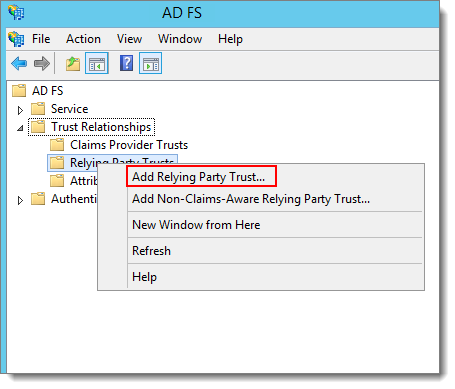
- On the Welcome page of the Relying Party Trust Wizard,
which opens, click Start , as shown in the following
screenshot.
Figure 2. Welcome page 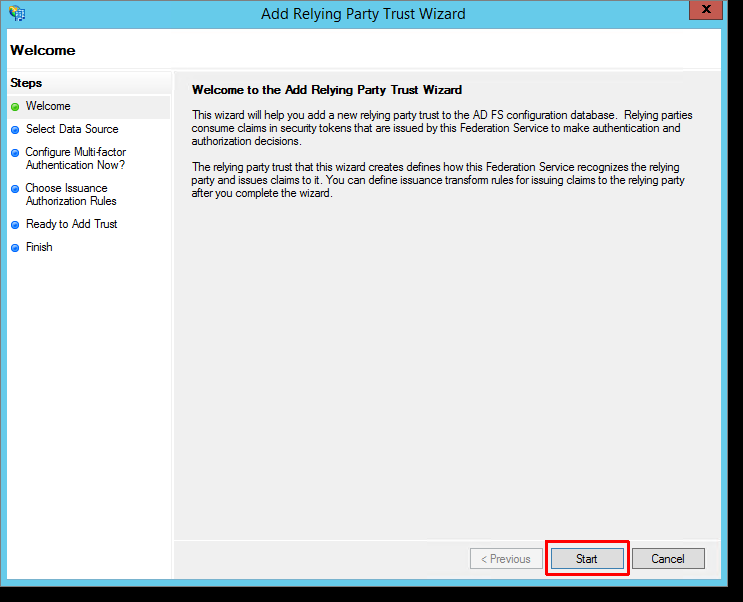
- On the Select Data Source page, select Enter
data about the relying party manually, as shown in the
screenshot below, and then click Next.
Figure 3. Select Data Source page 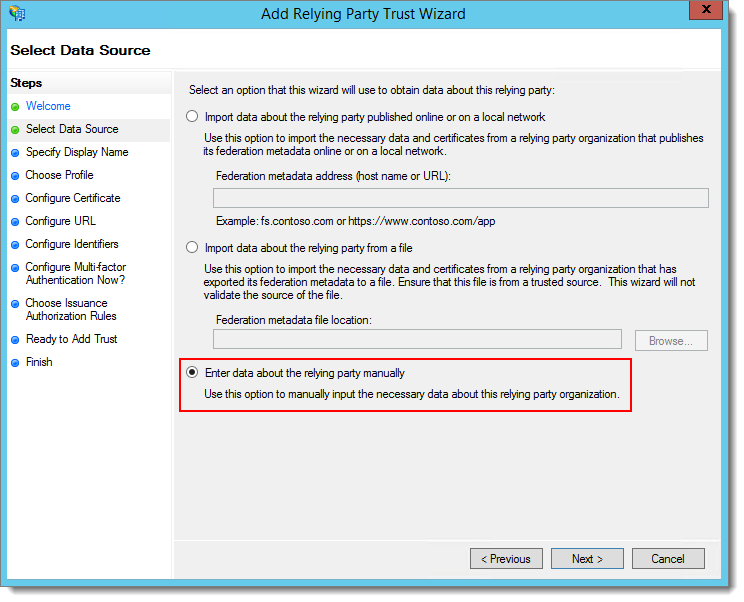
- On the Specify Display Name page, specify the display
name for the relying party, as shown in the following screenshot. The display
name is the name that will be displayed in the AD FS Management Console for the
relying party. Then click Next.
Figure 4. Specify Display Name page 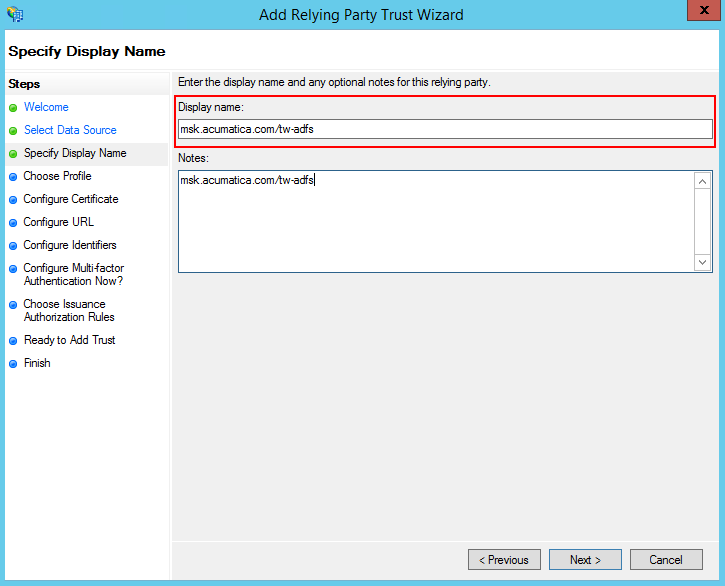
- On the Choose Profile page, select AD FS
Profile, as shown in the screenshot below, and then click
Next.
Figure 5. Choose Profile page 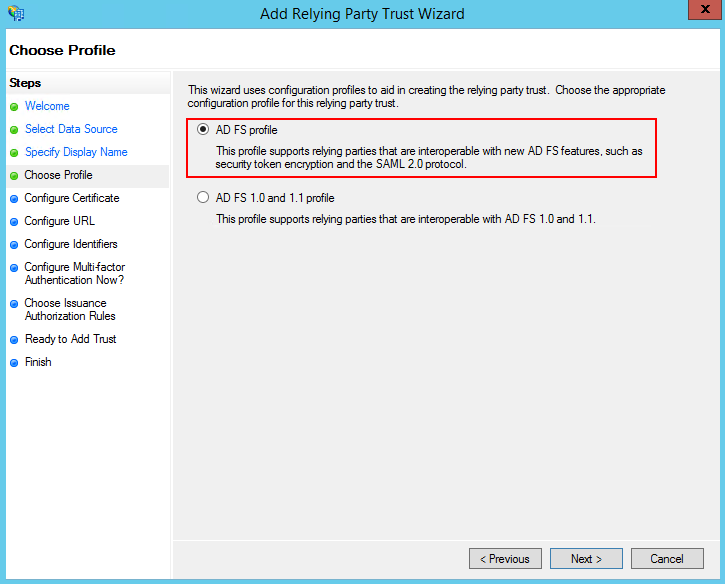
- On the Configure Certificate page, click
Next to skip the step of specifying a token
encryption certificate.
Figure 6. Configure Certificate page 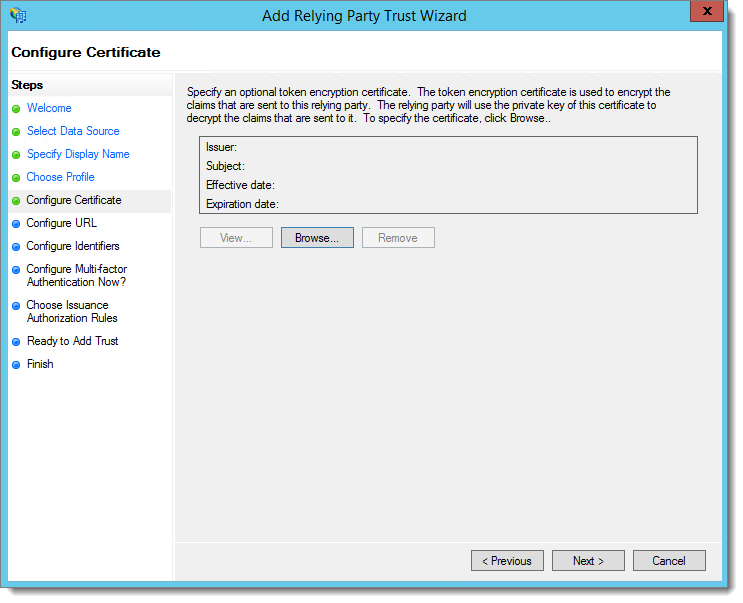
- On the Configure URL page, select the Enable
support for the WS-Federation Passive protocol check box, and
specify the full URL of your MYOB Acumatica instance—for example, https://app.site.net/instance_name—as shown in
the following screenshot.
Figure 7. Configure URL page 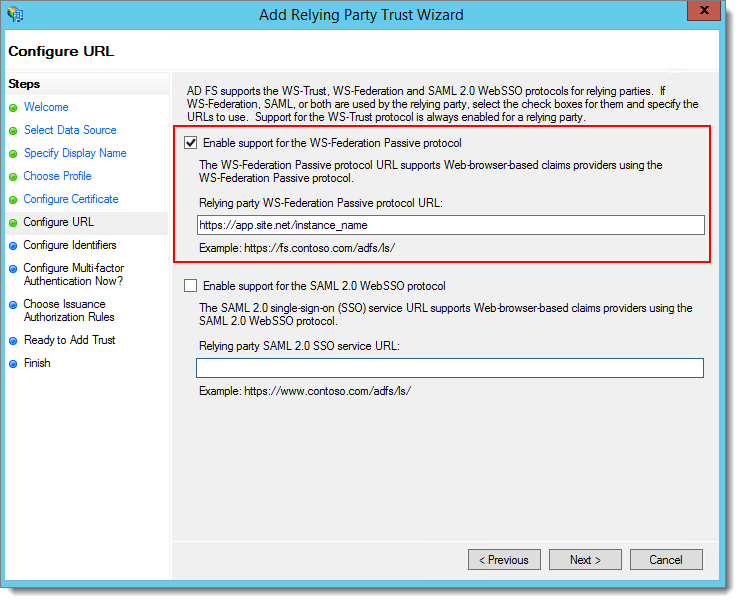
- On the Configure Identifiers page (shown in the
screenshot below), specify the relying party trust identifier, and then click
Next.
Figure 8. Configure Identifiers page 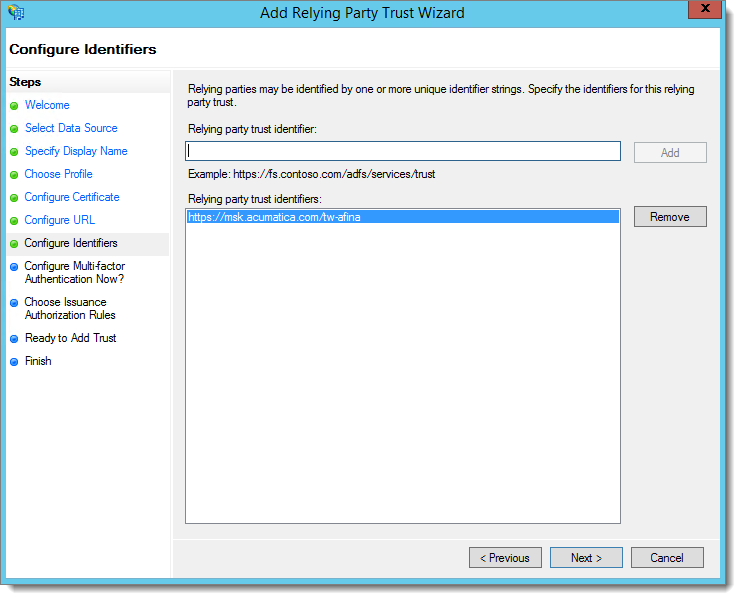
- On the Configure Multi-factor Authentication Now? page,
select the option button indicating that you do not want to configure
multifactor authentication at this time, and then click
Next. (See the following screenshot.)
Figure 9. Configure Multi-factor Authentication Now? page 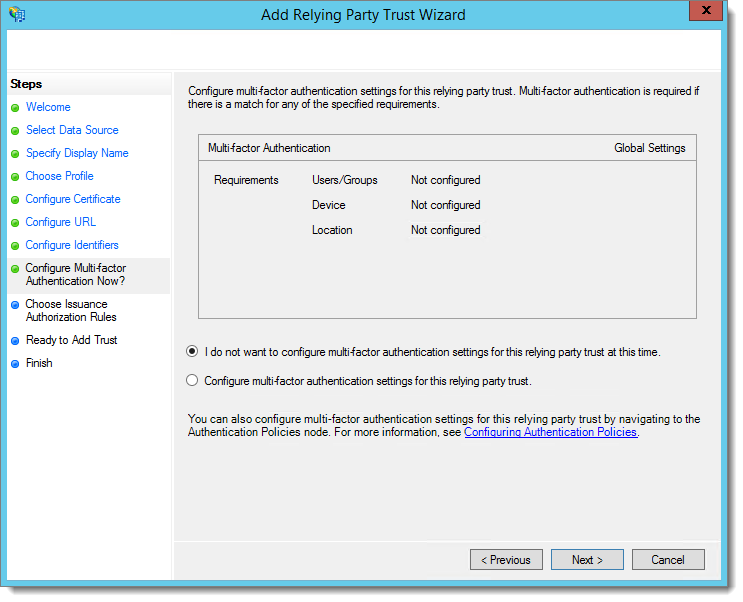
- On the Choose Issuance Authorization Rules page, select
the Permit all users to access this relying party option
button, as shown in the following screenshot, and then click
Next.
Figure 10. Choose Issuance Authorization Rules page 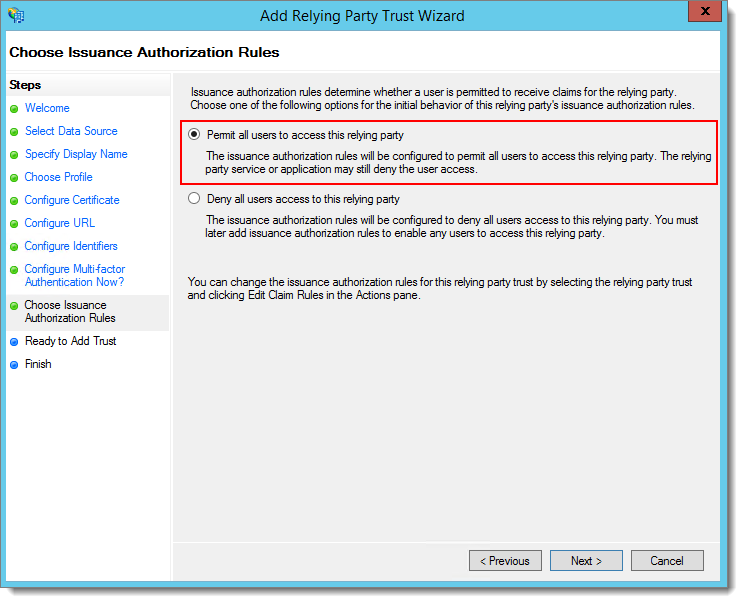
- On the Ready to Add Trust page, review the settings, and then click Next.
- On the Finish page, select the Open the Edit
Claim Rules dialog for this relying party trust when the wizard
closes check box (as shown in the screenshot below), and then
click Close.
Figure 11. Finish page 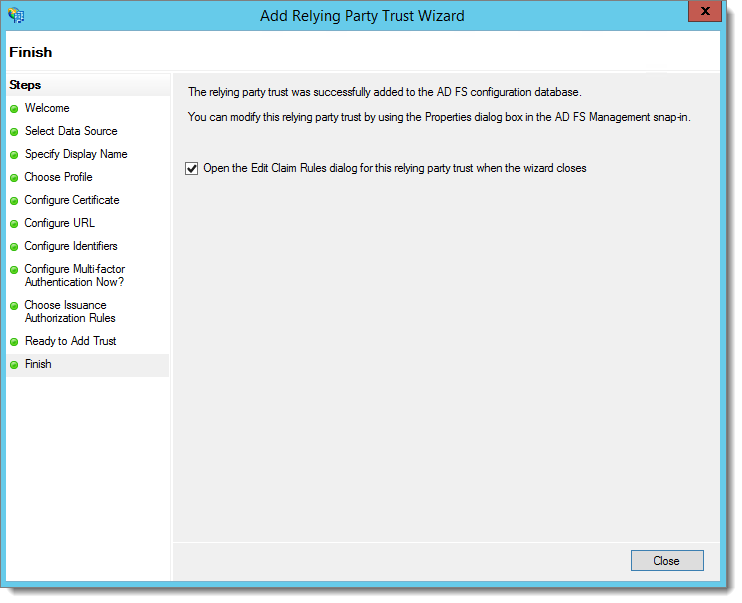
This opens the Edit Claim Rules dialog box, which you will use to configure claim rules for the added relying party trust. For the detailed procedure, see To Configure AD FS Claims.