Dragging, Moving, and Deleting UI Controls and Grid Columns
This topic describes in detail how to change the placement of UI controls by dragging them and how to use the facilities of the Screen Editor to delete or move UI controls and grid columns.
Dragging and Dropping UI Controls
- You can move a UI control anywhere within its container control.
- To move a UI control within a container, you have to drag the element to the required place.
- Any UI control moved within a form is automatically aligned according to the nearest PXLayoutRule component placed above it. (See Layout Rule (PXLayoutRule) for details.)
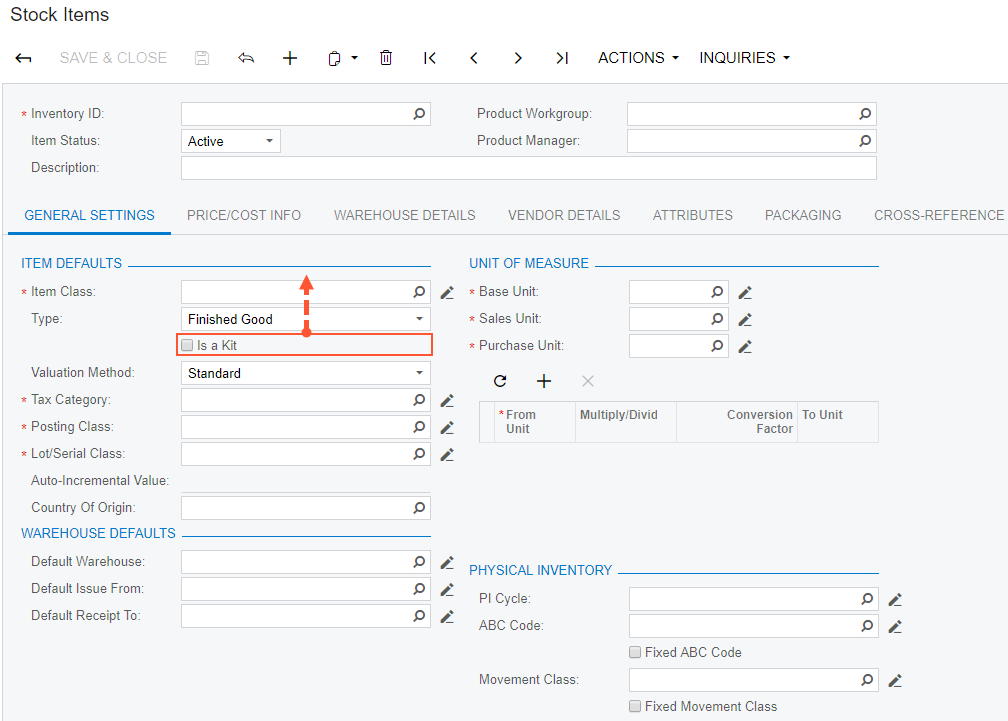
On the Stock Items (IN202500) form, suppose that you want to move up the Is a Kit check box, to make it the first control in the first column of the General tab area, as the screenshot below illustrates.
To move the check box:
- Click the Customization menu on the form and choose the Inspect Element command.
- Click the Is a Kit check box.
- Click the Customize button on the Element
Properties dialog box.
The customization item is added to the current project if you have selected one by using the command, or you will be asked to select the customization project to add the item to it.
- In the Control Tree of the Screen Editor, drag the Is a Kit check box to the position above the Item Class control.
- Save the changes to the customization project, and publish the customization project.
Figure 2. Moving the UI control to the required position 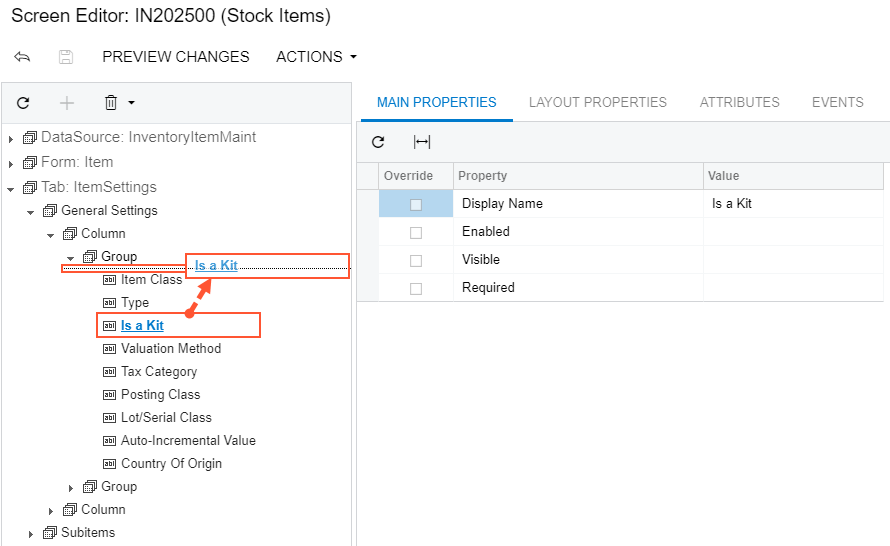

Moving and Deleting UI Controls and Grid Columns
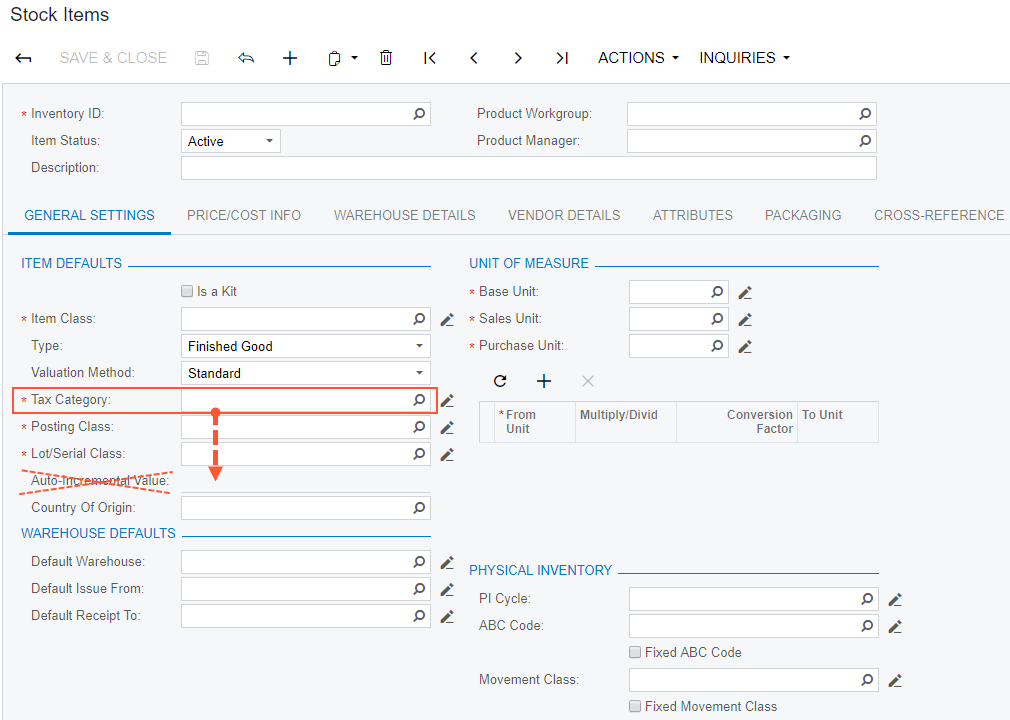
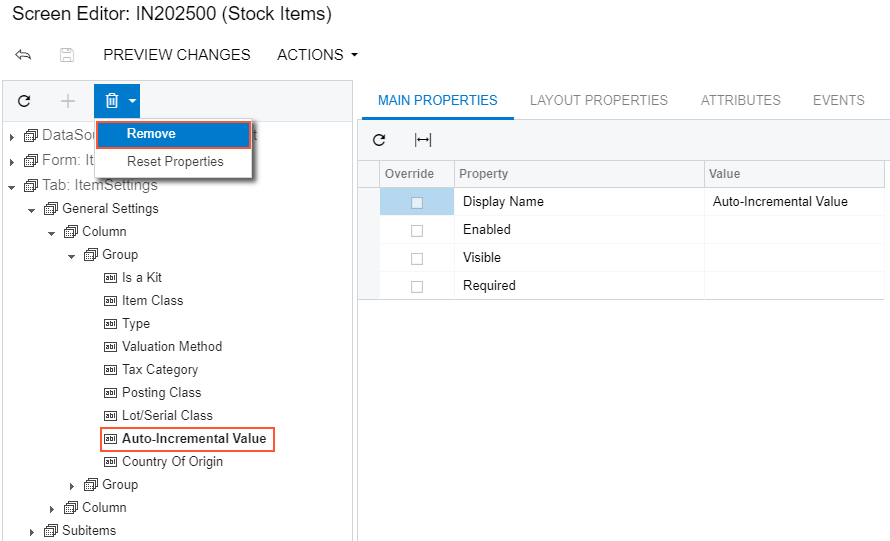
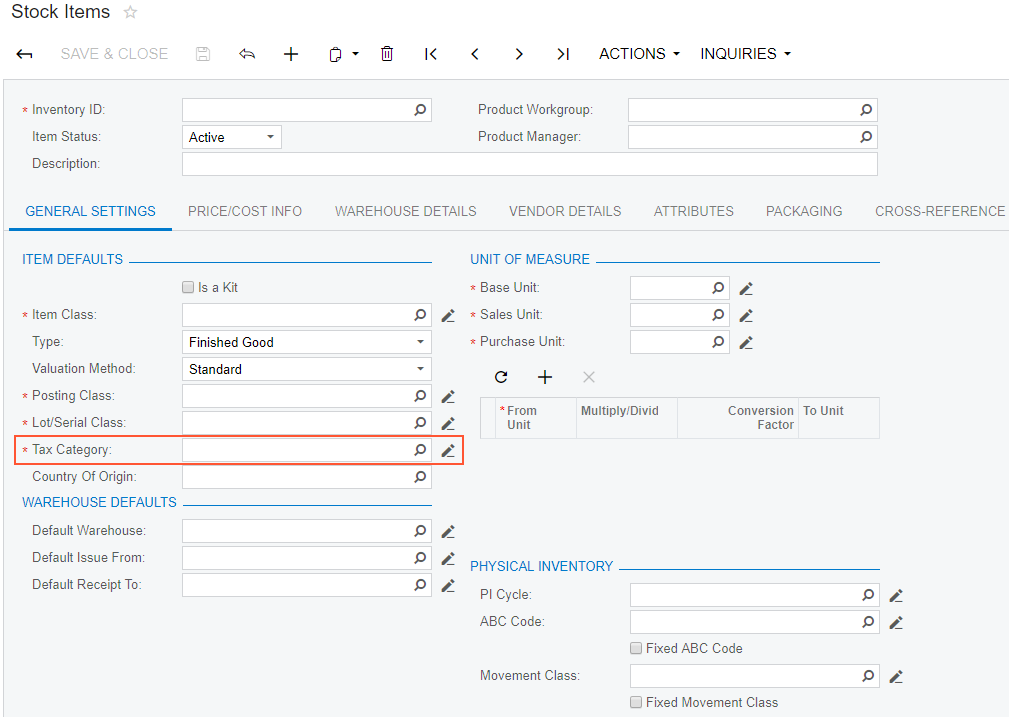
- Delete the Auto-Incremental Value input control. (See the first screenshot below.)
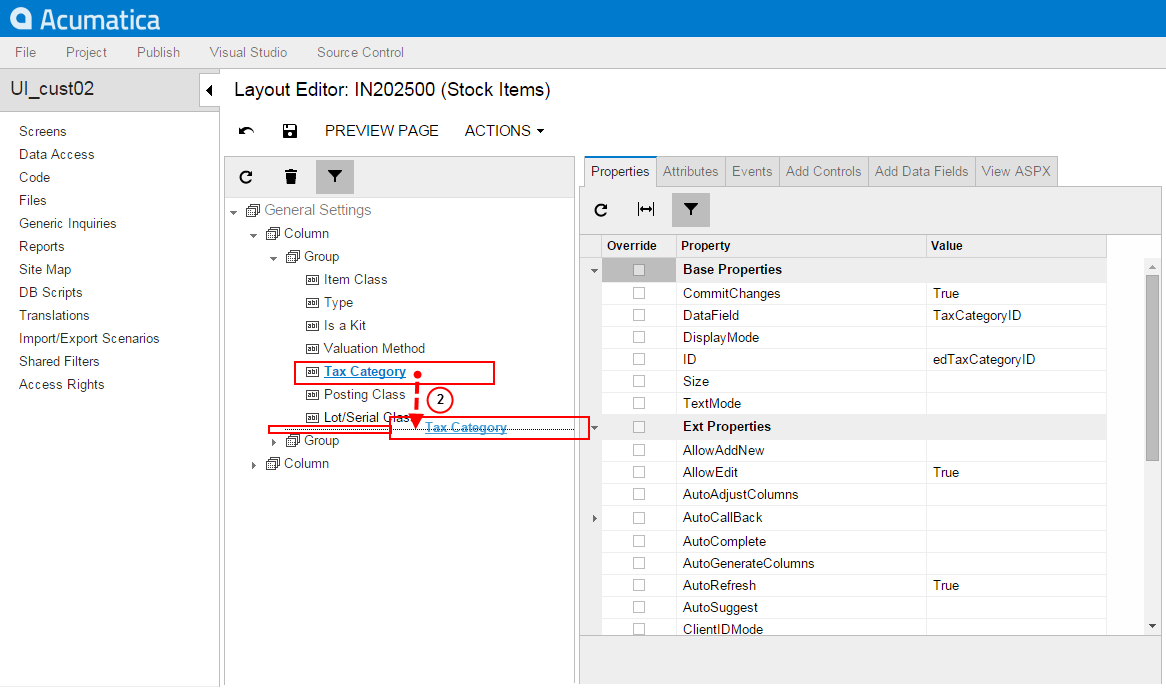
- Move down the Tax Category control so that it is placed under
the Lot/Serial Class control, as the first screenshot also
illustrates.Note:The Lot/Serial Class field is visible if the Lot and Serial Tracking feature is enabled on the Enable/Disable Features (CS100000) form.
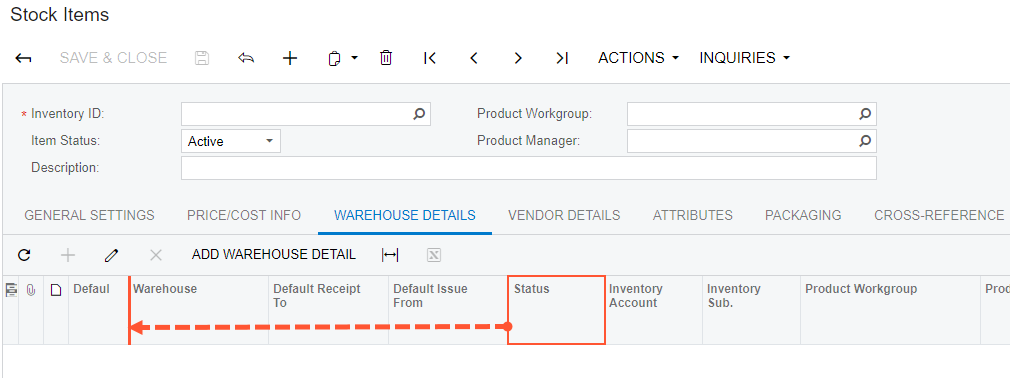
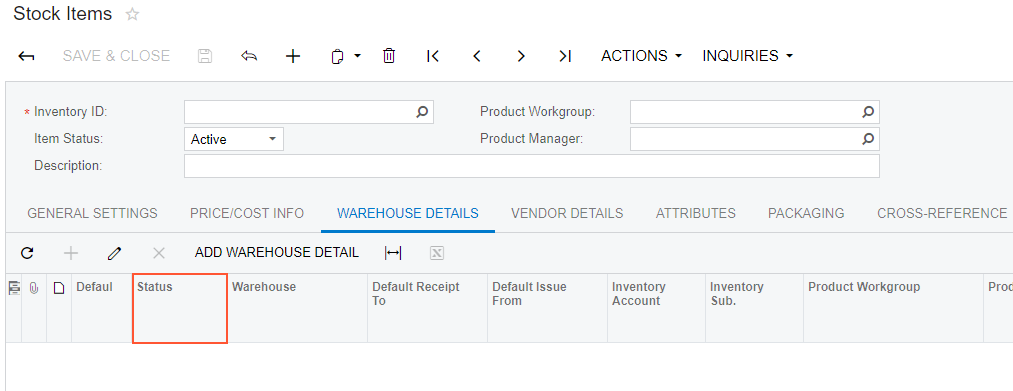
- Move to the left the Status column of the details table so that it is placed at the right of the Default column, as shown in the second screenshot below
To open the Screen Editor, open the Stock Items (IN202500) form, click the Customization menu, choose the Inspect Element command, select the Auto-Incremental Value control on the form, and click the Customize button on the Element Properties dialog box.
To delete the selected control, select of the tree toolbar.
Thus, to change the placement of a UI control, you select it on the Control Tree of the Screen Editor, drag it and drop to place this control appropriately in relation to other UI controls.
Click Save on the toolbar of the Screen Editor to save changes to the current customization project.
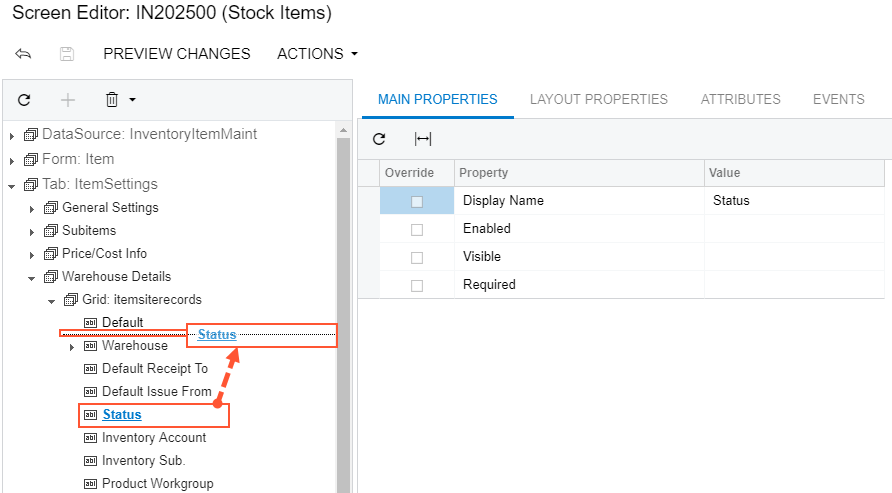
- Open the Stock Items (IN202500) form and use the Element Inspector for the Status column on the form
- Open the Screen Editor for the form and find the column in the Control Tree
Drag and drop the Status control to the required position in the tree, as the screenshot below illustrates.
Thus, to change the placement of a grid column, you find the column in the Control Tree of the Screen Editor and drag it to the desired position.
Click Save on the toolbar of the Screen Editor to save changes to the current customization project.
If you open the Warehouses tab of this form, you will see that the column of the details table has been moved to the left, as shown in the screenshot below.
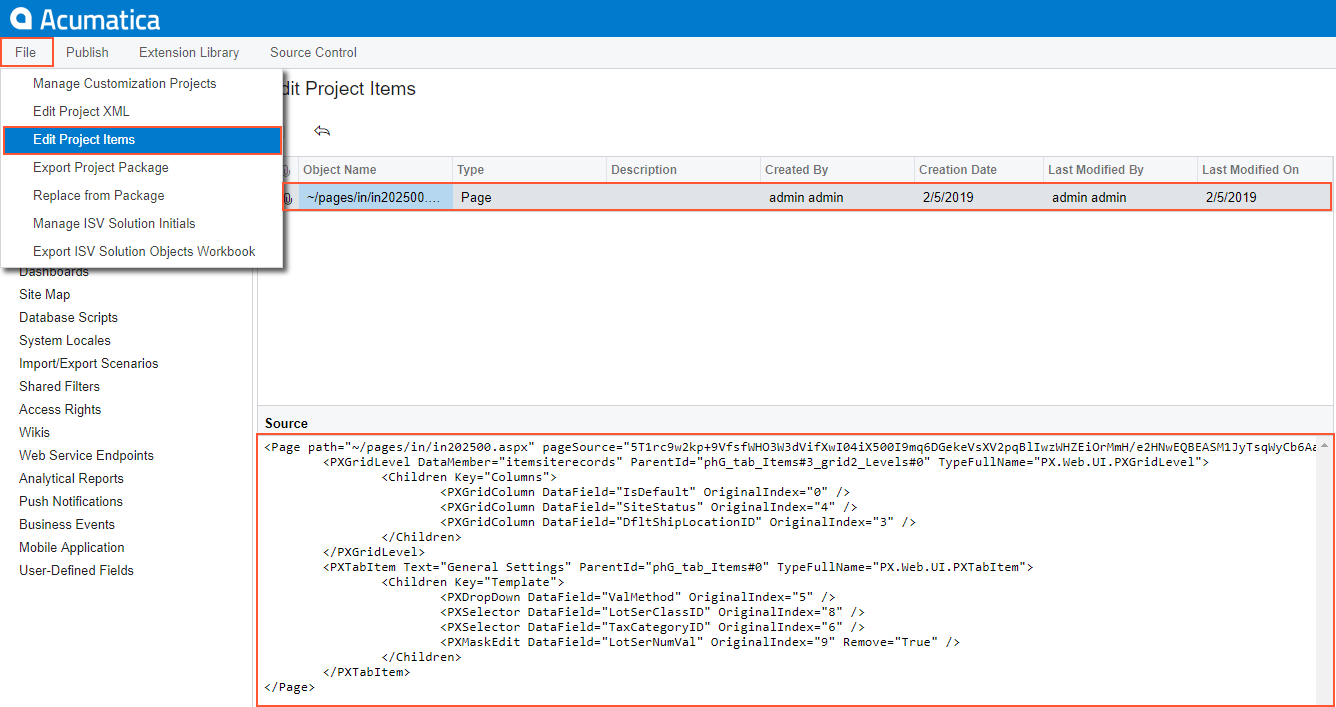
If you need to analyze the added content (changeset) of the customization project, open the project in the Project Editor, choose the Edit Project Items command on the File menu item and select the Object Name field of the customized object (see the screenshot below).