Adding Columns to a Grid
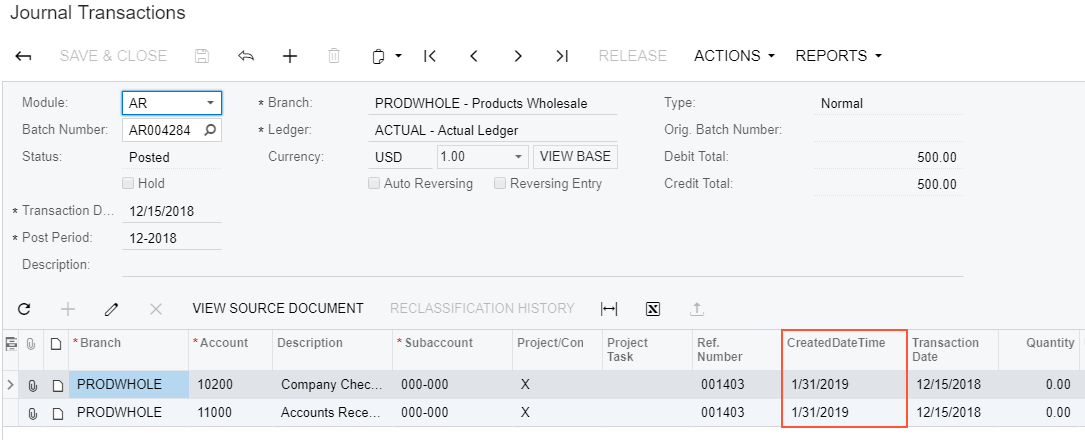
For instance, suppose that you need to add the column for the CreateDateTime data field to the position after the Ref. Number column.
To do this, perform the following actions:
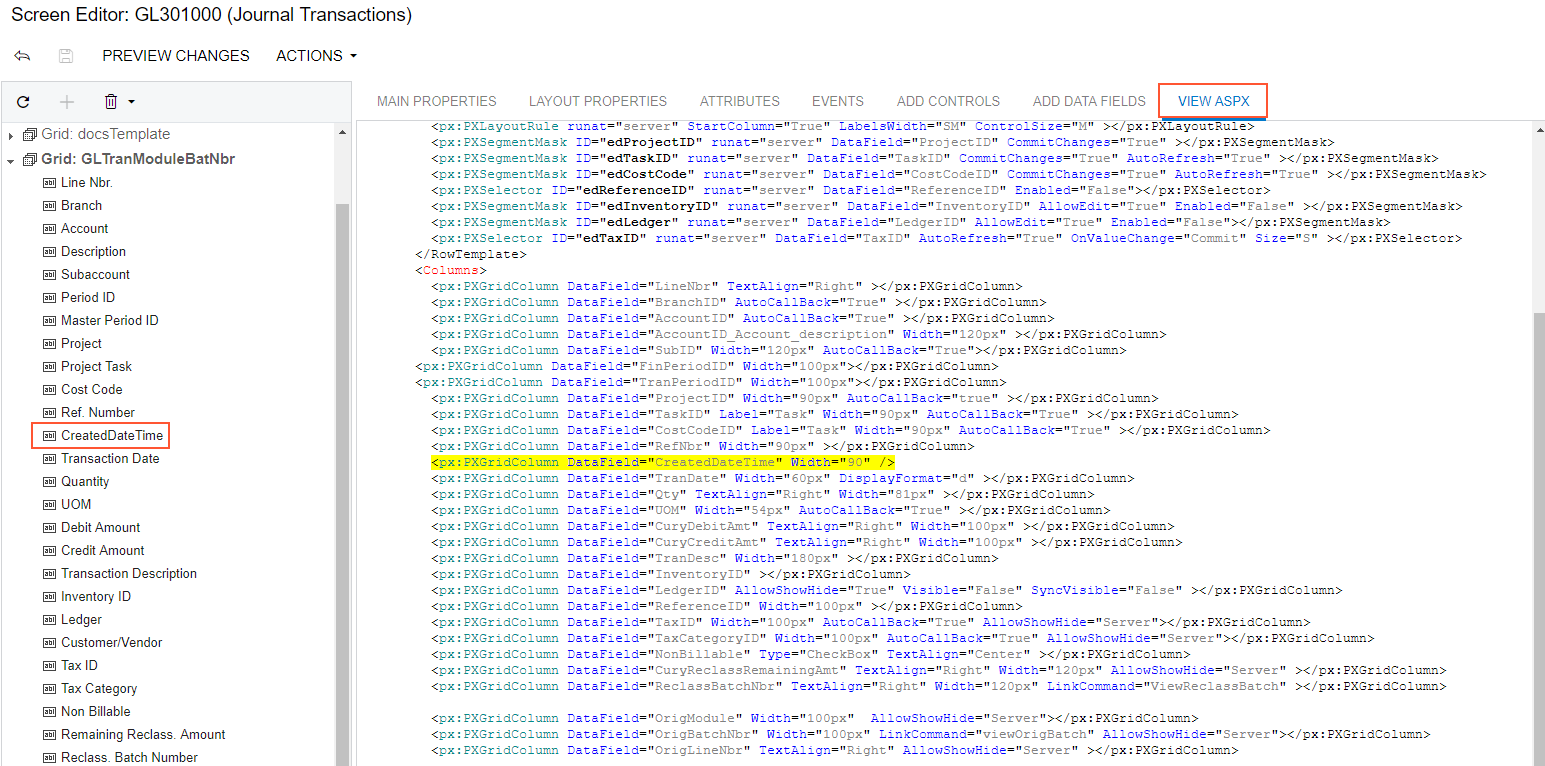
- On the Journal Transactions (GL301000) form, click the , select the Ref. Number column header, and click Customize on the Element Properties dialog box.
- In the Screen Editor, open the Add Data Fields tab.
- Apply the All filter to the list of the fields.
- Select the CreateDateTime field in the list, as shown in the screenshot below.
- Click Create Controls in the tab toolbar.Note:New columns are added to the grid in the position after the item selected in the Control Tree of the Screen Editor. If you need to change the placement of a UI control, select the control on the tree, drag and drop it to the needed place.
Figure 2. Adding the column to the grid 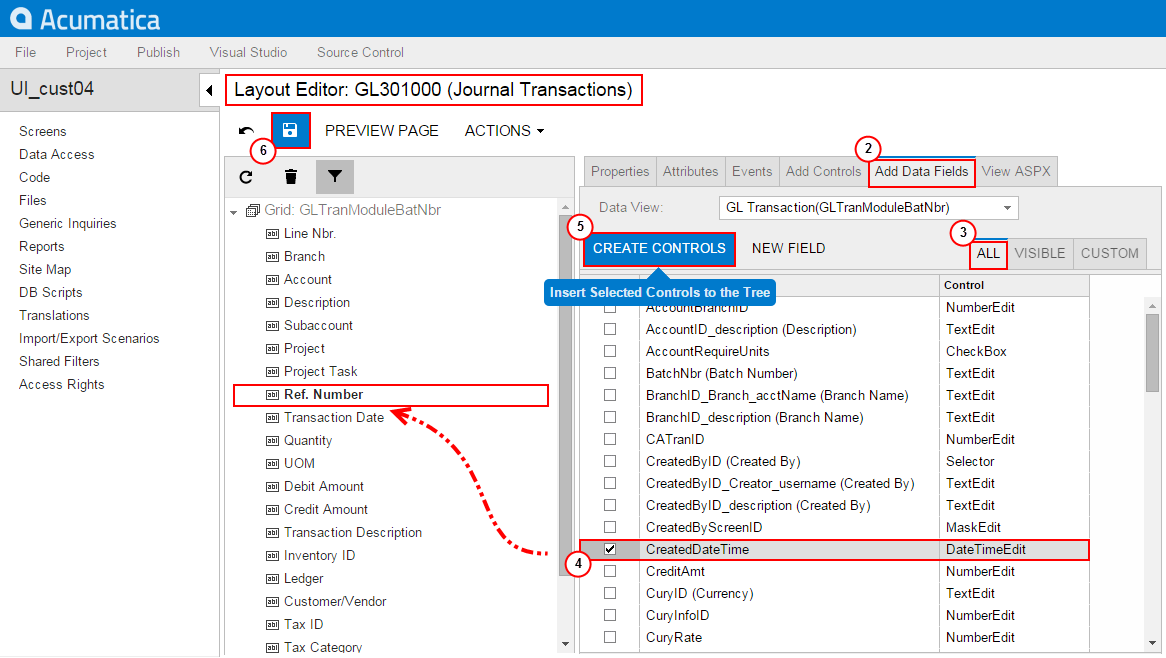
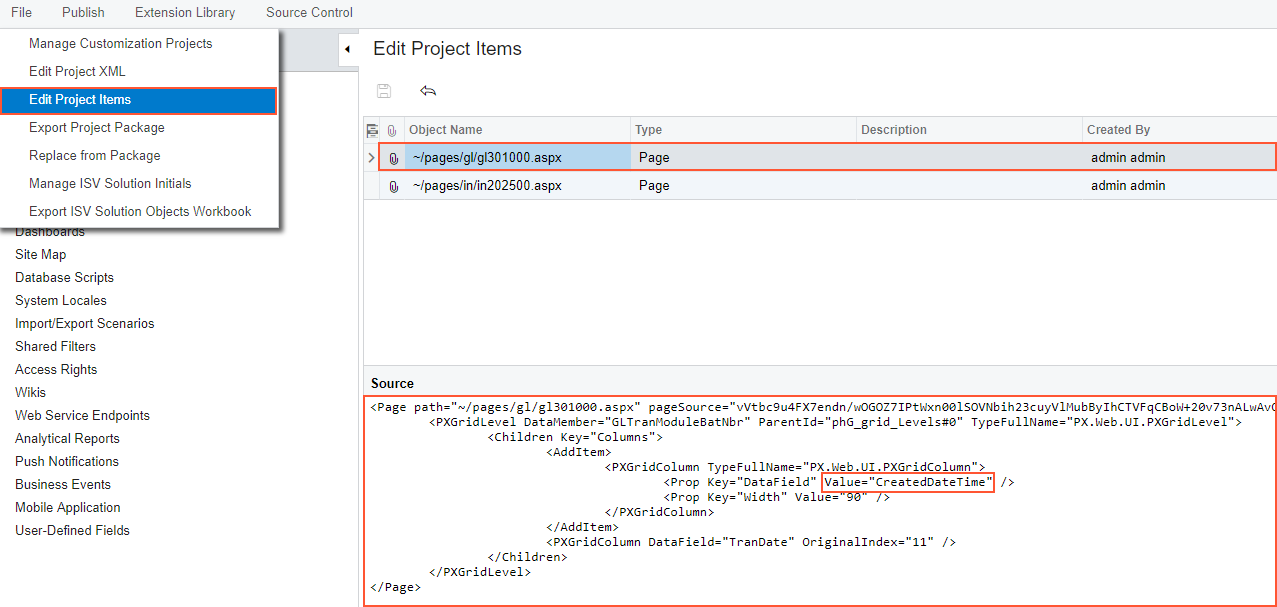
- Click Save on the toolbar of the Screen Editor to save changes to the current customization project.
Thus, to add new columns to a grid, you have to open the grid node on the Control Tree of the Screen, select the Add Data Fields tab in the editor, select needed fields in the list on the tab, click Create Controls, and then drag and drop new columns to desired positions inside the grid. You can add a column for any field that belongs to any data access class (DAC) of any data view of the business logic controller bound to the form. To select a DAC to view its fields in the list, use the Data View drop-down list on the Add Data Fields tab.