Modifying Columns in a Selector
If you add columns to a selector, you give the user the capability to see more information about each item in the lookup window, so the user can select the appropriate data record.
- Deleting an existing column, such as the Ledger column.
- Adding a column for the Created By field to the place after the Currency column.
- Changing the order of the selector columns, so the Status column moves to the position between the Credit Total and Currency columns.
- On the Journal Transactions (GL301000) form, click the , select the Batch Number control, click
Actions on the Element Properties dialog
box and select the Customize Data Fields command.
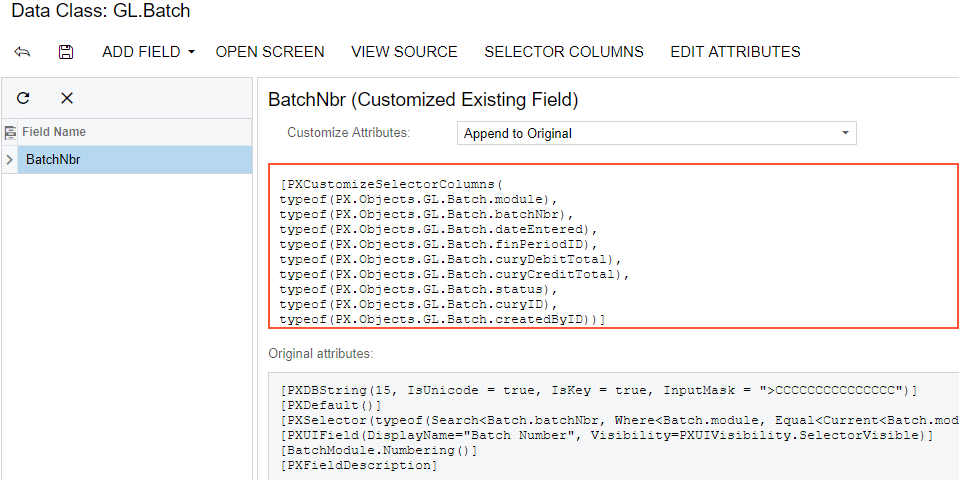
The Data Class Editor appears with only the BatchNbr field in the list of the customized fields of the class. The field is already selected in the field; therefore the work area of the editor holds information about the field.
Note:The selected field type is selector, so the Edit Selector Columns button is enabled on the More menu. - Click Edit Selector Columns to open the Customize Selector Columns dialog box, as shown in the screenshot below.
- In the table of the Customize Selector Columns dialog box, select the row with the Ledger column.
- Click Delete Row to delete the selected
Ledger column from the selector.
Figure 2. Deleting the selected column from the selector 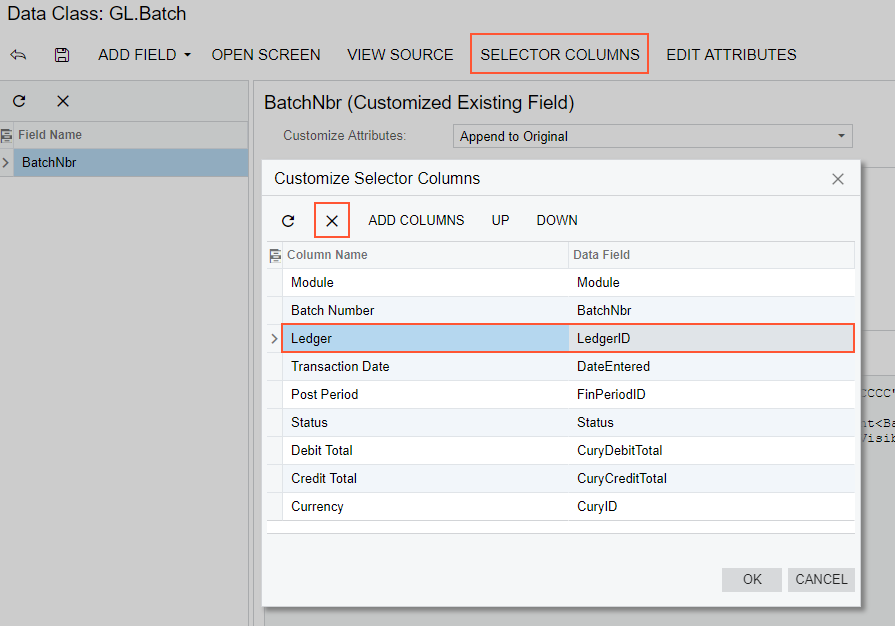
- Click Add Columns on the toolbar of the Customize Selector Columns dialog box to open the Add Columns to Selector dialog box.
- In the Add Columns to Selector dialog box, select the All tab to view all fields of the customized data access class (DAC) in the table.
- In the table, select the row with the Created By column name.
- Click OK to add the selected field to the table of the
Customize Selector Columns dialog box.
Figure 3. Adding the column for the field to the table of the Customize Selector Columns dialog box 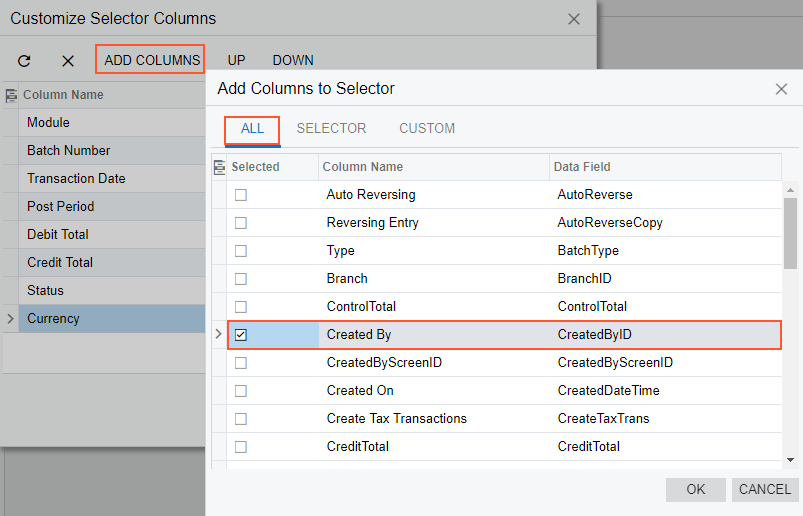
Note:New columns are added to the position after the last existing column of the selector.The Created By column is created in the table of the Customize Selector Columns dialog box at the rightmost position. Therefore, you do not need to move this column inside the selector. But you still have to move the Status column to position between the Credit Total and Currency columns.
- Select the row with the Status column.
- Click Down twice to move the selected row to the required position, as shown in the screenshot below.
- Click OK on the Customize Selector Columns dialog box to apply the changes to the selector.
- Click Save on the toolbar of the Data Class Editor to save the changes to the current customization project.