If you need to add a control onto a form, you use the Screen Editor.
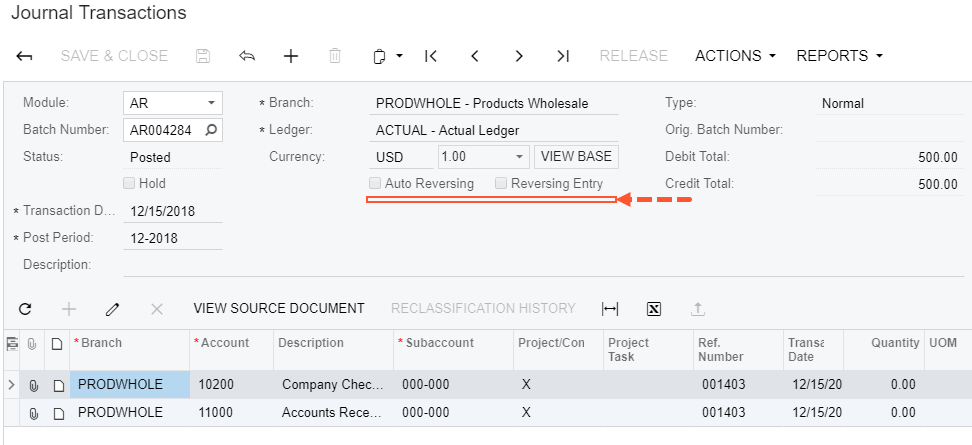
The screenshot below illustrates the original Journal Transactions (GL301000) form. Suppose
that you want to add a text field (for instance, the CreatedByID selector
of the GL Batch DAC) below the Auto Reversing check box.Figure 1. Viewing the original form
To open the Screen Editor, open the Journal Transactions (GL301000) form, click the
Customization menu, choose the Inspect Element
command, select the Auto Reversing control, and click the
Customize button on the Element Properties dialog
box.
The editor is opened with the Auto Reversing control selected and
highlighted in bold in the tree of controls.
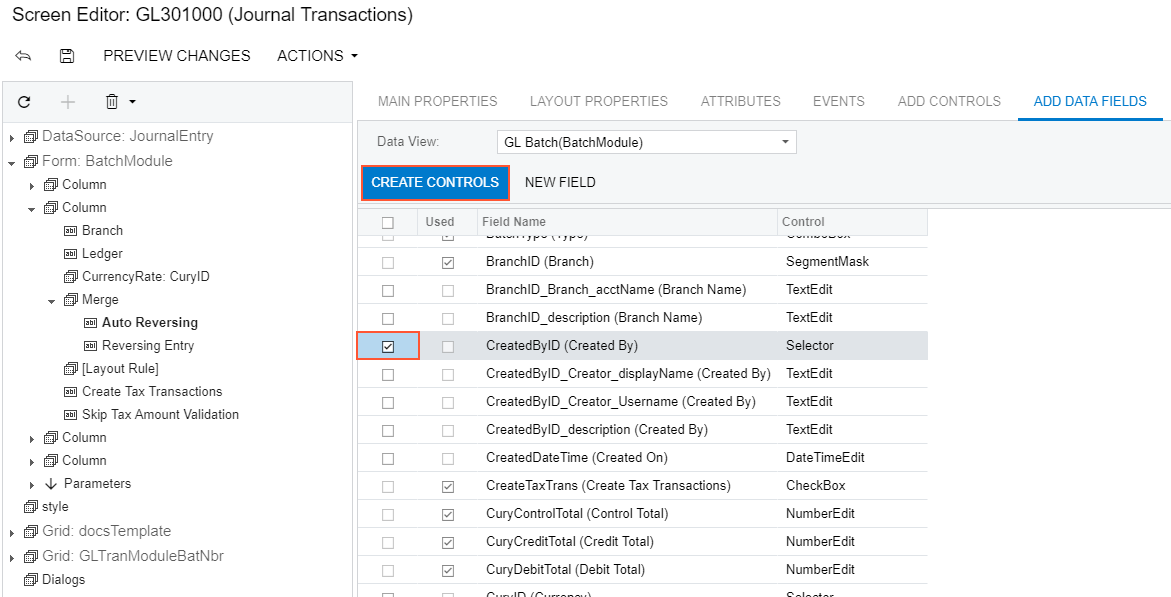
To create a control below the selected item in the tree:
Click on the Add Data Field tab.
Select the CreatedByID field in the list on the tab.
Click the Create Controls button on the tab toolbar.
Figure 2. Creating a control below the selected one in the tree of controls
Adjust the placement of a UI control so that it is after the [Layout Rule] node by
dragging it to the needed place.
Click Save on the toolbar of the Screen Editor to save changes to the
current customization project.
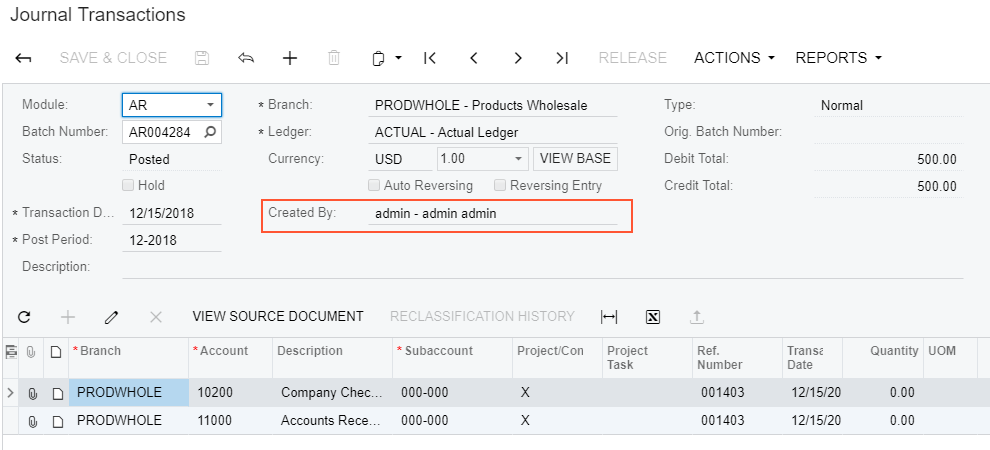
After publishing the customization project, you will see the added field on the Journal
Transactions form, as the screenshot below illustrates.Figure 3. Viewing the customized form
To view the fragment of the .aspx code that represents the customization result, open the form
in the Screen Editor and select the View ASPX tab. The customized
fragment is highlighted in yellow, as the screenshot below illustrates.Figure 4. Analyzing the changeset of the .aspx code
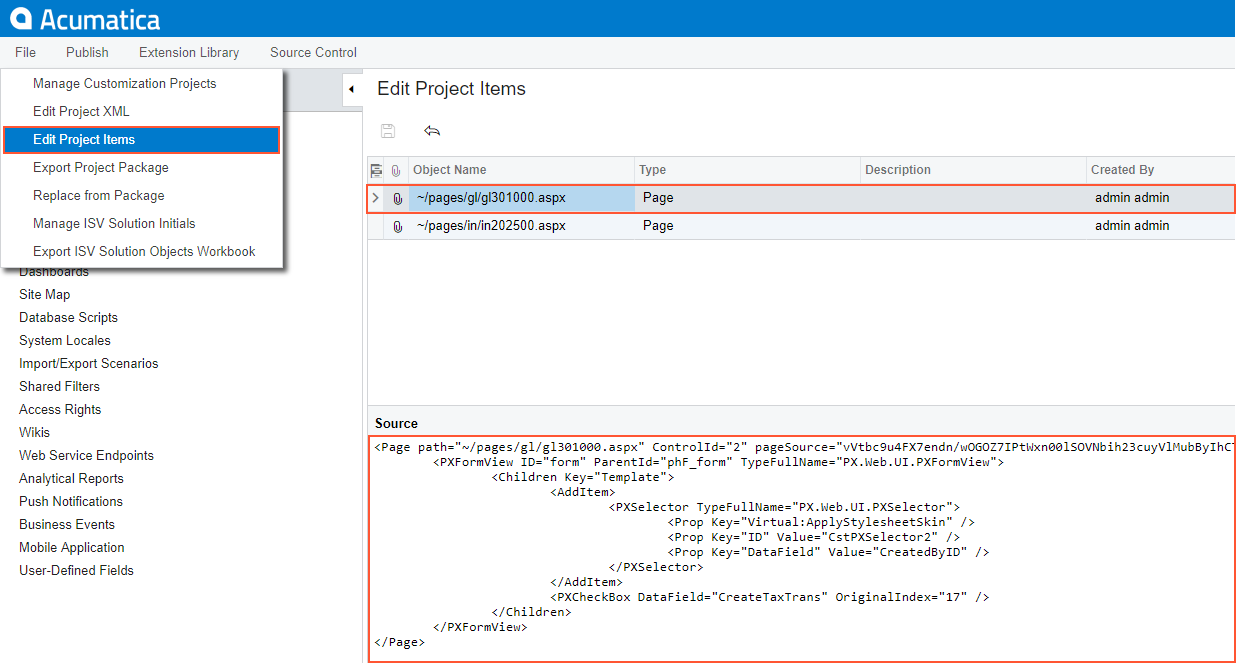
To view the changes to the layout of the form introduced by the new control, open the project
in the Project Editor, choose the Edit Project Items command on the
File menu item and select the Object Name field
of the customized object (see the screenshot below). You can see the new Page
item that contains the .aspx code changeset.Figure 5. Analyzing the added content of the customization project
Tip:
As a rule, if you add a new data field, you need to perform some additional actions related
to the functional customization. For an example of the creation of a new data field, see Adding Data Fields.