
Project Publication: To Customize the Cases Form
The following activity will walk you through the process of customizing the Cases (CR306000) form by using a new customization project.
Story
Suppose that want to test the publication of two customization projects. You have the customization project that contains the modification of the Cases (CR306000) form in the Yogifon instance. In the Yogifon_Staging instance, you need to create a customization project that makes modifications to the Cases form that are different from the modifications in the Yogifon instance.
Process Overview
By using the Customization Projects (SM204505) form, you will create a customization project. On the Customized Screens page, you will add the Cases (CR306000) form so that it can be customized. By using the Screen Editor, you will then add the Time Spent box to the Summary area of the form below the Owner box.
System Preparation
Before you begin performing the steps of this activity, make sure that you have completed the Project Publication: To Deploy a Customization Project prerequisite activity.
Step 1: Creating a Customization Project
To create a customization project, do the following:
- In MYOB Acumatica, open the Customization Projects (SM204505) form.
- On the form toolbar, click Add Row.
- In the Project Name column of the added row, enter the customization project name, YogifonExtra.
- On the form toolbar, click Save.
- Click the project name in the table to open the Customization Project Editor for the project.
Step 2: Modifying the List of Customized Screens
To add the Cases (CR306000) form to the list of customized screens, do the following in the Customization Project Editor:
- In the navigation pane, click Screens.
The Customized Screens page opens.
- On the page toolbar, click Customize Existing
Screen.
The Customize Existing Screen dialog box opens.
- In the Select Screen box of the dialog box, click the magnifier button. In the lookup table, type CR306000, and select the Cases form.
- Click OK to close the dialog box.
The Cases form is added to the list of forms on the Customized Screens page, and the Screen Editor: CR306000 (Cases) page opens.
Step 3: Adding the Time Spent Box
To add the Time Spent box to the Summary area of the Cases (CR306000), do the following:
- While you are still working on the Screen Editor: CR306000 (Cases) page, in the control tree, select the node that contains the Owner box by clicking .
- On the Add Data Fields tab, select the unlabeled check box for the Time Spent box.
- On the table toolbar, click Create Controls.
The Time Spent node appears in the control tree.
- On the page toolbar, click Save.
- On the page toolbar, click Preview Changes to preview
your changes.
The following screenshot shows the Cases form with these changes made.
Figure 1. Preview of the Cases form 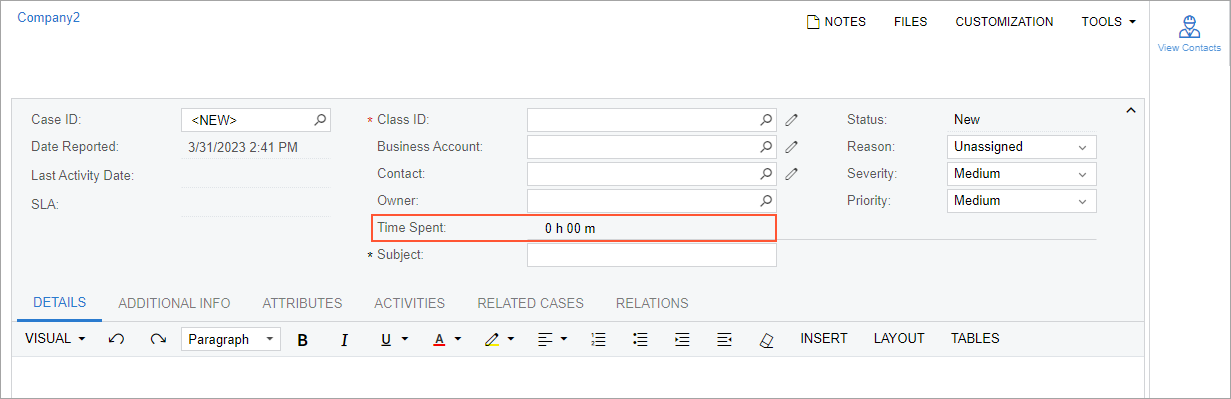
Tip:Because you are not changing the Display Name property of this field, you do not need to add theTimeSpentfield to the list on the Fields page, as you did in Form Layout: To Add a Box to a Form for theAddressTypefield.