
Project Publication: To Test the Changes in Two Customization Projects
The following activity will walk you through the process of testing your changes in two published customization projects.
Story
Suppose that you have published the Yogifon and YogifonExtra projects, which both customized the Cases (CR306000) form, to your MYOB Acumatica instance. You need to make sure that the changes of the customization projects have been applied correctly.
Process Overview
By using the Cases (CR306000), you will ensure that the changes from both customization projects have been applied.
System Preparation
Before you begin performing the steps of this activity, make sure that you have completed the Project Publication: To Publish Two Customization Projects prerequisite activity.
Step 1: Testing the Time Spent Box
To test the changes to the Time Spent box, do the following:
- On the Cases form in MYOB Acumatica, open the case with the 000002 ID.
- Make sure that the Time Spent box has been added to the
Summary area and is now displayed below the Owner box in
the Summary area, as shown in the following screenshot.
Figure 1. Verification of the customized Cases form 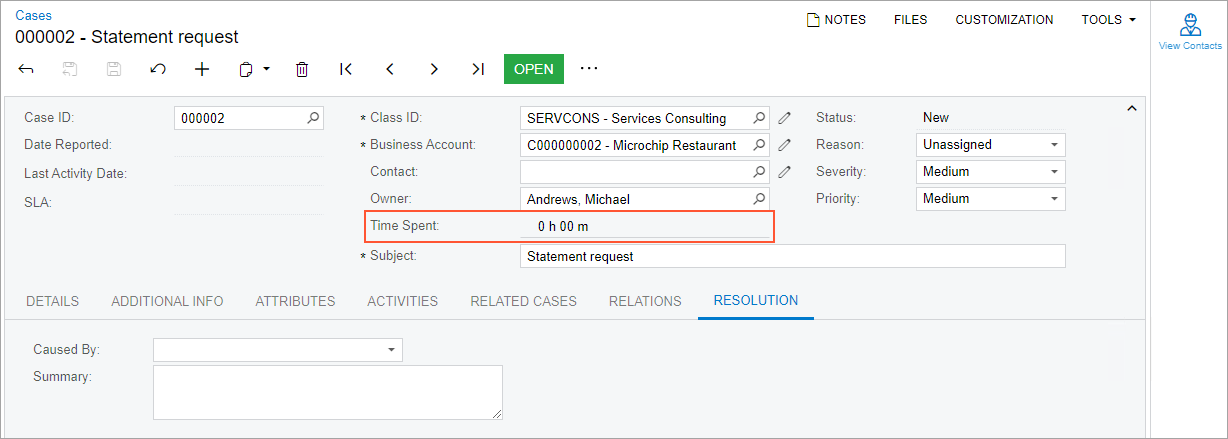
Step 2: Testing the Lookup Table
While you are still viewing the Cases form, test the lookup column of the Case ID box as follows:
- In the Summary area, click the magnifier button of the Case ID box, and make sure that the Data Reported column is displayed in the lookup table.
- Make sure that the form contains the Resolution tab with the Caused By and Summary boxes.
Step 3: Testing the Conditions for the Closed On Box
Make sure that the conditions you have created in Conditional Properties: To Hide a Element work correctly by doing the following:
- While you are still viewing the 000002 case on the Cases form, make sure that its status is New and that the Closed On box is not displayed.
- On the More menu (under Processing), click Open.
- In the
Open
dialog box, which opens, specify In Process as the
Reason, and click OK.
The dialog box closes and the status of the case changes to Open. Make sure that the Closed On box is not displayed on the form.
- On the form toolbar, click Close.
- In the
Close
dialog box, which opens, specify Resolved as the
Reason, and click OK.
The dialog box closes and the status of the case changes to Closed. Make sure that the Closed On box, which appears in the Summary area, contains today's date.
- On the form toolbar, click Release.
The status of the case changes to Released. Make sure that the Closed On box with today's date is displayed in the Summary area of the form.