
Project Publication: To Publish Two Customization Projects
The following activity will walk you through the process of publishing two customization projects.
Story
Suppose that you have two customization projects. The Yogifon project contains the modifications of various elements on the Customers (AR303000), Cases (CR306000), Leads (CR301000), Sales Orders (SO301000), and Customer Locations (AR303020) forms. The OpportunitiesForm project adjusts the size of the Description box on the Opportunities (CR304000) form so that this box has the same length as other boxes in the Summary area. You need to publish these customization projects simultaneously to apply the changes from both projects.
Process Overview
By using the Customization Projects (SM204505) form of the Yogifon_Staging instance, you will publish the Yogifon and the OpportunitiesForm projects.
System Preparation
Before you begin performing the steps of this activity, do the following:
- Prepare anMYOB Acumatica instance called Yogifon_Staging by using the process described in Customization Projects: To Deploy an Instance.
- In the Yogifon_Staging instance, enable the following features on the
Enable/Disable Features (CS100000) form:
- Business Account Locations
- Multicurrency Accounting
- Payment Application by Line
- Download the following files of the deployment packages:
Step 1: Importing the Customization Projects
To import the deployment packages to the staging environment, do the following:
- In the Yogifon_Staging instance, open the Customization Projects (SM204505) form.
- On the More menu (under Import), click Import.
- In the Open Package dialog box, which opens, select the Yogifon.zip file, which you have downloaded.
- Click Upload.
The system uploads the project and adds it to the list on the Customization Projects form.
- On the More menu (under Import), click Import again.
- In the Open Package dialog box, which opens, select the OpportunitiesForm.zip file, which you have downloaded.
- Click Upload.
The system uploads the project and adds it to the list on the Customization Projects form.
Step 2 : Publishing the Yogifon Project and the OpportunitiesForm Project
To publish multiple customization projects, do the following on the Customization Projects (SM204505) form:
- In the table, select the check boxes (in the unlabeled column) for the Yogifon and OpportunitiesForm projects, as shown in the following
screenshot.
Figure 1. Selection of the projects for publication 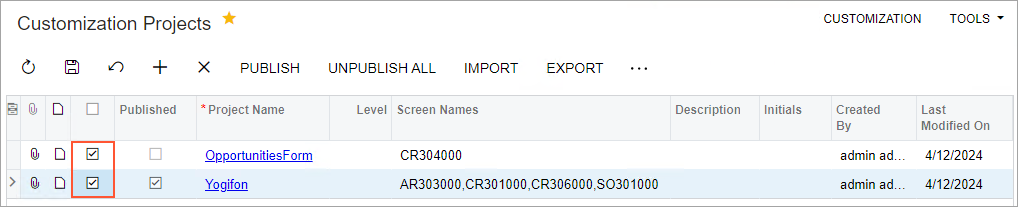
Tip:You can open this form directly in MYOB Acumatica; you can also open it while you are working in the Customization Project Editor by clicking . - On the form toolbar, click Save.
- On the More menu (under Publish), click
Publish.
The Compilation pane appears, and the validation of the projects is performed.
- After the validation has completed, click Publish (see
the following screenshot).
Figure 2. Selecting Publish in the Compilation pane 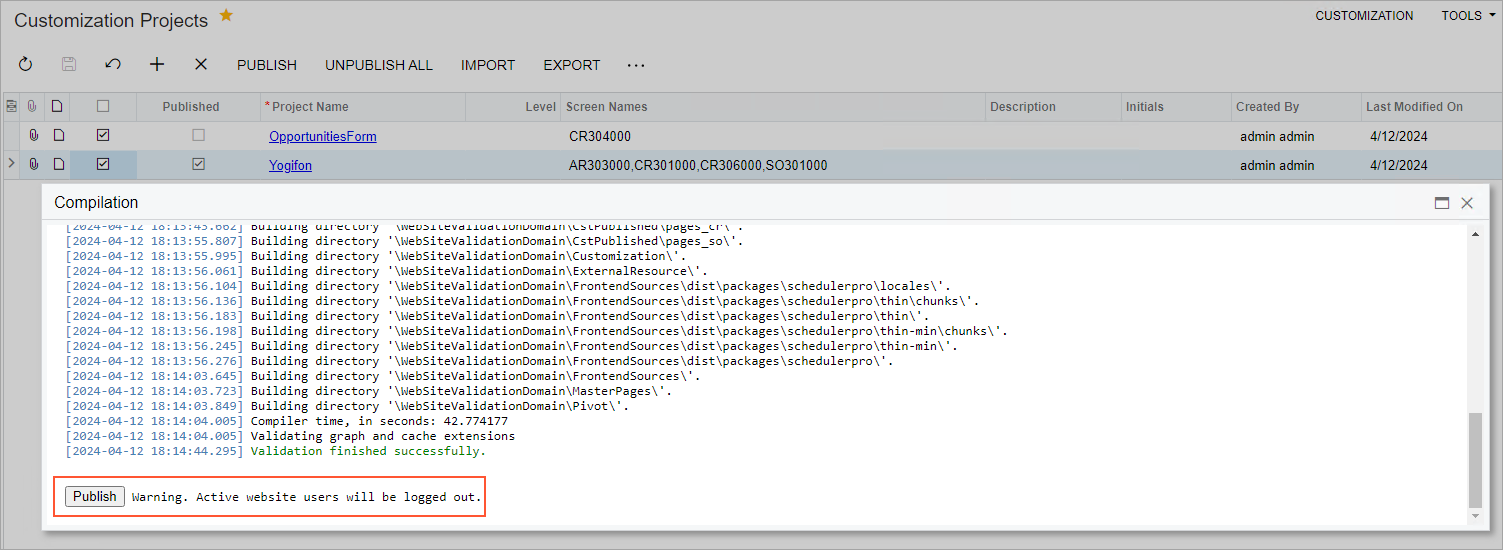
When the Website updated line and Close Compilation Pane button appear in the Compilation pane, the publication has completed.
- Close the Compilation pane.
Step 3: Testing the Changes from the OpportunitiesForm Customization Project
To test the changes to the Subject box, do the following:
- On the Opportunities (CR304000) form in MYOB Acumatica, open the opportunity with the 000003 ID.
- In the Summary area, make sure that the Description box
has the same length as other boxes in this area (see the following
screenshot).
Figure 3. Verification of the customized Opportunities form 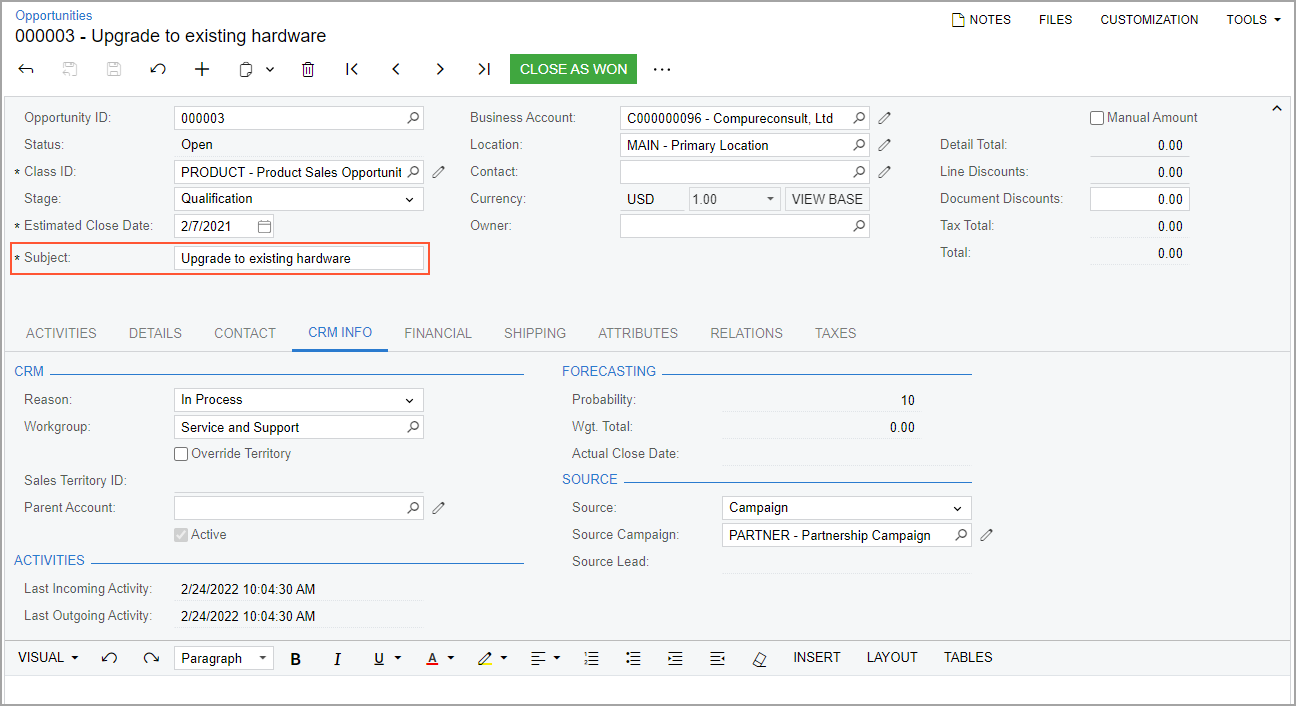
Step 4: Testing the Changes in the Yogifon Customization Project
To test the changes in the published Yogifon customization project, perform the following steps:
- Open the Generic Inquiry (SM208000) form. In the Inquiry Title box, select SO-OpenByCustomer.
- On the form toolbar, click View Inquiry.
Make sure that the inquiry opens in a new browser tab, and that it contains the Order Type column.
- On the Customers (AR303000) form, do the
following:
- Open the customer with the C000000003 ID.
- Find the Address Type box on the General tab, and make sure that it has the Business, Home, and Other options.
- Make sure that the Financial tab contains the Currency section.
- On the More menu (under Inquiries), click Open SO by Customer, and make sure that the Open Sales Orders by Customer generic inquiry opens in a new browser tab.
- On the Cases (CR306000) form, do the
following:
- Open the case with the 000002 ID.
- Verify that the form contains the Problem Summary tab, and that this tab contains the Problem Type and Comments boxes.
- Click the magnifier button of the Case ID box in the Summary area, and make sure that the lookup table contains the Reported On column.
- On the Leads (CR301000) form, clear the Email for the record with the Smith, Jenny lead ID, and make sure that the Accept command on the More menu is visible but unavailable.
- On the Sales Orders (SO301000) form, do the
following:
- On the Company and Branch Selection menu in the top pane of the screen, select the MyStore branch.
- In the info area, in the upper-right corner of the top pane of the MYOB Acumatica screen, make sure that the business date in your system is set to 10/31/2024. If a different date is displayed, click the Business Date menu button, and select 10/31/2024 from the calendar.
- Open the sales order with the 000002 ID.
- Verify that the form toolbar contains the Sales Orders by Customer button, and that the More menu contains the Sales Orders by Customer command.
- Click this button or menu command, and make sure that the report opens in a new browser tab.
- On the Customer Locations (AR303020) form, make sure that the Network Type box is displayed on the User-Defined Fields tab.