
To Change the Type of a Box
For a data field, you can create a control of any type that is supported in MYOB Acumatica. However to avoid issues with rendering controls and processing control values, you have to have an appropriate control for each data field. Therefore, if you have changed the type of a data field, you should recreate all the controls that exist on MYOB Acumatica forms for this field.
For example, a text edit box for the MyFieldName PXDBString field can be defined in the ASPX code as follows.
<px:PXTextEdit ... DataField="MyFieldName" />Suppose that you have added the PXStringList attribute for the field in the data access class to use the control for the field as a drop-down box. Then you need to redefine the control as follows.
<px:PXDropDown ... DataField="MyFieldName" />Because this change must be saved in a customization project, you have to use the Screen Editor to delete the old definition of the box and to add the new one.
- Select the box in the Screen Editor, as described in To Select a Box in the Screen Editor.
- On the toolbar of the Control Tree, select .
- Click the Add Data Fields tab item (see the screenshot below).
- If you need to create a control for a data field that is not accessible through the data view specified for the container in the DataMember property, but is accessible through another data view of the same graph, and the Data View box gives you the availability to select a data view, select the needed data view in this box. (See Use of Multiple Data Views for Boxes in Containers in the MYOB Acumatica Framework Guide for details.)
- On the tab item, click the All, Visible, or Custom filter for the fields provided by the data view selected in the Data View box to view the appropriate field list.
- Find the required data field in the Field Name column of the list
and select the check box for the field in the unlabeled first column, as the following
screenshot shows.
Figure 1. Selecting a data field for which a box is to be created 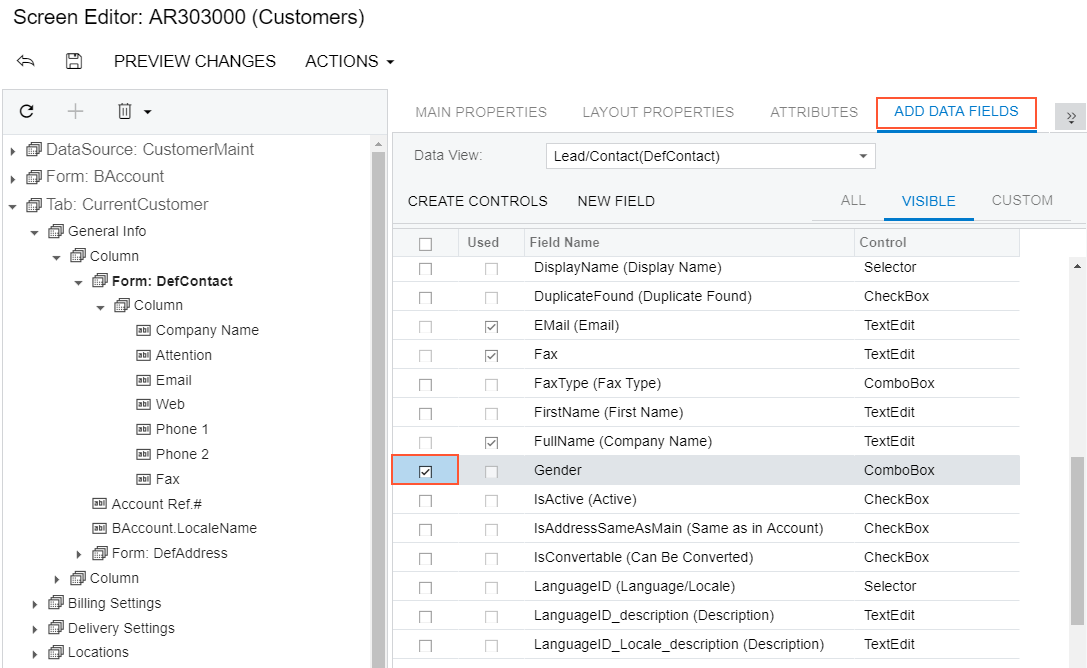
For each data field in the list, the Screen Editor presets the most appropriate control type. However you can select another control type to be created for a field.Note:The control type must match the field type. Otherwise, the control cannot work properly with the field data. If you create a control that does not match the data field, you have to update the data field in the DAC (see To Customize a Field on the DAC Level for details) or in the graph. (See To Customize a Field on the Graph Level for details.) - If you need to change the type of the control to be created, select the needed type in the Control column of the selected field.
- On the list toolbar, click Create Controls.
The platform creates a box for the selected data field and adds to the Control Tree a node for the box.
- Click Save to save your changes to the customization project.