
To Add an Event Handler
If you customize a form, you may need to provide additional business logic for processing a control value immediately after the value is changed.
To implement business logic for data changed by the user on an original form, you should add event handlers for data fields (or data records) to the extension of the graph that provides business logic for the form.
To process data modification on a custom form, you should add event handlers for data fields (or data records) to the appropriate custom graph.
You can use the Screen Editor to add to the appropriate customization code a workable template of an event handler for a data field (or data record) that can be modified on a form. To do this, perform the following actions:
- Open the form in the browser and make the control for the field visible on the form.
- On the form title bar, click to launch the Element Inspector.Note:If you need to activate the Element Inspector for a pop-up panel, dialog box, or another UI element that opens in modal mode and makes the Customization Menu unavailable for selection, you can press Control-Alt.
- On the form, click the control to open the Element Properties Dialog Box for the control.
- In the dialog box, click Customize.
- If there is no currently selected customization project and the inspector opens the
Select Customization Project Dialog Box, select an existing customization project or create a new one.
If the customization project does not contain a changeset for the form, the Customization Project Editor adds to the project a Page item for the form, to keep the changeset to the ASPX code of the form in the database. The container of the control is opened in the Screen Editor, and the control is selected in the Control Tree of the editor.
- Select the node of the control in the Control Tree.
- Click the Layout Properties tab item to open the list of properties for the control.
- In the list, set the CommitChange property to True. (For detailed information about the property, see Use of the CommitChanges Property of Boxes in the MYOB Acumatica Framework Guide.)
- Click Save to save your changes in the customization project.
- Click the Events tab item to open the list of available event types for the control.
- In the list, click the type of the event that you want to process for the field to highlight the type, as shown in the screenshot below.
- On the list toolbar, click Add Handler > Keep Base Method.
Figure 1. Adding an event handler for a data field 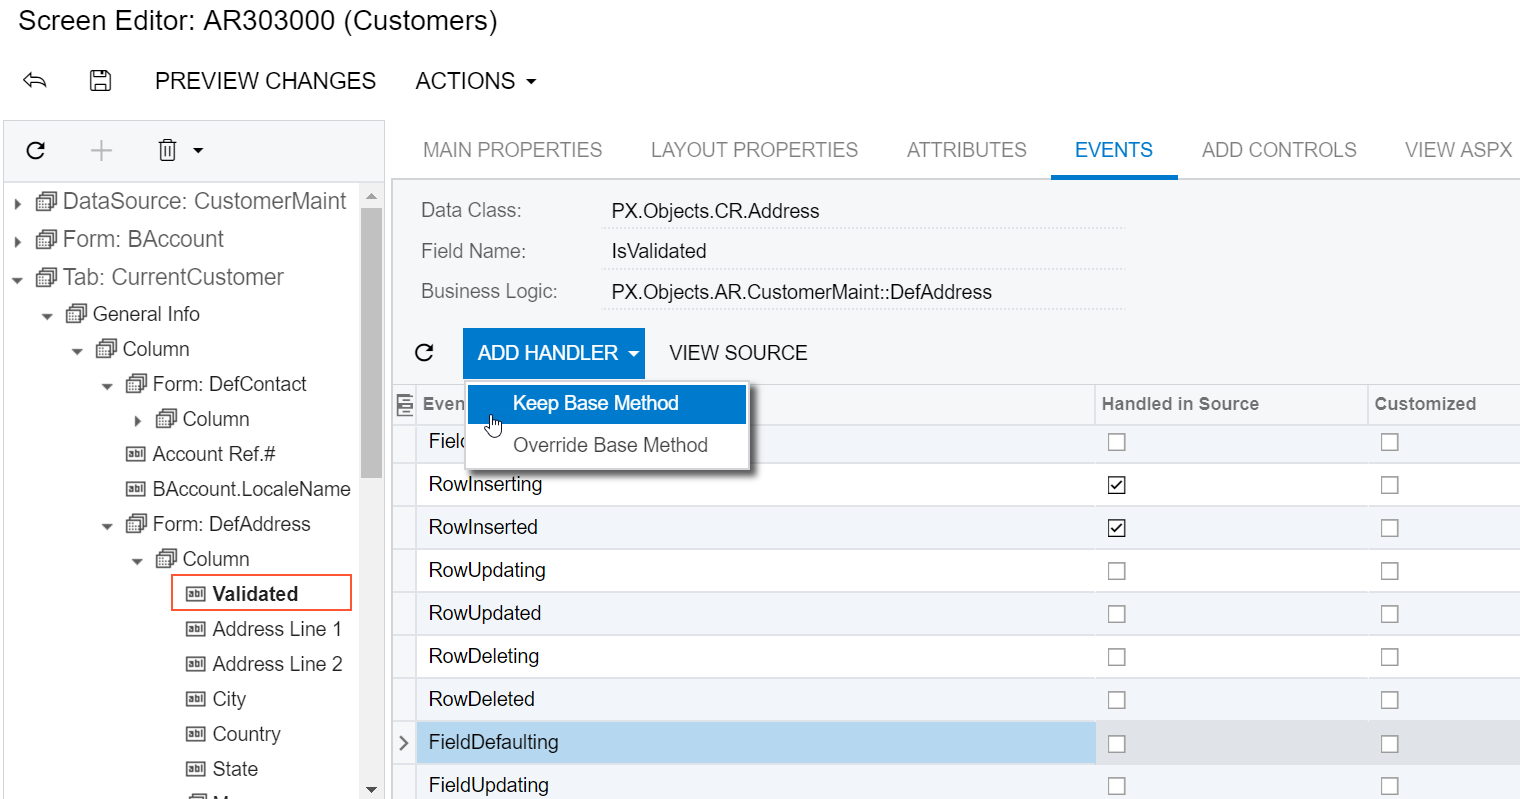
If there is no extension for the graph that provides business logic for the form in the customization project, the MYOB Acumatica Customization Platform creates a template for the extension and saves it as a Code item in the database. Then the platform adds to the graph extension a template for the event handler highlighted in the list and opens the Code item in the Code Editor, as shown in the following screenshot.
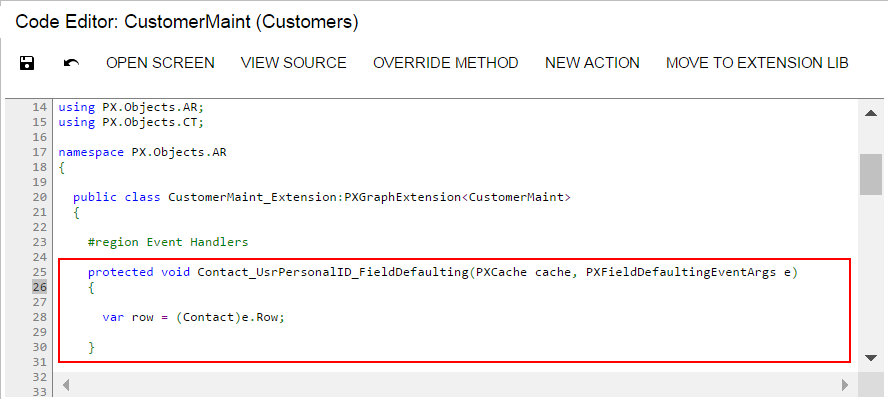
In the template, the event handler has two parameters, as is defined in the base graph. As a result, the event handler is added to the appropriate event handler collection.
When you publish the customization project, the platform saves the graph extension as a C# source code file in the App_RuntimeCode folder of the website. You can later develop the event handler in Microsoft Visual Studio. (See Integrating the Project Editor with Microsoft Visual Studio for details.)