
To Create a Graph Extension
In the Customization Project Editor, you can create an extension of a graph or a higher-level extension of a graph extension defined in the source code of MYOB Acumatica. You do it by creating a Code item with the graph extension template on the Code page of by using the Create Code File dialog box.
Before creating a graph extension, you need to know the name of the graph or graph extension to be customized. You can learn the name by using the Element Inspector or by exploring the source code of MYOB Acumatica in the Source Code Browser or in Visual Studio.
To create a graph extension, perform the following actions:
- Open the customization project in the editor. (See To Open a Project for details.)
- Click Code in the navigation pane to open the Code page.
- Click Add New Record (+) on the page toolbar.
- In the Create Code File dialog box, which opens, select Graph Extension in the File Template box, as the screenshot below shows.
- In the Base Graph box, select the name of the graph or a graph extension to be customized.
- Click OK.
Figure 1. Adding a Code item with the graph extension to the project 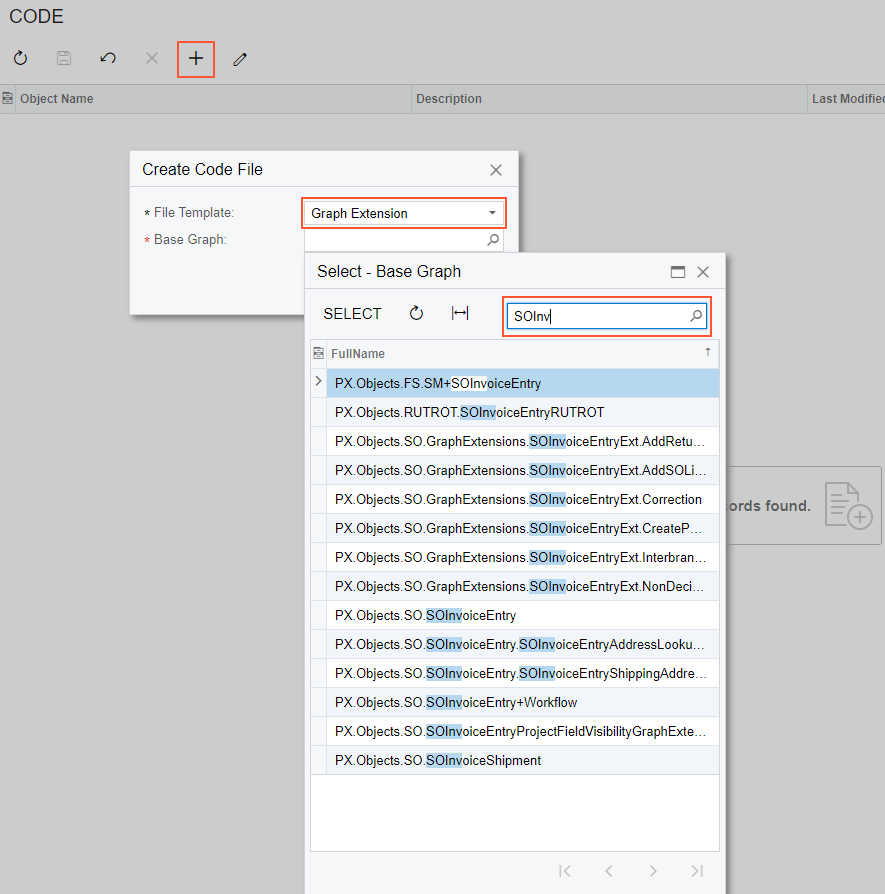
The platform creates the template of the class that is derived from the PXGraphExtension<> class, saves the code as a Code item of the project in the database, and opens the item in the Code Editor.