
Processing Form: General Information
On a processing form, a user can perform an operation on multiple selected records at once.
Learning Objectives
In this chapter, you'll learn how to organize the layout of the processing form.
Applicable Scenarios
You implement a processing form if you need to provide the ability for the user to invoke an operation on multiple records at once.
Processing Forms
Processing forms look similar to inquiry forms. A processing form usually has the following components:
- A table (which is also referred to as a grid) that displays the list of records
retrieved by the processing data view. The table includes:
- A column with an unlabeled check box, which gives the user the ability to select one record or multiple records in the grid for processing.
- Additional columns that contain key settings of each listed record, including its ID or number.
- Optional: A redirection button or link that can be clicked to open the data entry form for any selected record.
- Optional: Table filters (also known as quick filters) that are displayed above the table.
- A form toolbar that includes the Process, Process All, and Cancel buttons.
- Optional: An area that provides selection criteria (for narrowing the records that are listed and may be processed) or configuration settings—or both—for the processing method.
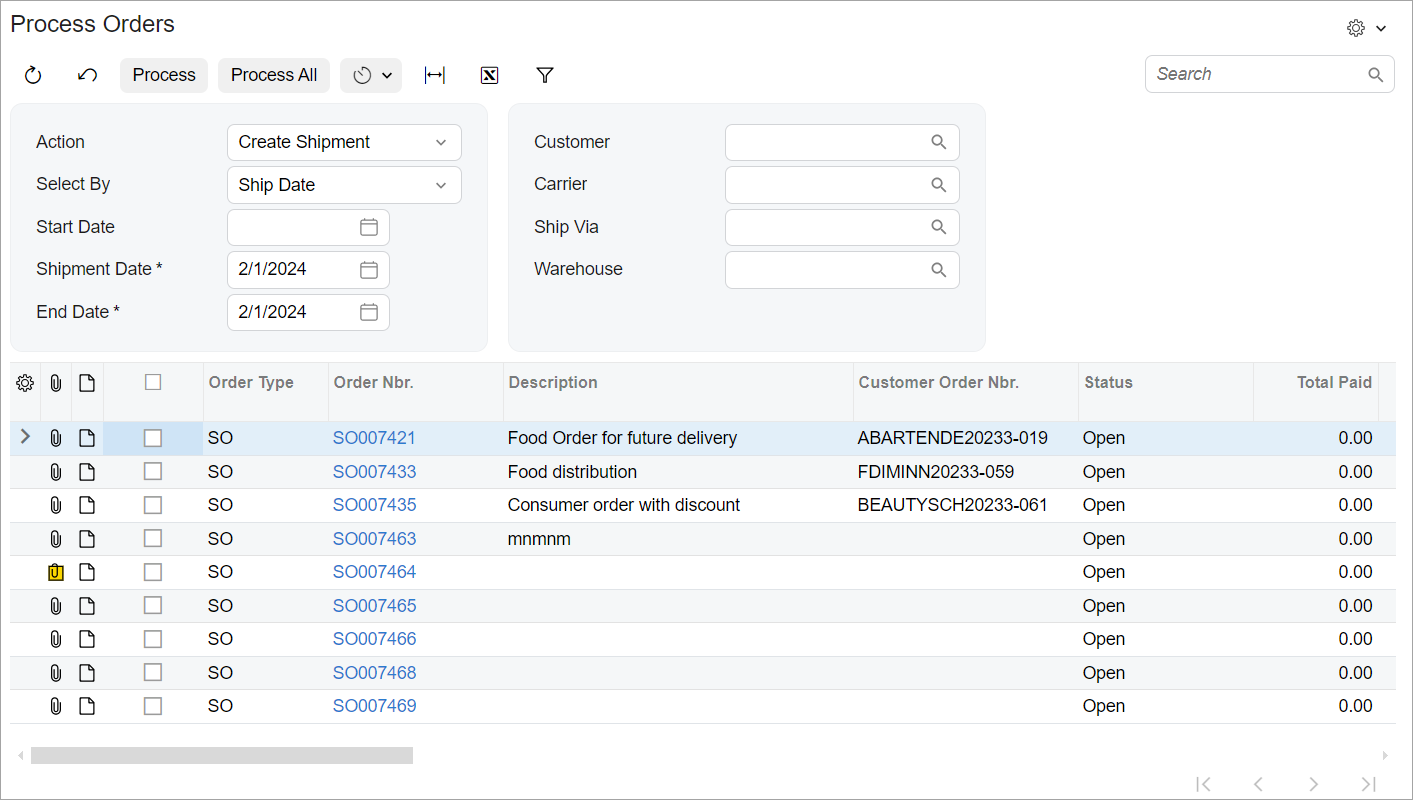
The screenshot below shows an example of a processing form with a Selection area and a grid.
Naming Conventions for Processing Forms
Processing forms have IDs that start with a two-letter abbreviation (indicating the functional area of the form) followed by 50 (indicating a processing form), such as RS501000.
The names of the graphs that work with processing forms have the Process suffix. For
instance, RSSVAssignProcess will be the name of the graph for the Assign Work
Orders (RS501000) form.
For more details about these naming conventions, see Form and Report Numbering and Graph Naming.
Definition of the Processing Graph and Data View
To configure the graph that works with the processing form, you do the following:
- You define the data view for the processing form.
To do this, you use the SelectFrom<Table>.ProcessingView class. This class is derived from the PXProcessingBase<Table> class, which is a base class for the data views of processing forms. You can also use one of the types that use the traditional BQL style of data queries, such as PXProcessing or PXProcessingJoin
Important:To ensure the history of a processing operation is saved correctly, the main DAC of the processing view must contain theNoteIDfield. This field must have the PXNote attribute declared on it. - You add the
Cancelaction to the processing graph.You do this by using the PXCancel class. If the processing form does not have a filter, you use the main DAC of the processing data view as the type parameter, as shown in the following code.
// Definition of the Cancel button for processing without filtering public class SalesOrderProcess : PXGraph<SalesOrderProcess> { public SelectFrom<SalesOrder>.ProcessingView SalesOrders; // Main DAC of the processing data view public PXCancel<SalesOrder> Cancel; } -
Optional: You replace the names of the default buttons in the graph constructor.
By default, any form that has a data view of a type derived from PXProcessingBase<Table> has the Process and Process All buttons on the form toolbar. To override the button captions, you use the SetProcessCaption() and SetProcessAllCaption() methods, as the following code shows.
public RSSVAssignProcess()
{
    WorkOrders.SetProcessCaption("Assign");
    WorkOrders.SetProcessAllCaption("Assign All");
}
You also need to specify the processing action. For details, see Processing Operations: General Information.
Selected Data Field and Column
You must add the unbound Selected data field of the Boolean type to the DAC
that provides the records to process for the processing form and then add the column for this
field to the form. If a user doesn’t want to process all listed records, the user will select
the check box in this column for each record to be processed. You define the
Selected data field as unbound by using the PXBool type
attribute. (Unlike the PXDBBool attribute, the PXBool
attribute does not have DB in its name. DB indicates a bound data type.)
Selected is the default name for the data field for this check box; you can
define the data field with any name and override the default Selected name in
the graph constructor with the SetSelected() method of the
PXProcessing class.You make all columns in the grid (except for the column that corresponds to the
Selected field) unavailable for editing by specifying the
Processing preset for the grid. For the Selected field, you
set the allowCheckAll property to true. This lets users
select all records on the current page of the table for processing by selecting the check box in
the column header.