Customization Items: To Add Items to the Customization Project
The following activity will walk you through the process of adding a generic inquiry and an import scenario to a customization project.
Story
Suppose that the employees of your company often need to review all sales orders of a particular customer, and that you have already prepared a generic inquiry to view this information. You need to include this generic inquiry in the Yogifon customization project.
Also, you need to include the Import GL Transactions import scenario in the customization project. (This import scenario, which employees will use to import general ledger transactions into the system, already exists in the instance.)
Process Overview
You will open the customization project in the Customization Project Editor, and use the Generic Inquiries and Import and Export Scenarios pages to add the needed items. You will also use the Access Rights page to add the access rights for one of the added items.
System Preparation
Before you begin performing the steps of this activity, do the following:
- Prepare an MYOB Acumatica instance by performing the Customization Projects: To Deploy an Instance prerequisite activity.
- Create the Yogifon customization project by performing the Customization Projects: To Create a Customization Project prerequisite activity.
- Import the generic inquiry from the SO-OpenByCustomer.xml file to your instance as
follows:
- Open the Generic Inquiry (SM208000) form.
- On the form toolbar, click .
- In the Upload XML File dialog box, select the SO-OpenByCustomer.xml file.
- Click Upload.
- On the More menu (under Other), click Publish to the UI.
- In the Publish to the UI dialog box, which opens, specify
the following settings:
- Site Map Title: Open Sales Orders by Customer
- Workspace: Receivables
- Category: Reports
- Screen ID: GI.40.00.01 (inserted automatically)
- In the Access Rights section, select the Set to Granted for All Roles option button to make the system set the access rights for this generic inquiry to Granted for all user roles in the system.
- Click Publish.
Step 1: Adding the Imported Generic Inquiry to the Customization Project
To add the SO-OpenByCustomer generic inquiry to the customization project, do the following:
- Open the Customization Projects (SM204505) form.
- Click the name of the Yogifon customization project.
The Customization Project Editor opens for this customization project.
- In the navigation pane, click Generic Inquiries.
The Generic Inquiries page opens.
- On the page toolbar, click Add New Record.
- In the Add Generic Inquiries dialog box, which opens,
select the unlabeled check box in the row with the SO-OpenByCustomer
generic inquiry (see the following screenshot).
Figure 1. Selection of the SO-OpenByCustomer inquiry 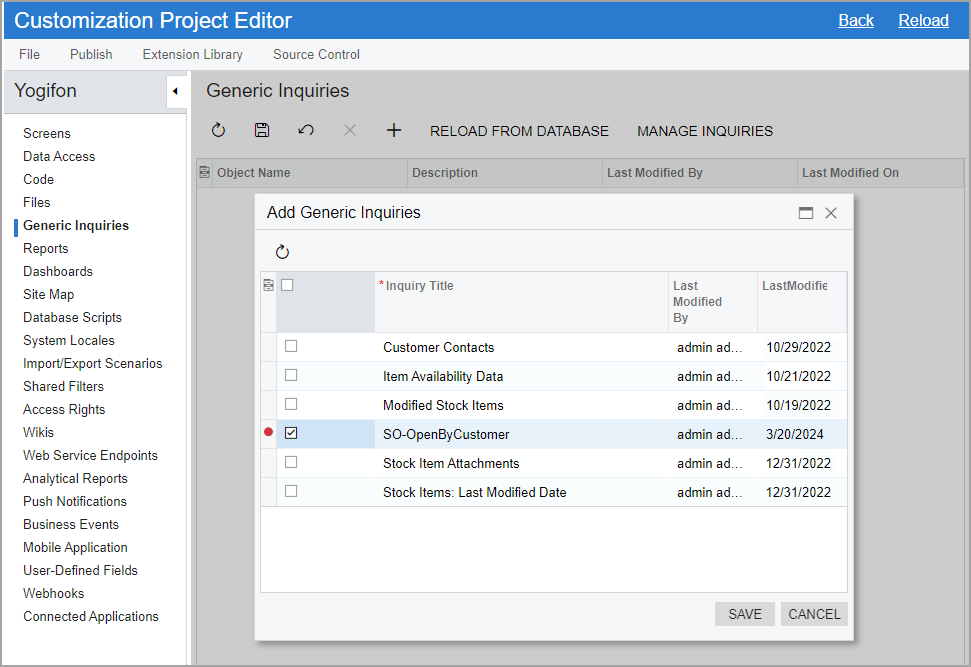
- Click Save to add the generic inquiry to the
customization project and return to the Generic Inquiries page.
The generic inquiry is saved as a customization item in the customization project, as shown in the following screenshot. Notice that it is listed on the Generic Inquiries page and that in the navigation pane, the system has added (1) after Generic Inquiries, indicating that the customization project now includes one generic inquiry.
Figure 2. The SO-OpenByCustomer generic inquiry as a customization item 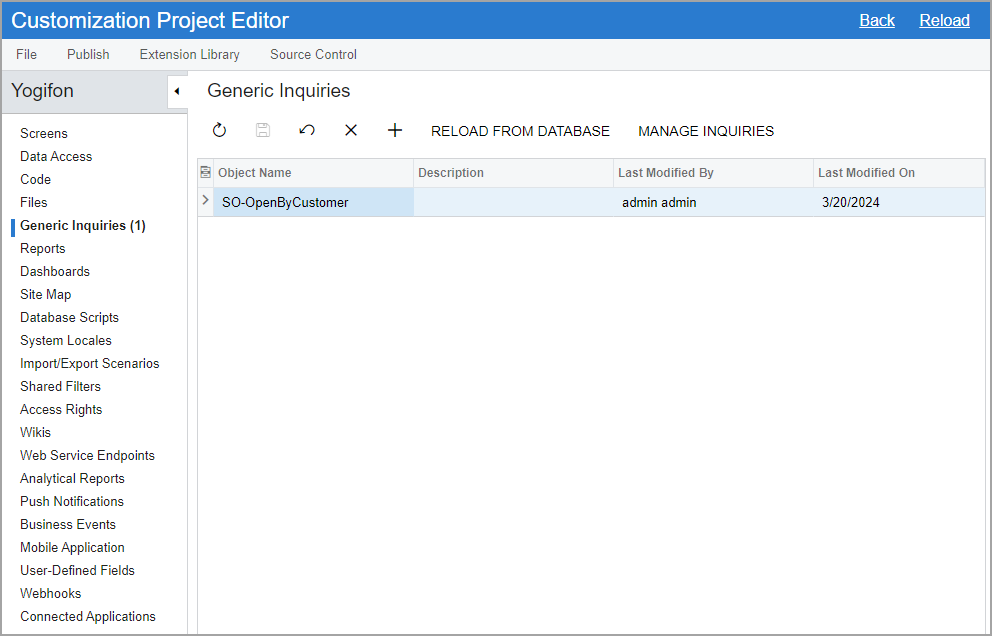
Tip:You do not need to add the Generic Inquiry (SM208000) form to the customization project because a generic inquiry is an entity created on this form but the Generic Inquiry form itself is not changed.
For more information on generic inquiries, see Managing Generic Inquiries.
Step 2: Specifying Access Rights for the Added Generic Inquiry
To add the access rights for the SO-OpenByCustomer generic inquiry to the customization project, do the following:
- While you are still working in the Customization Project Editor, in the
navigation pane, click Access Rights.
The Access Rights page opens.
- On the page toolbar, click Add New Record.
- In the Add Access Rights for Screen dialog box, which
opens, do the following:
- In the Search box, type GI400001.
This is the ID of the SO-OpenByCustomer generic inquiry.
- In the table, select the Included check box for the row with this
inquiry (see the following screenshot).
Figure 3. Addition of access rights 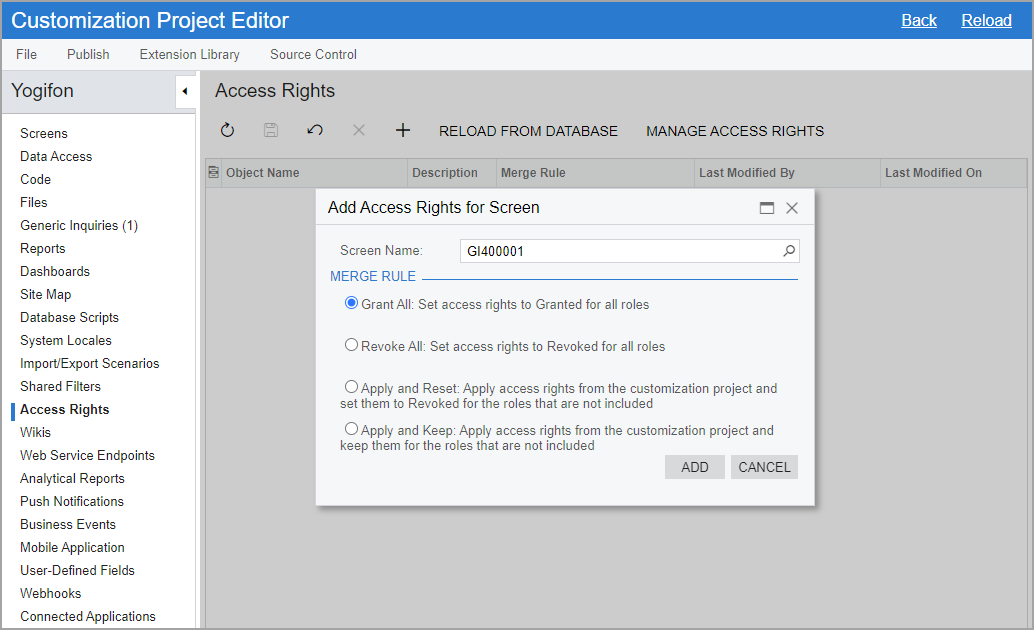
- Click Add to add the access rights to the customization project and return to the Access Rights page.
- In the Search box, type GI400001.
- In the Merge Rule column, select Grant All.
With this option selected, the system will set the access rights to Granted for all user roles in the system.
- On the page toolbar, click Save.
The access rights are saved as a customization item in the customization project.
For more information on access rights, see To Add Access Rights to a Project.
Step 3: Adding the Import Scenario to the Customization Project
To add the Import GL Transactions scenario to the customization project, do the following:
- While you are still working in the Customization Project Editor, in the
navigation pane, click Import/Export Scenarios.
The Import and Export Scenarios page opens.
- On the page toolbar, click Add New Record.
- In the Add Import or Export Scenario dialog box, which opens, select the unlabeled check box in the row with the Import GL Transactions scenario.
- Click OK to close the dialog box and return to the Import and Export Scenarios page.
- On the page toolbar, click Save.
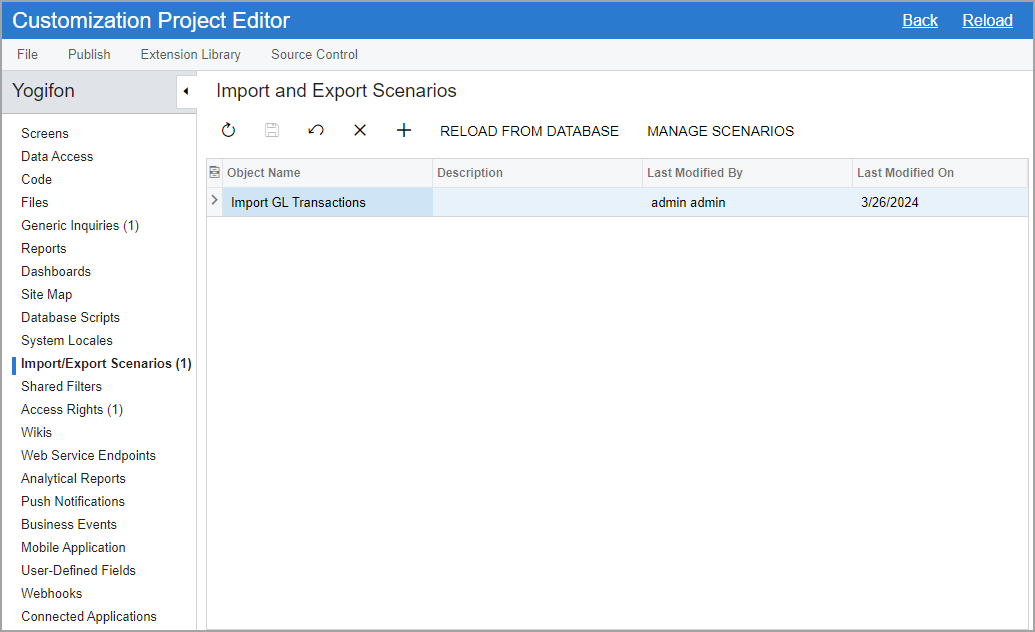
The system adds the import scenario to the customization project as a customization item (see the following screenshot).
Figure 4. The import scenario as a customization item