
To Move a Code Item to the Extension Library
You can develop customization code either as Code items in a customization project or as source code included in an extension library project in Microsoft Visual Studio. Some part of a customization may exist in the Code items of a customization project, while another part can be included in an extension library that is added in the customization project as a dynamic link library (DLL) file. (See Extension Library for details.)
If you have a Code item in a customization project that you want to move to an extension library to compile it into a DLL file, you can use the Move to Ext. Library button on the page toolbar of the Code Editor page.
After the operation is complete, the Code item that is currently displayed in the work area of the Code Editor is removed from the customization project, and a file with the same source code is appended to the extension library that is bound to the customization project. The system assigns a similar name to the file: For example, if the Code item name was CodeItemName, the name of the created file will be CodeItemName.cs.
The operation of moving code to an extension library is irreversible. If you need to move source code from an extension library to a Code item of a customization project, use the following approach:
- In Visual Studio (or any text editor), open the file, select the needed source code, and copy it to the clipboard.
- Create a new Code item in the customization project.
- Delete the code template from the created item.
- Paste the code from the clipboard, and save the Code item to the customization project.
- Delete the source code file from the extension library.
To move the code from a Code item to an extension library, you perform the following general actions:
- You open the customization project in the Customization Project Editor. (See To Open a Project for details.)
- You click Code in the navigation pane to open the Code page.
- In the page table, you click the name of the item to be moved to open the Code Editor page for the item.
- On the page toolbar, you click Move to Ext. Library.Attention:Before you launch the operation, be sure that the customization project is bound to an existing extension library. (See Customization Project Editor for details.)
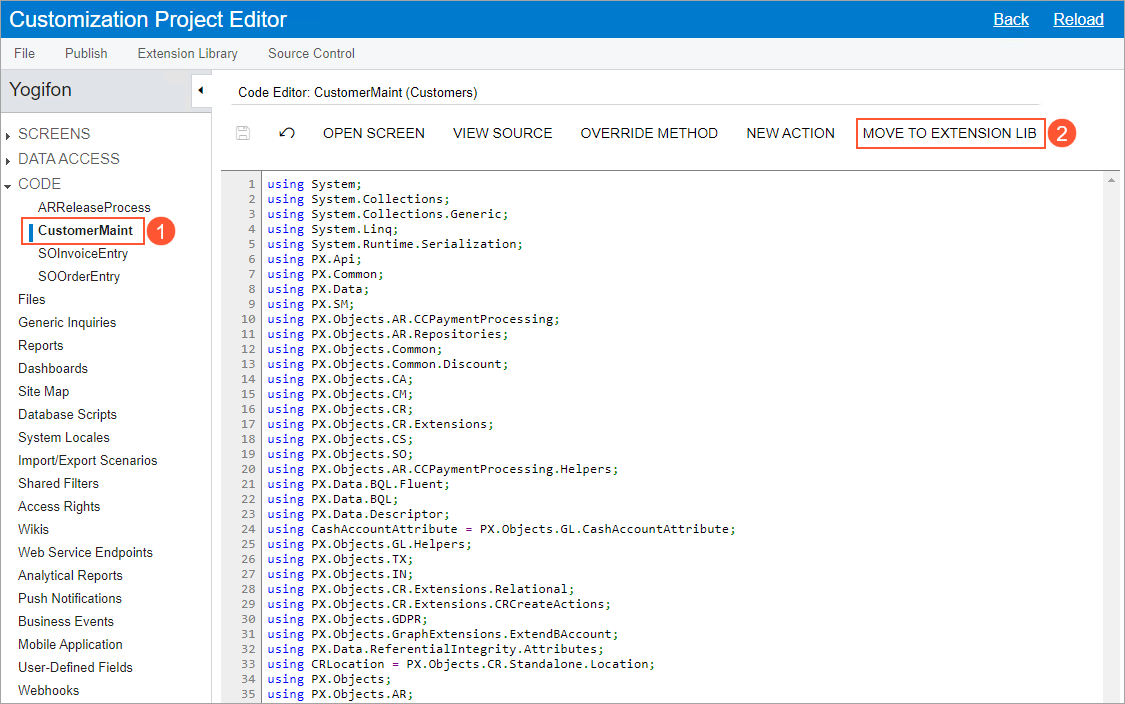
For example, suppose you need to move the CustomerMaint Code item (see Item 1 in the following screenshot) to the YogiFon extension library (Item 2).
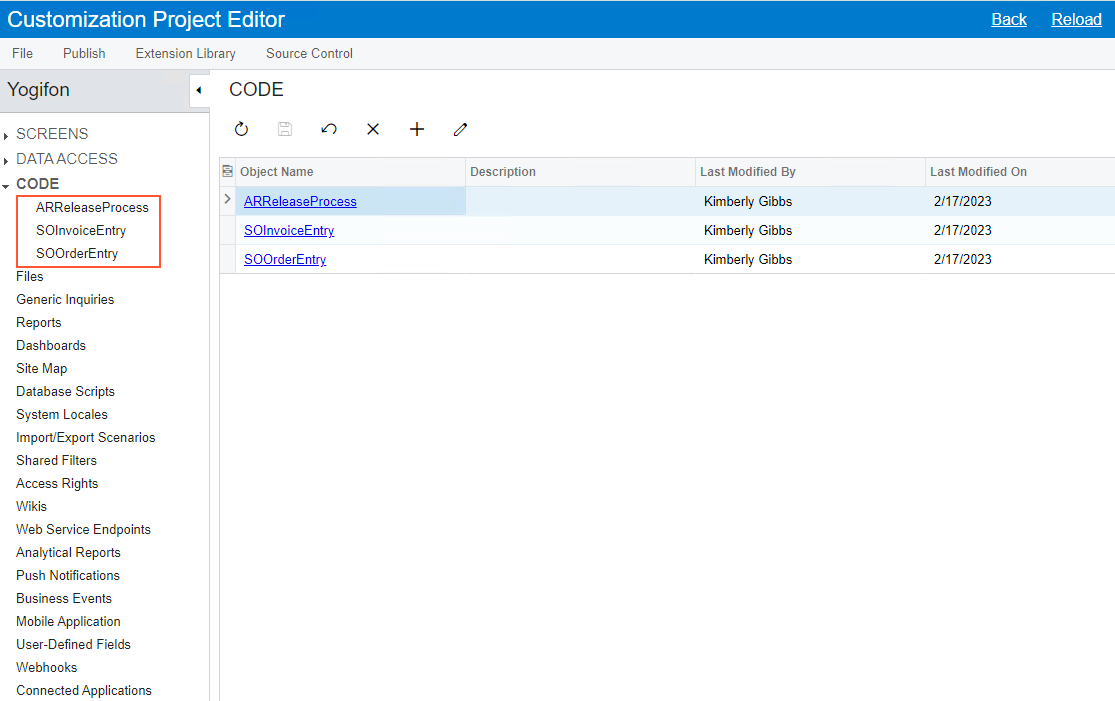
When the operation is complete, the CustomerMaint Code item is removed from the customization project, as shown in following screenshot.
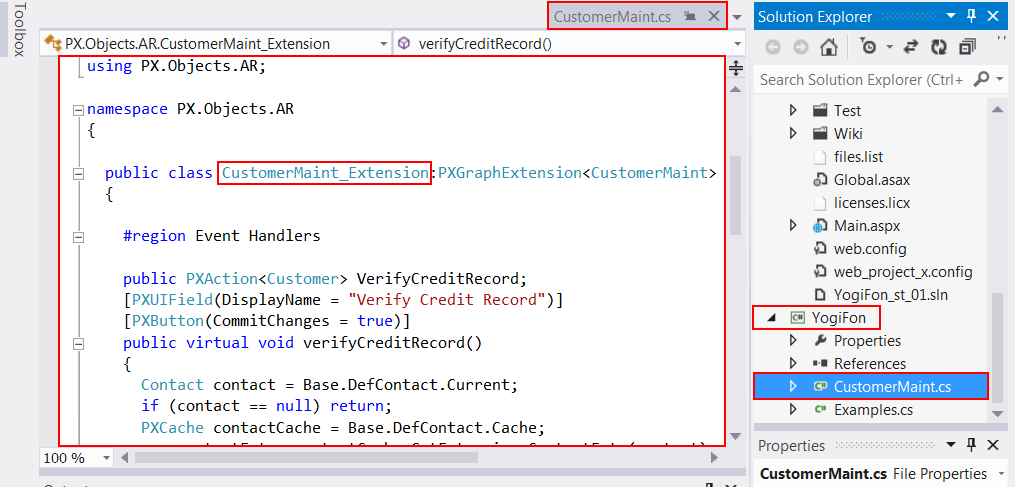
In place of the removed item, the CustomerMaint.cs file with the same source code is appended to the bound extension library project, as shown in the following screenshot.
See Extension Library (DLL) Versus Code in a Customization Project for our recommendations about where you should keep your customization code.