
GL Anomaly Detection: Scheduled Mode
GL anomaly detection can be run by a system administrator in manual or scheduled mode. Before configuring scheduled mode for companies in a tenant, an administrative user performs the following actions:
- On the Enable/Disable Features (CS100000) form, the user enables the GL Anomaly Detection feature.
- On the Companies (CS101500) form, for each company where GL error detection is needed, the user selects the Use for Anomaly Detection check box in the Summary area.
For details on creating automation schedules, see Automated Processing: General Information.
Creating the Train Model Automation Schedule
To create an automation schedule for training the model, do the following:
- Open the Automation Schedules (SM205020) form.
- On the form toolbar, click Add New Record.
- In the Summary area, specify the following settings:
- Active: Selected
- Description: Train Model
- Screen ID: Analyze Accounting Transactions (GL.51.00.00)
- Action Name: Process
- On the Details tab, specify the following settings:
- No Expiration Date: Selected
- Process with Branch: HEADOFFICE
The Train Model automation schedule is shown in the following screenshot.
Figure 1. The Train Model automation schedule 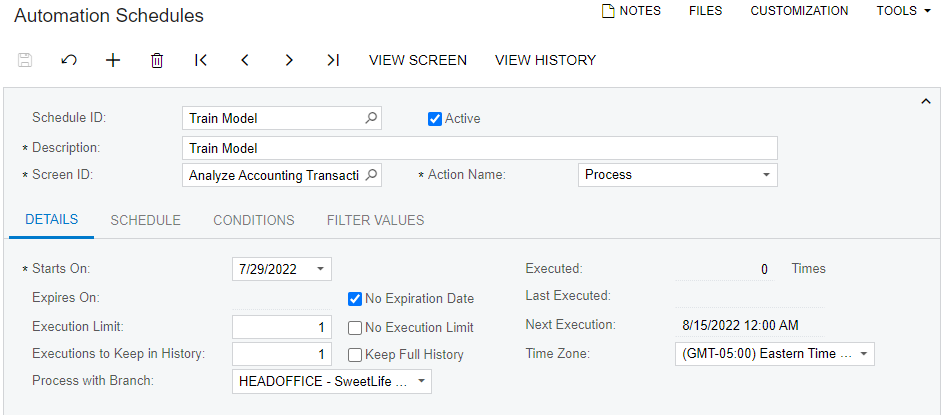
Tip:We recommend that the Train Model process is scheduled once per financial period, approximately in the middle of the financial period. The time can be chosen according to the server performance, for example at night or on a weekend. More frequent training will not provide any additional value as the same data will be used. - On the Schedule tab, specify the following settings:
- By Financial Period: Selected
- Next Execution Date: 8/15/2025 12:00 AM (the date may vary, but the day should be in the middle of a financial period)
- Fixed Day of the Period: Selected, 15
- Starts On: 12:00 AM
The schedule of the Train Model automation schedule is shown in the following screenshot.
Figure 2. The schedule of the Train Model automation schedule 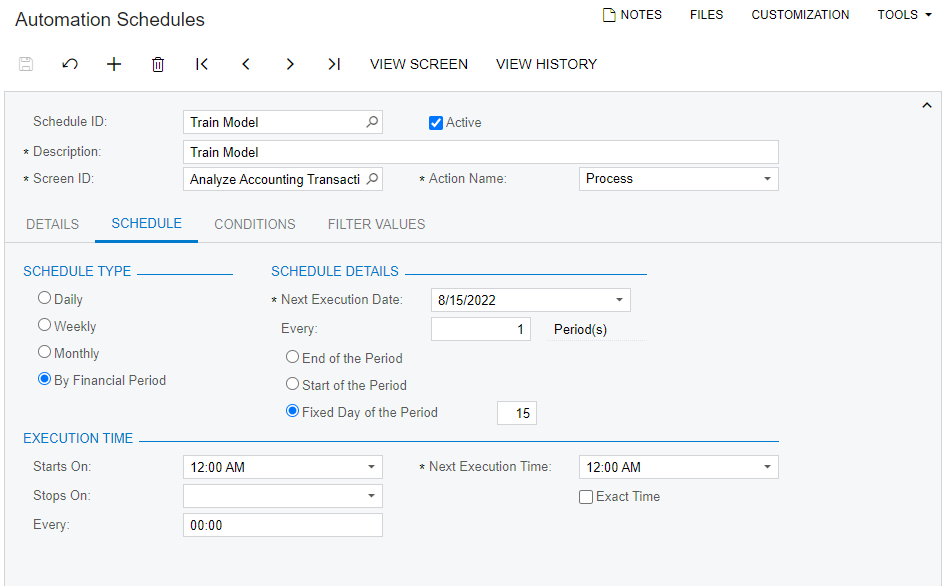
- On the Conditions tab, click Add Row and
specify the following settings:
- Field Name: Company ID
- Condition: Equals
- Value: SWEETLIFE
The condition for the Train Model schedule is shown in the following screenshot.
Figure 3. The condition for the Train Model automation schedule 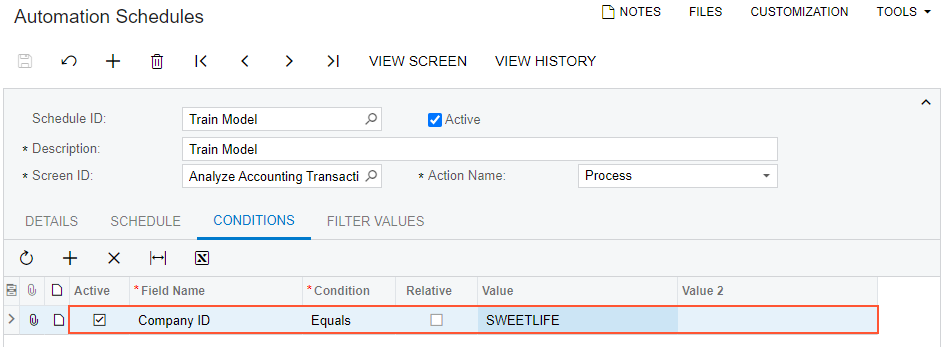
- On the Filter Values tab, specify the following settings for the
only row:
- Field Name: Action
- Value: Train Model
The filter values for the Train Model automation schedule are shown in the following screenshot.
Figure 4. The filter values for the Train Model automation schedule 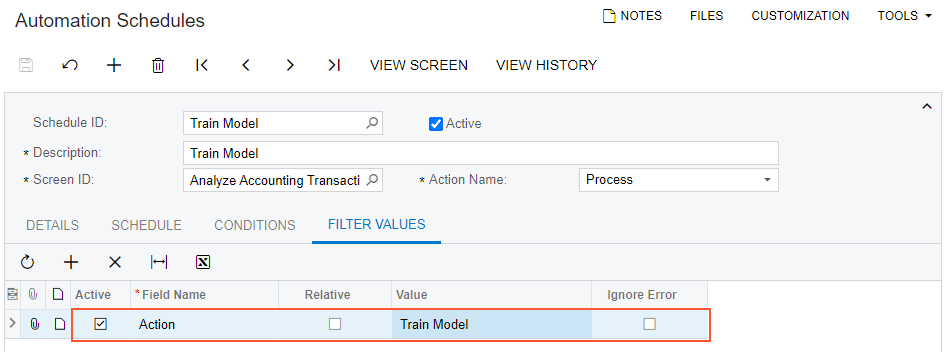
- On the form toolbar, click Save to save your changes.
Creating the Analyze Transactions Automation Schedule
To create an automation schedule for analyzing transactions, do the following:
- Open the Automation Schedules (SM205020) form.
- On the form toolbar, click Add New Record.
- In the Summary area, specify the following settings:
- Active: Selected
- Description: Analyze Transactions
- Screen ID: Analyze Accounting Transactions (GL.51.00.00)
- Action Name: Process
- On the Details tab, specify the following settings:
- No Expiration Date: Selected
- Process with Branch: HEADOFFICE
The Analyze Transactions automation schedule is shown in the following screenshot.
Figure 5. The Analyze Transactions automation schedule 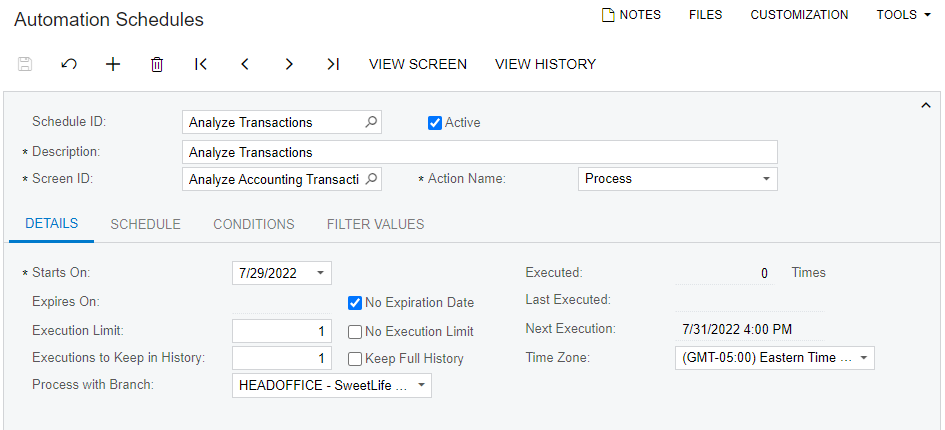
Tip:We recommend that the Analyze Transactions process is scheduled daily or weekly. The time for running the process can be three and more hours later than the time of the Train Model process. The reasons for this recommendation are the following:- The Analyze Transaction process can be run only after the training process for the company is finished.
- The time for the training process may vary from time to time. For example, one day it may take thirty minutes and another day it may take two hours. The reason for this is the different amount of data and the distribution of values in each financial period in the general ledger, such as the distribution of accounts and subaccounts, which may vary every month depending on the season.
- On the Schedule tab, specify the following settings:
- Weekly: Selected
- Next Execution Date: 8/31/2025 4:00 PM
- Every: 1 Week(s)
- Sunday: Selected
- Starts On: 4:00 PM
The schedule of the Analyze Transactions automation schedule is shown in the following screenshot.
Figure 6. The schedule of the Analyze Transactions automation schedule 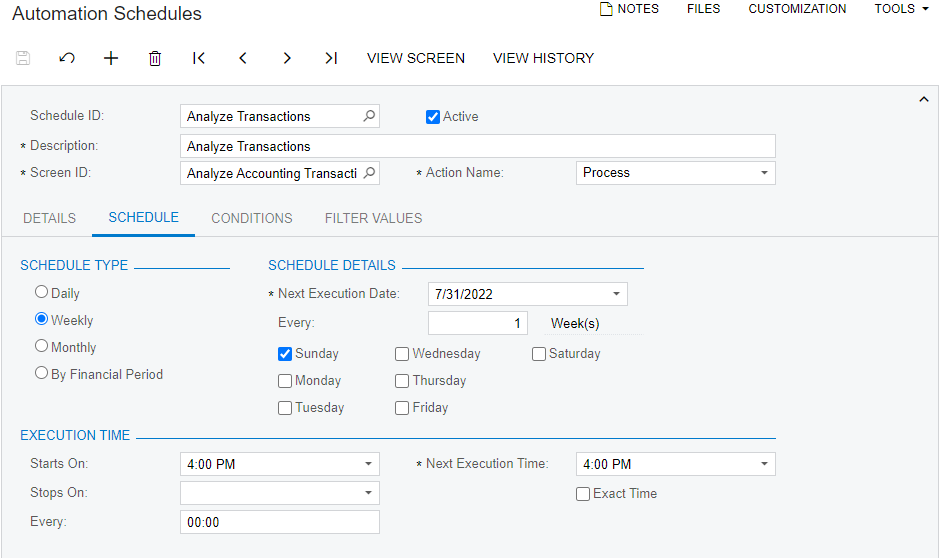
- On the Conditions tab, click Add Row and
specify the following settings:
- Field Name: Company ID
- Condition: Equals
- Value: SWEETLIFE
The condition for the Analyze Transaction schedule is shown in the following screenshot.
Figure 7. The condition for the Analyze Transaction automation schedule 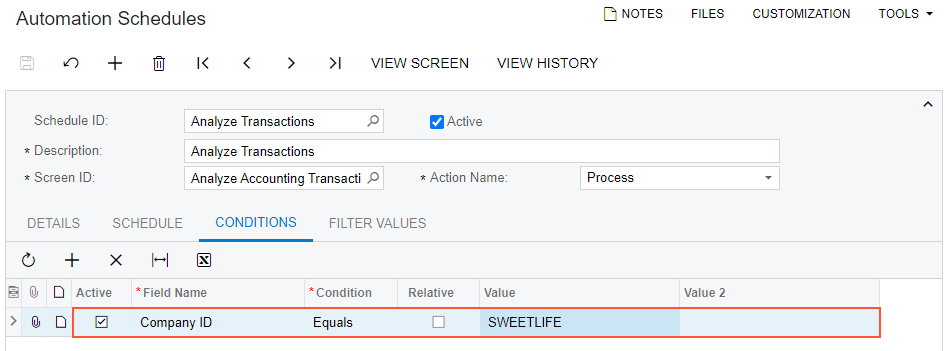
- On the Filter Values tab, specify the following settings for the
only row:
- Field Name: Action
- Value: Analyze Transactions
The filter values for the Analyze Transactions automation schedule are shown in the following screenshot.
Figure 8. The filter values for the Analyze Transactions automation schedule 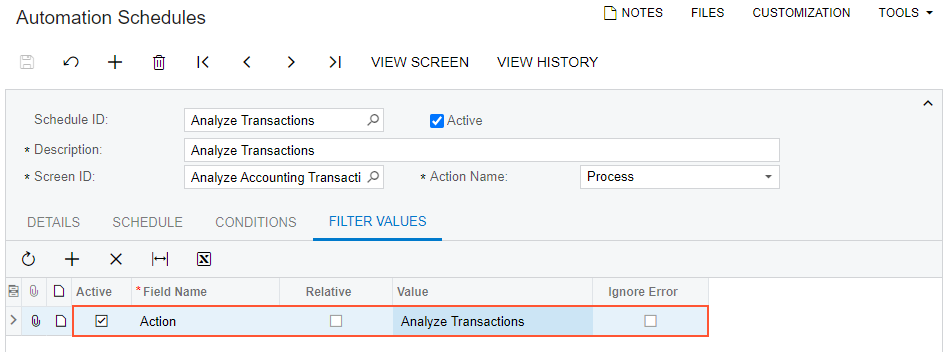
- On the form toolbar, click Save to save your changes.