
Photo Logs: Process Activity
This activity will walk you through the process of working with a photo log.
Story
Suppose that on March 15, 2025, the construction foreman has inspected the project site and taken progress photos. Acting as the construction foreman, you will create a photo log for the particular project and project task and upload the photos to this photo log. Then you will send the photos to the responsible person.
Configuration Overview
In the U100 dataset, the following tasks have been performed to support this activity:
- On the Enable/Disable Features (CS100000) form, the Construction and Construction Project Management features have been enabled.
- On the Projects (PM301000) form, the HOTEL project has been created, and the project tasks for the project have been specified on the Tasks tab, including the 02 – SITEWORK project task.
Process Overview
You will create the photo log on the Photo Log (PJ305000) form and upload the progress photos to the log by using the Photo (PJ305010) form. You will then select the photos to be sent, prepare an email on the Email Activity (CR306015) form, and send the email with the attached ZIP archive with the photos.
System Preparation
To prepare to perform the instructions of this activity, do the following:
- As a prerequisite to this activity, prepare the system for using photo logs by completing the Photo Logs: Implementation Activity.
- Launch the MYOB Acumatica website, and sign in to a company with the U100 dataset preloaded. You should sign in as a construction foreman by using the epsmith username and the 123 password.
- In the info area, in the upper-right corner of the top pane of the MYOB Acumatica screen, make sure that the business date in your system is set to 3/15/2025. If a different date is displayed, click the Business Date menu button, and select 3/15/2025 on the calendar. For simplicity, in this activity, you will create and process all documents in the system on this business date.
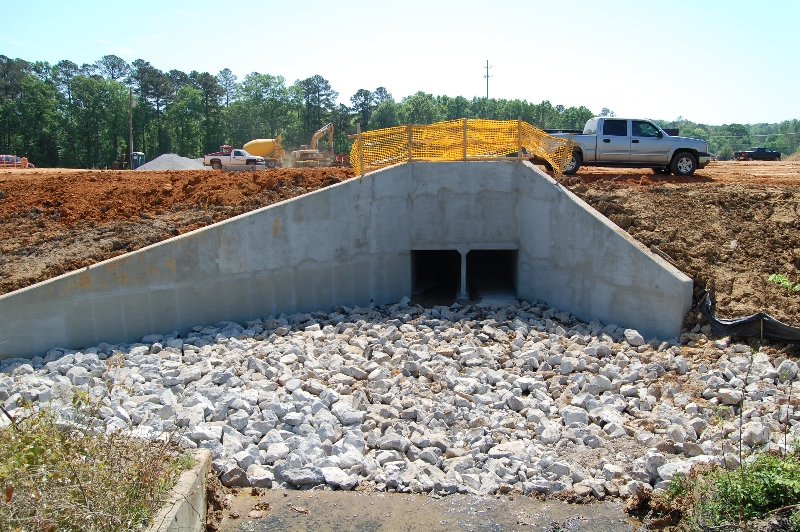
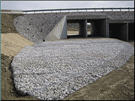
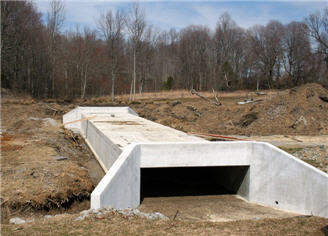
- Download the Photo_Log_Concrete_Headwall.jpg, Photo_Log_Erosion.jpg, and Photo_Log_Culvert.jpg files to your device.
Step 1: Creating a Photo Log
To create the photo log, do the following:
- Open the Photo Logs (PJ405000) form.
- On the form toolbar, click Add New Record, and on the
Photo Log (PJ305000) form that opens, specify the
following settings in the Summary area:
- Status: In Progress (inserted automatically)
- Date: 3/15/2025 (inserted automatically)
- Project: HOTEL
- Project Task: 02 - SITEWORK
- Description: Problem with the drainage system
- On the form toolbar, click Save.
Notice that an identifier has been automatically generated for the photo log. The system generates this identifier in accordance with the numbering sequence specified on the Photo Logs tab of the Project Management Preferences (PJ101000) form.
Step 2: Uploading Photos to the Photo Log
While you are still viewing the photo log that you have created on the Photo Log (PJ305000) form, upload the photos to the photo log by doing the following:
- On the Photos tab, click the file upload area (which has the Drag files here or click to upload text).
- In the dialog box that opens, select the
Photo_Log_Concrete_Headwall.jpg,
Photo_Log_Culvert.jpg, and
Photo_Log_Erosion.jpg files (which you have downloaded
earlier), and click Open to upload the selected photos to
the photo log.
Notice that the uploaded photos are now listed in the table on the tab. The system has uploaded each file as a separate photo record. The right pane shows the photo preview for the row that is currently selected in the table.
- Select the Main Photo check box in the row with the
Photo_Log_Culvert.jpg photo to indicate that this photo must be
displayed in the preview area on the Photo Logs form as the
main photo of this photo log, as the following screenshot shows.
Figure 1. Photo log with uploaded photos 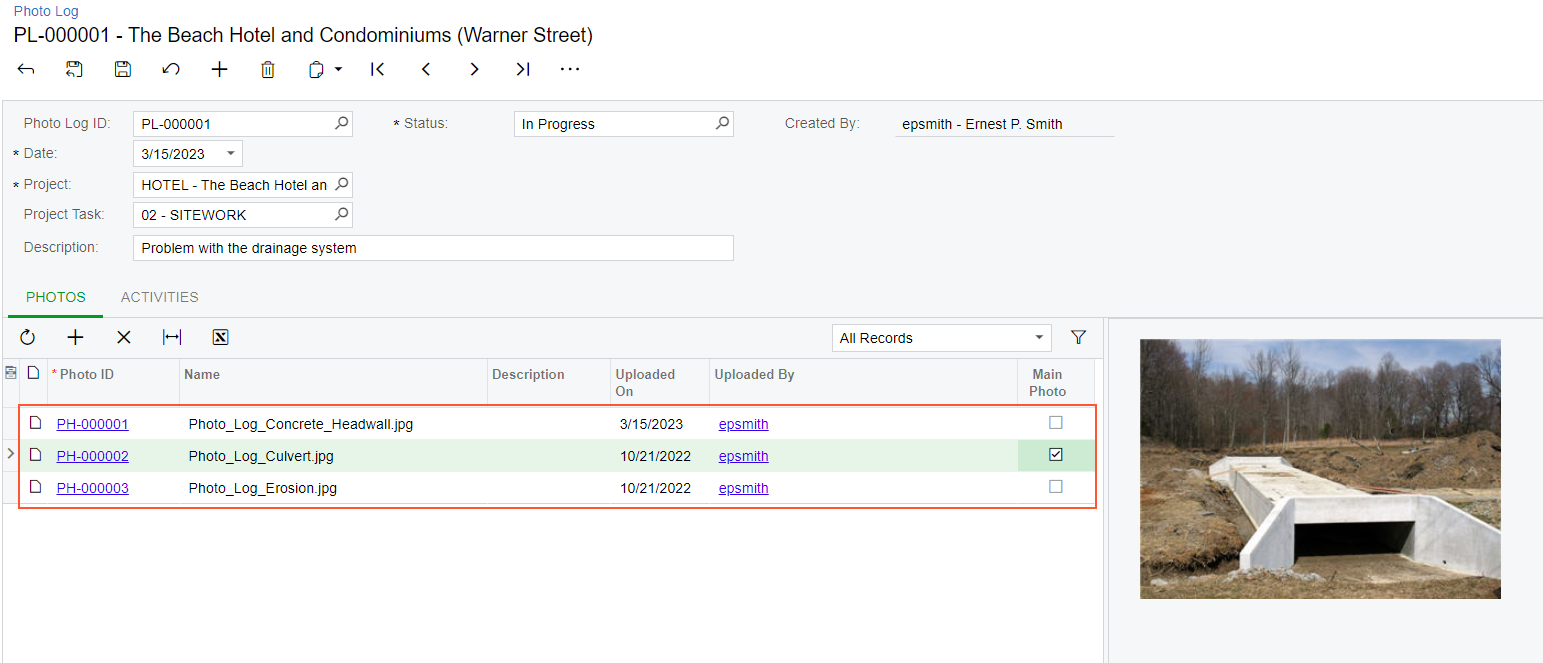
- Save your changes.
You have created a photo log with multiple photos for the project.
Step 3: Sending an Email with the Photos
To send the email, do the following:
- Open the Photo Logs (PJ405000) form.
- In the left pane, select the Included check box in the row of the photo log you have created.
- On the form toolbar, click Email.
The system opens the Email Activity (CR306015) form with a single ZIP file attached. The ZIP file contains all the photos (and any attached files) associated with the selected photo log. The automatically generated subject of the email includes information about the photo log and the related project.
- In the To box, select Ricky Thompson.
- On the form toolbar, click Send, close the form, and return to the Photo Logs (PJ405000) form.
- In the table, click the link to the photo log that you have created in the Photo Log ID column.
- On the Photo Log (PJ305000) form that opens, select Completed in the Status box, and save your changes.
You have created the photo log, uploaded photos, and send these photos by email.